.png)
How to use Change Department in Design Studio
-

- Saeid Kajkolah
 08 August 2024
Change Department is one of the actions in Design Studio that enables you to move from one department to another in a conversation.
Imagine having different departments specified for support, sales, after-sales, etc. You can create a bot for each of these departments and, based on the user’s inquiries, activate the proper bot and department.
With this strategy, you will achieve first contact resolution as the appropriate bot will be assigned to the user’s request. Additionally, you can ensure that sales-oriented inquiries are not directed to the support team and vice versa.
If you haven’t created your departments yet, you can use this tutorial to create different departments for different purposes.
Embedding Change Department in conversations
First, navigate to the Tiledesk dashboard and then to the Design Studio.
The Change Department action is located among the Special actions in the left-side menu.
Drop it onto the canvas as shown in the image below.
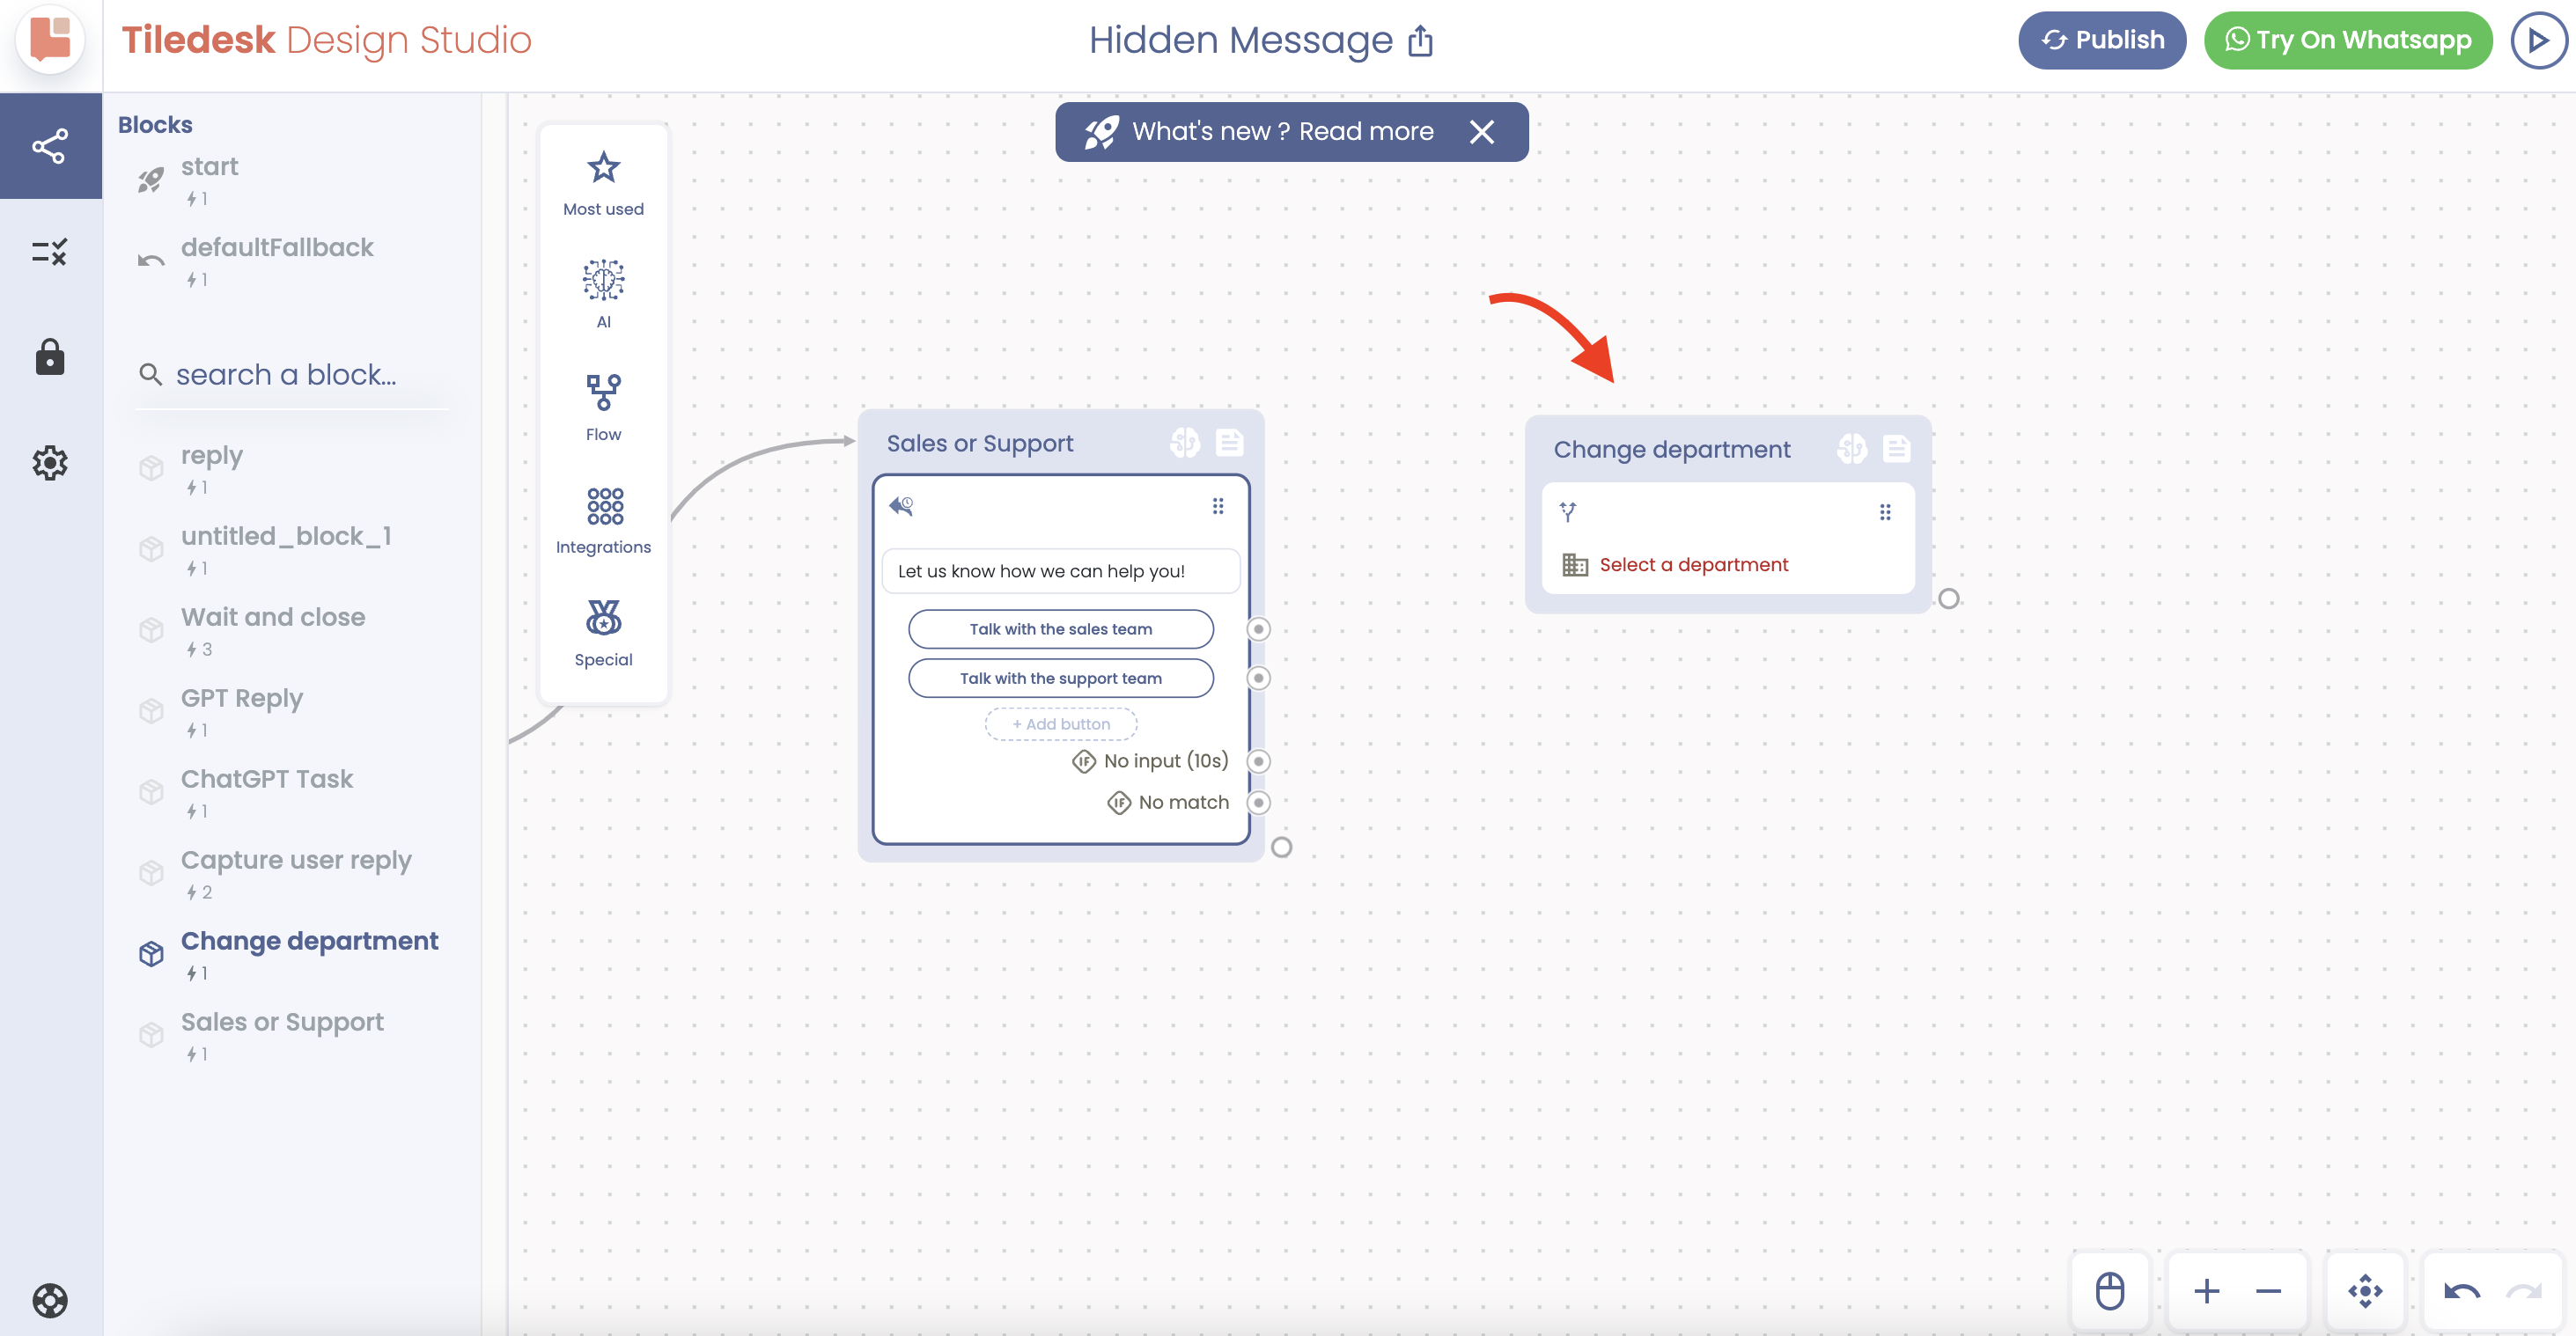
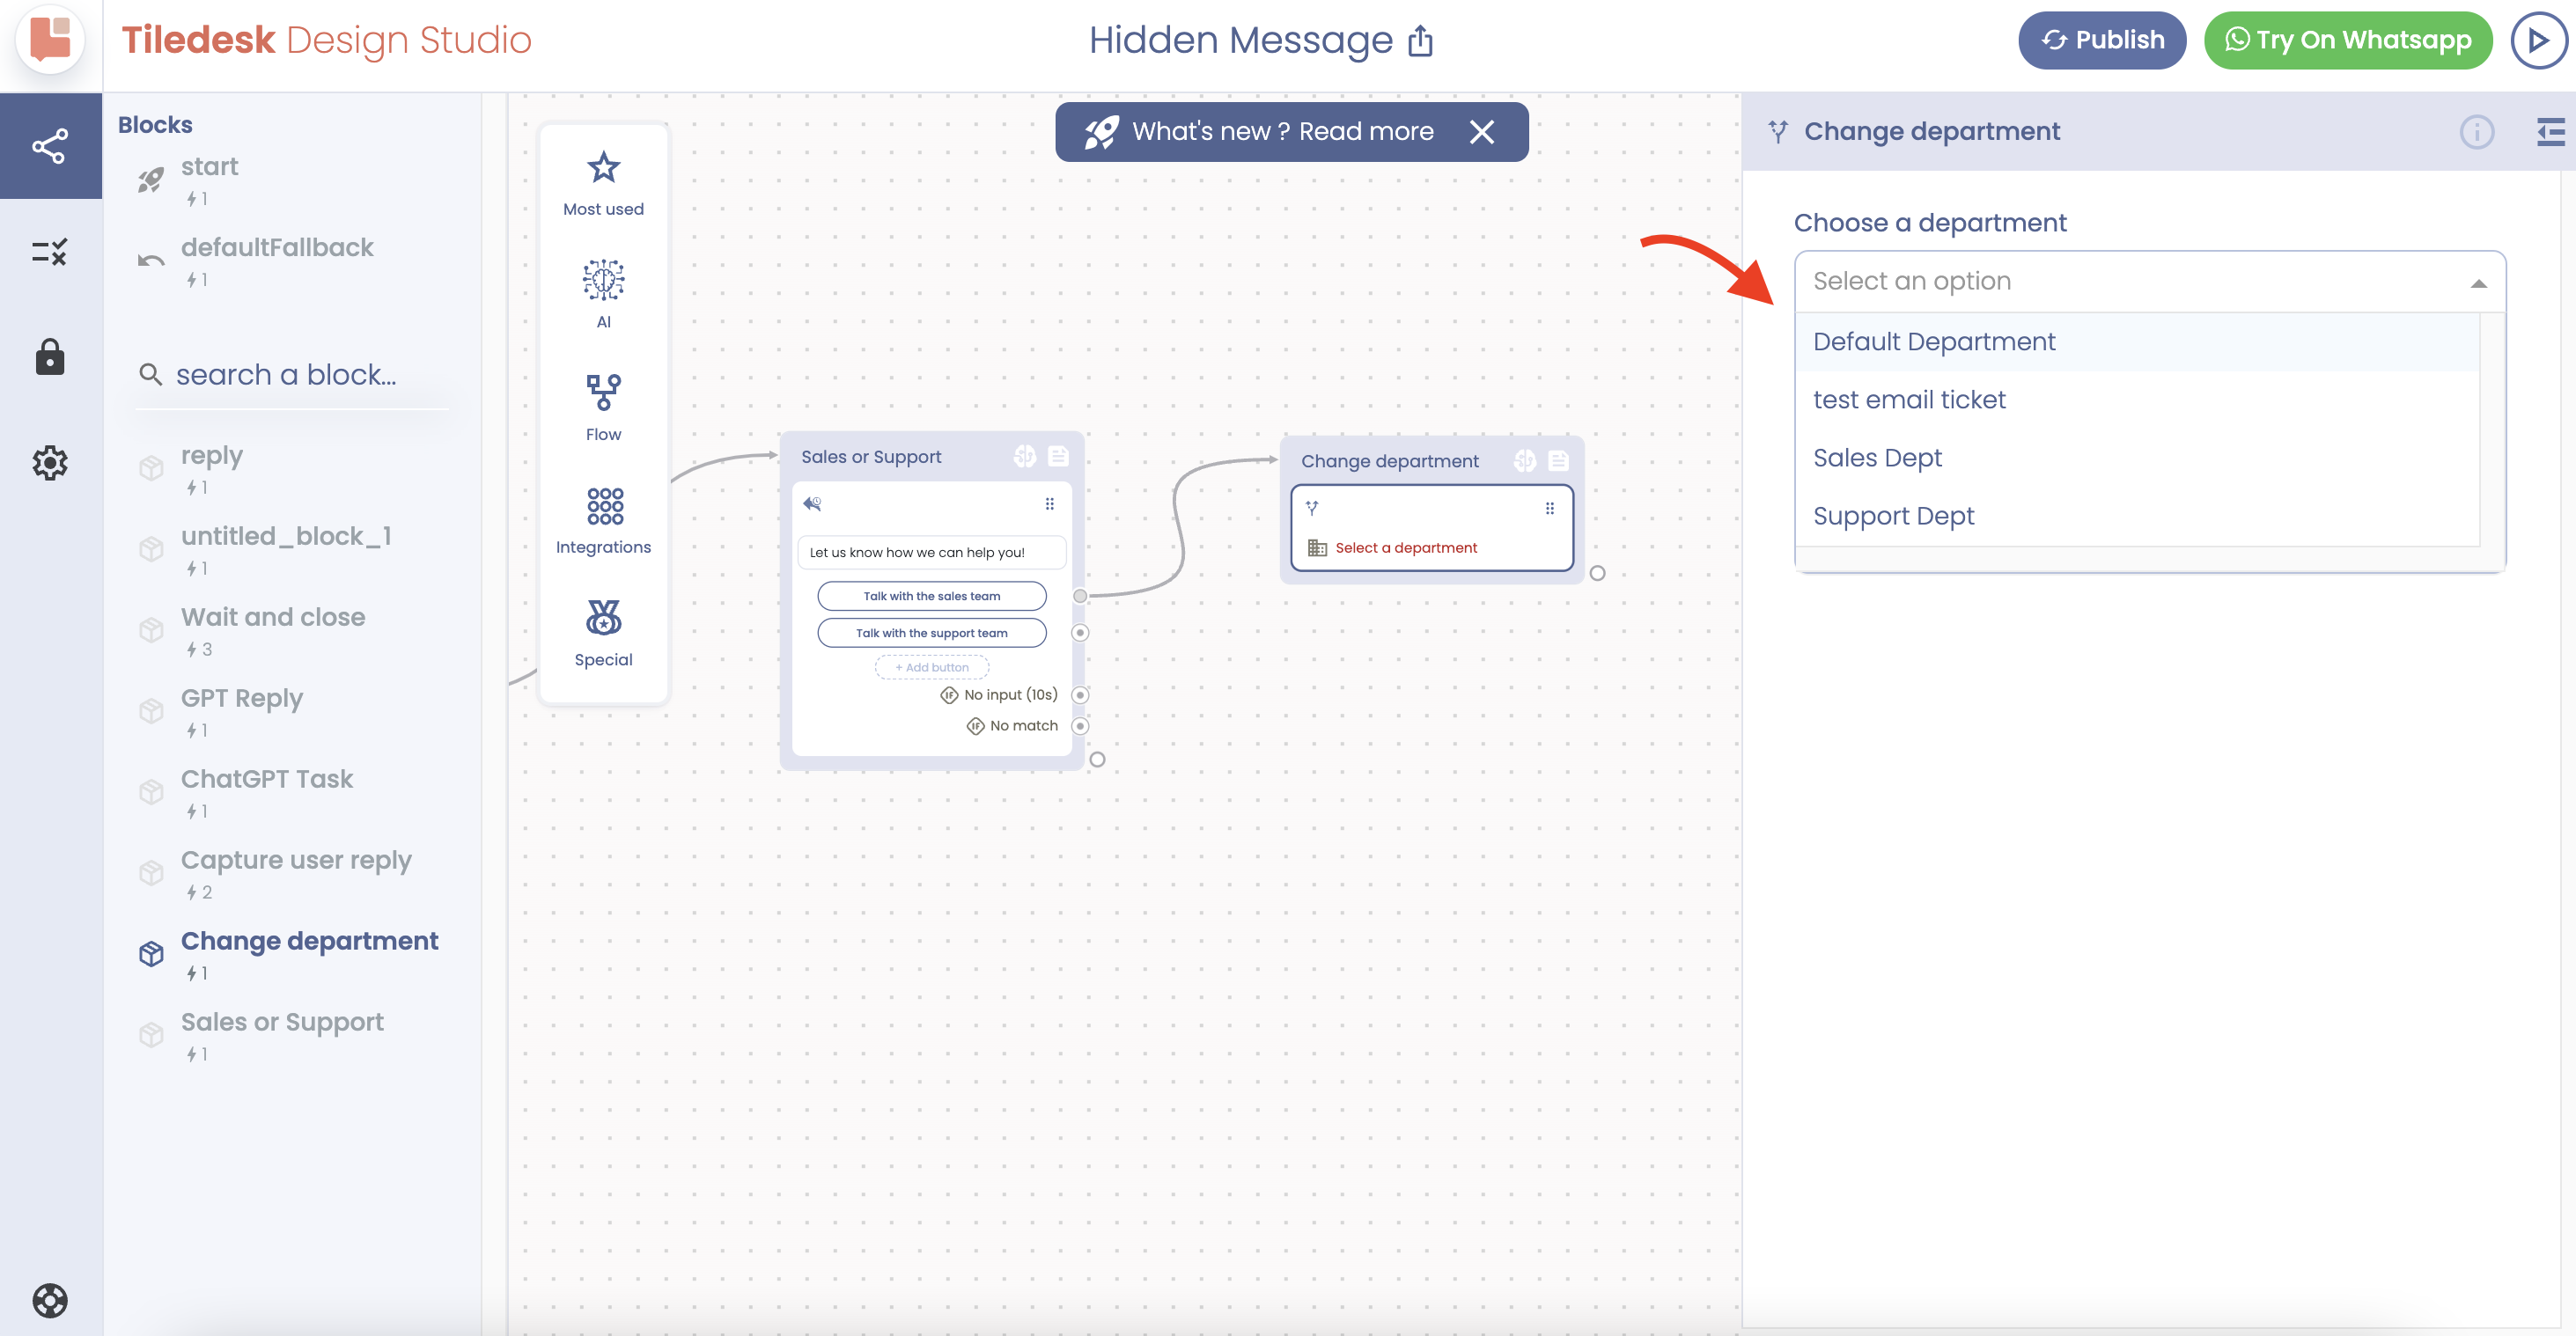
Then, from the “Talk with the Sales Team” button, continue the conversation to the Change Department action. By clicking on the block, the right-side menu will appear, allowing you to choose the proper department.
I hope you found this helpful.
If you need assistance, do not hesitate to contact us via support@tiledesk.com.
For more details, please visit www.tiledesk.com.
If you haven’t created your free account yet, start here.