.png)
How to Send WhatsApp Templates via Tiledesk Webhook and HubSpot Workflow
-

- Jovana Ugrinic
 28 April 2025
Intro
Do you need to set automatic WhatsApp messages being sent to your selected audience based on the state of their deal your contact is in? Follow these 5 simple steps to achieve a complete flow entailing a HubSpot workflow integration with a conversation automation tool such as Tiledesk.
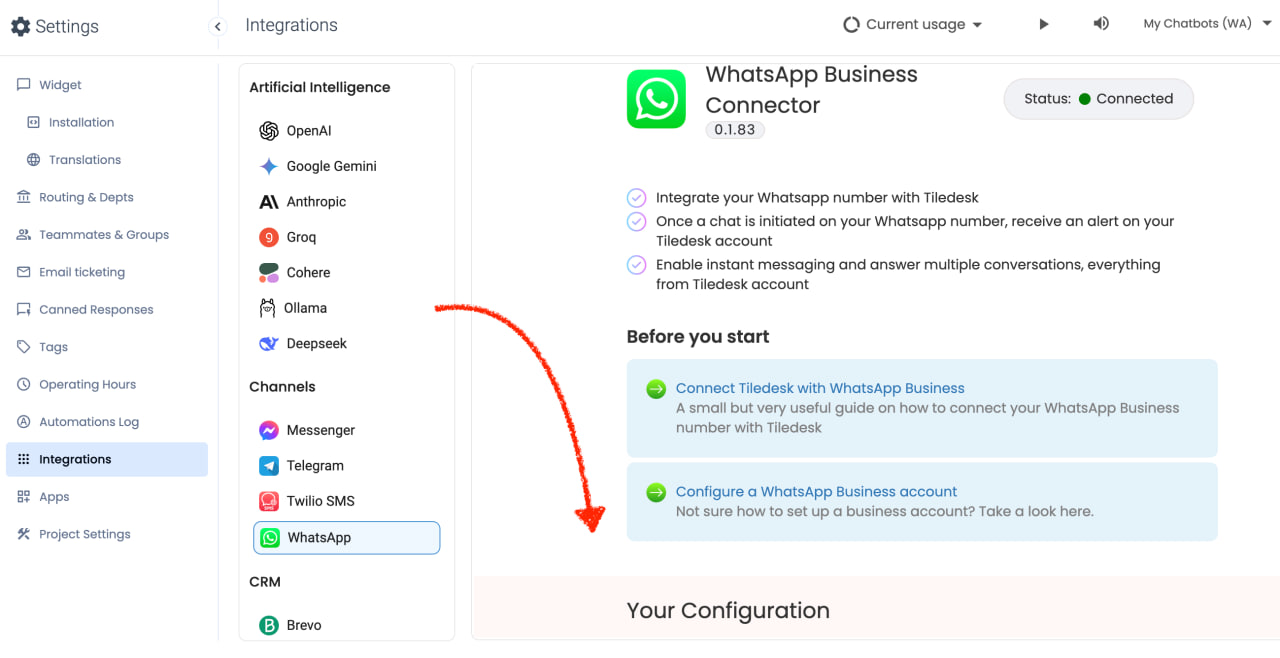
1. Connect WhatsApp Business API to Your Tiledesk Project
Follow the official Tiledesk guide to connect your WhatsApp Business API:
Tiledesk WhatsApp Integration Guide
Once connected, you will be able to send and manage WhatsApp messages from Tiledesk.
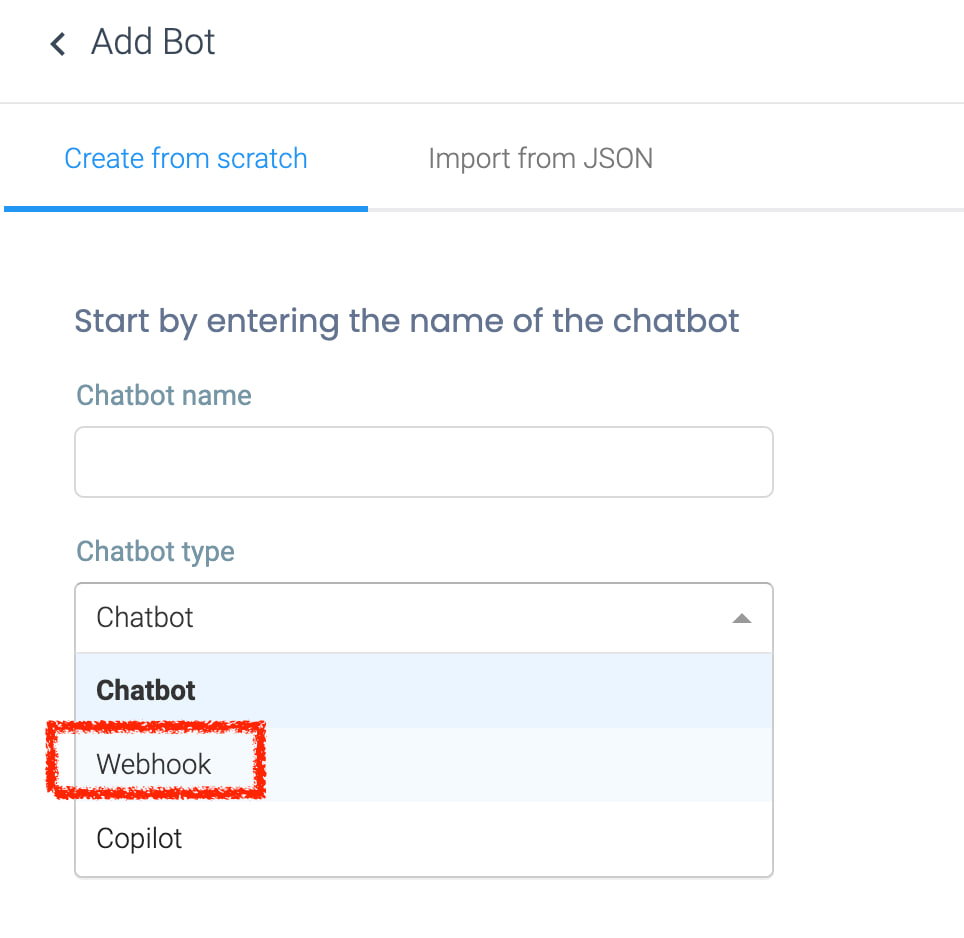
2. Create a Webhook in Tiledesk Design Studio
Go to the Bots section in your Tiledesk console.
Click Create from scratch.
In the type dropdown, choose Webhook.
Once inside the Design Studio, find the Webhook button in the panel.
Click on the three dots next to the webhook button and select Generate URL.
Copy the generated URL: you will use it later in HubSpot.
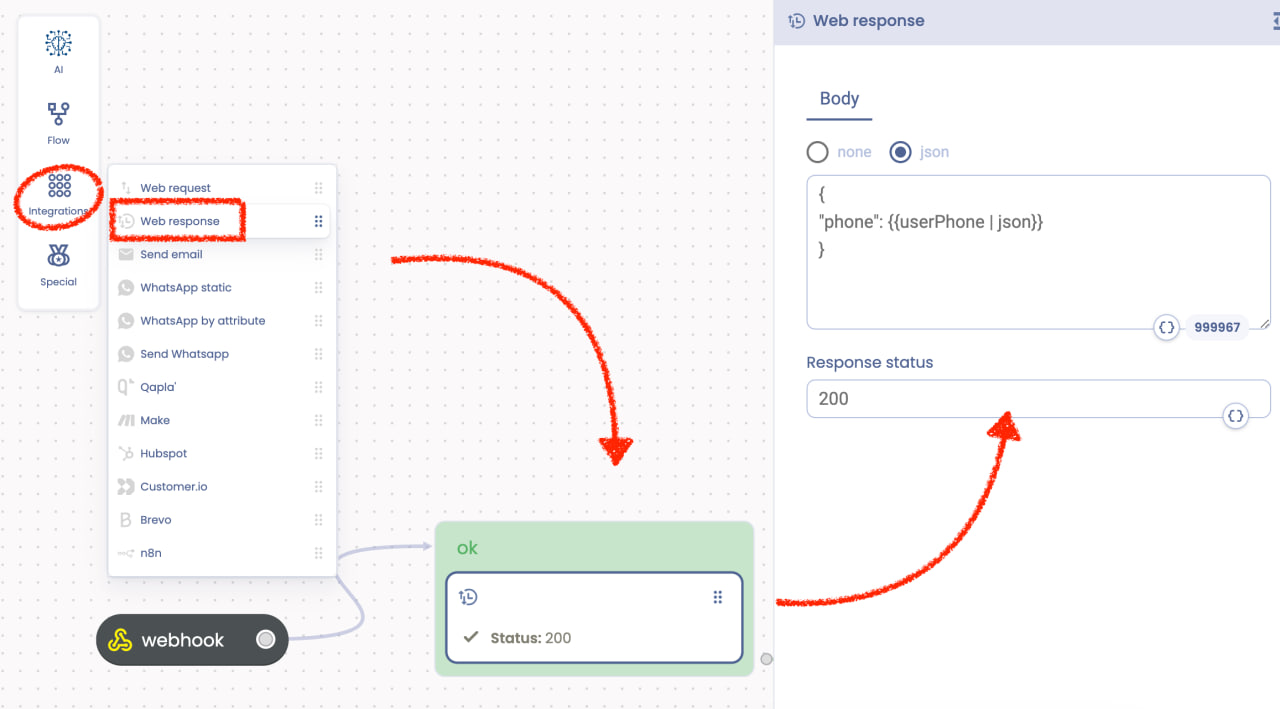
3. Configure the Webhook Action in Your Bot
Connect a Web Response action to your Webhook button.
Configure the Web Response block with:
Response status: 200
Response body (JSON):
{
  "phone":
}
This acts as a gatekeeper to ensure that only valid phone numbers proceed.
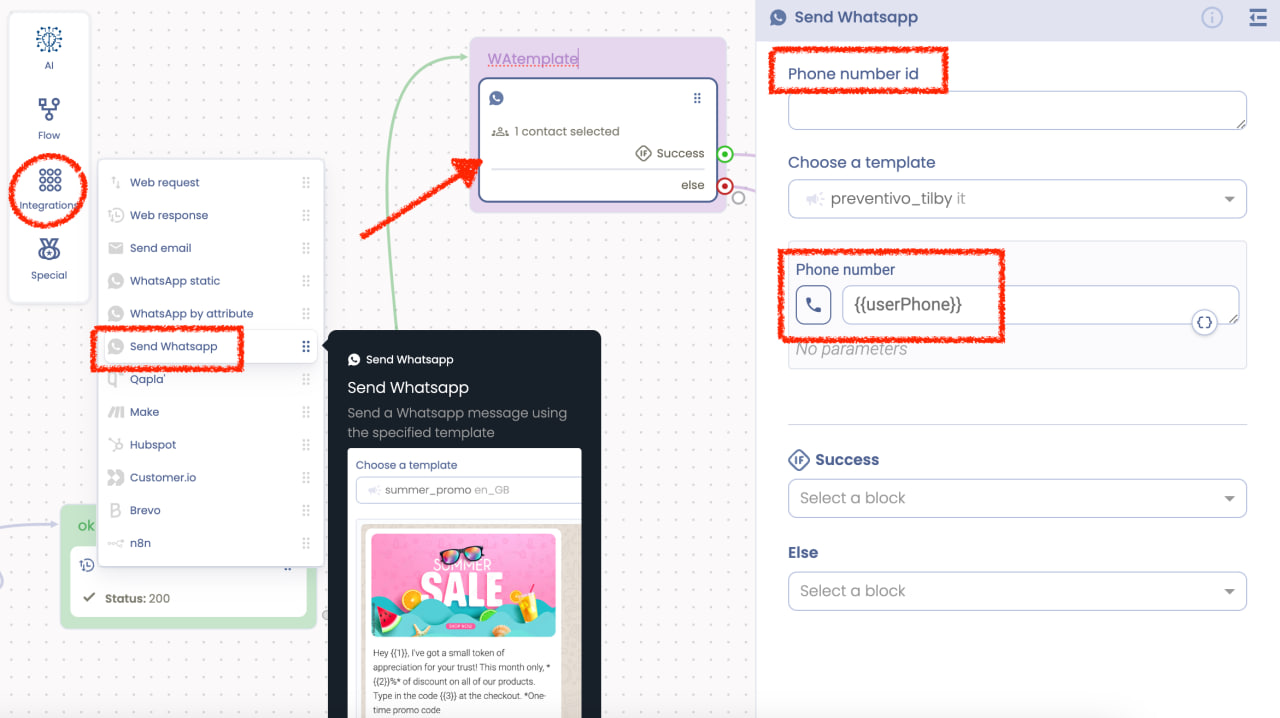
4. Configure the WhatsApp Template Sending Action
From the Actions menu on the left, under the Integrations tab, select Send WhatsApp.
Drag and drop this action right after the Web Response block.
Edit the Send WhatsApp action:
Phone number ID: Insert the Phone Number ID available in your Meta for Developers account.
Template: Select the WhatsApp template already approved in your Meta account.
Receiver phone number: Insert the variable .
Add Web Response Blocks for Success and Error Paths
Connect two Web Response blocks to the "Success" and "Else" exits of the Send WhatsApp action.
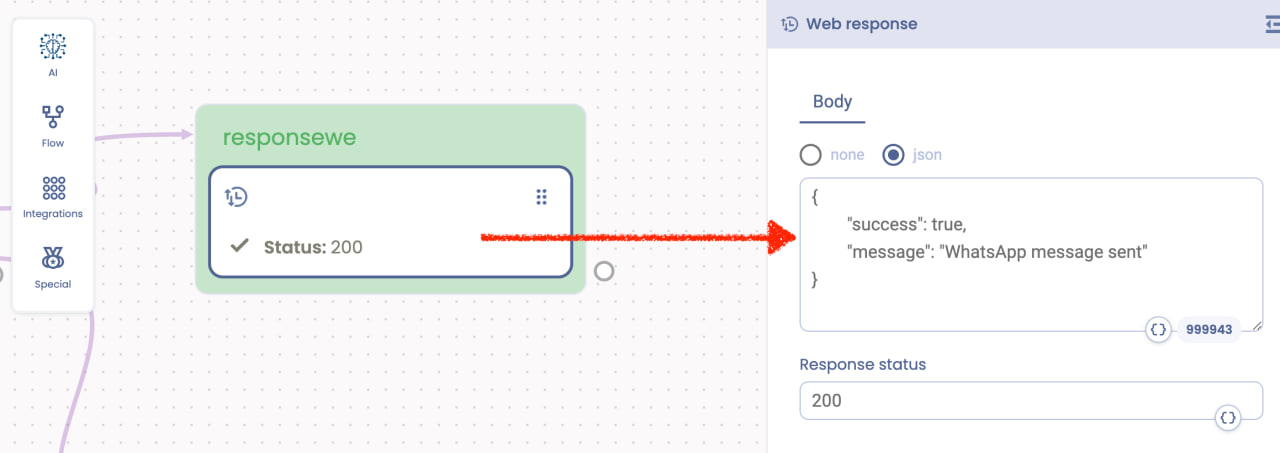
For the Success port:
Response status: 200
Response body (JSON):
{
  "success": true,
  "message": "WhatsApp message sent"
}
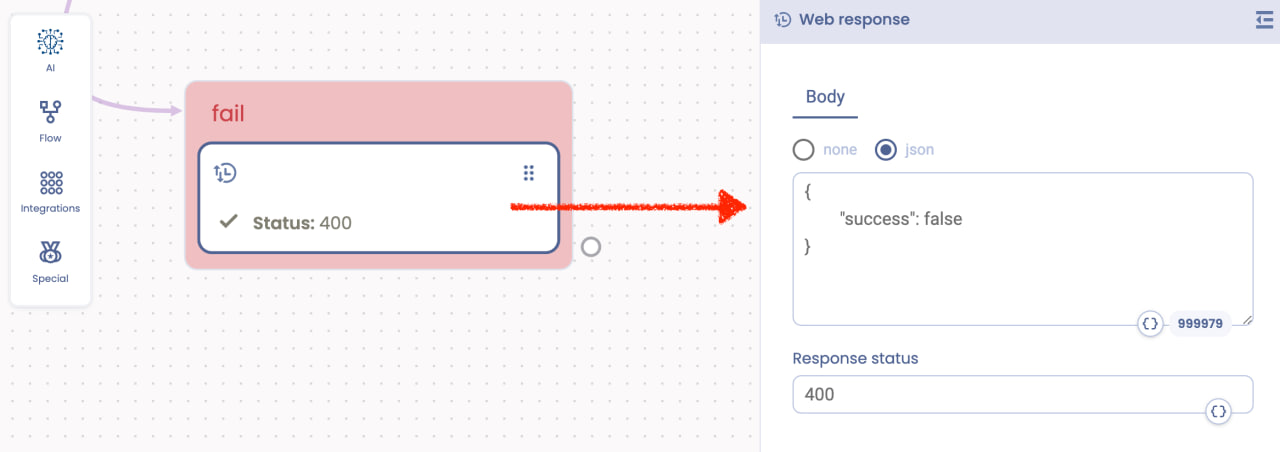
For the Else port:
Response status: 400
Response body (JSON):
{
  "success": false
}
5. Configure HubSpot to Trigger the WhatsApp Webhook
Log into your HubSpot account.
Go to Automation > Workflows (note: this feature is not available on free plans).
Click the orange Create workflow button in the top right corner.
Choose a Deal-based workflow.
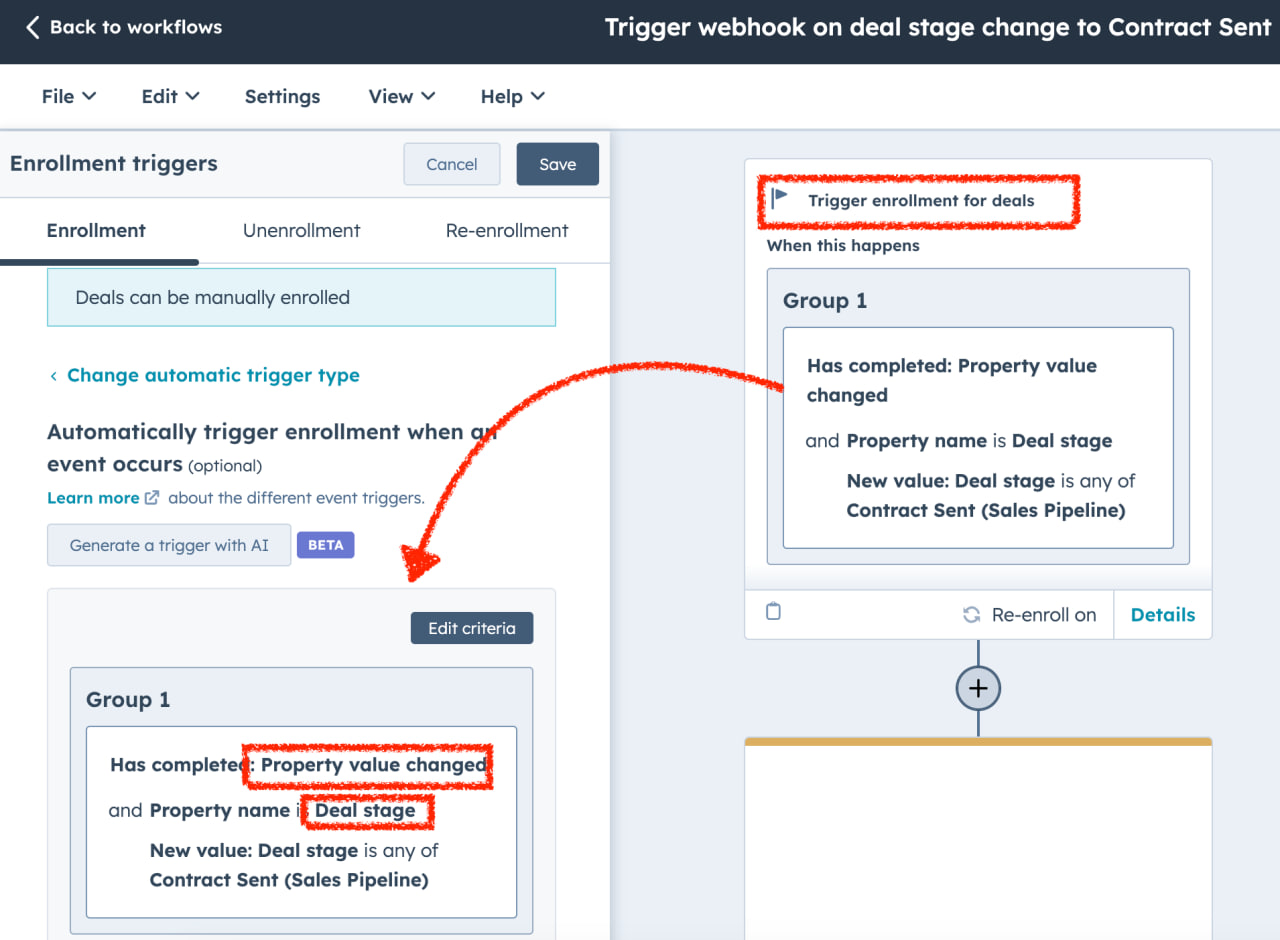
Set Up the Trigger
For enrollment trigger, select:
Has completed: Property value changed
Property name: Deal Stage
New Value: Contract Sent (or any stage where you want the message triggered).
Add a Webhook Action
Click the plus icon below the enrollment trigger.
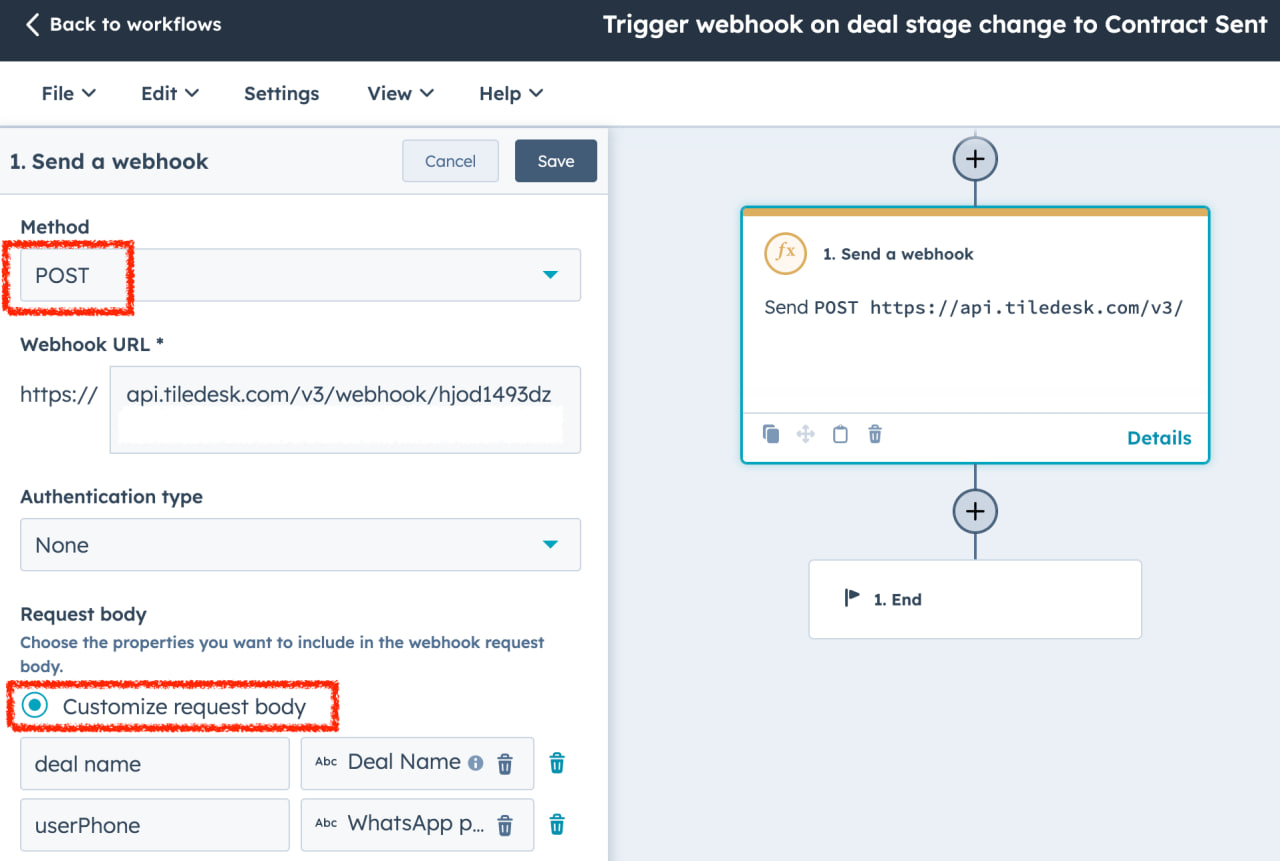
Select Send a Webhook.
Configuration:
Method: POST
URL: Paste the webhook URL you copied from Tiledesk Design Studio.
Authentication: None
Request body: Select Choose properties to include, and add:
deal name = Deal name
userPhone = WhatsApp number (make sure this matches your HubSpot contact property for WhatsApp numbers).
Test the Workflow
Move a test deal into the "Contract Sent" stage in your pipeline.
The webhook should trigger, sending the WhatsApp template through Tiledesk.
Once the message is sent, the chatbot configured in Tiledesk will automatically take over the conversation based on the knowledge base you have set up.
Check our video about this integration (don't forget to activate the English subtitles) here.