Integrate Tiledesk AI Agent with Zendesk Ticketing
While Zendesk is a dominant and powerful tool in ticketing, it doesn't offer the best AI capabilities for AI-driven agents or assistants. New platforms like Tiledesk, with AI-focused features, have shown a more innovative approach in automated customer support.
Combining Zendesk's robust ticketing system with Tiledesk's AI-driven solutions can significantly improve efficiency and customer satisfaction.
In this tutorial, we'll show you step by step how to integrate Tiledesk with Zendesk.
Tiledesk Configuration
First, you'll need to log in to your Tiledesk account.
If you don’t have an account yet, don’t worry—you can create one quickly here.
Once you’re logged in, head over to the Bots section in your Tiledesk dashboard. Here, you have the option to either choose an existing bot or start from scratch.
For this tutorial, we’re going to start from scratch.
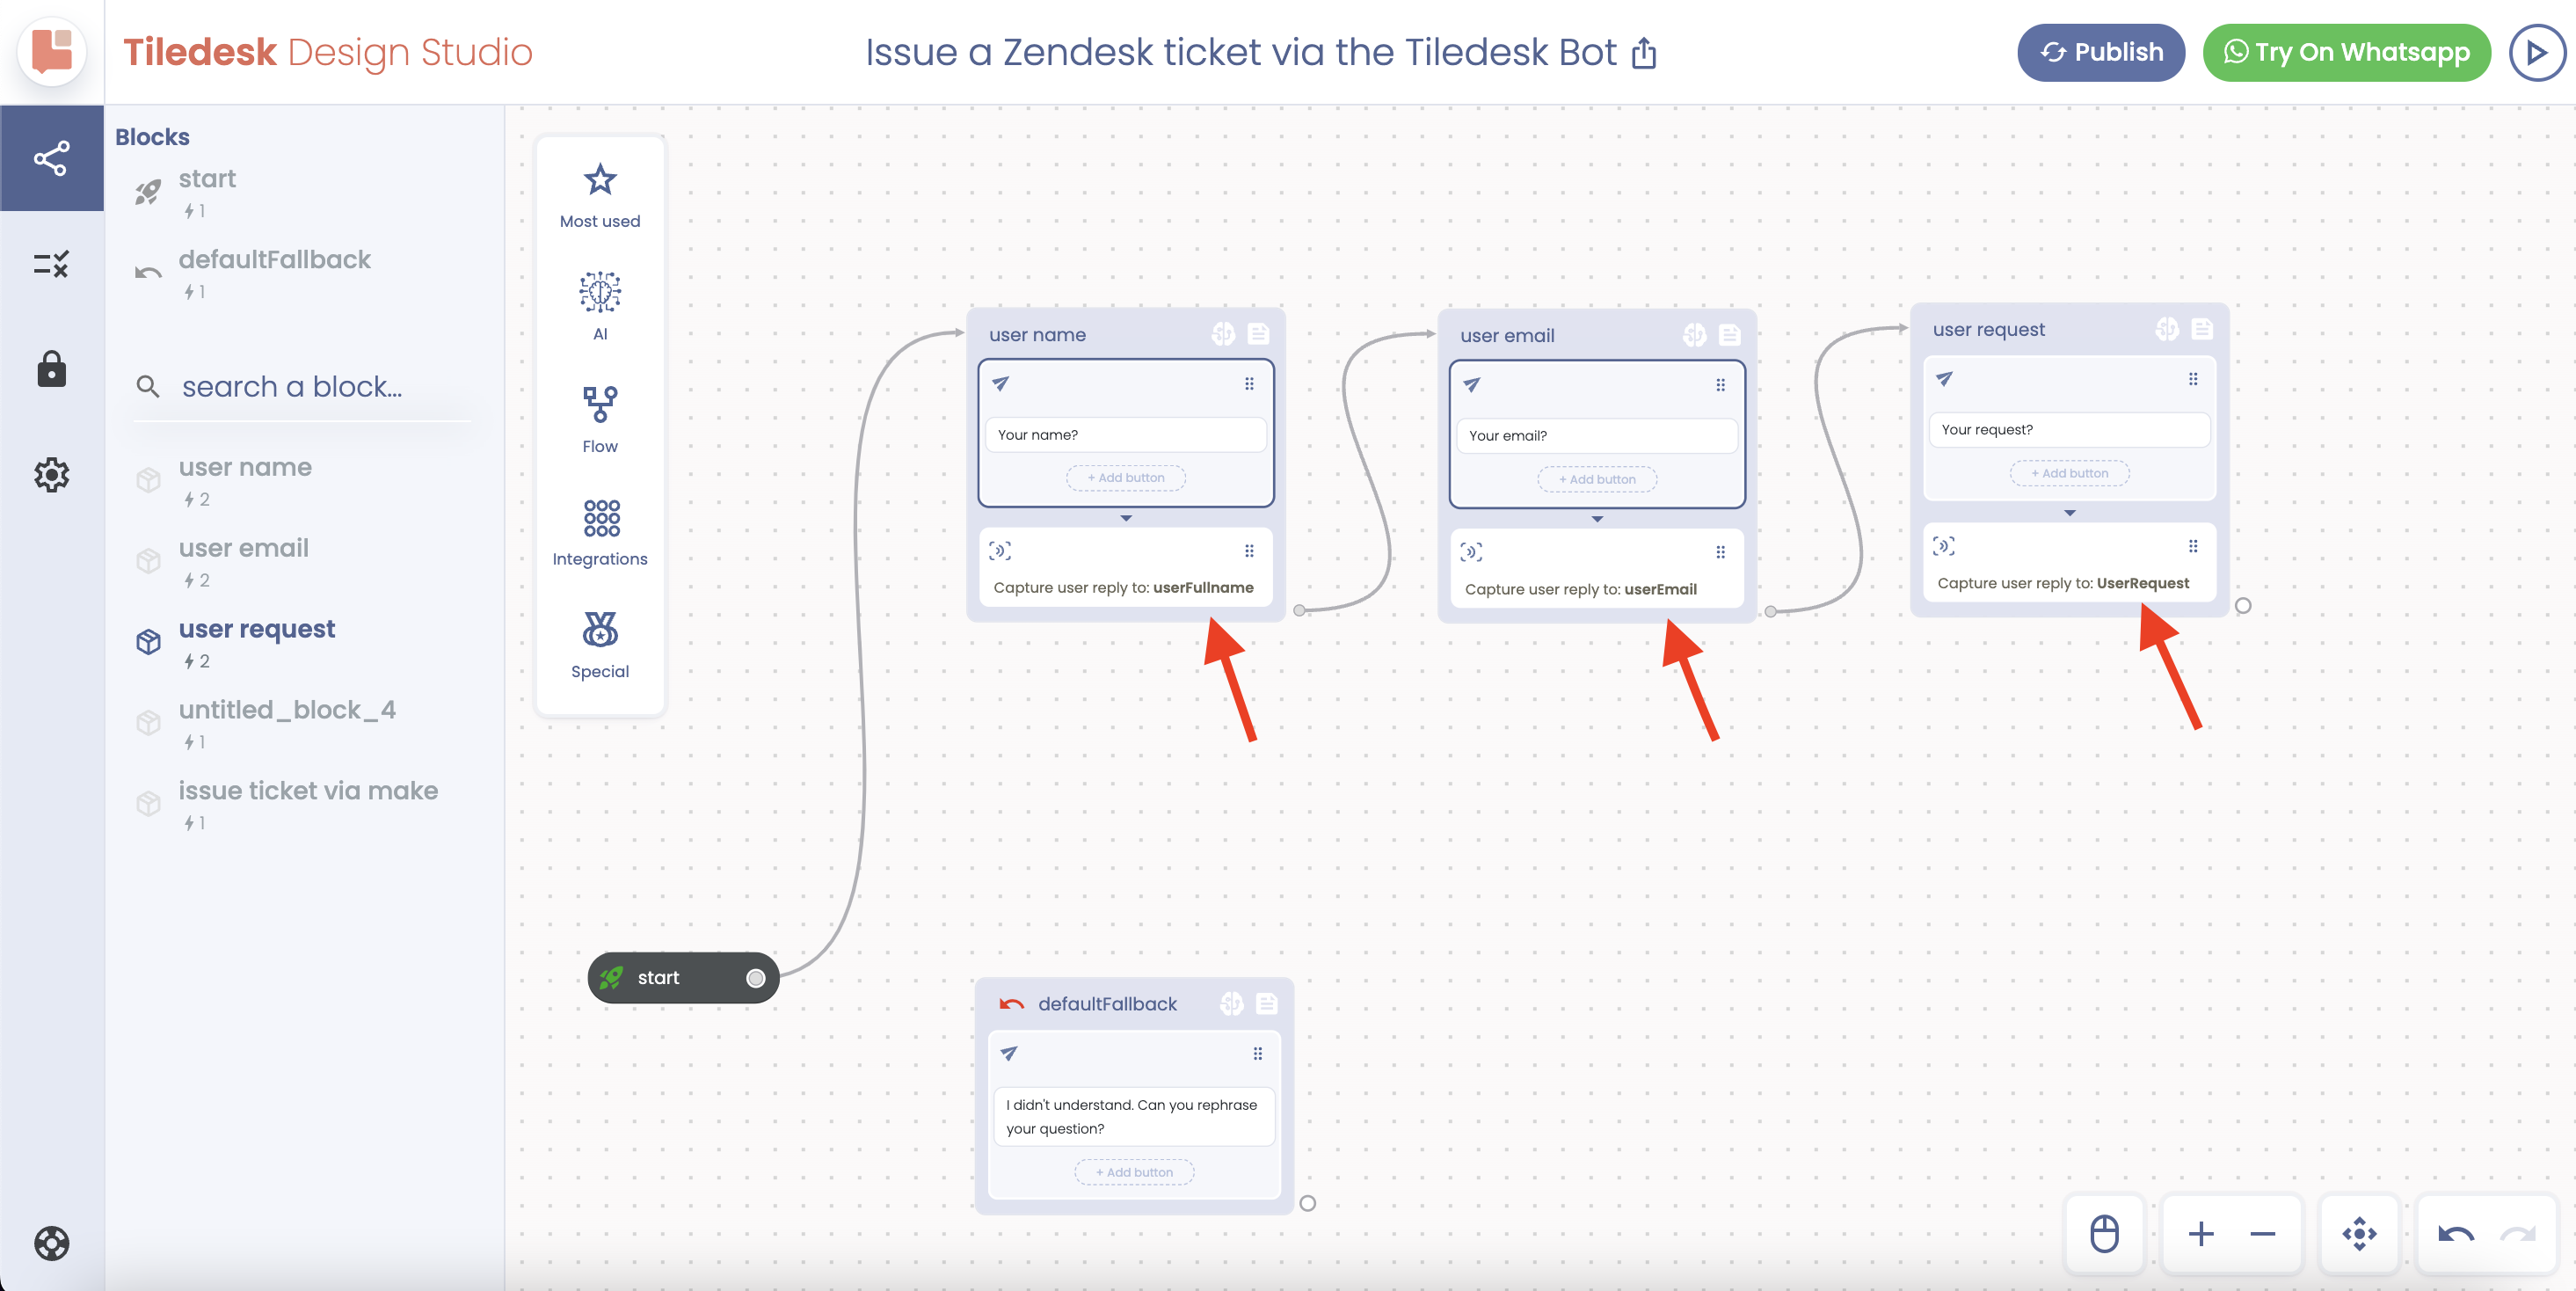
In the Design Studio, you'll set up your bot to gather essential information from users, such as their name, email, and request. To do this, simply use the "Capture User Reply" action, as shown in the image below.
Now, let’s connect Tiledesk to Zendesk using Make.
On the left toolbar, under the Integrations section, find and select Make to add it to your bot’s flow, as illustrated below.
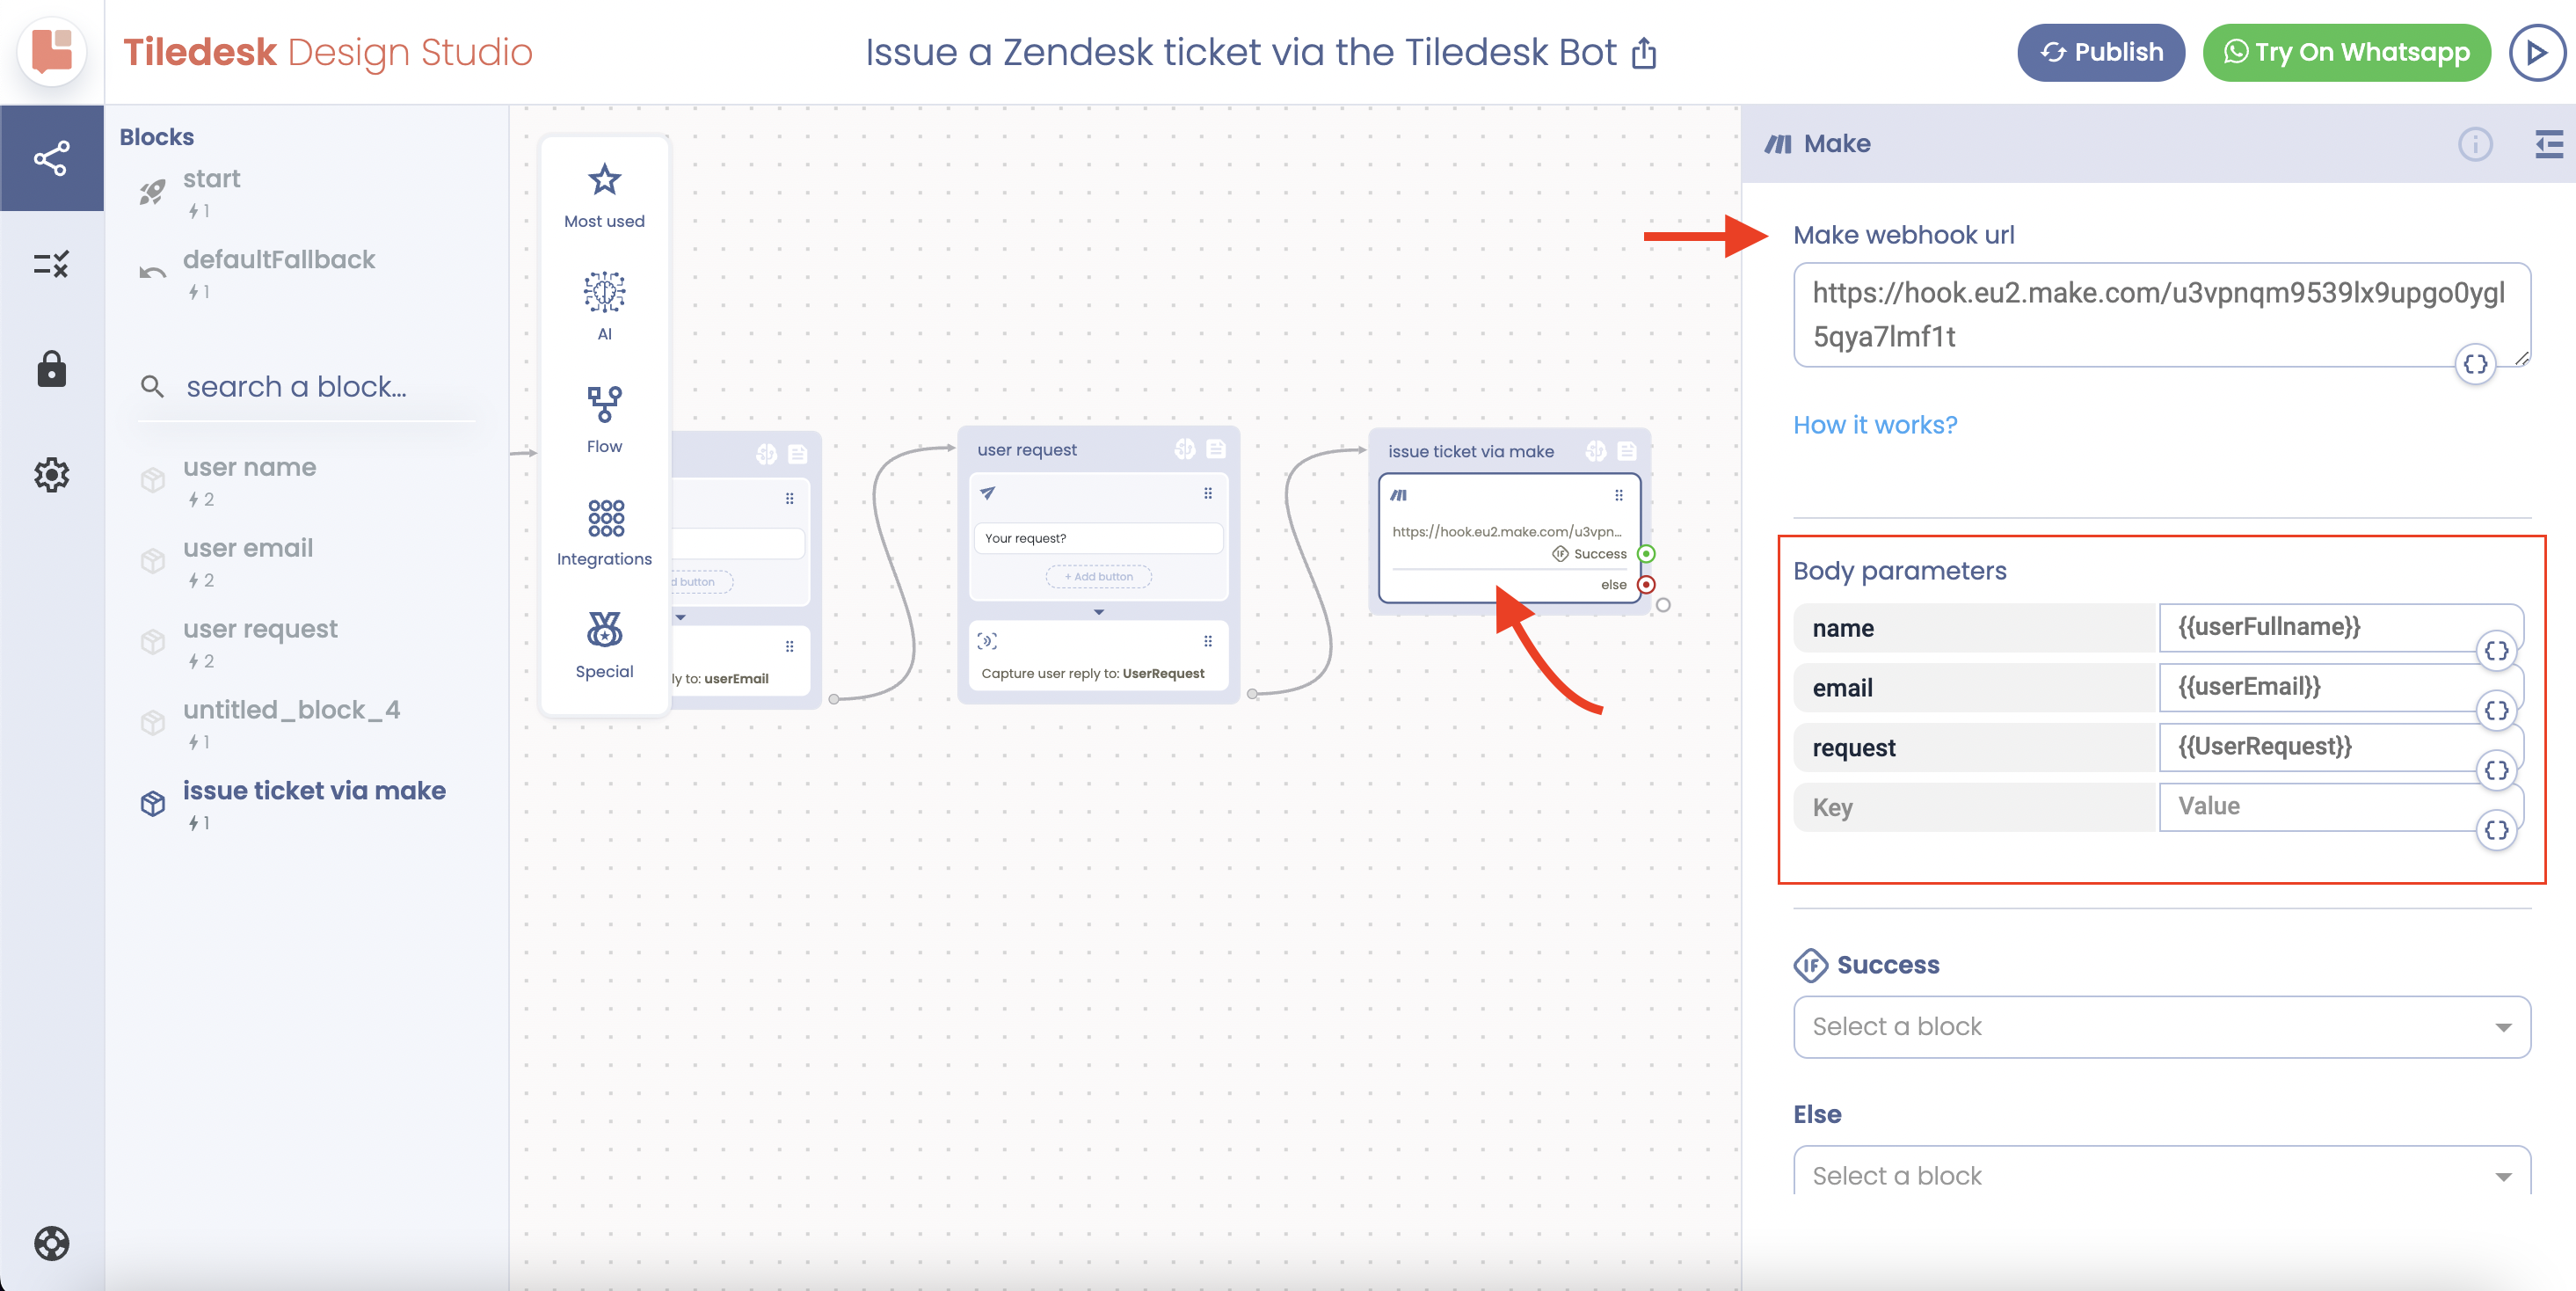
When you click on the Make block, a popup will appear on the right. This is where you'll define which information should be sent to Make. In the Body Parameters section, map the user’s details to the following attributes:
- userFullname
- userEmail
- UserRequest
Next, you’ll need to create a webhook URL in Make, which I’ll show you how to do shortly.
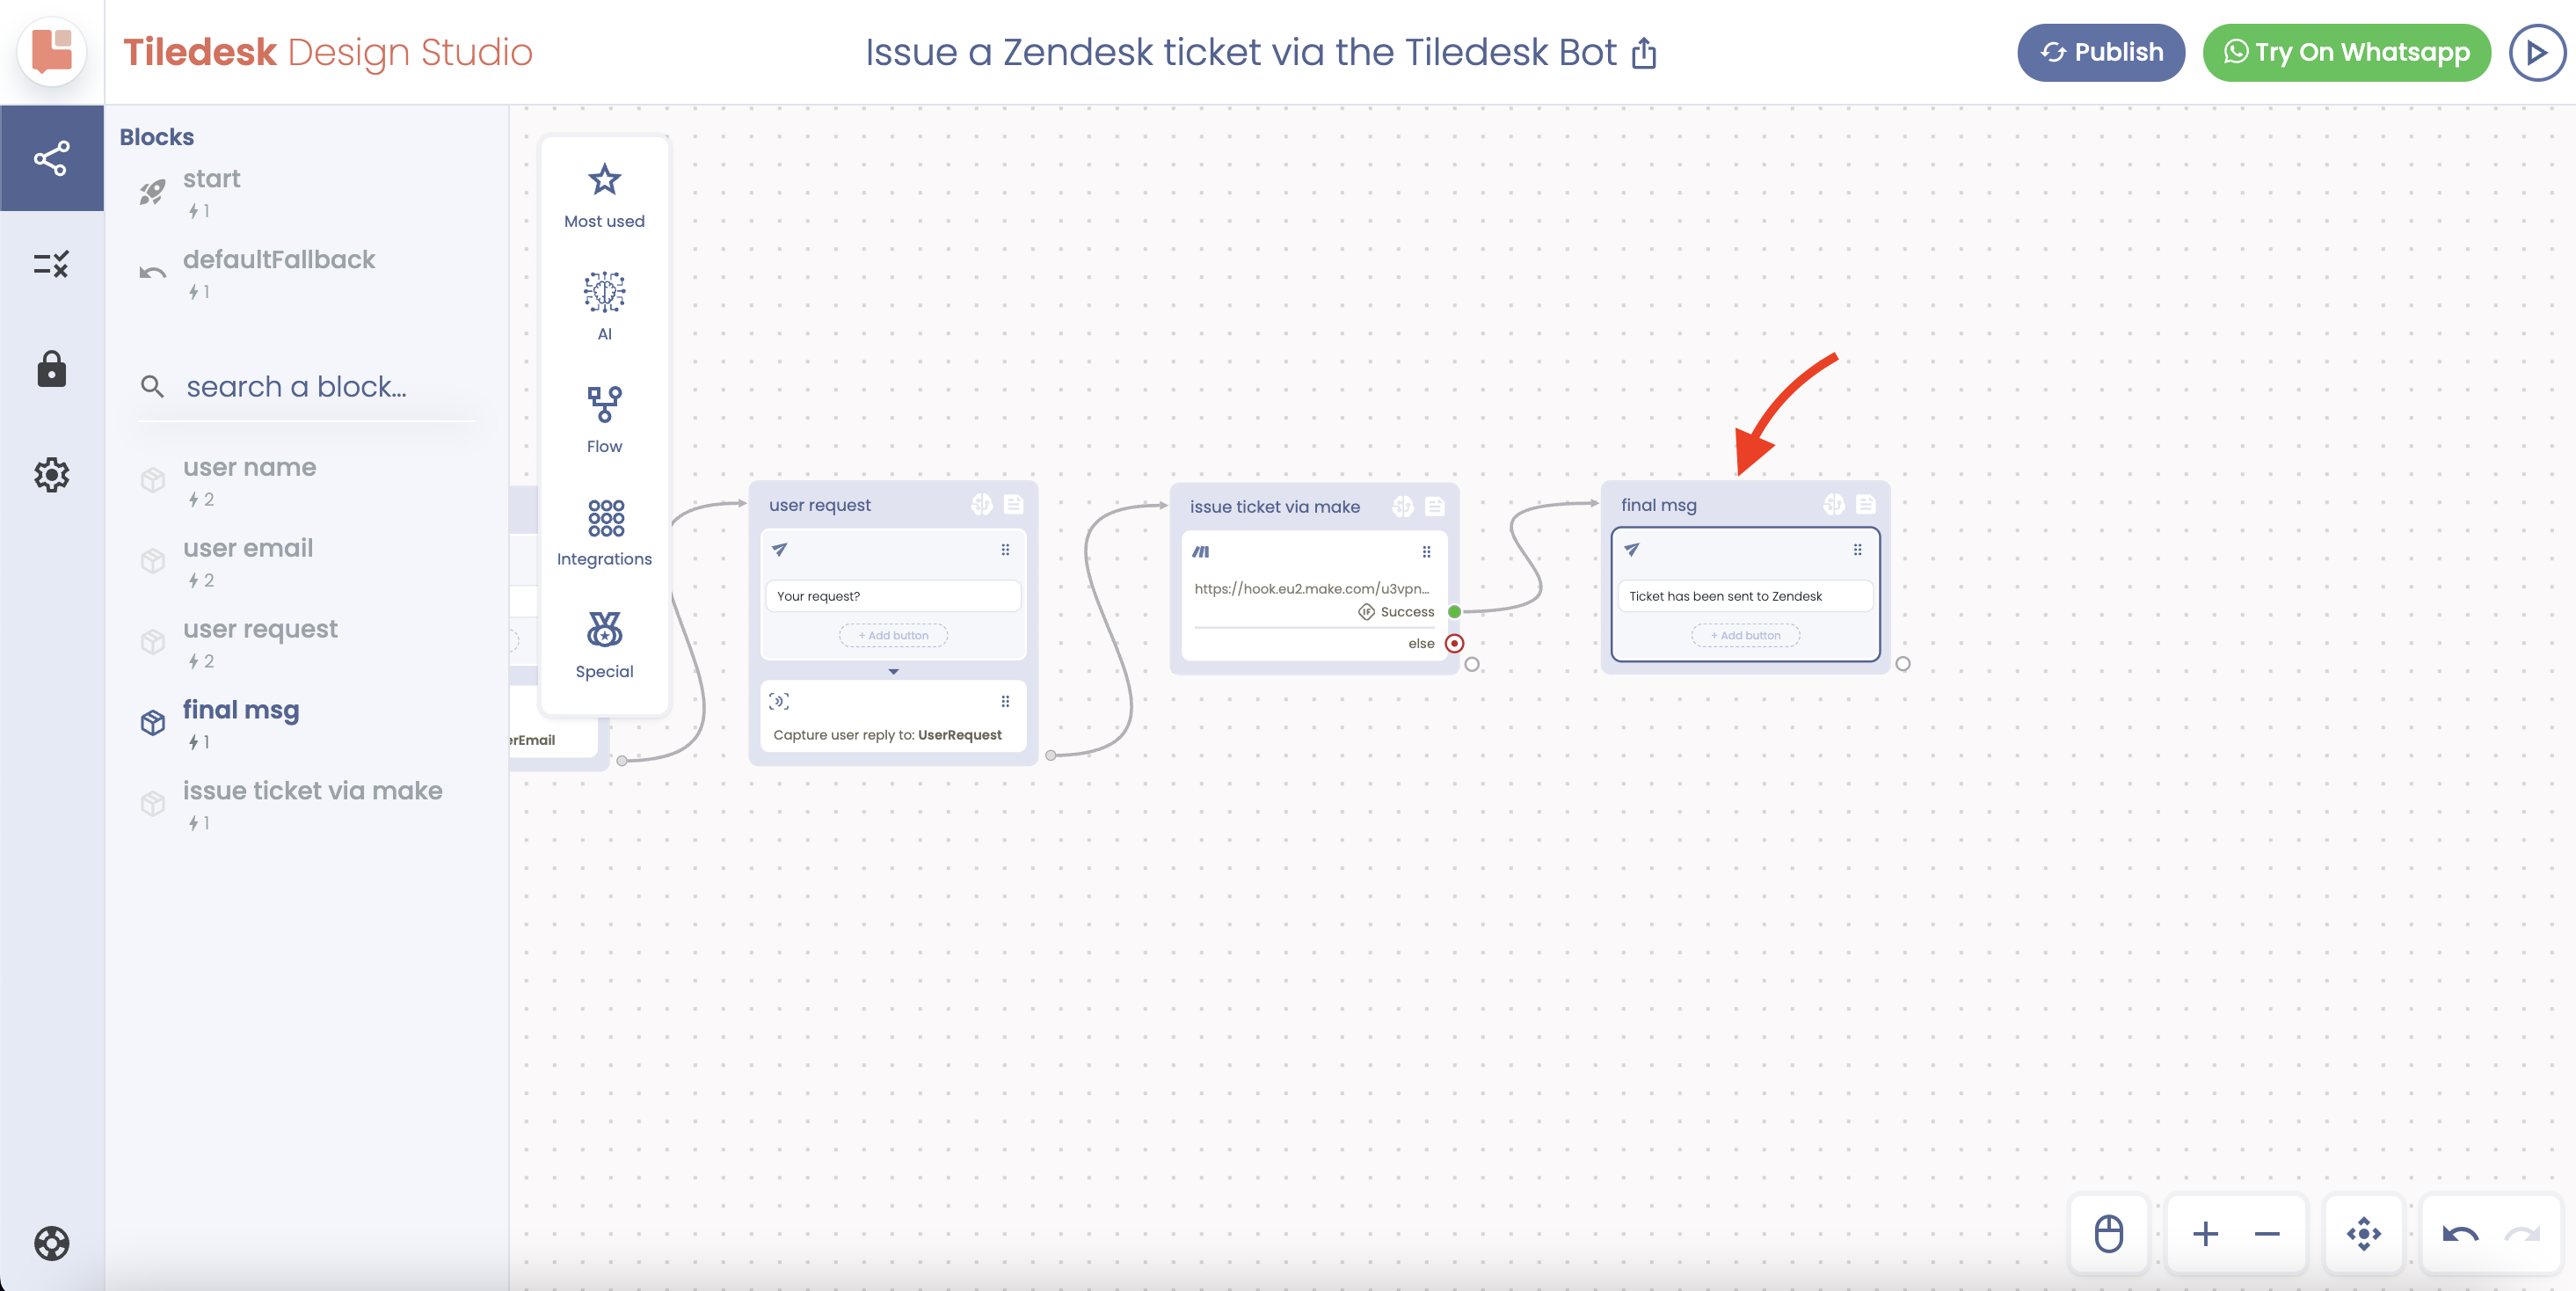
Once that's done, you'll connect the flow’s green endpoint to a simple reply action to confirm that the data has been successfully sent.
Great! That’s the Tiledesk setup done. Now, let’s move on to the Zendesk configuration.
Zendesk Configuration
To connect Tiledesk with Zendesk, the first thing you'll need to do is create an OAuth client in your Zendesk account. This will provide you with the necessary Domain, Client ID, and Client Secret for the integration.
Here’s how you do it:
- Log in to your Zendesk account as an administrator.
- Navigate to the Admin Center by clicking on the gear icon or through your profile dropdown.
- In the Admin Center, go to Apps and Integrations > APIs > OAuth Clients.
- Click the Add OAuth Client button.
- Fill in the required fields:
- Client Name
- Unique Identifier (Client ID)
- Client Type: Set this to Confidential.
- A Secret key will be automatically generated—make sure to copy and save it securely, as Zendesk suggests.
- Finally, click Save to create your OAuth client.
Awesome! Now that we have what we need from Zendesk, let's finish setting up the integration in Make.
Make Configuration
First, log in to your Make account and navigate to the Scenarios section.
From there, select the Custom Webhook module. Once you do, a webhook URL will be generated—copy this URL.
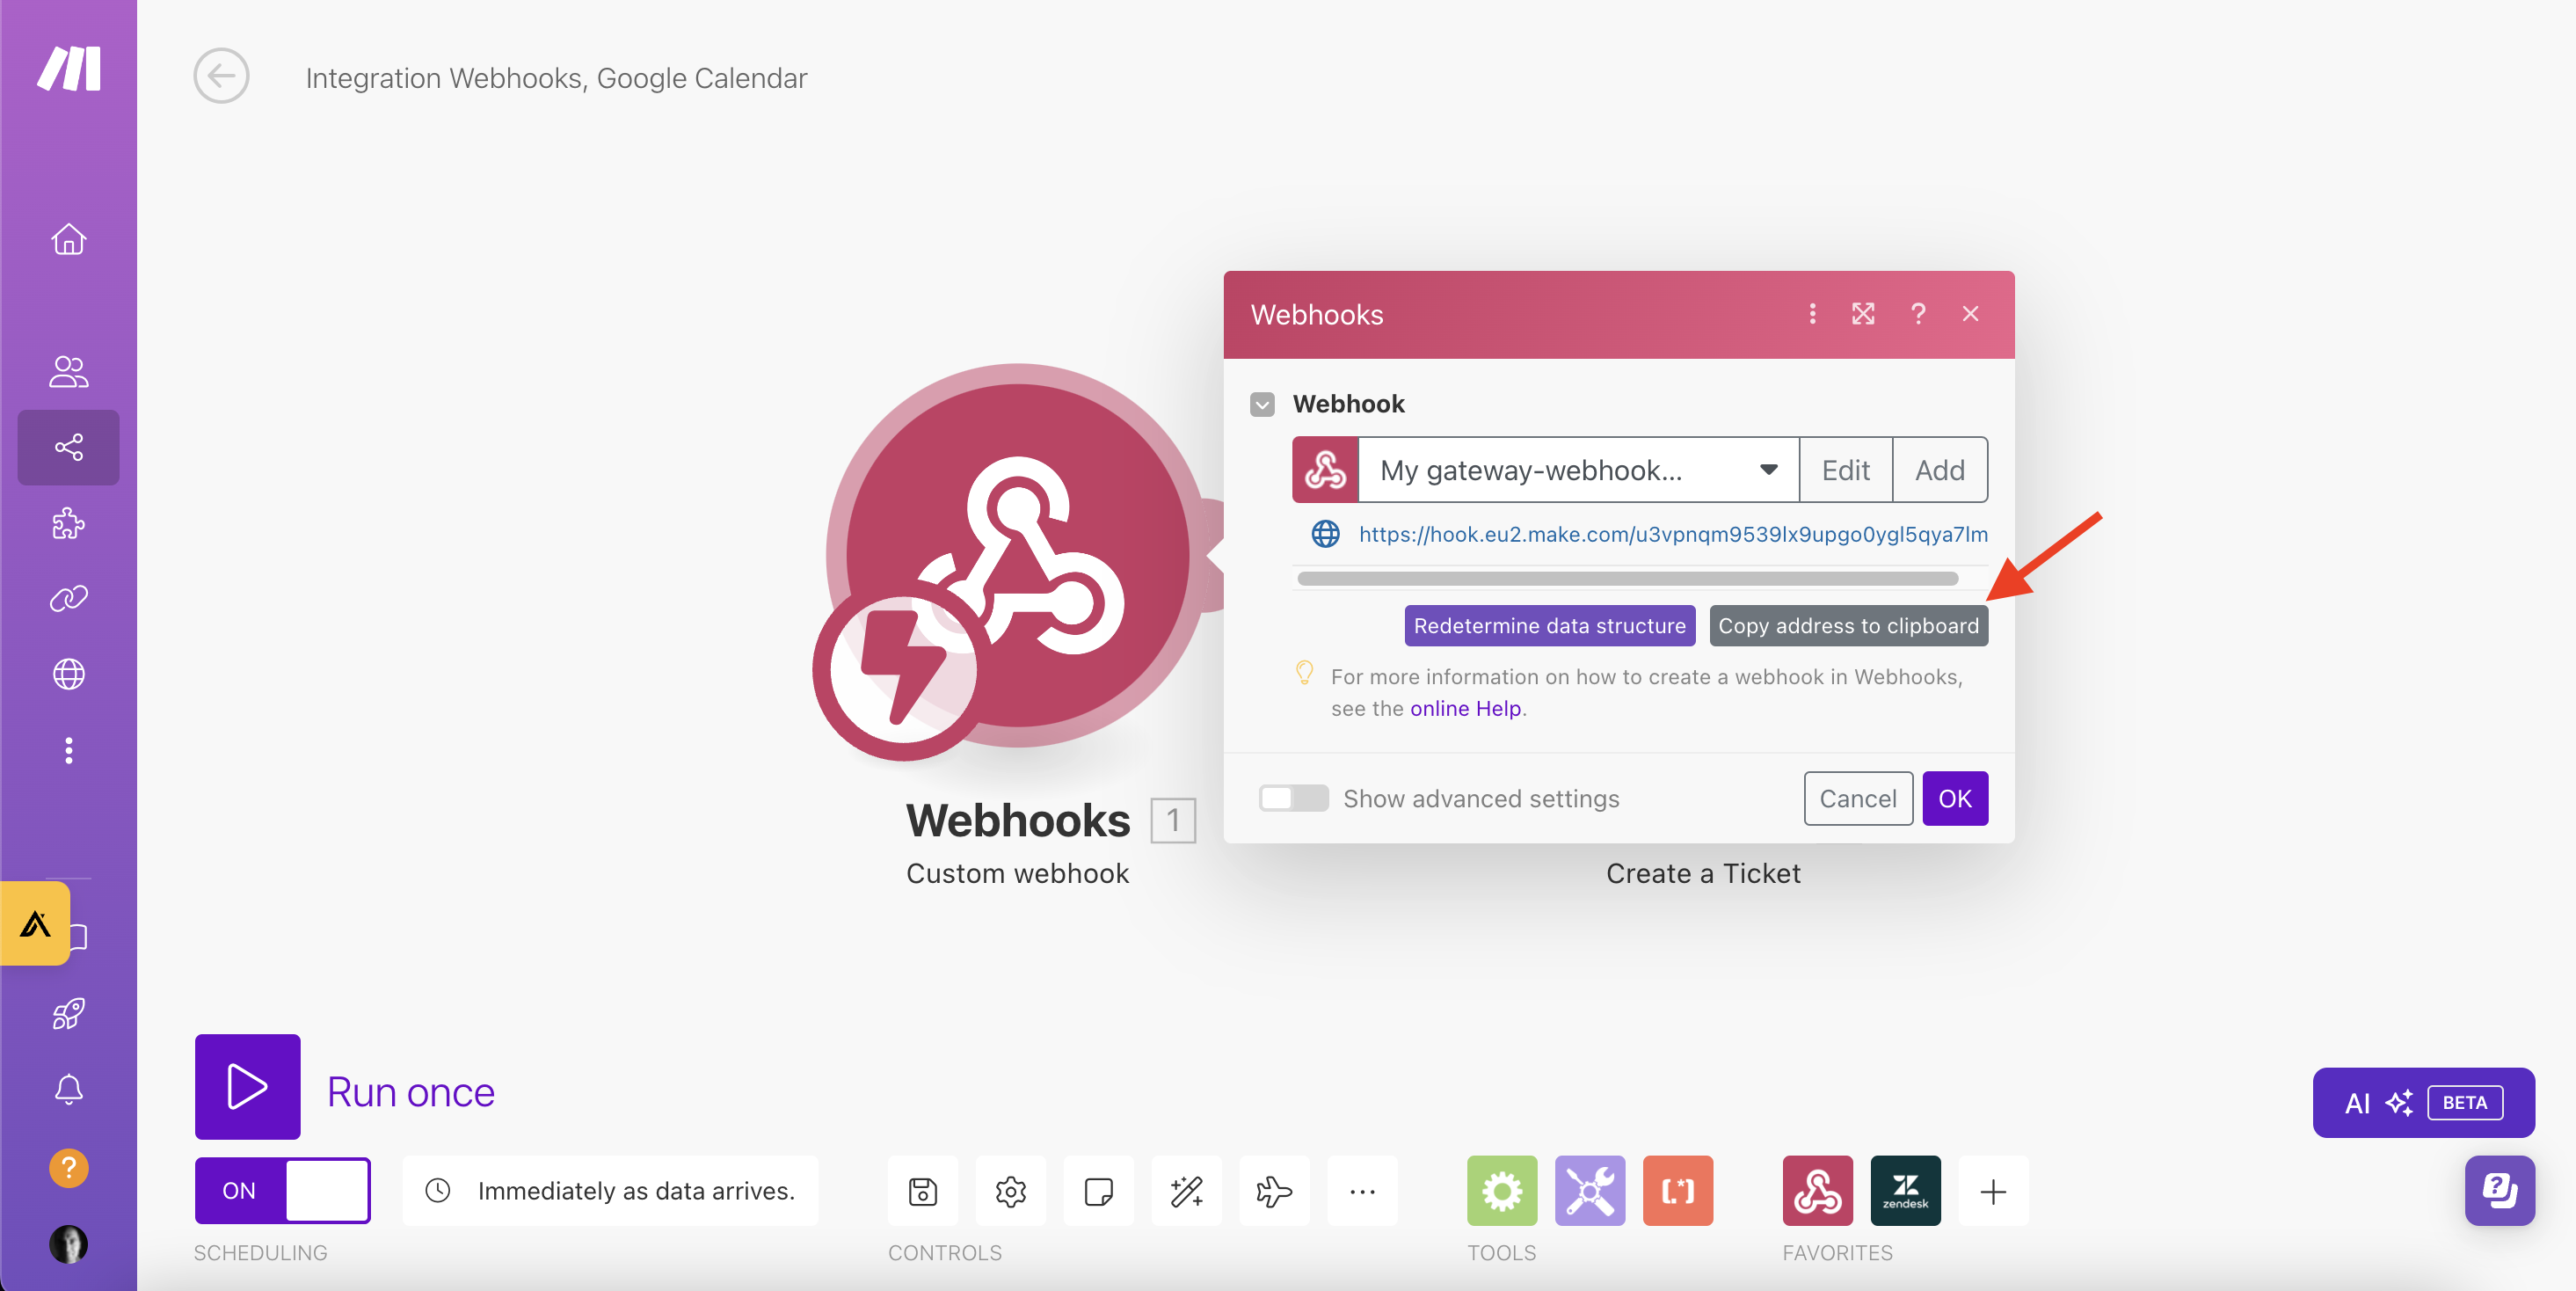
Next, go back to your Tiledesk dashboard, and in the Make block of your bot’s flow, paste the webhook URL you just copied.
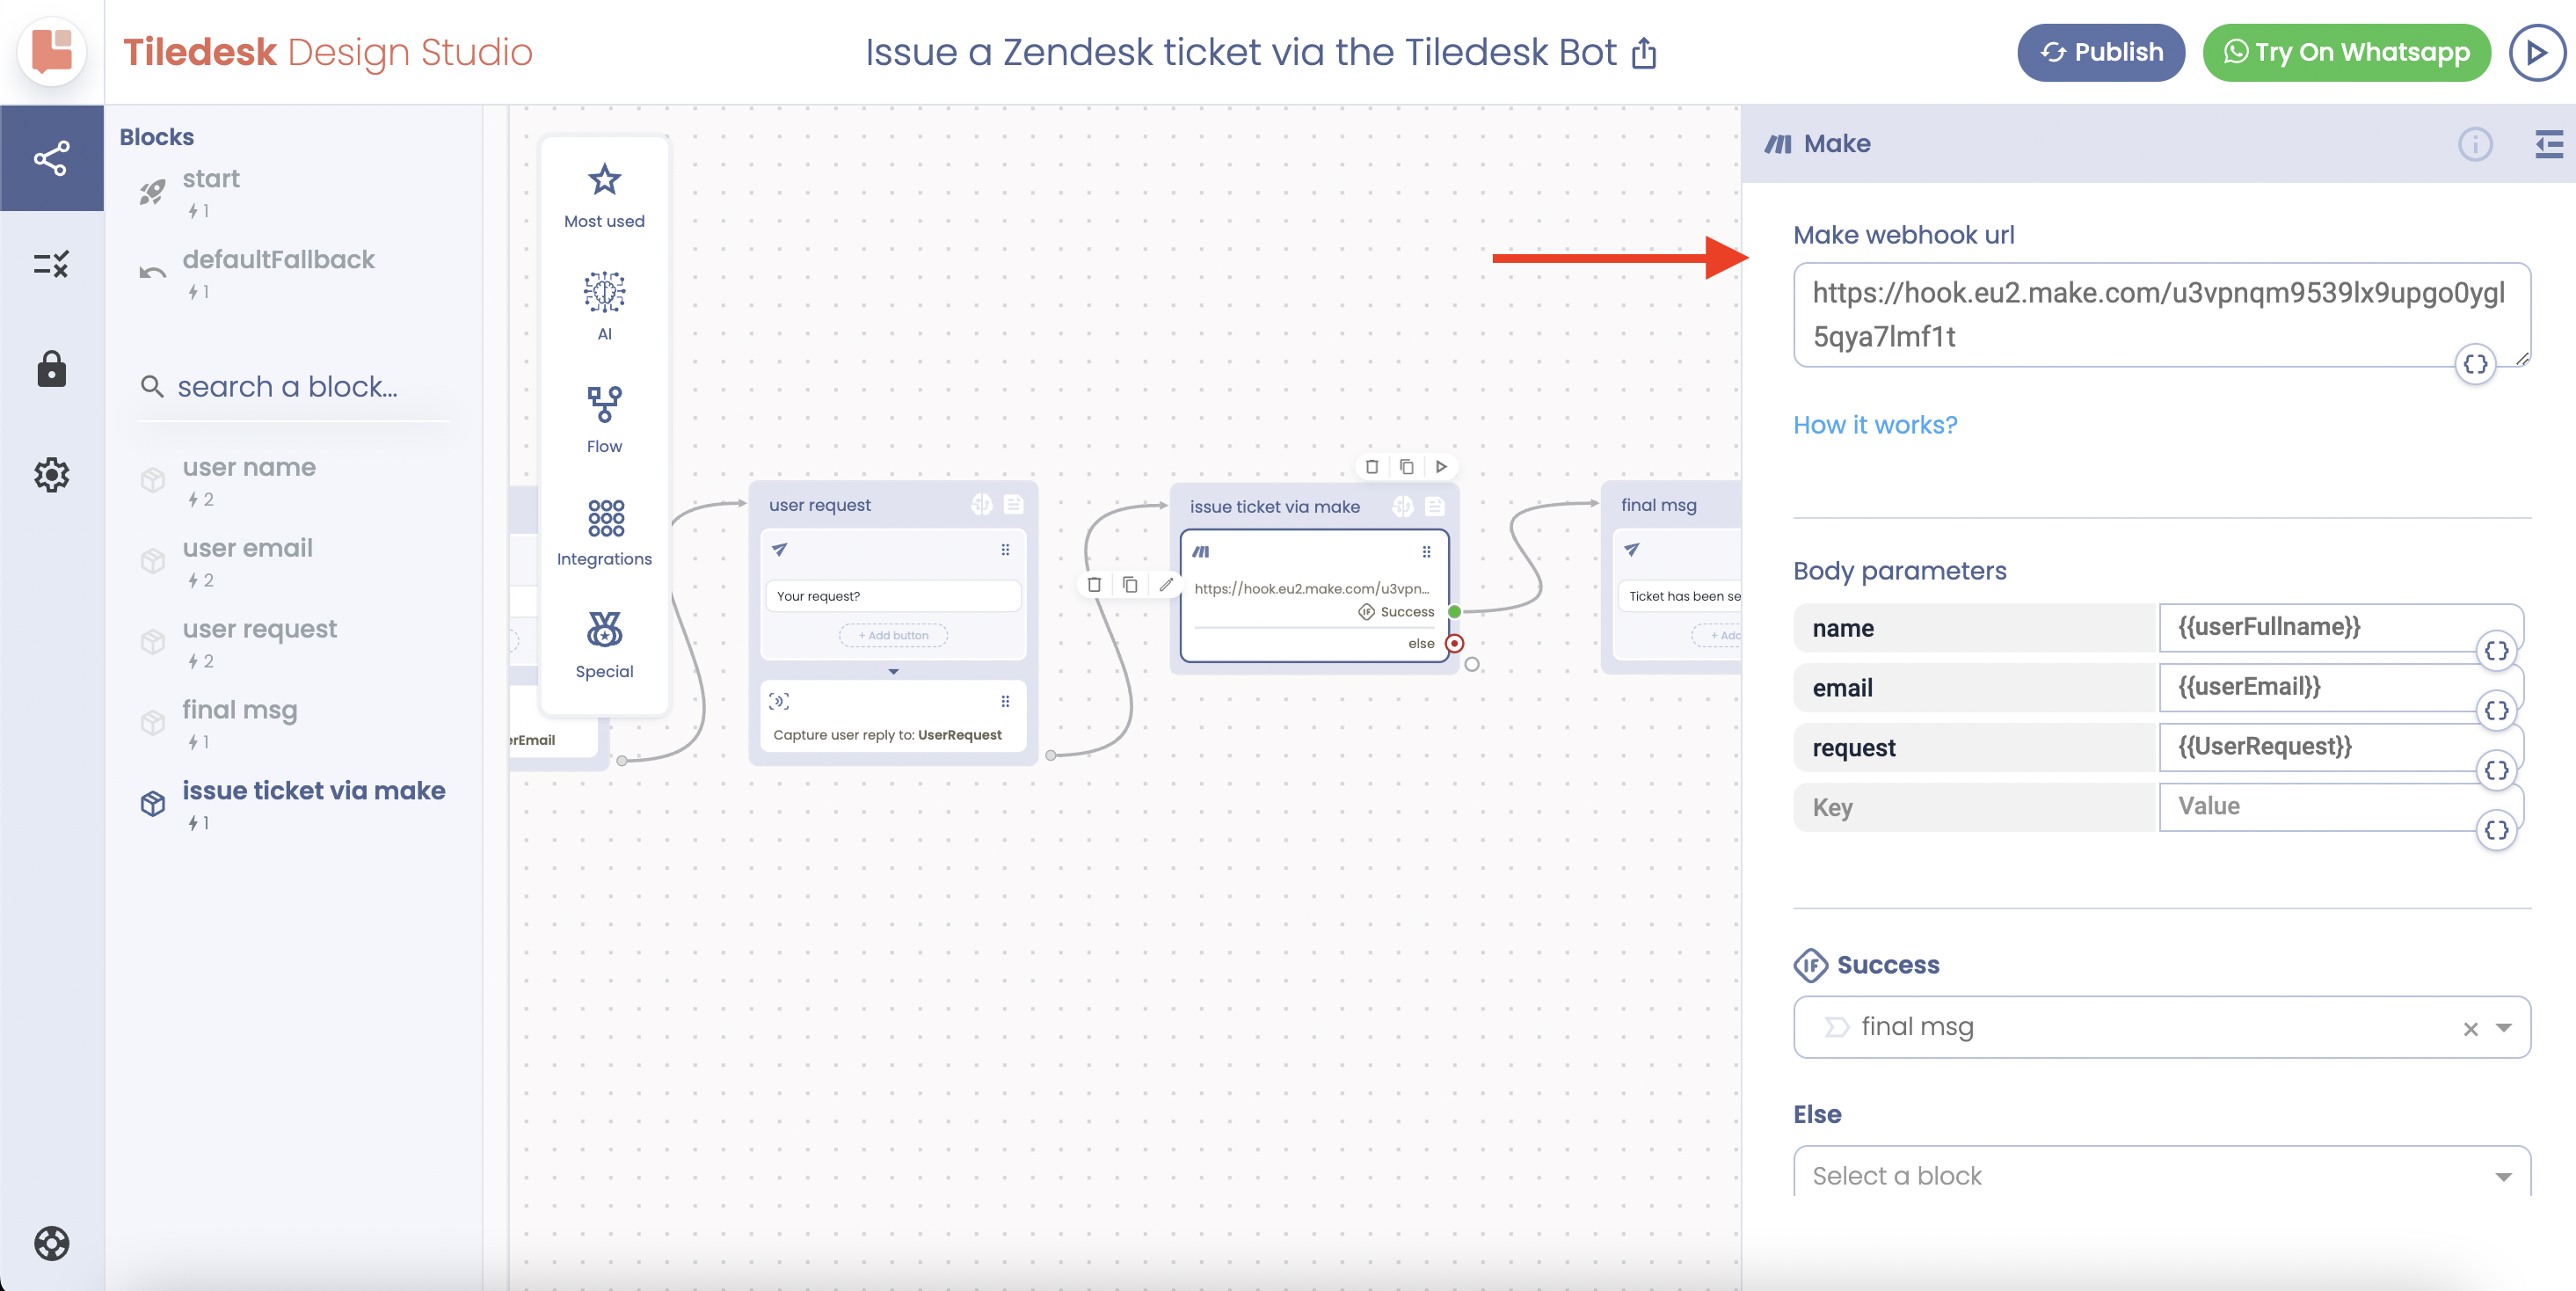
Now, return to Make and add a new module called Zendesk - Create a Ticket.
You'll need to connect this module to your Zendesk account using the Unique Identifier (Client ID), Secret (Client Secret), and Domain that we got earlier from the Zendesk OAuth setup.
If you're unsure about the Domain, you can easily find it in the URL of your Zendesk dashboard, something like <yourdomain>.zendesk.com.
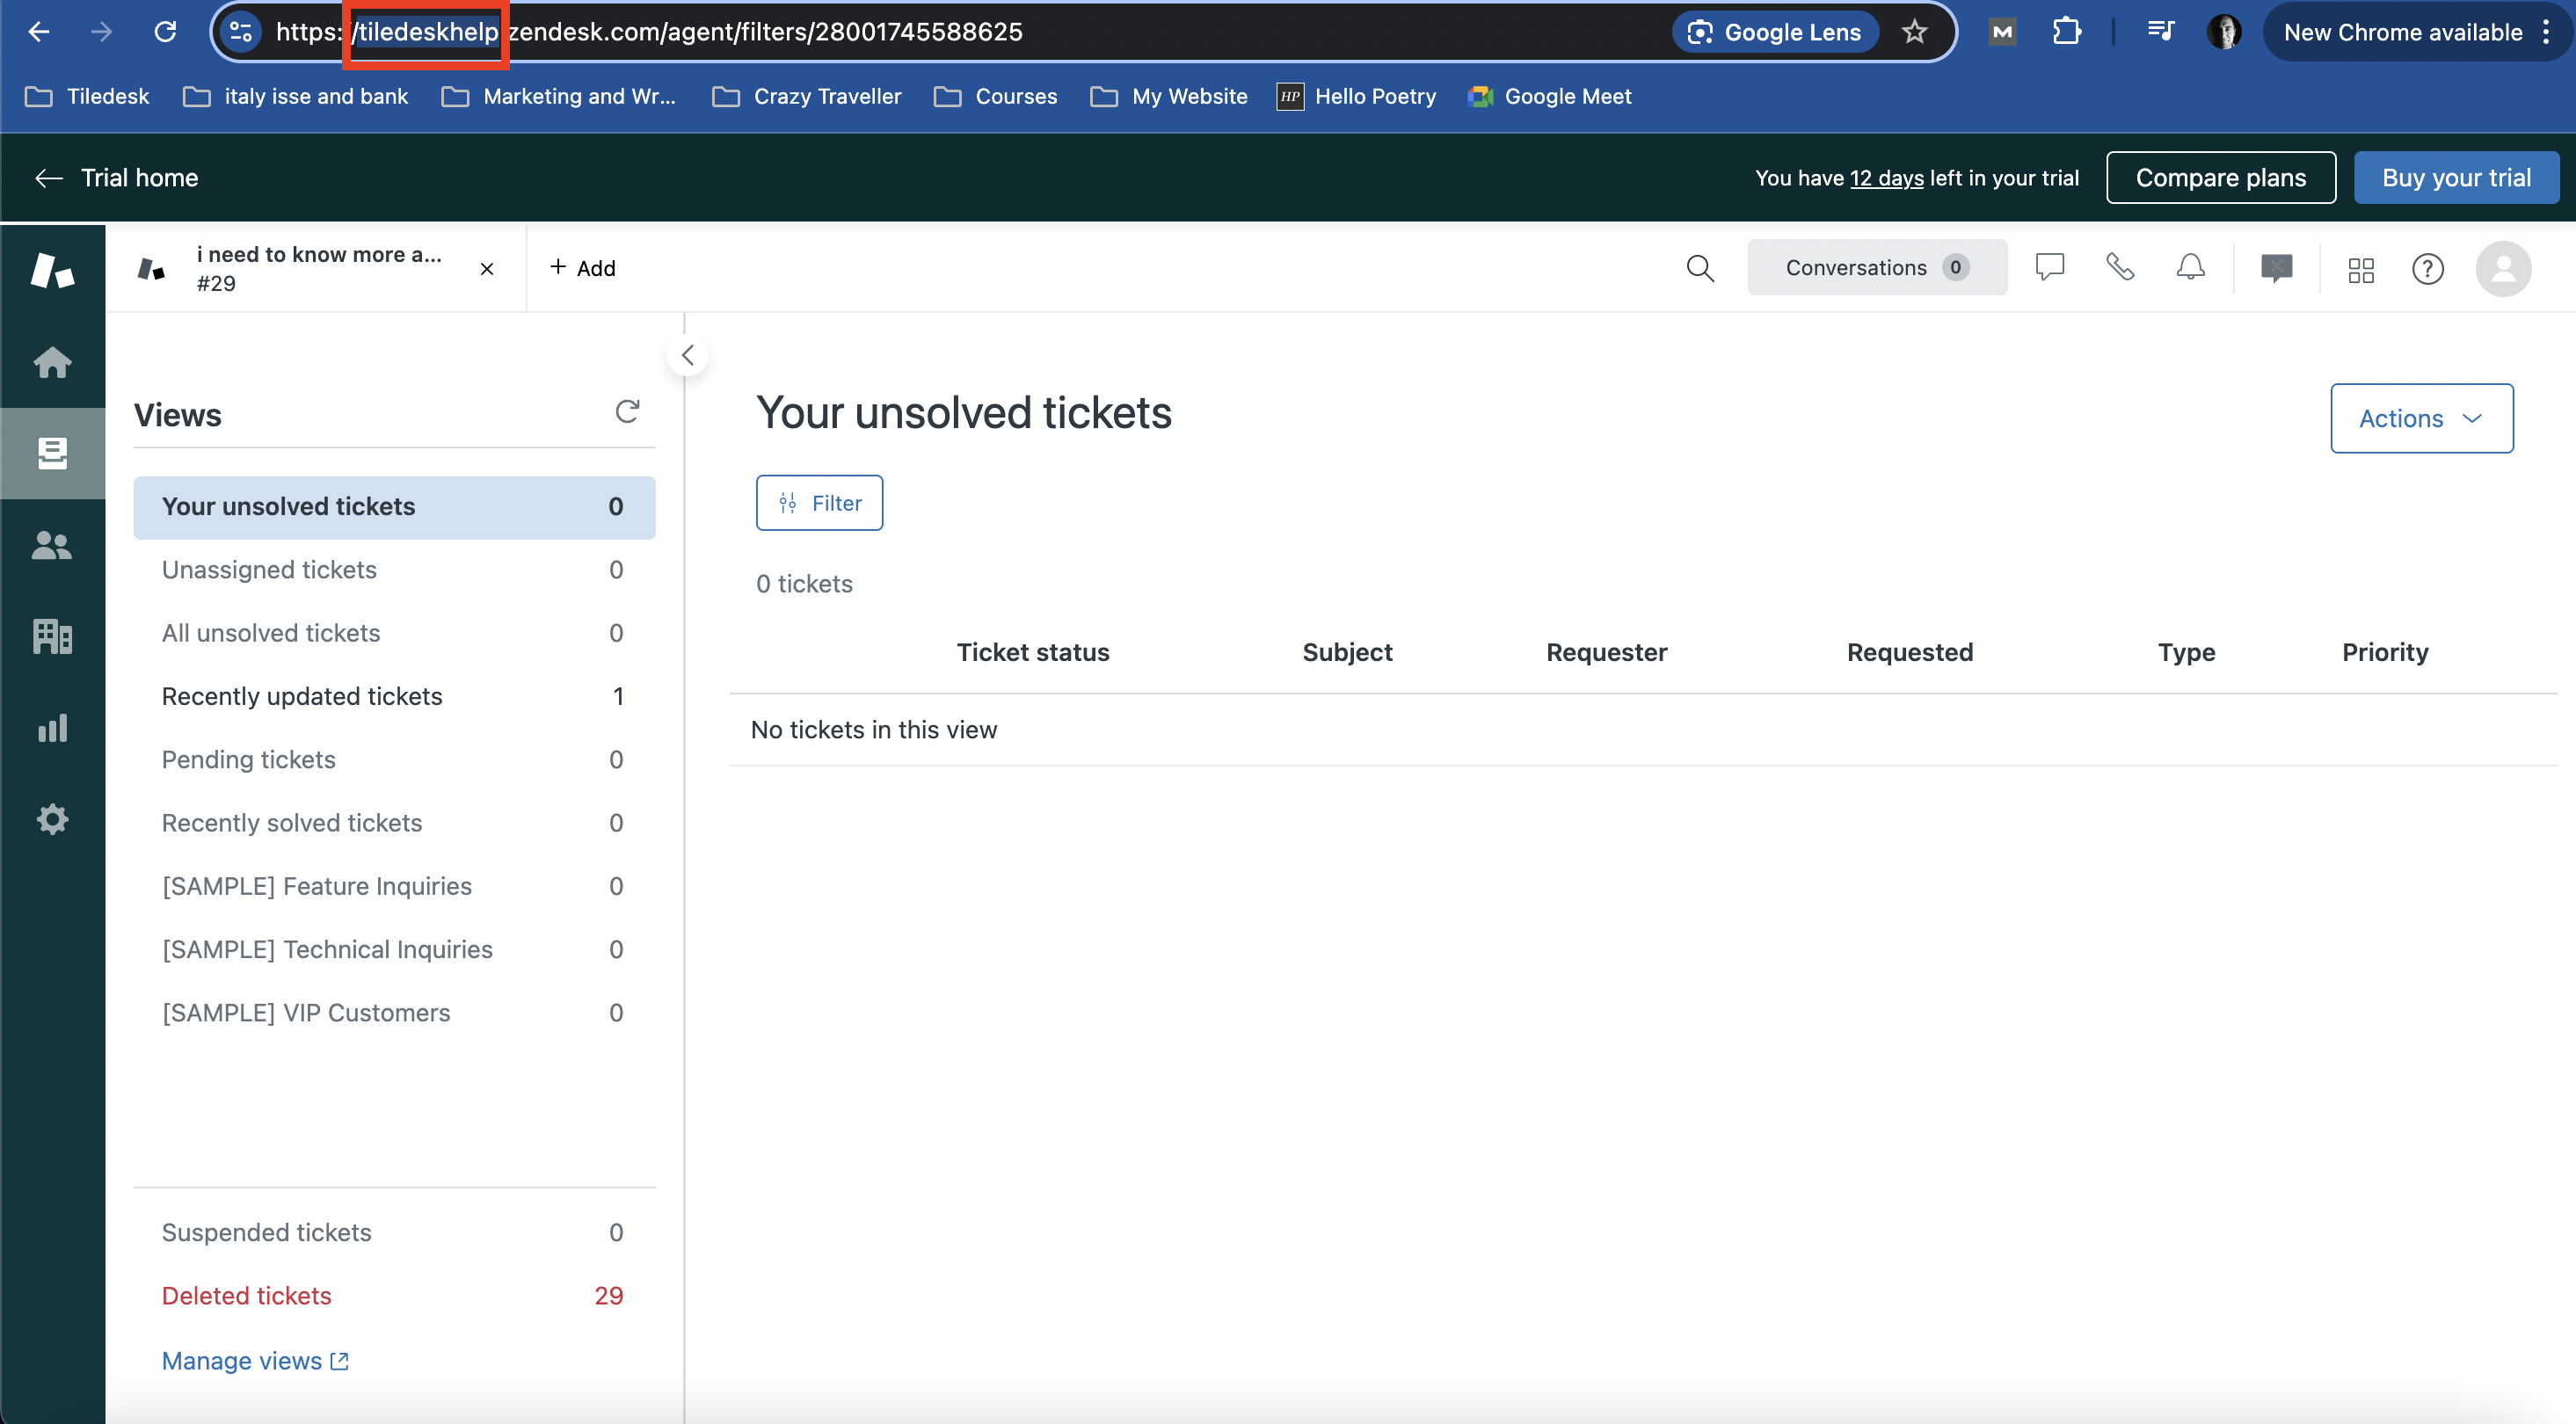
Once you’ve done that, your Make scenario will be all set to connect Tiledesk with Zendesk.
Hit Run Once to test everything out.
Then get back to your Tiledesk dashboard.Click on the Test it button in the top right corner.
Go through the conversation with the bot, providing your name, email, and request.
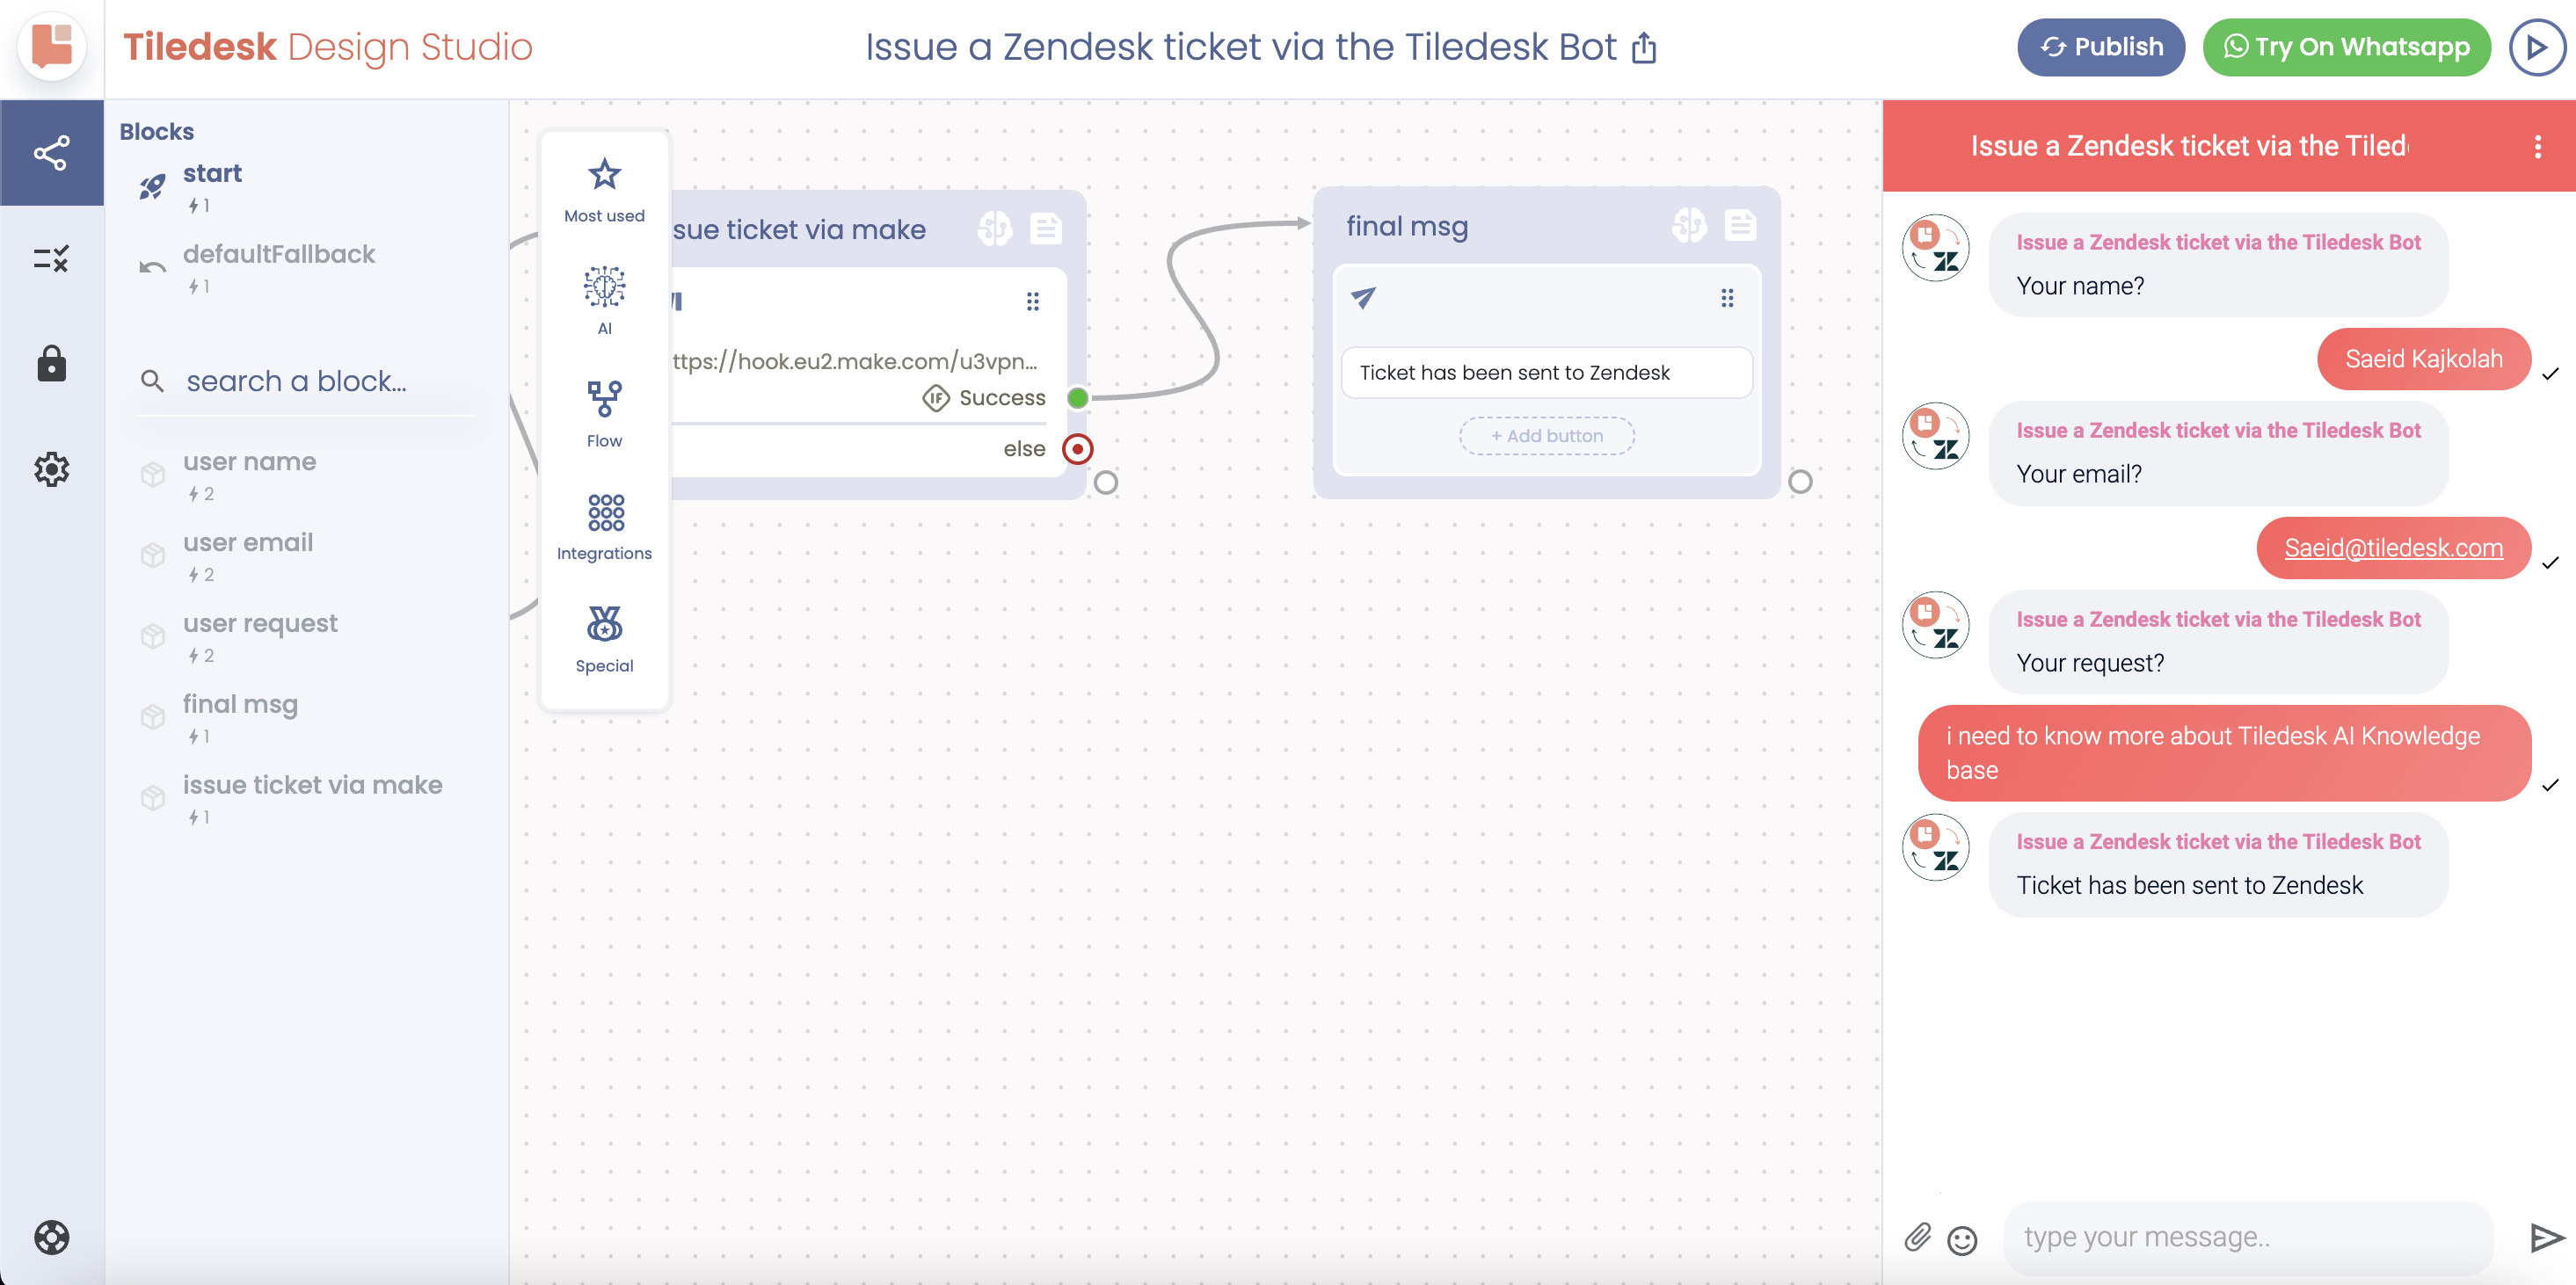
Now we need to get back to the Make scenario.
In the Zendesk module, map the data from Tiledesk to the appropriate fields:
- For Subject, you can use .
- For Requester Name, use .
- For Requester Email, use .
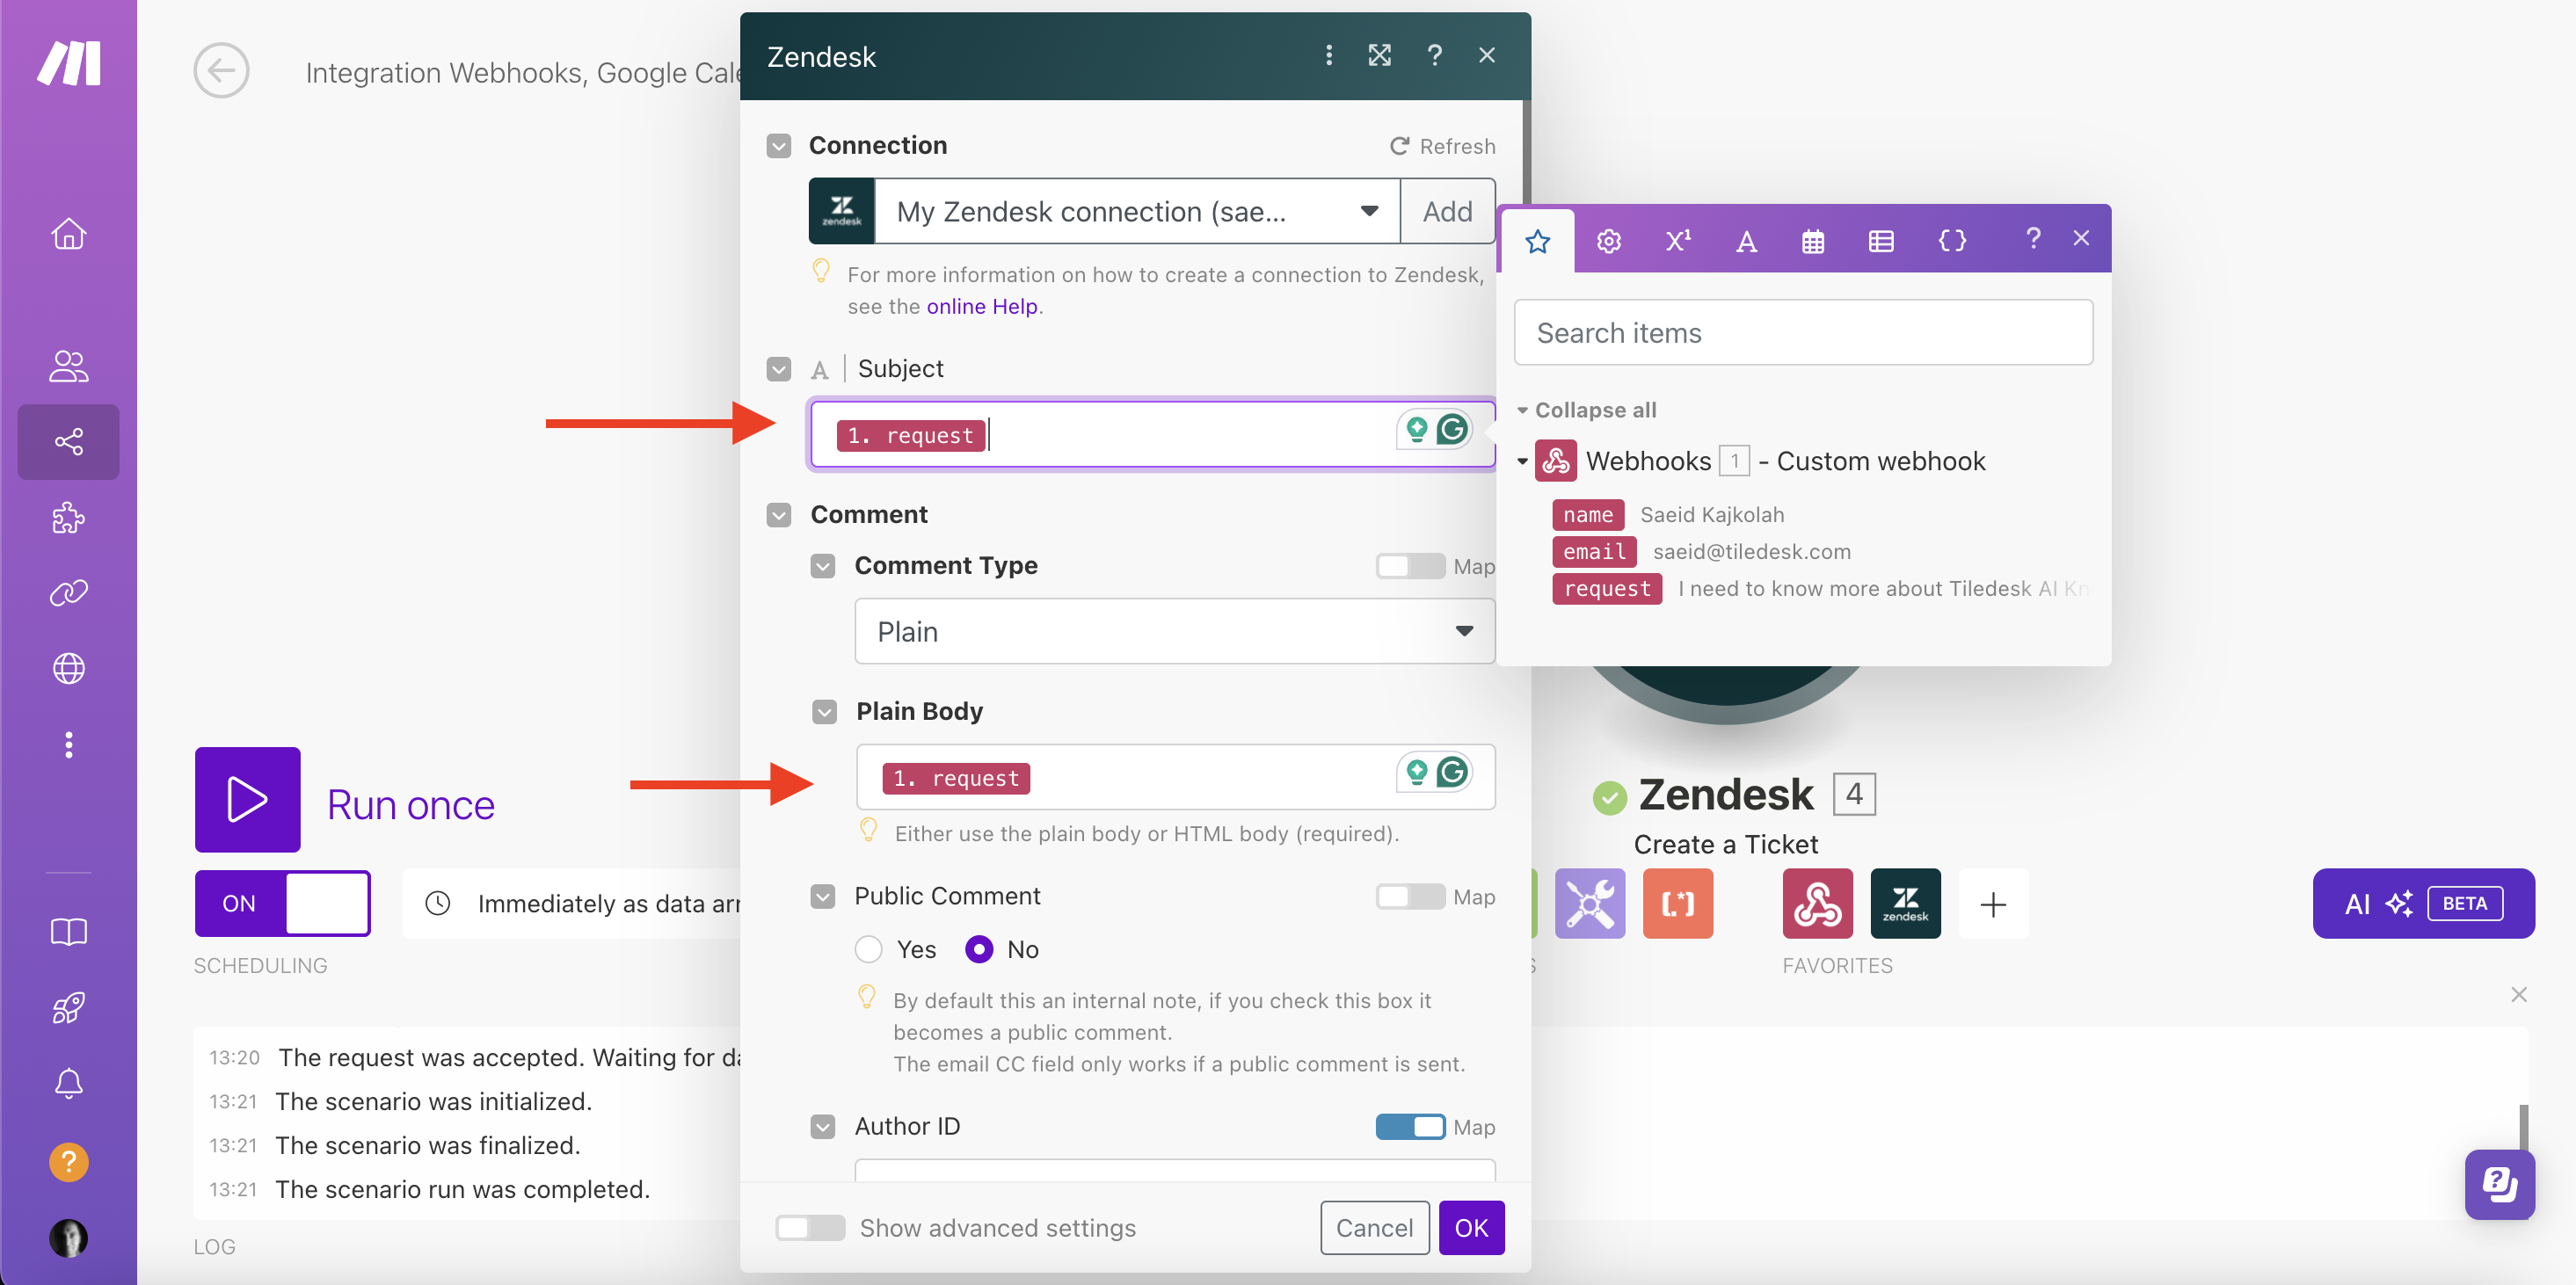
Feel free to customize other fields based on your specific needs.
Perfect. All done. We just need to save and activate the scenario.
Testing the Integration
Let’s test the bot in Tiledesk. Click the Test it button in the top right corner of the Tiledesk dashboard and interact with the bot to go through the conversation.
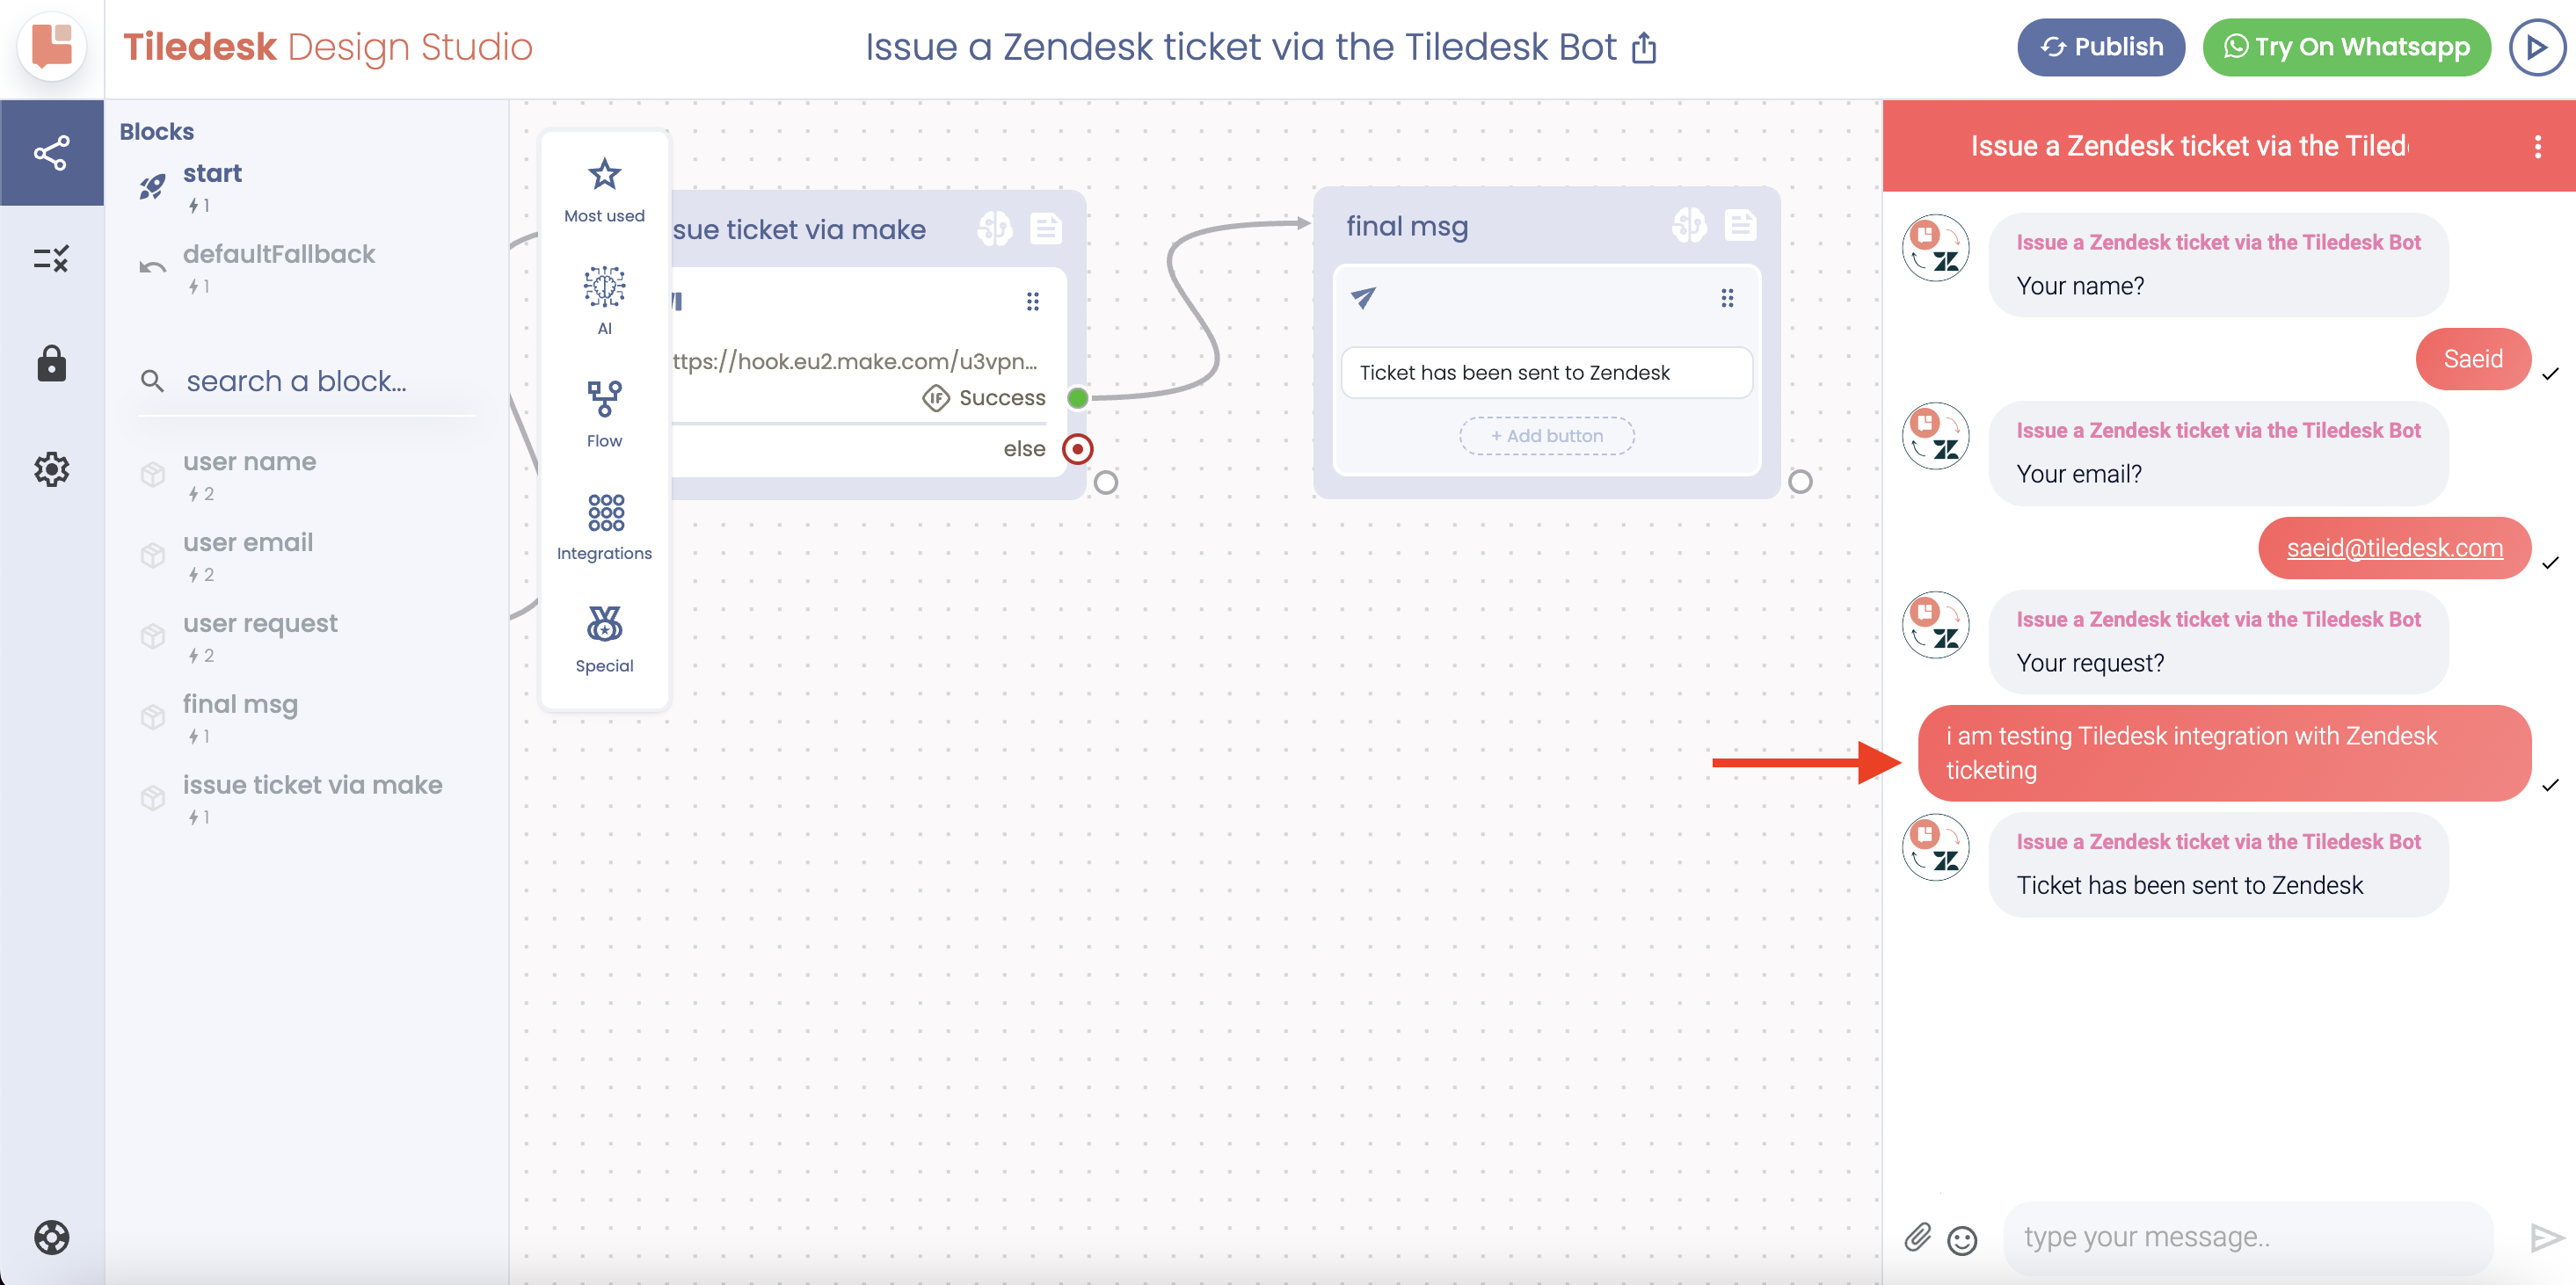
Next, check your Make dashboard to see if the scenario ran successfully and received the data from Tiledesk.
Finally, head over to your Zendesk dashboard, refresh the page, and you should see a new ticket created with the information you provided.
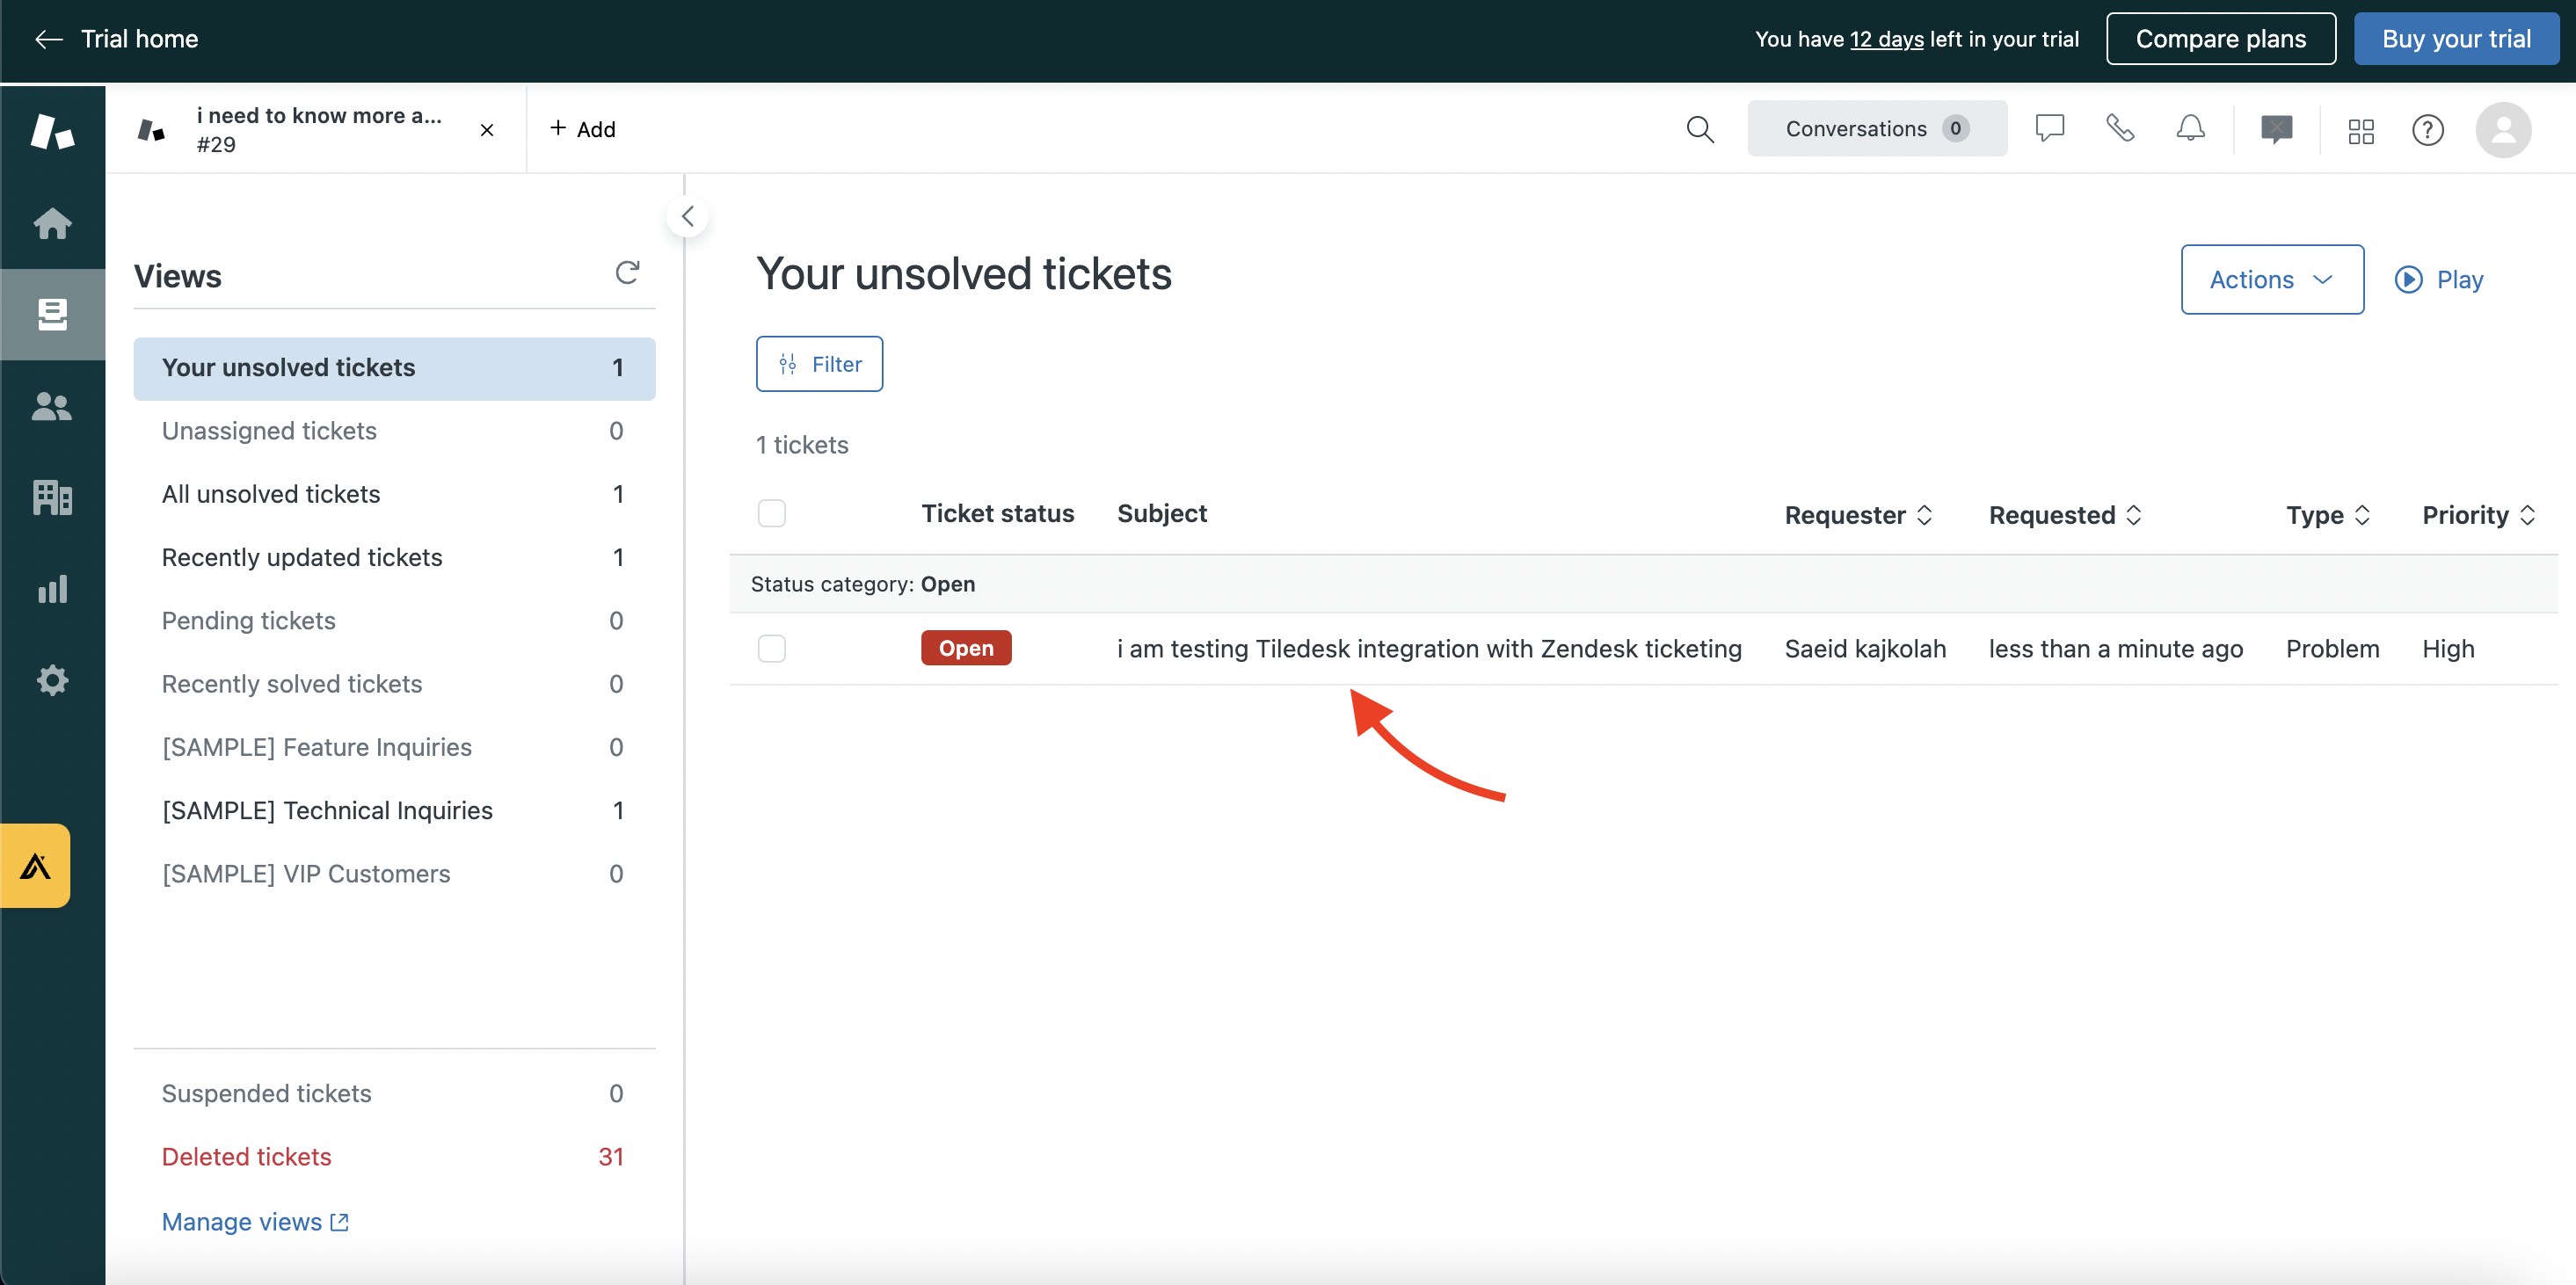
Now, your integration is live, and any new interactions with your Tiledesk bot will automatically create tickets in Zendesk.
Please note that the Make integration is not available in the Tiledesk trial version. If you’re on a trial and want to test this feature, feel free to contact us.
We hope this integration enhances your customer support experience!
If you have any questions, don’t hesitate to reach out to us at support@tiledesk.com.
Learn more about Tiledesk: www.tiledesk.com
Get started with a free Tiledesk account: Sign Up Here
.png)

