.png)
Capture User Reply Action
-

- Andrea Sponziello
 15 January 2024
To interact with a chatbot it is crucial to have some tool to get user input and processing it in some way. The Capture User Reply (CUR) action is designed exactly for this purpose.
You can use the Capture User Reply action in your existing blocks, in chain with your already existing actions.
To understand how the CUR works let's create a new project and customize your reply action with a text to ask the user name:
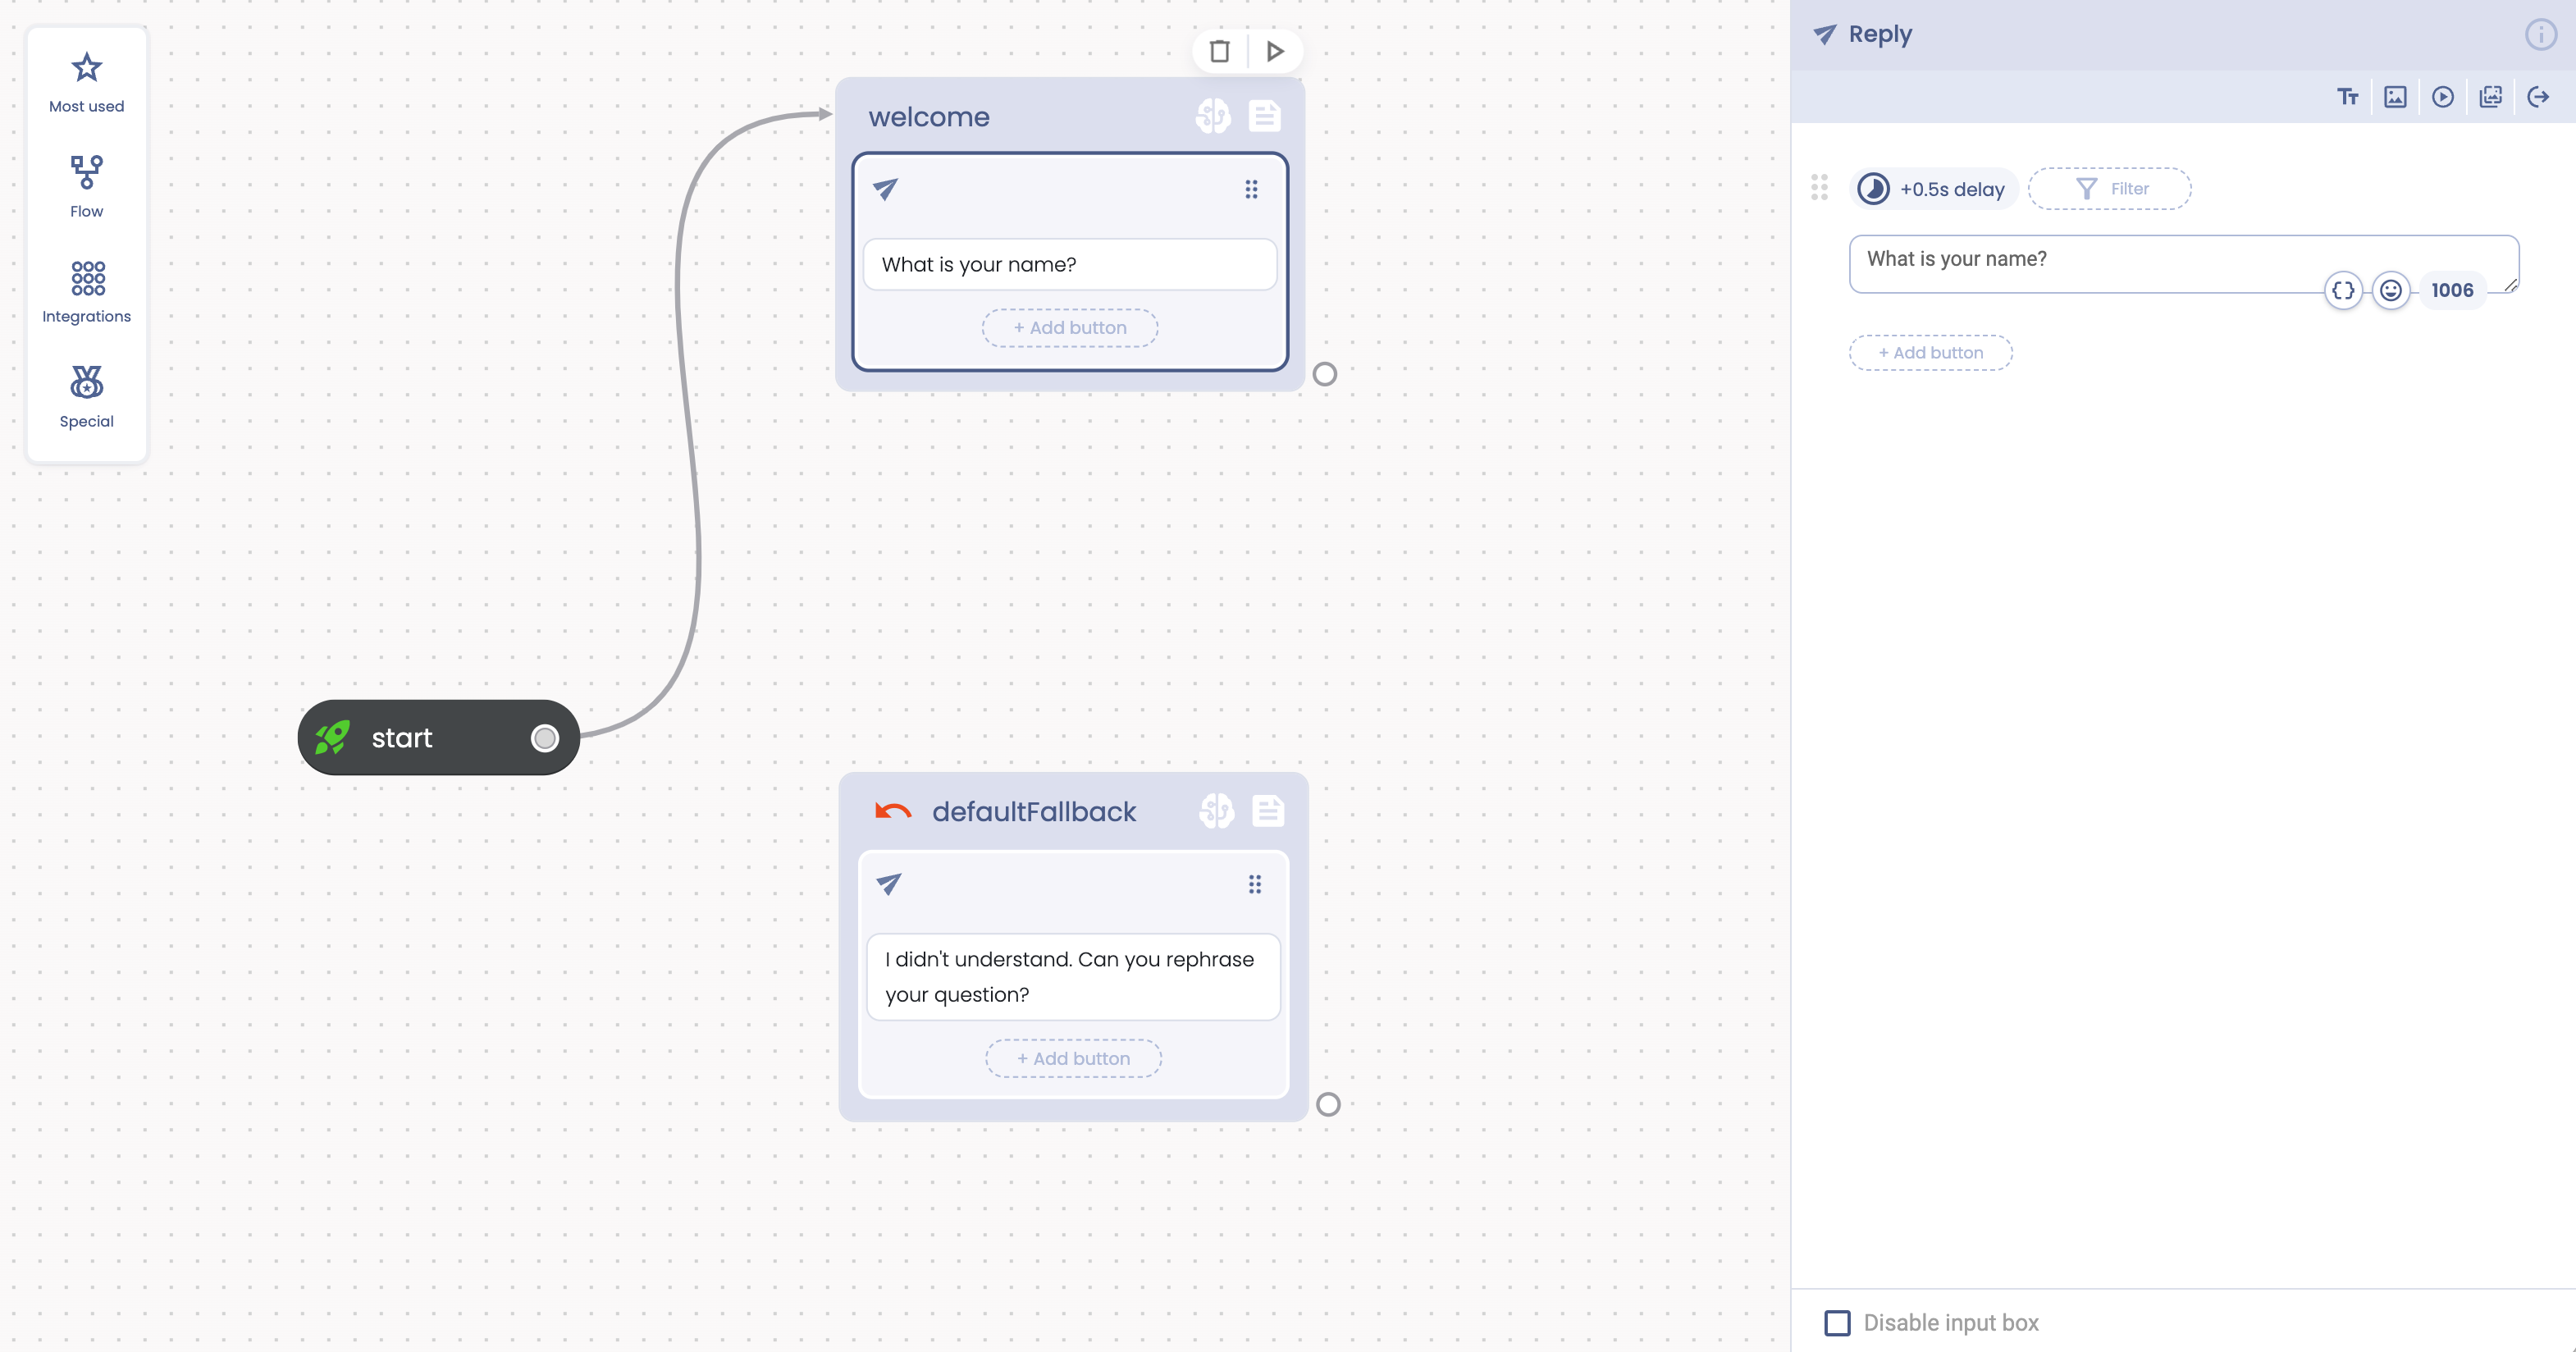
What we want now is to block the flow until the user replies with his own name, then assign the captured name to a flow attribute.
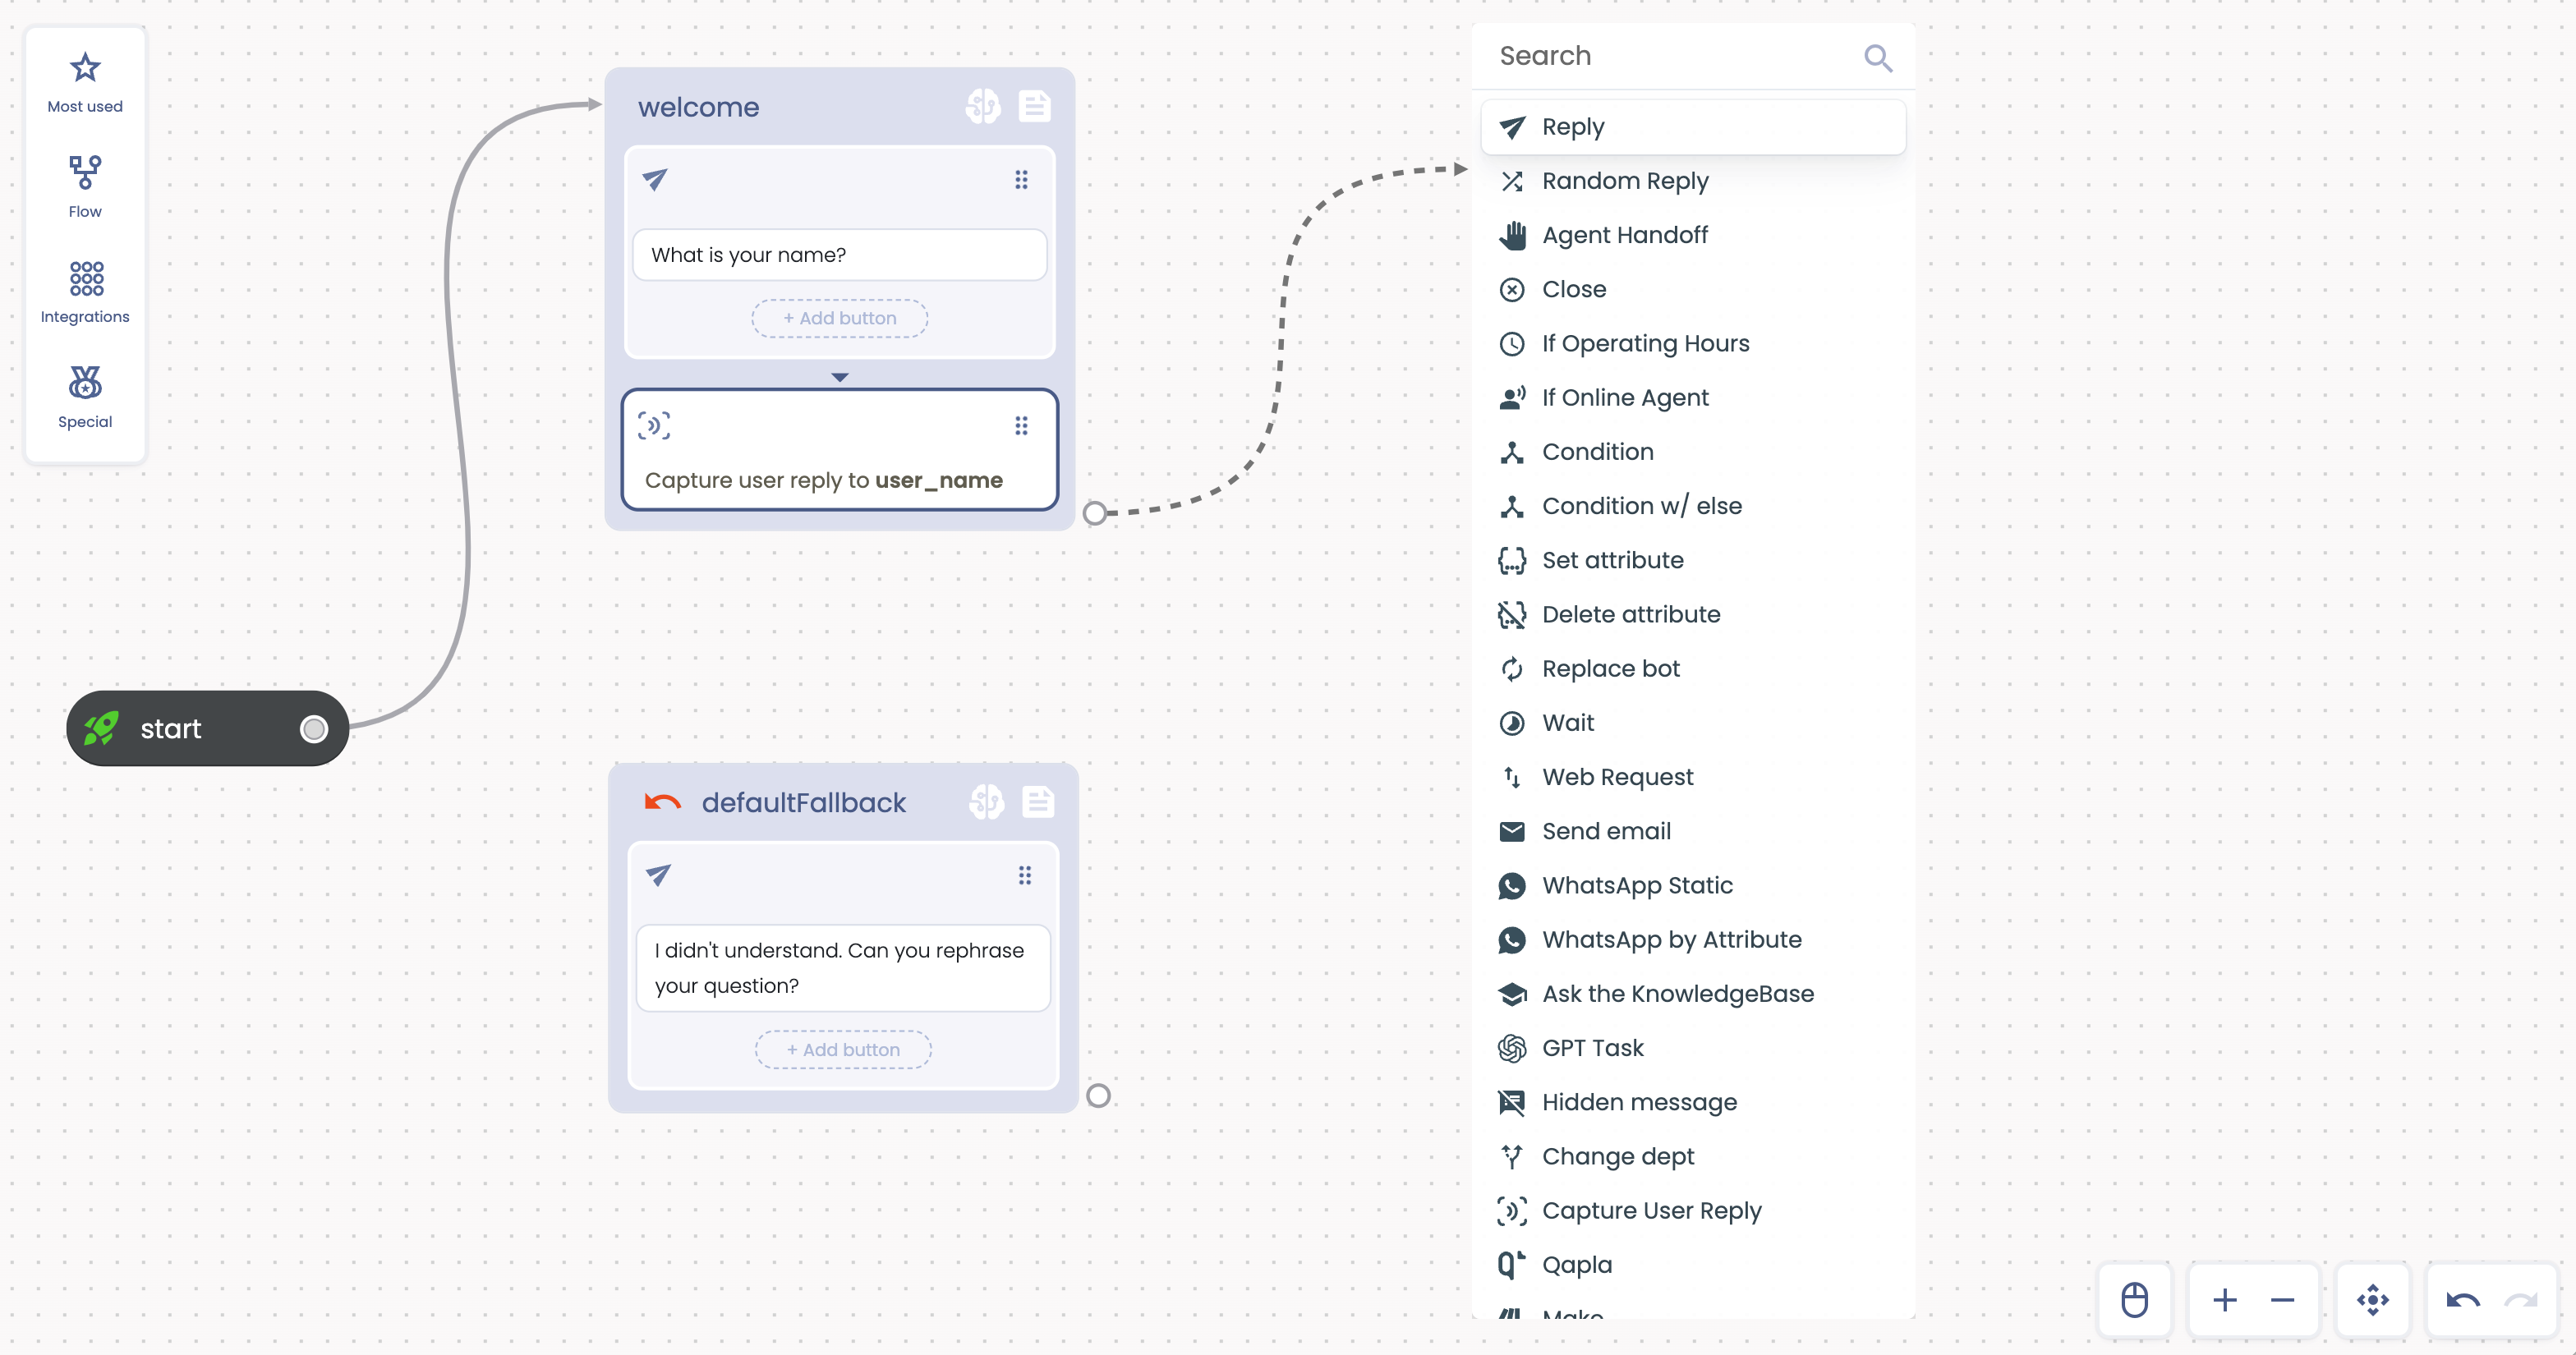
Drag the “Capture User Reply” action into the “welcome” block, just under the above configured Reply action, like in the following two picture:
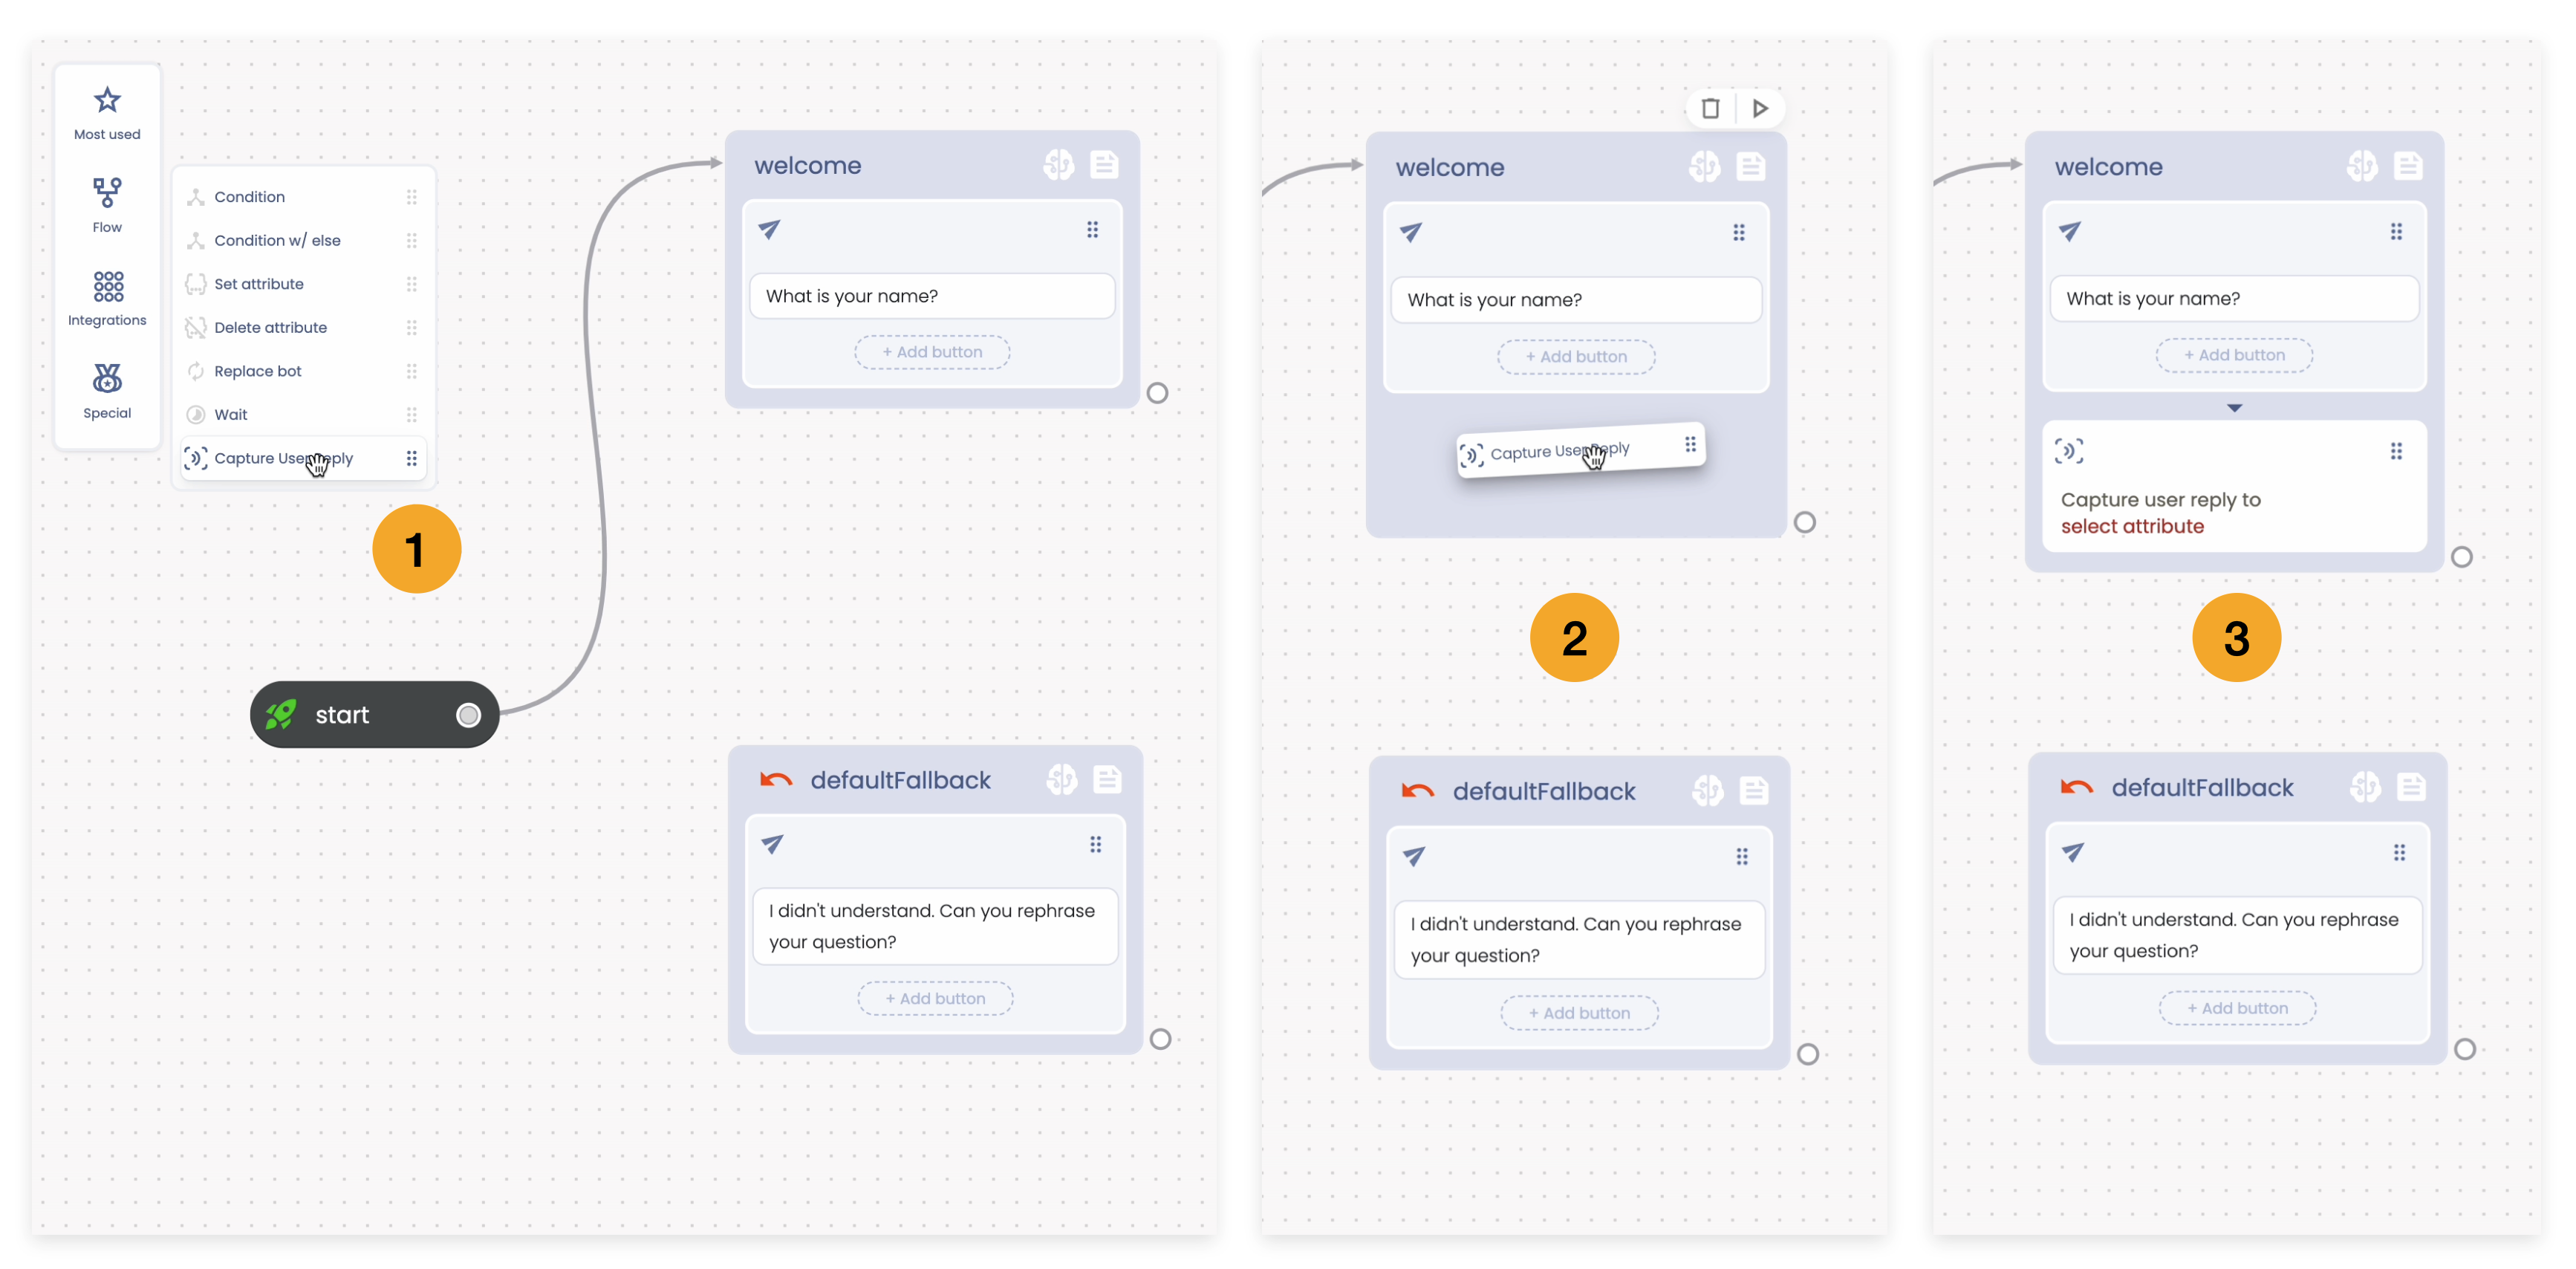
Now click on the Capture User Reply action to open the corresponding action editor. We want to create a new flow attribute that we'll fill out with the name that the user will provide during the chat. Press the {} button under the “Assign user reply to” field. In the attributes pop up press “Add custom attribute”.
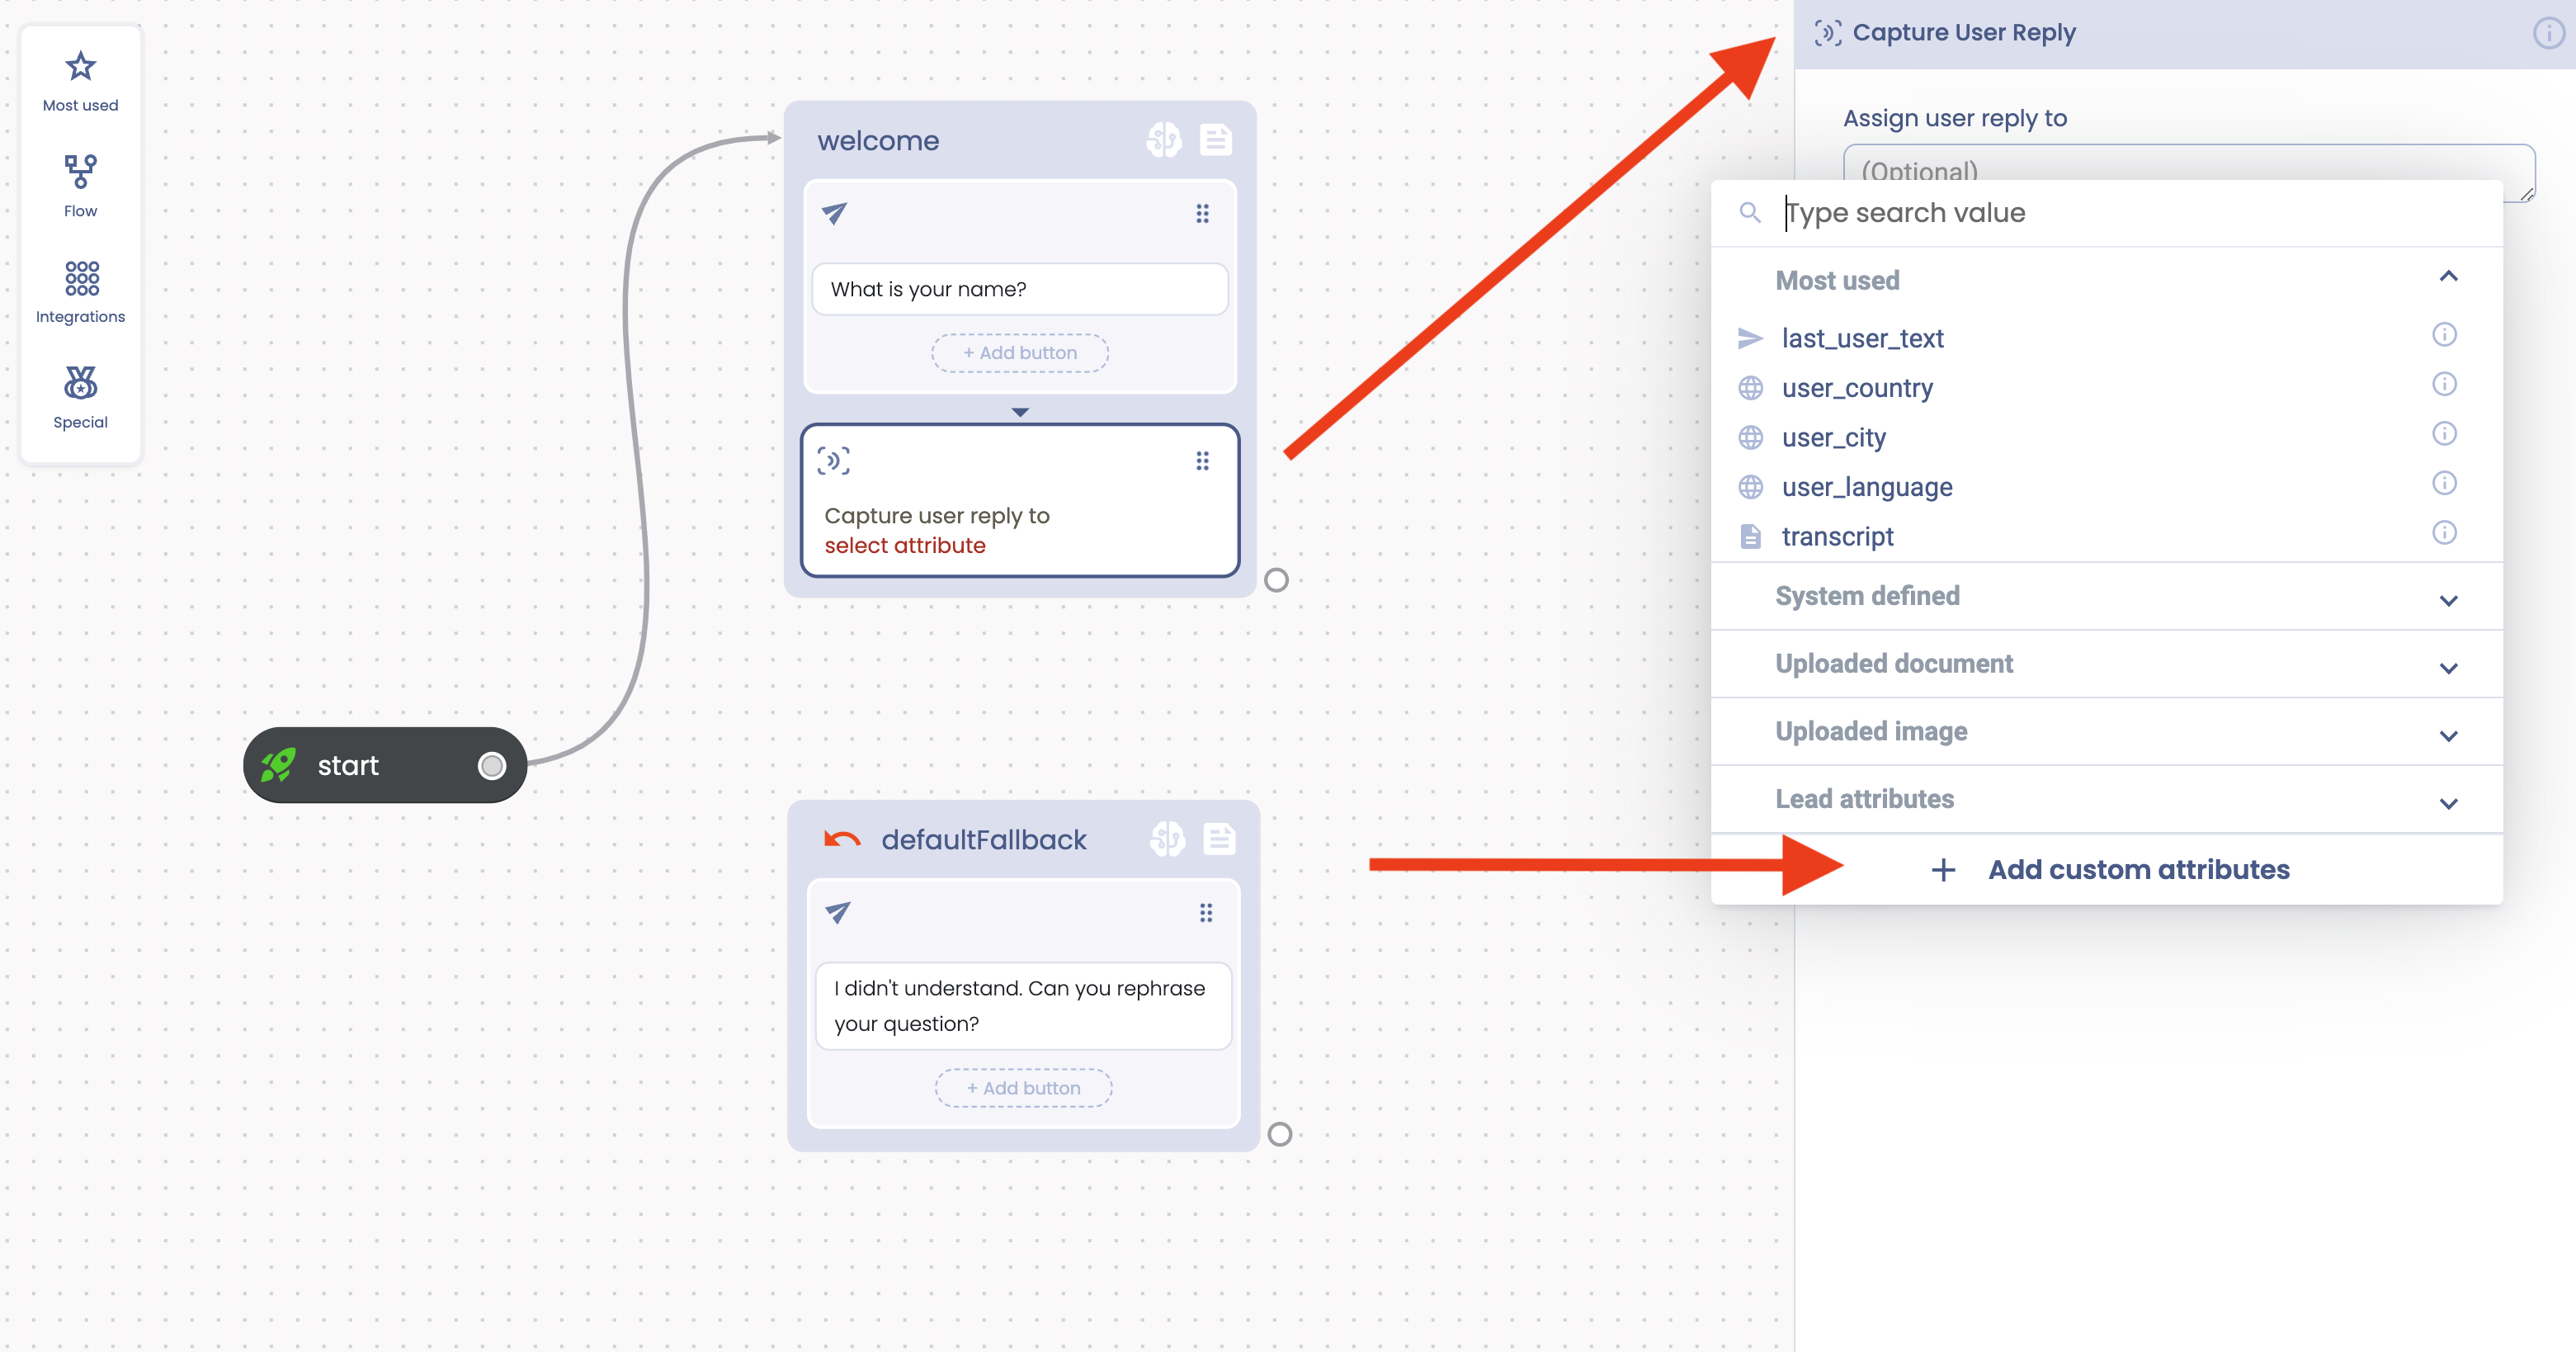
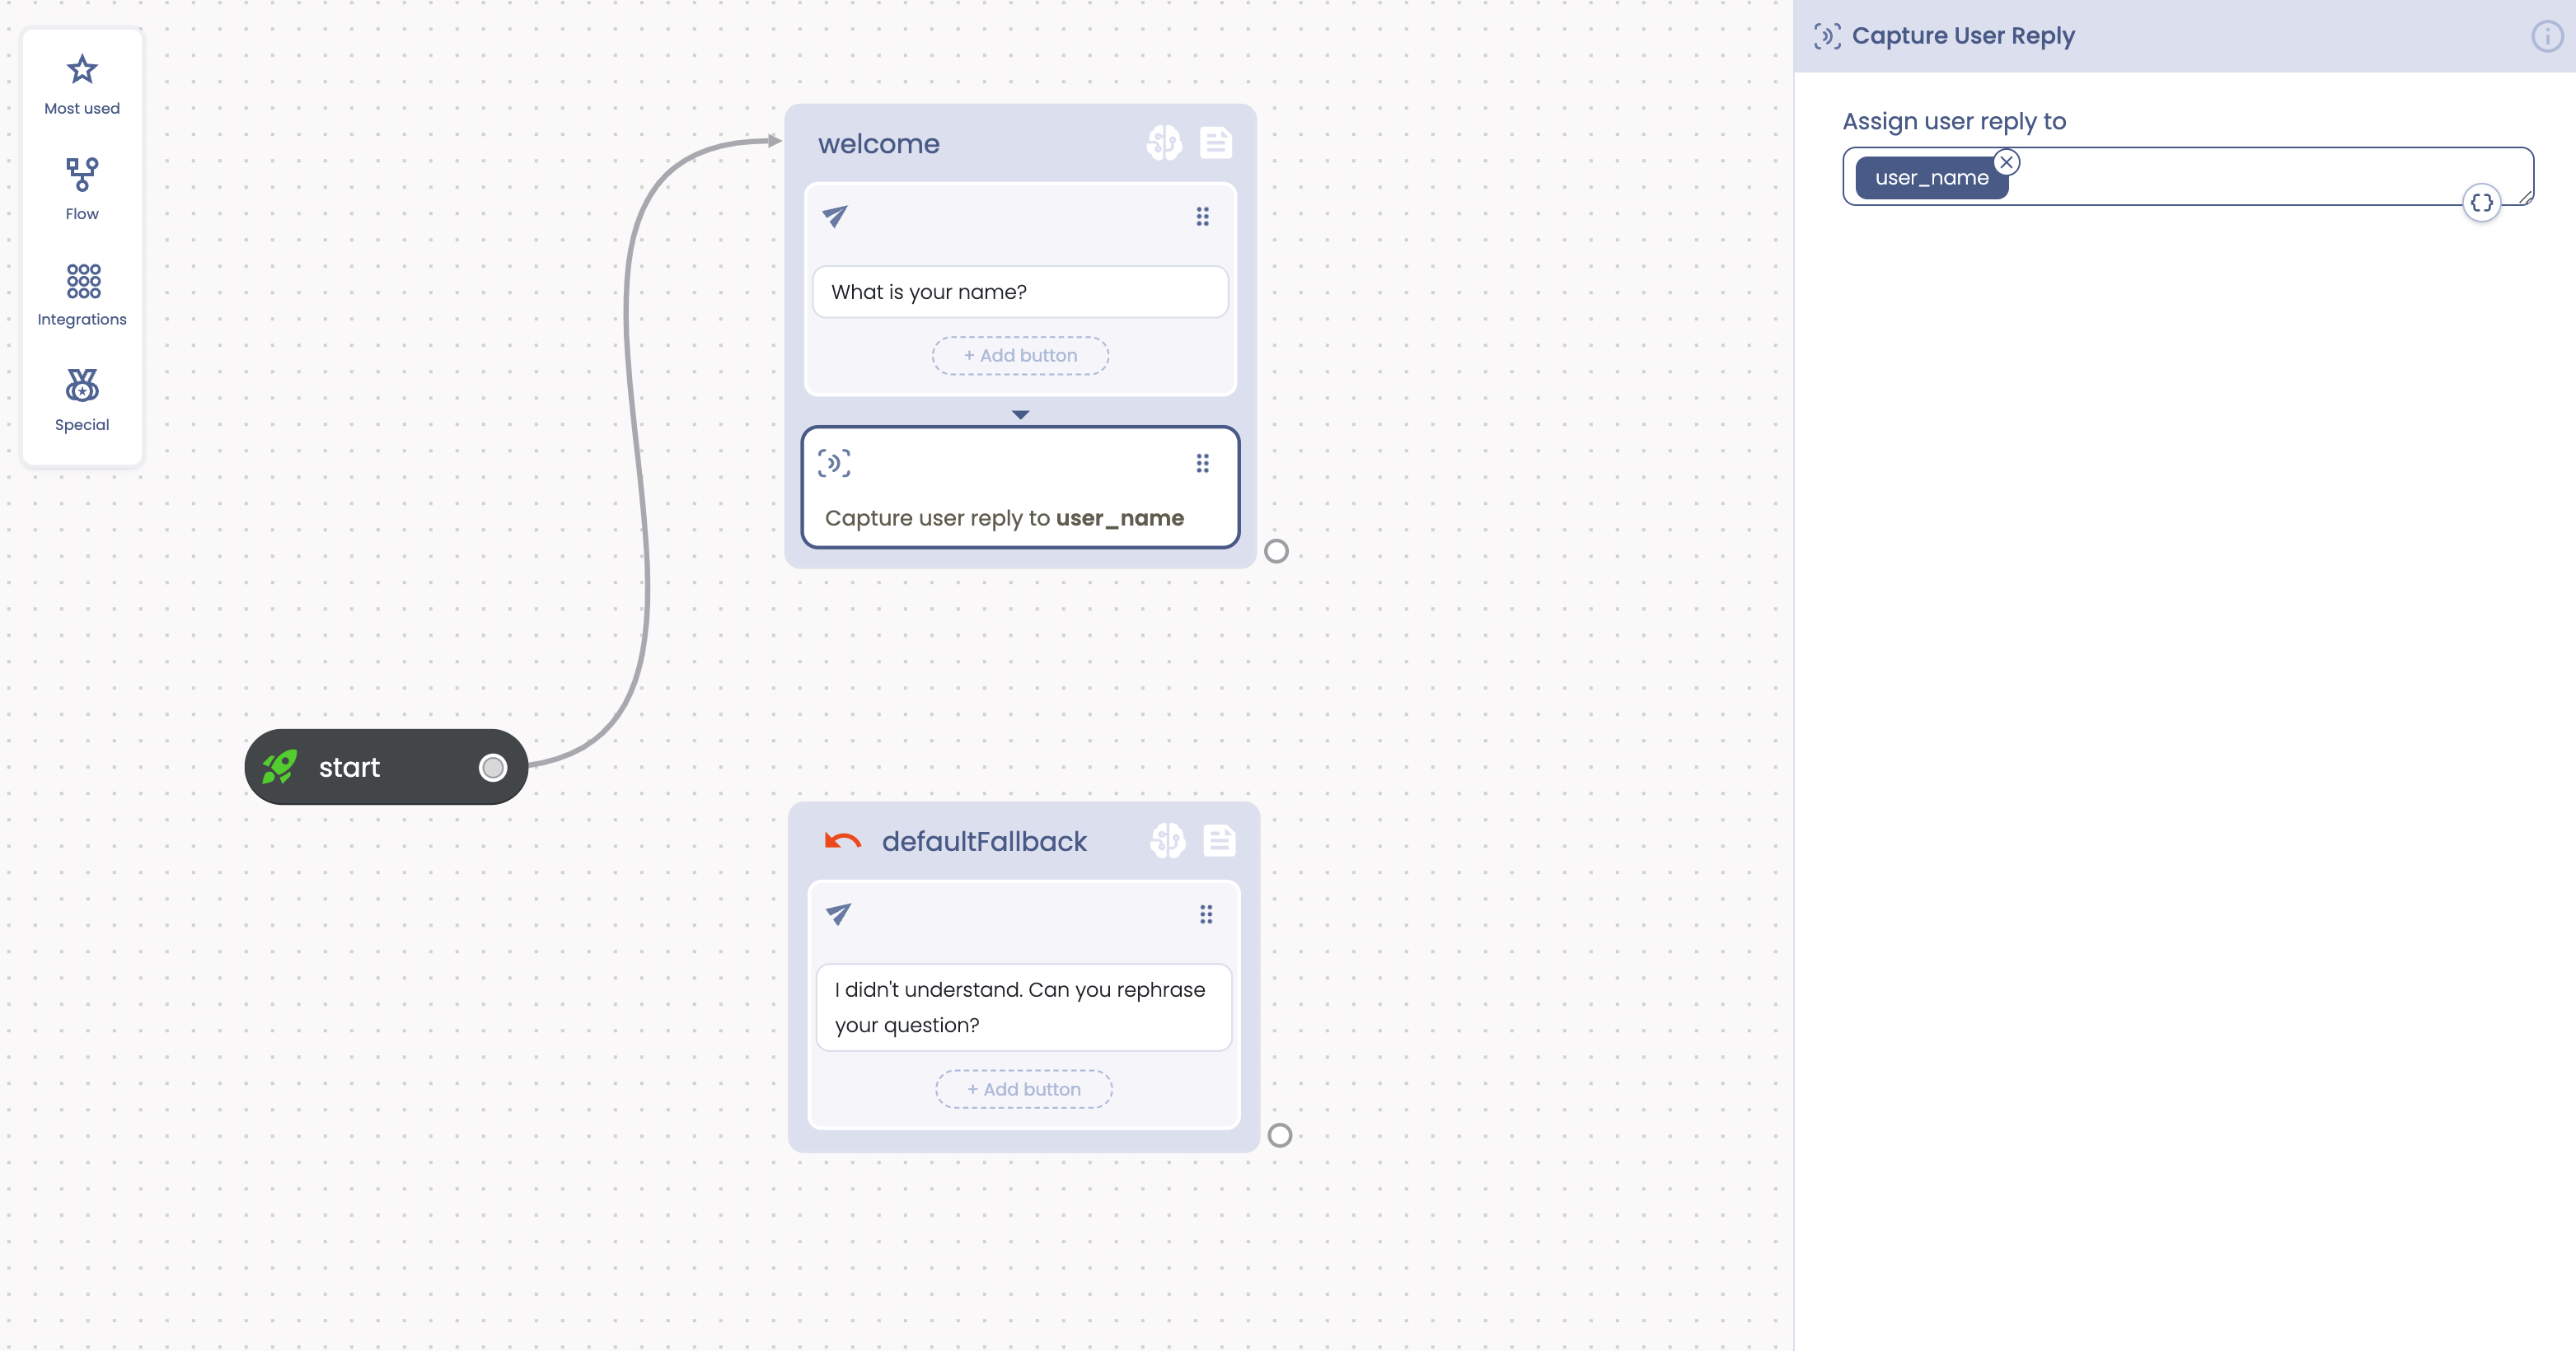
Choose the attribute name "user_name". Click on the added attribute so it will be selected in the action editor. The name that the user will provide will be assigned to the user_name attribute.
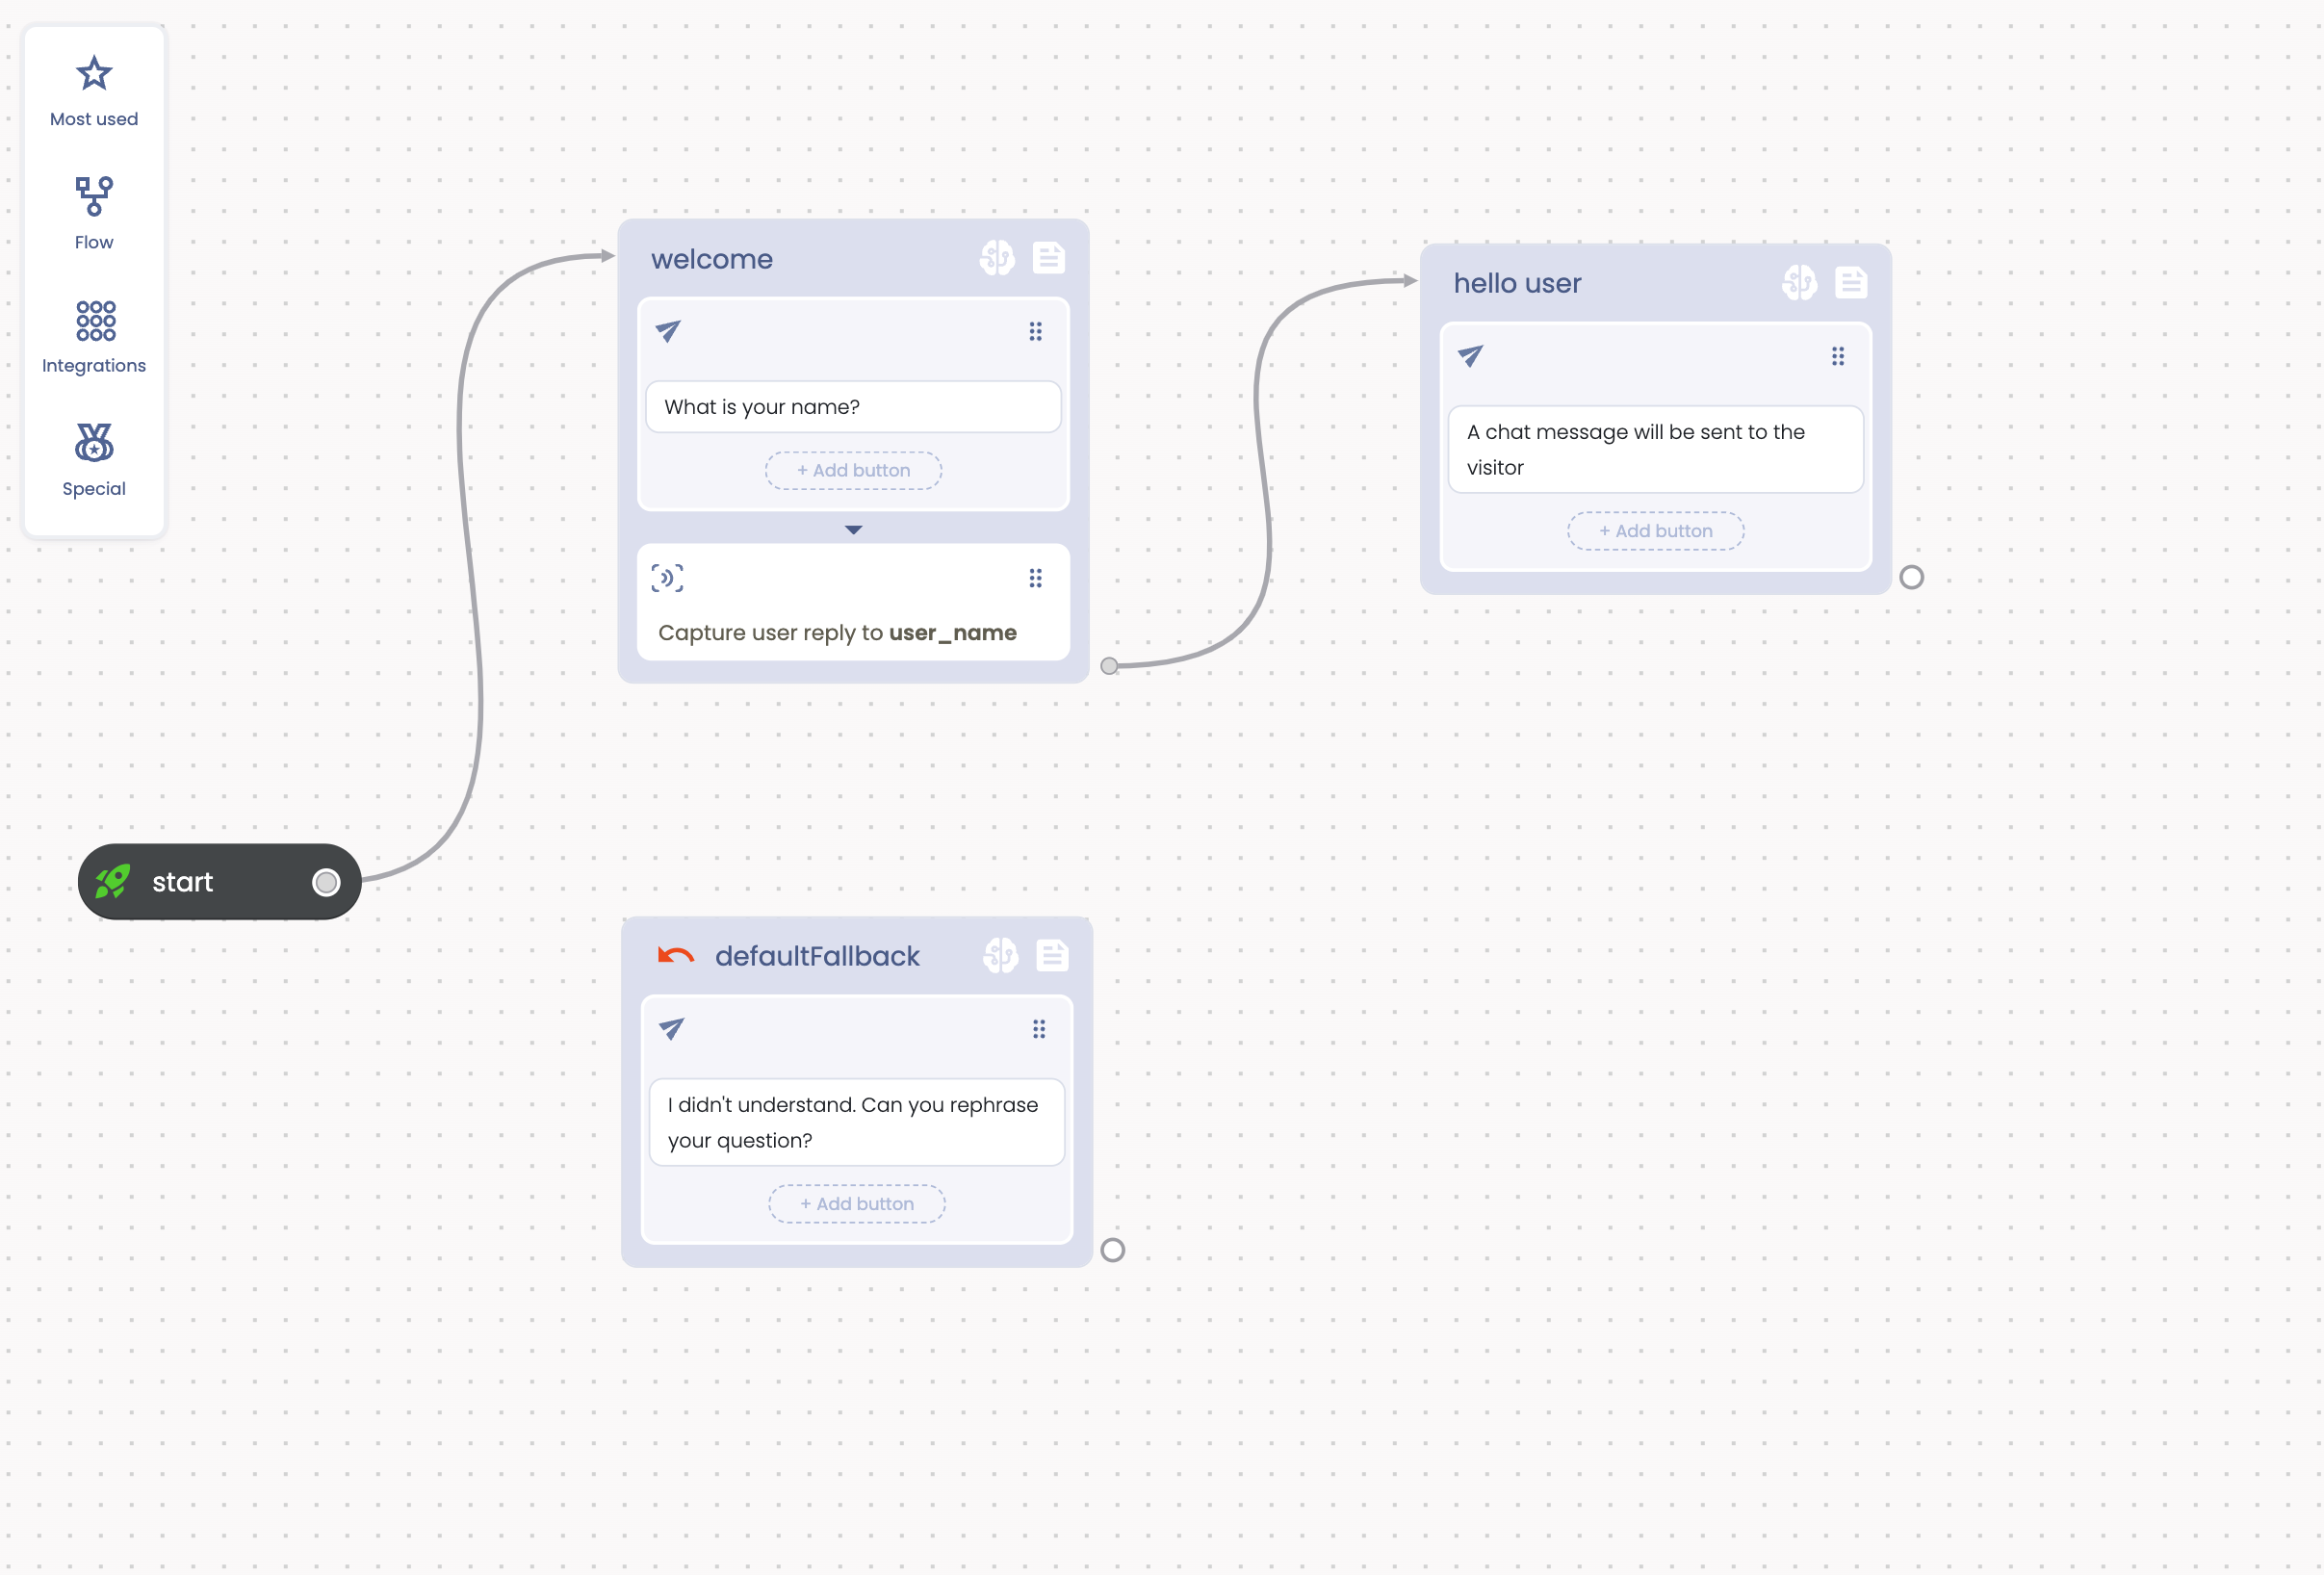
We want to use the attribute to greet the user soon after he tells us his name. Go on the bottom right corner of the block near the Capture User Reply and create “on the fly” a new Reply action. As soon as the user will reply, the automation flow will move to the end of the block (because there are no other actions to execute). The tag on the bottom right corner will connect the block to another block to optionally continue the flow. In this case this is exactly wath we want: after capturing the user name the flow will continue to the next connected block and his actions will be executed. Drag the tag with the connector on the stage, a menu will appear where you can keep the Reply action. An enclosing block will be created on the fly.
We have our new Reply action enclosed in a new block.
Click on the Reply detail and modify the text that we'll send back to the user. Click on the {} button and select “user_name” from the pop-up
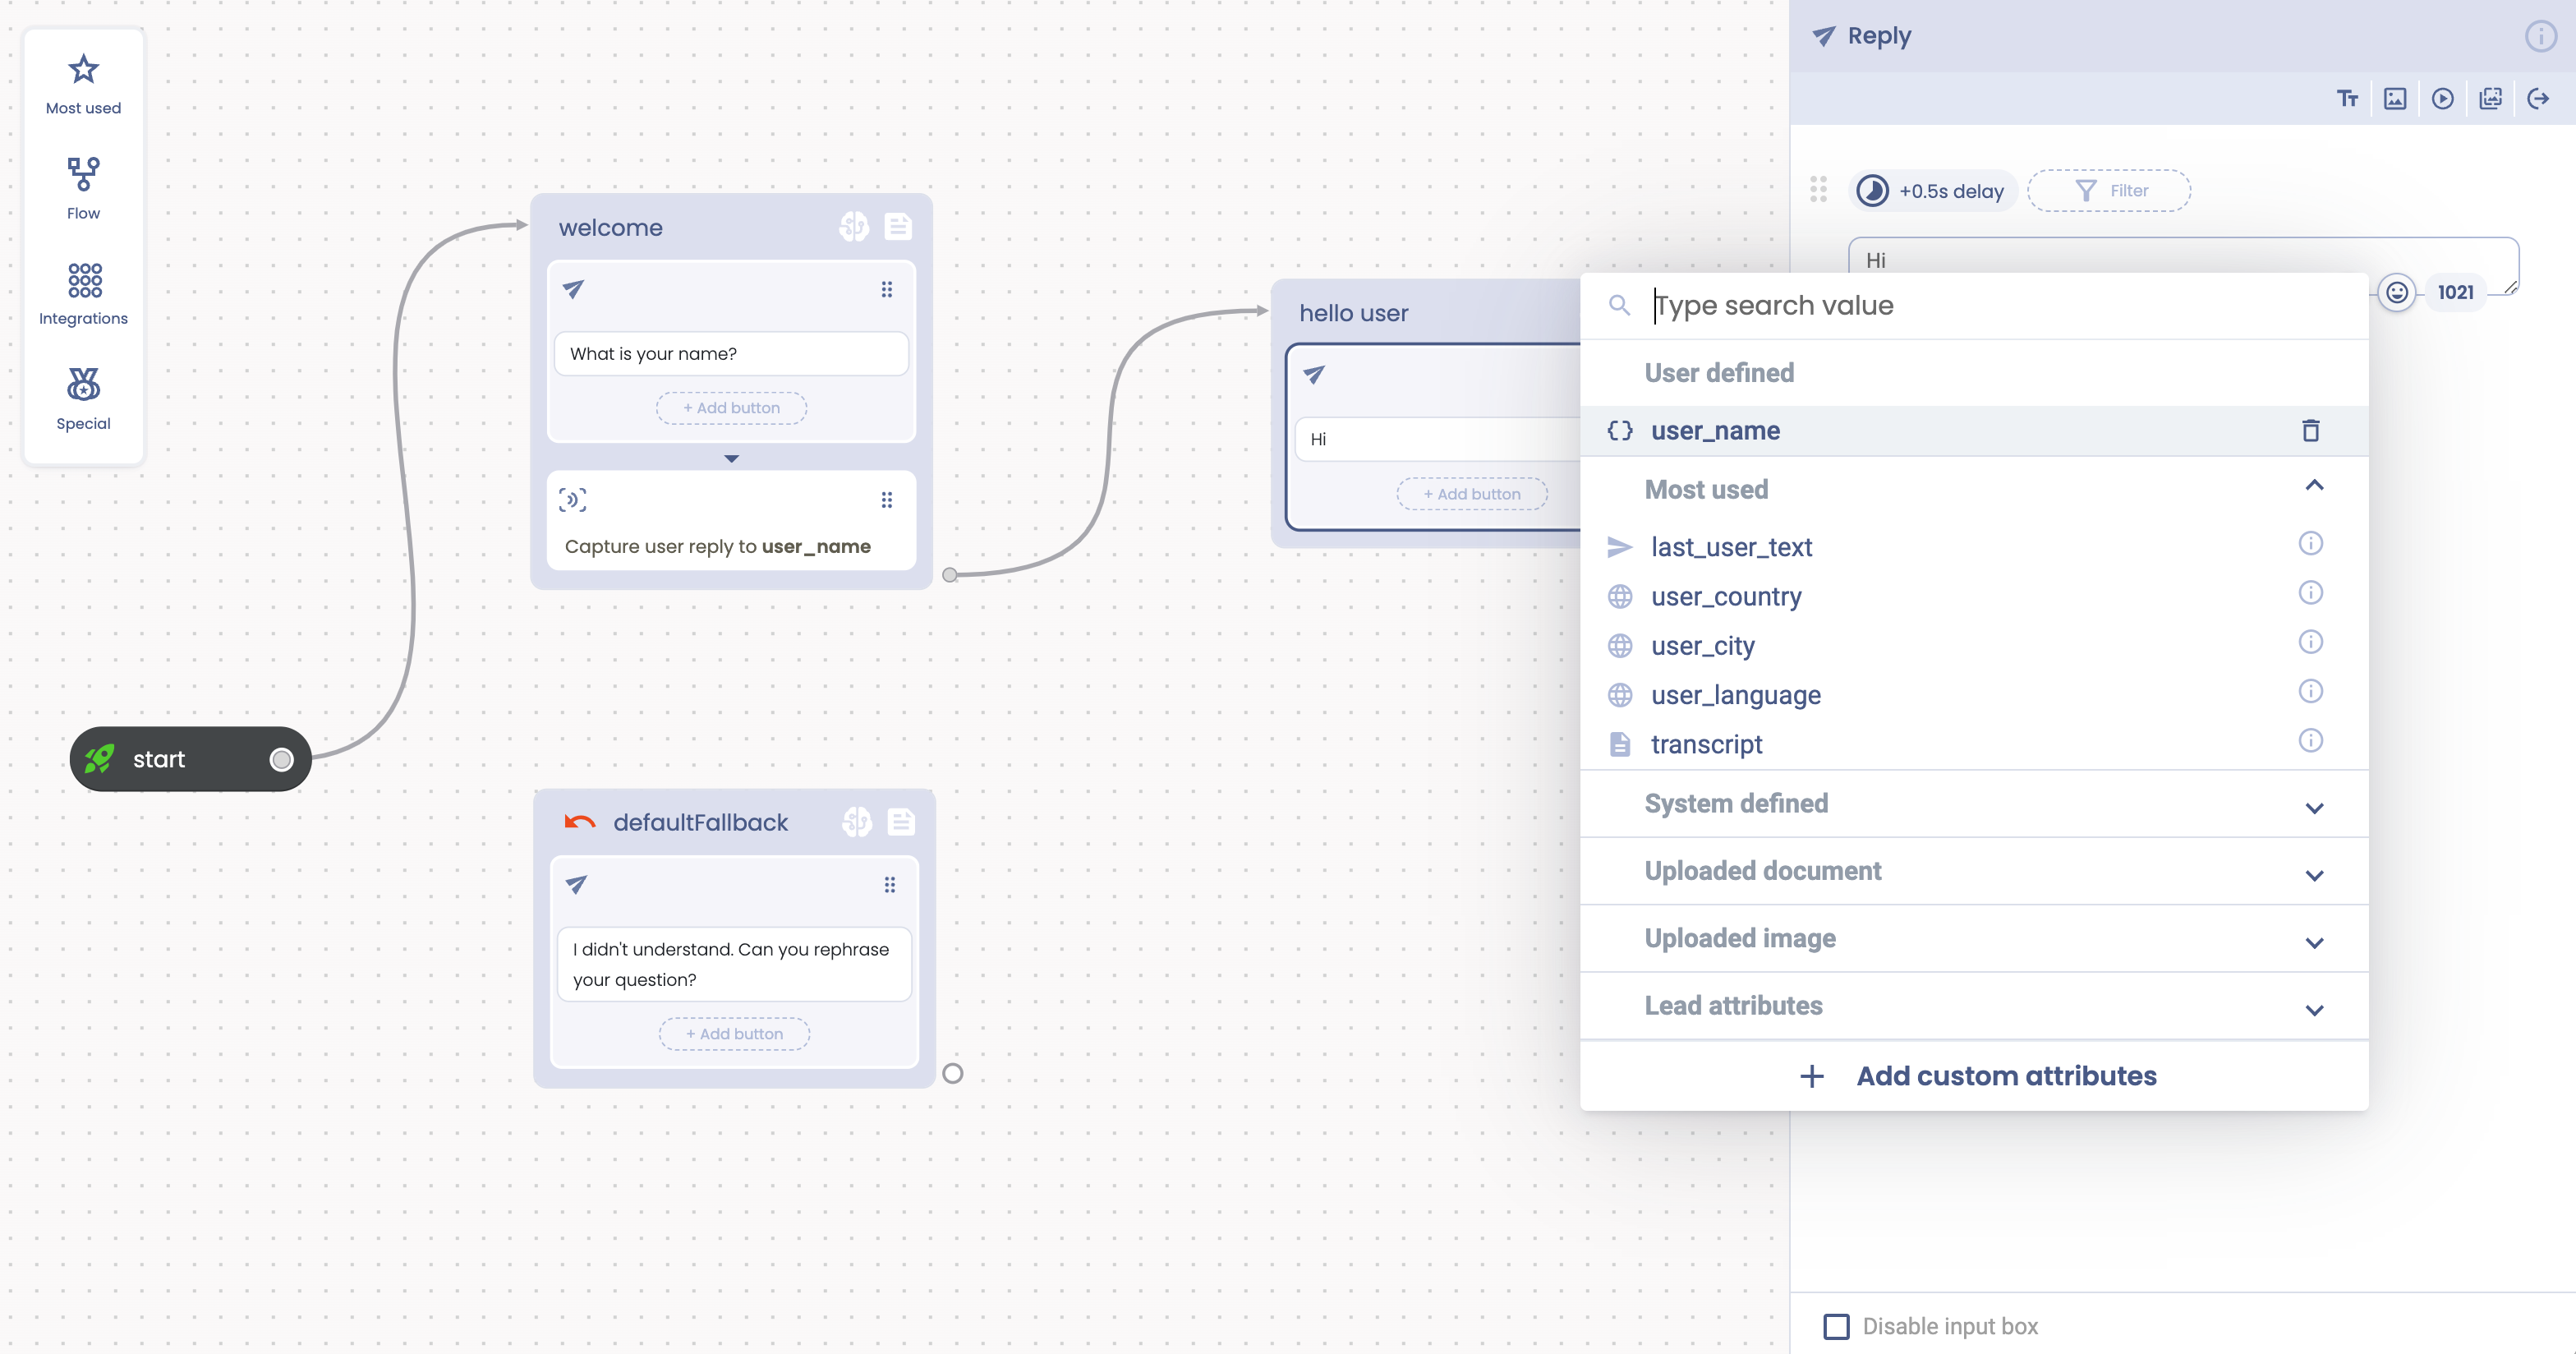
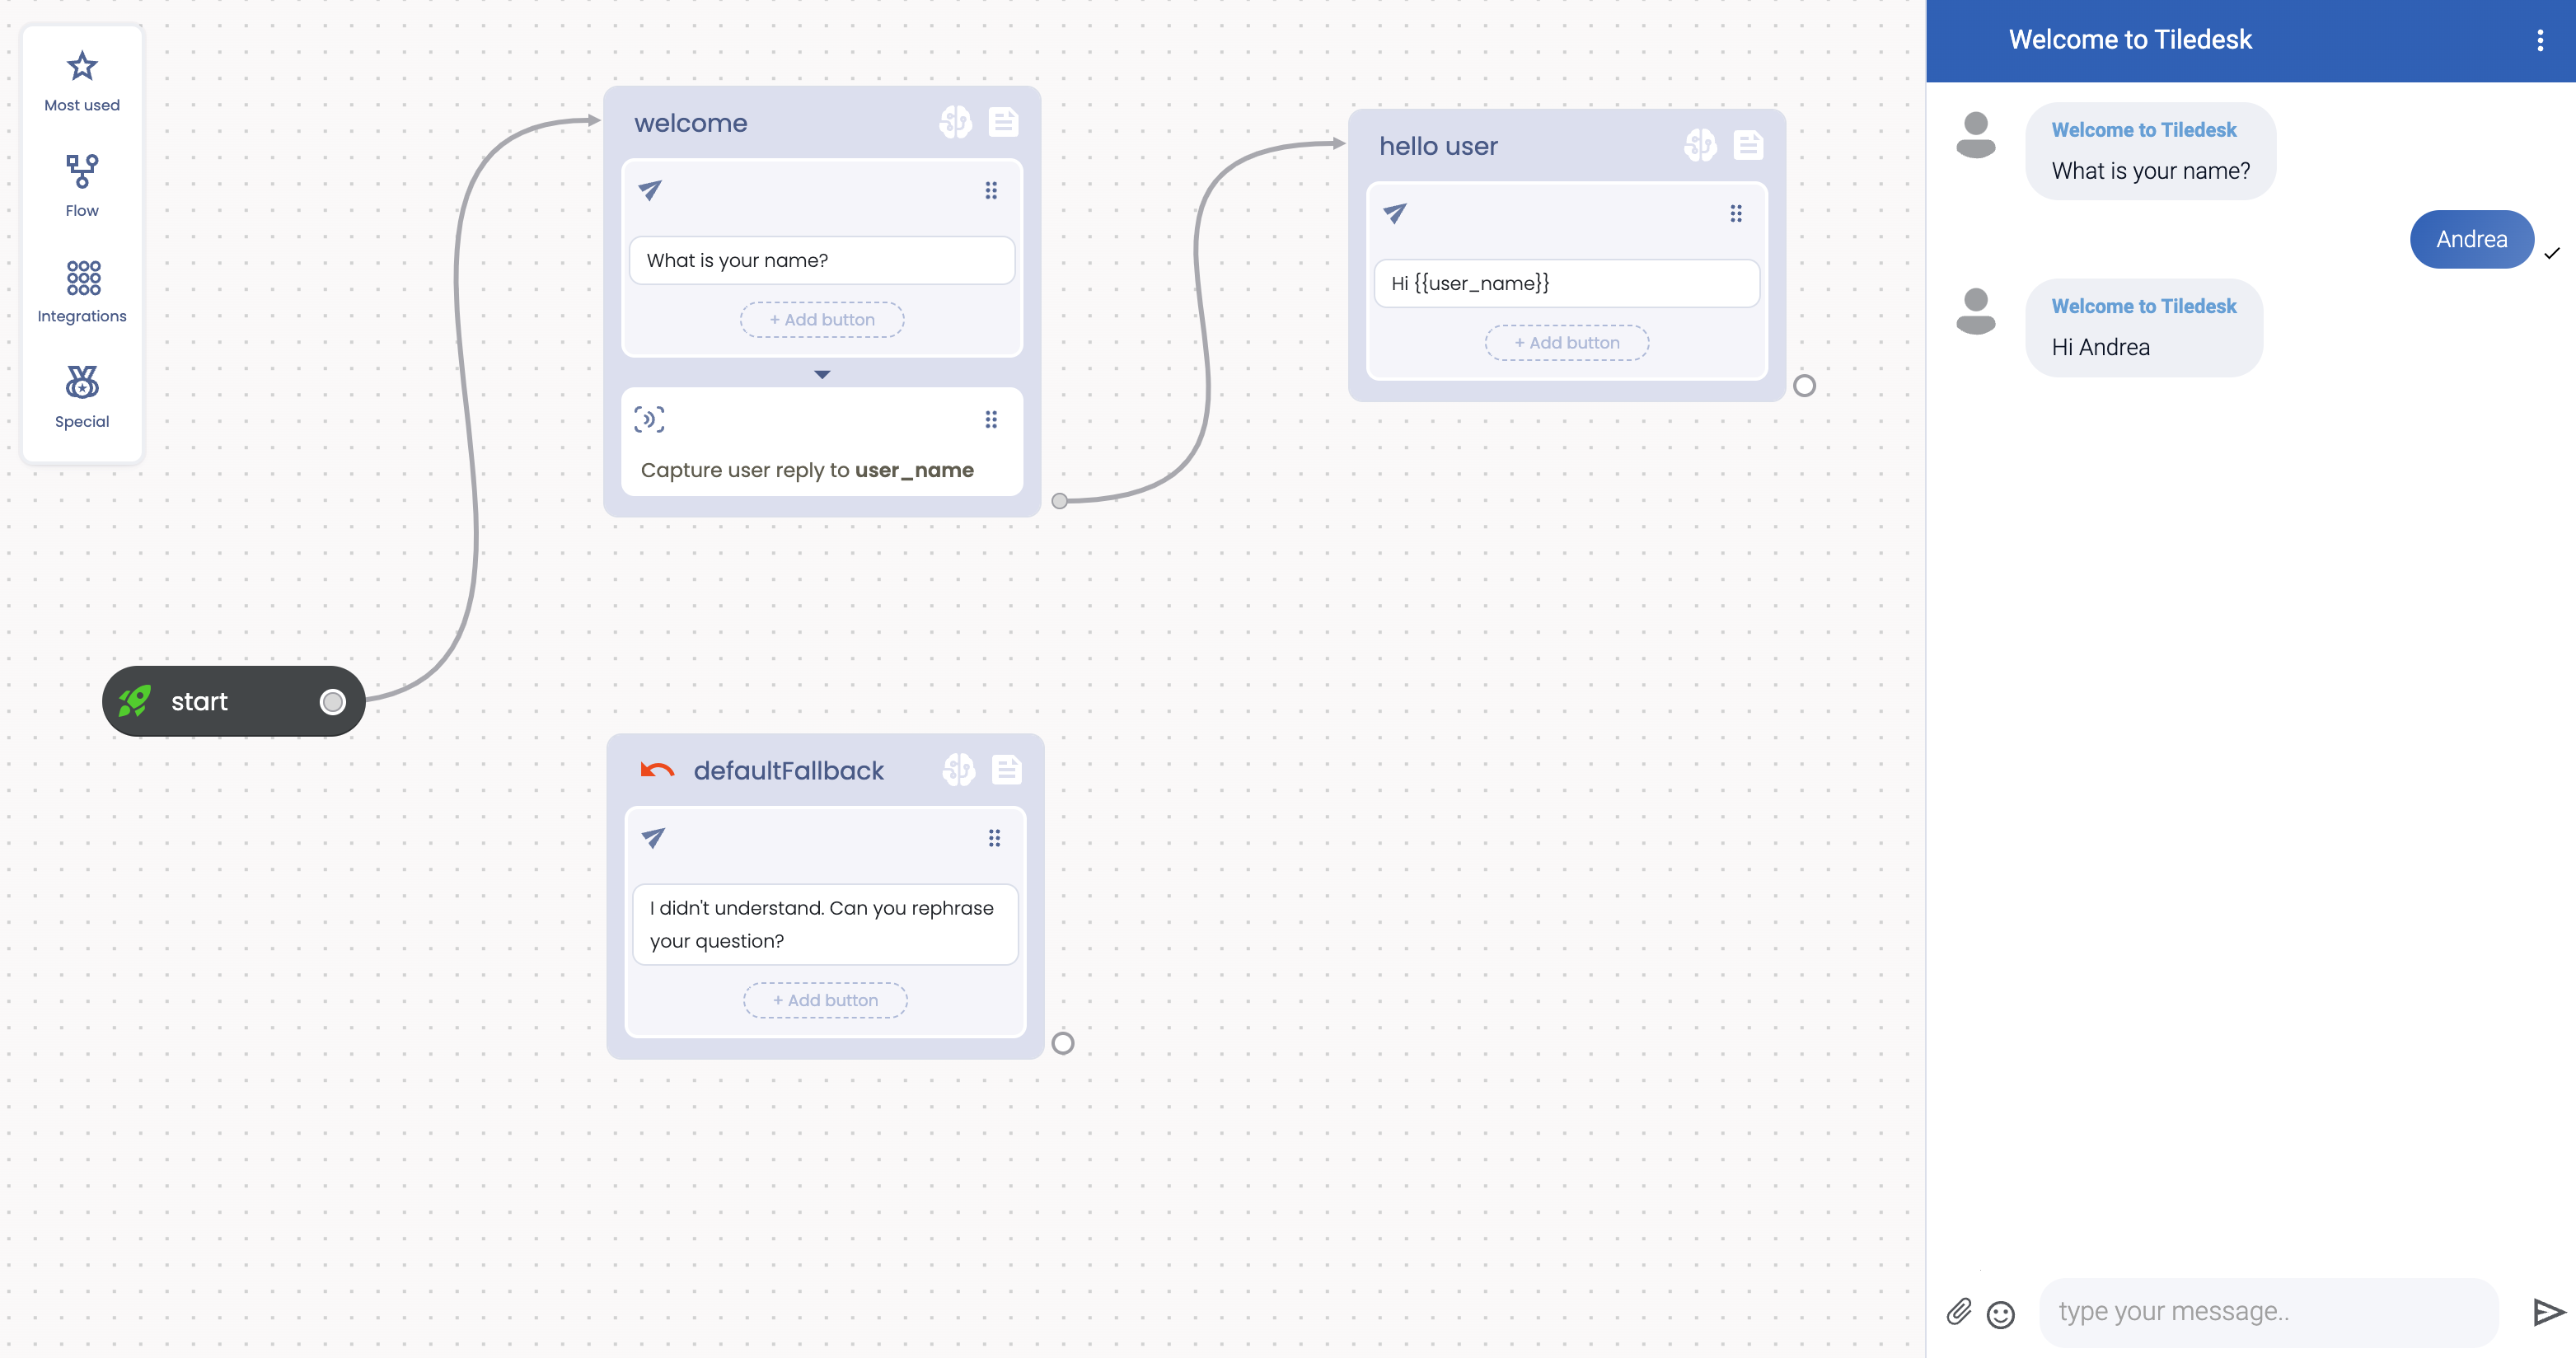
We setup the “Hi ”. The placeholder of the user_name will be replaced at runtime with the provided name.
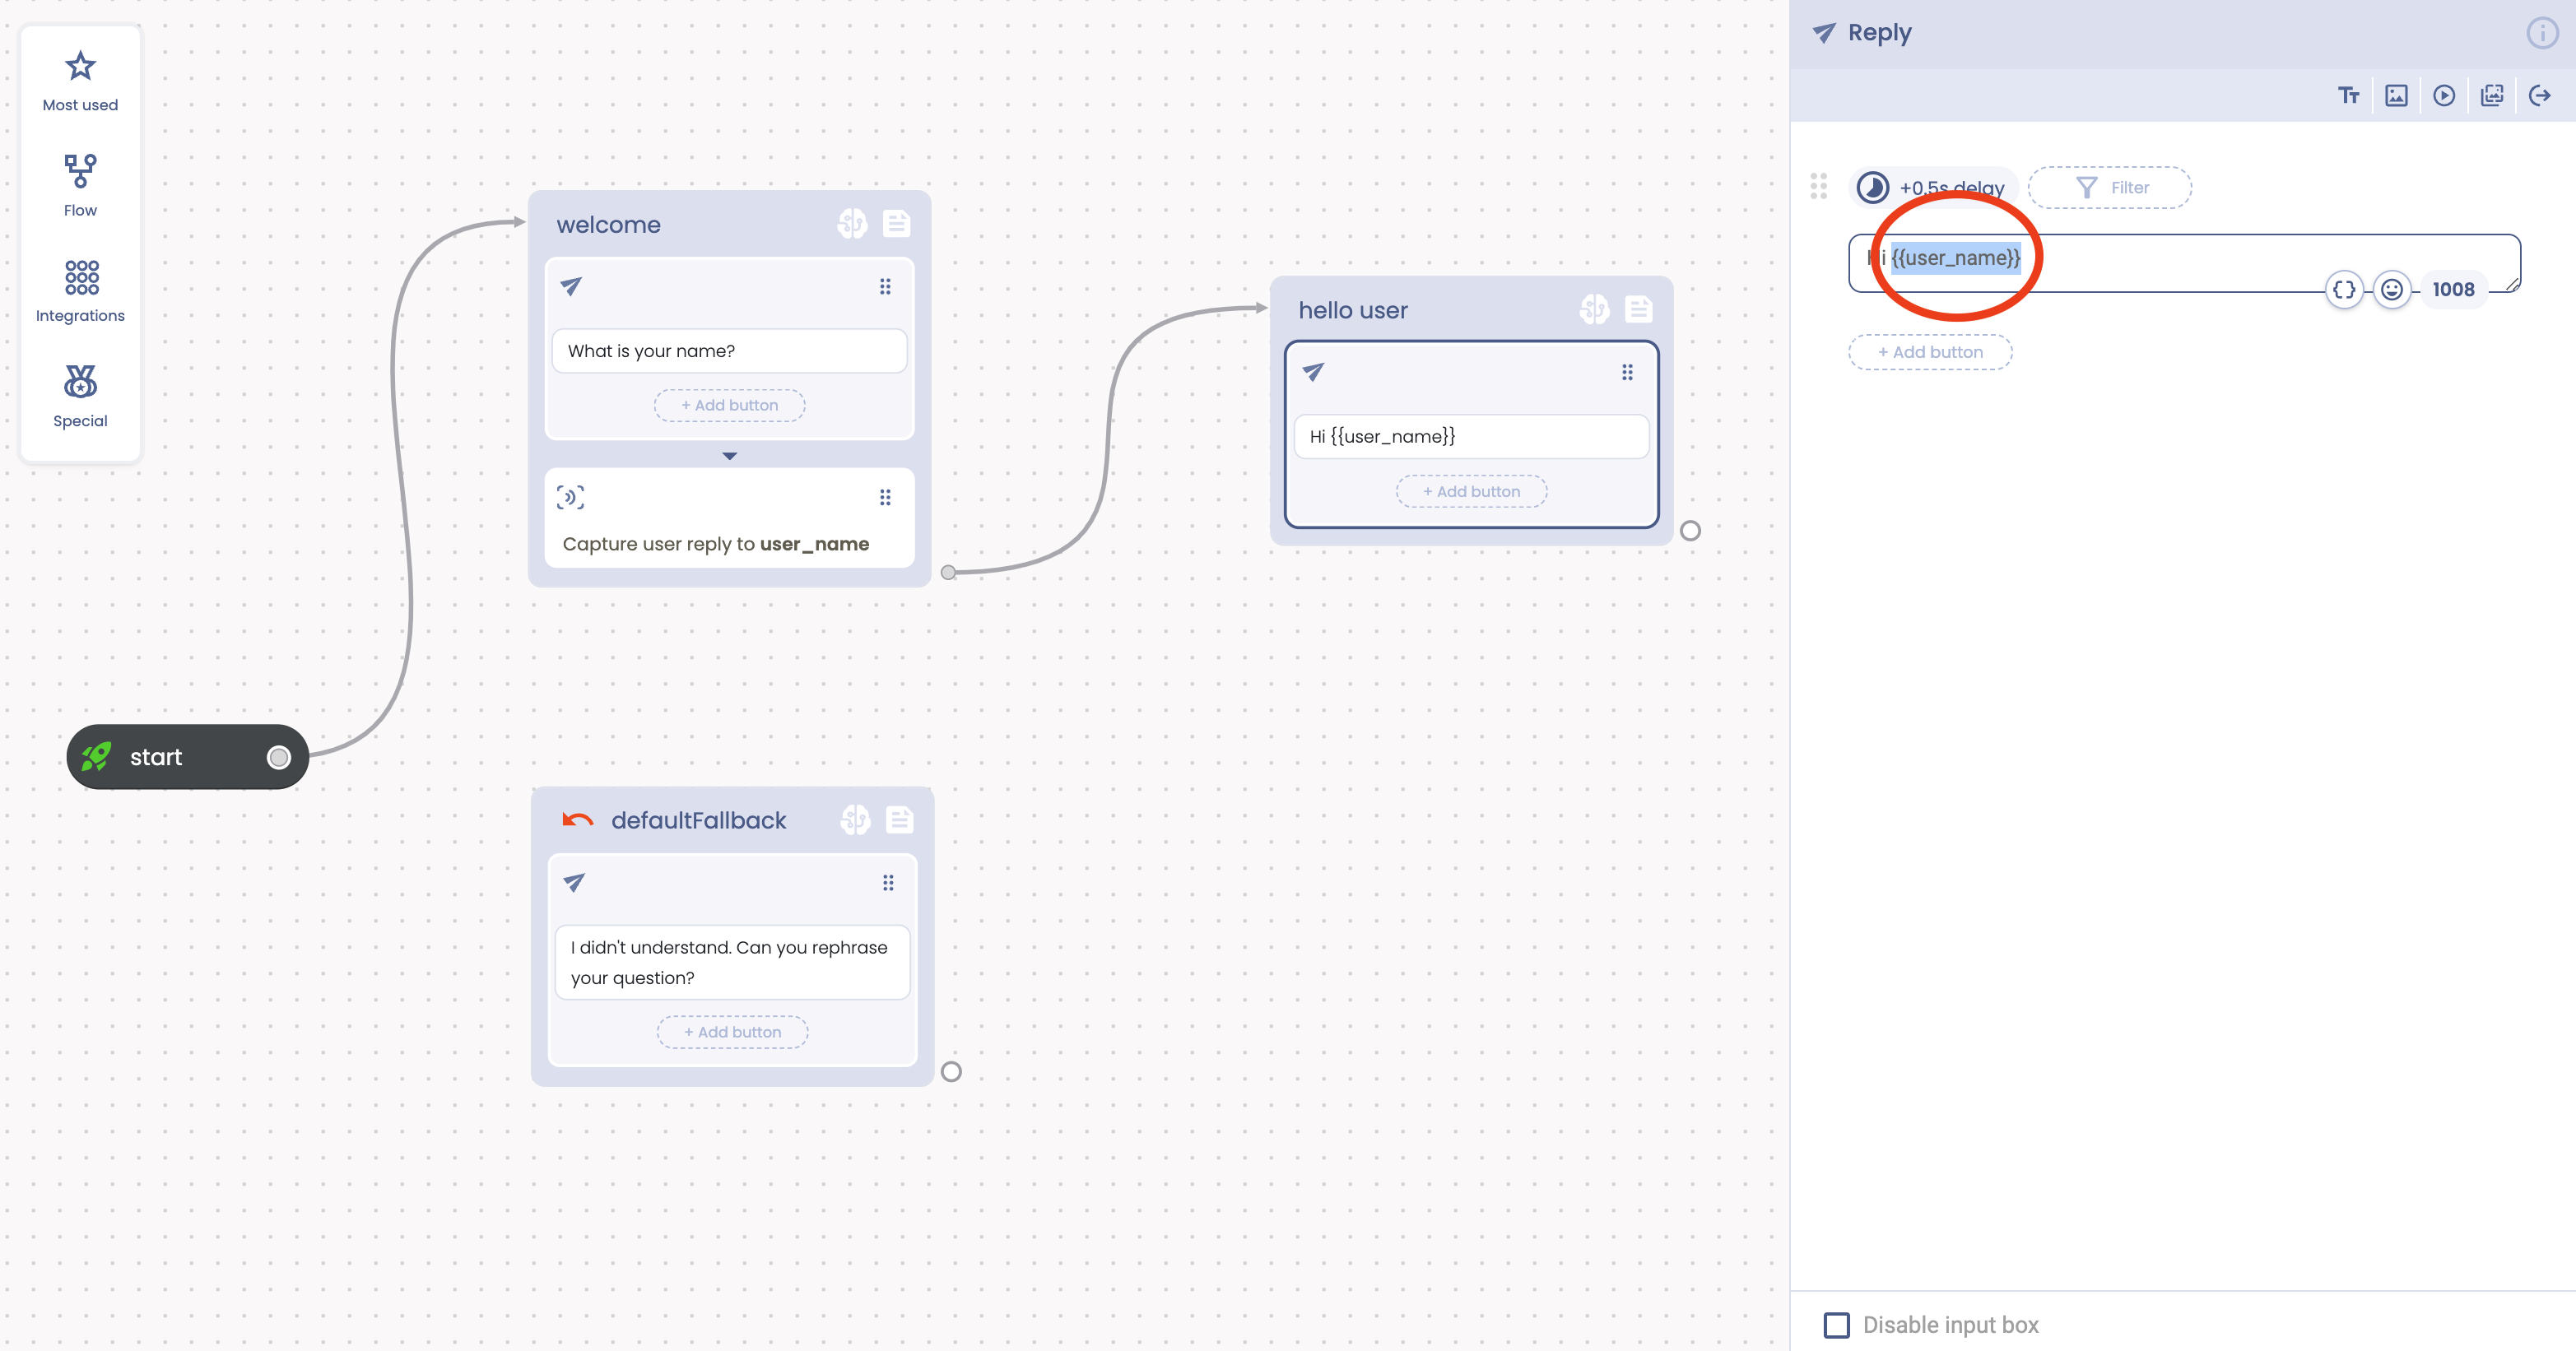
Once the converstation starts we ask the user for his name. The user name is got from the user input and assigned to the flow attribute user_name, then used in the following reply action to correctly greet the user with his name.
You can find the example in this tutorial in the Tiledesk Chatbot Community:
Capture User Reply chain
Sometimes you want to ask the user multiple questions before he can continue the conversation.
For example it's not unusual to ask the user his email in addition to the name. In this case you can “chain” replies and CURs together to obtain a simple “form”. Let's see this in action.
We can use the previous example, asking the user for his name. We must add a new reply in the block, after the last CUR. It will act ask the user for his email. Consider that a block action sequence is blocked as soon as you reach a blocking action. This is the case of our Capture User Reply, that blocks the flow waiting for the user to reply. As soon as he replies the flow will move to the next action, in this case it is the next reply that will send “Your email?” text to the user. As in the following example:
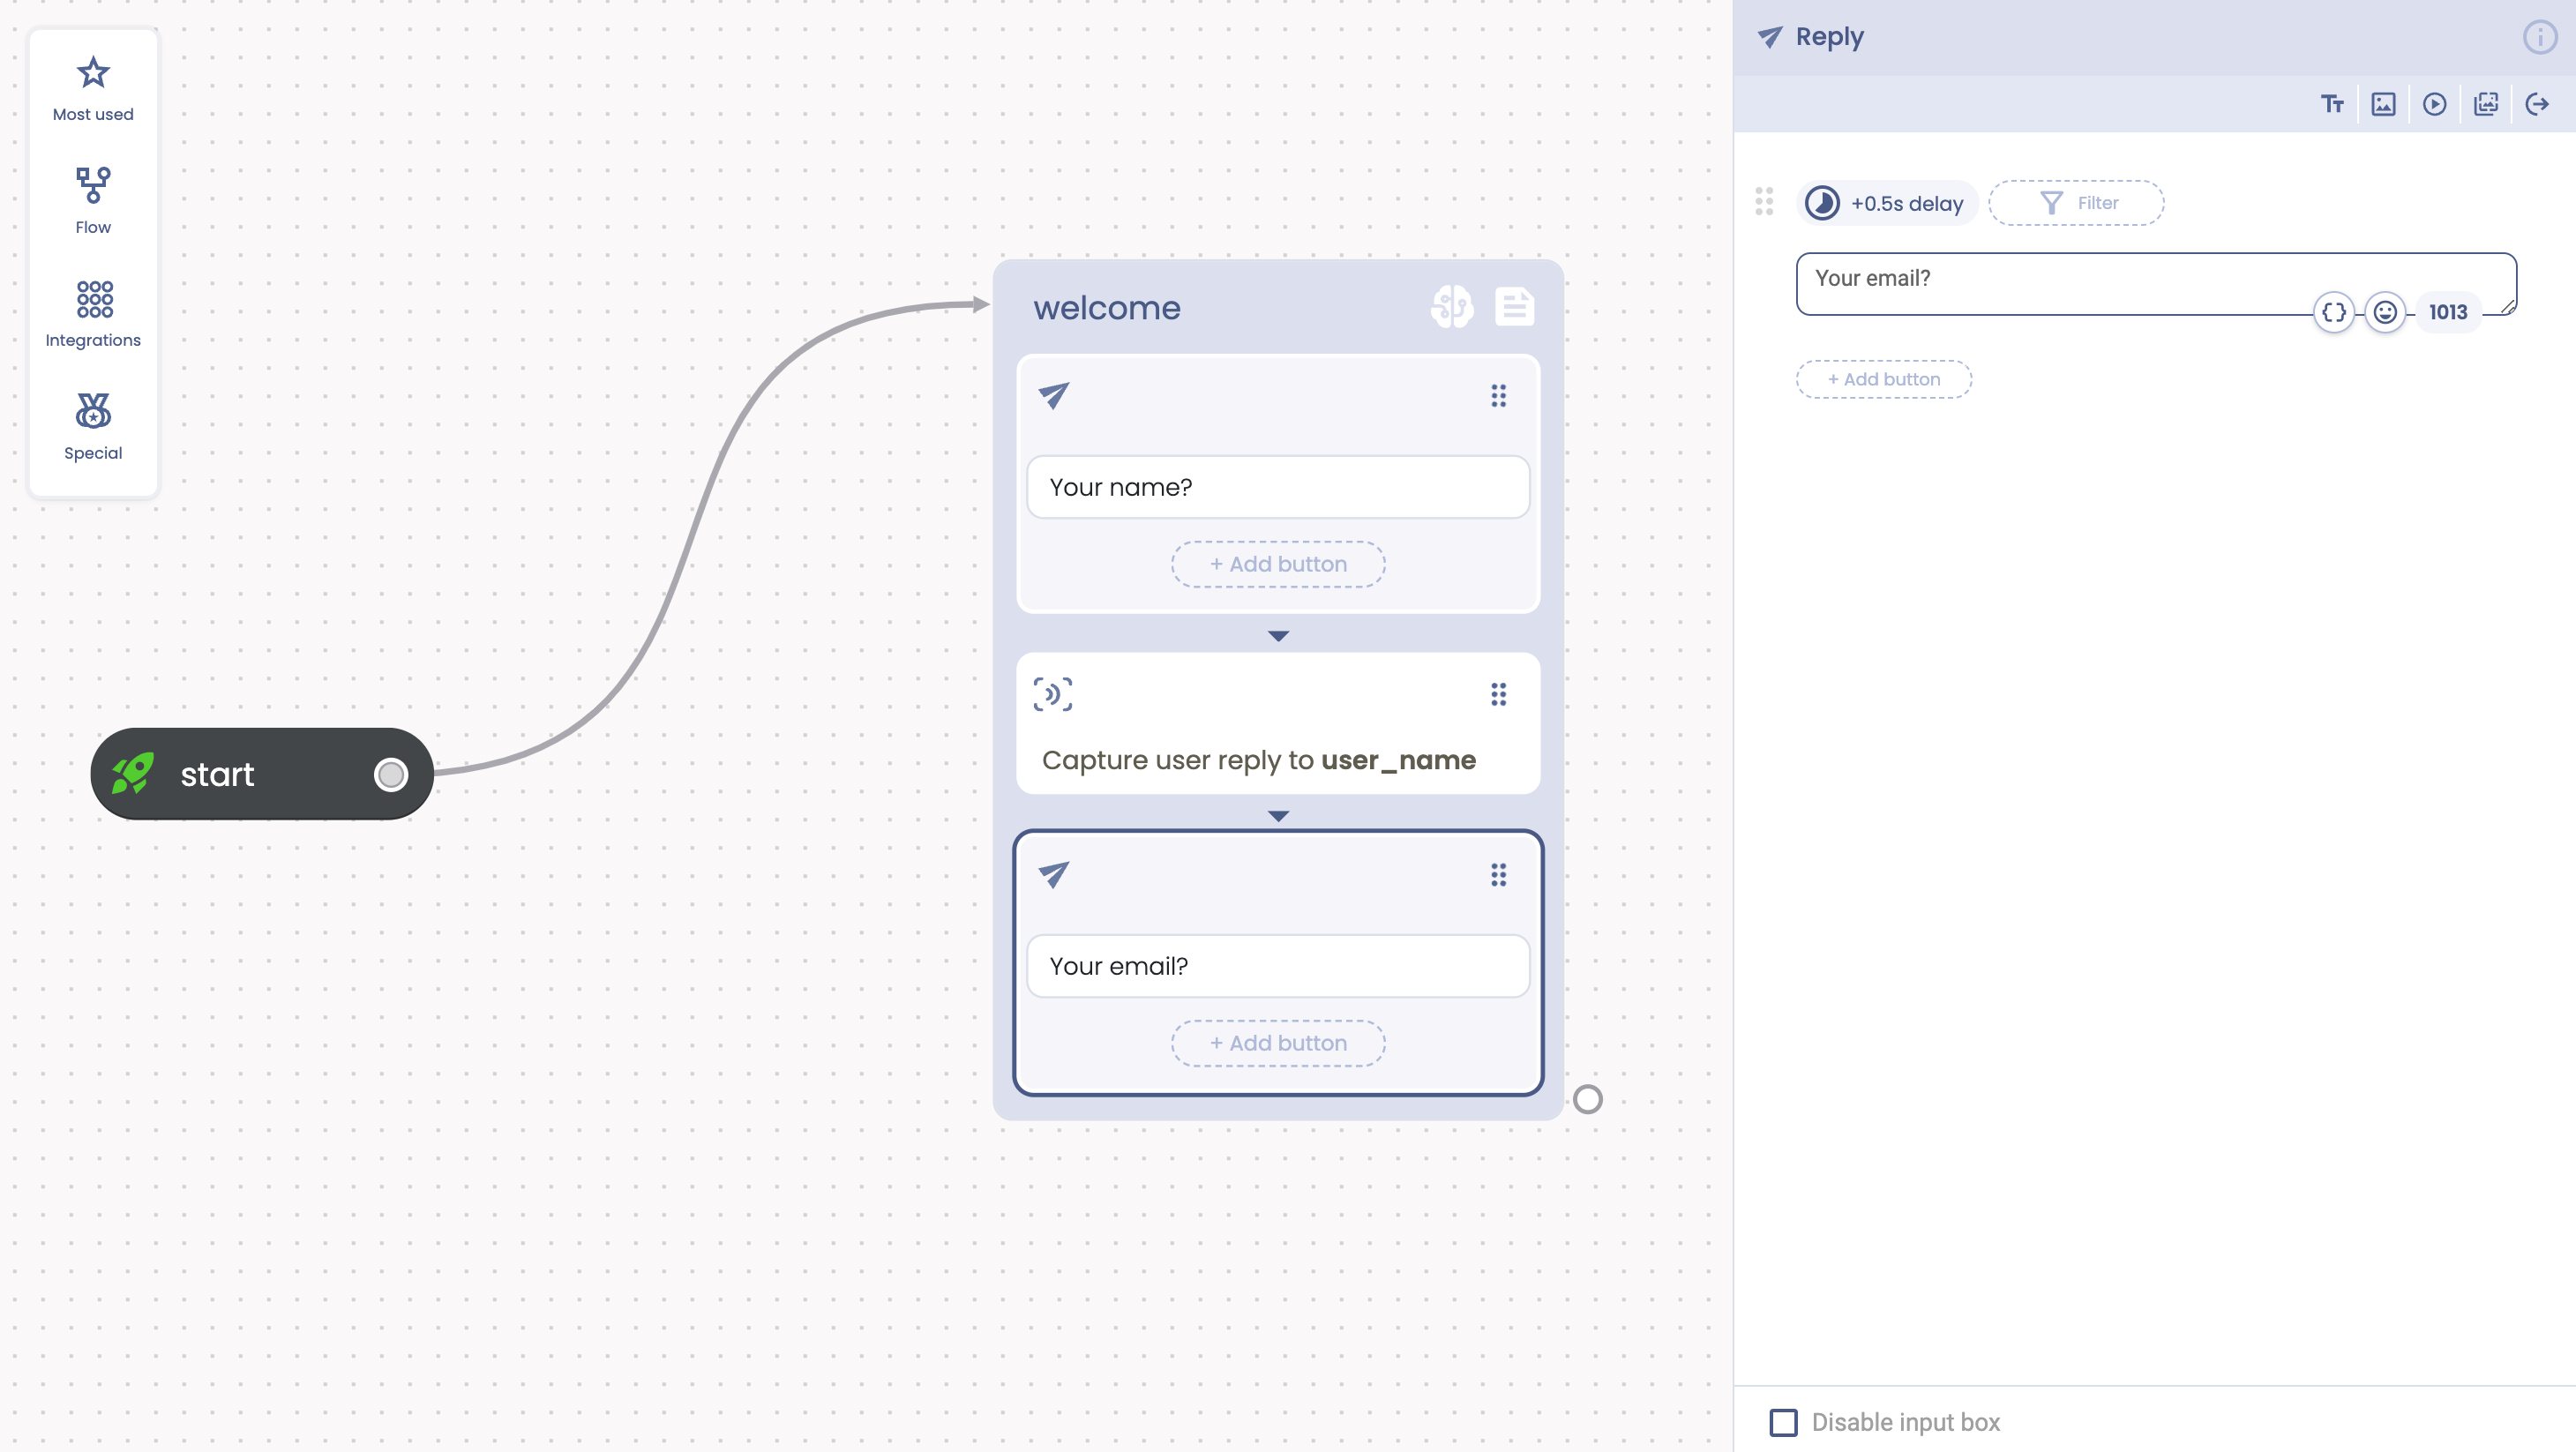
But we want to get the email in some way, so we need to add a new Capture User Reply next to the last reply action, like in the following picture:
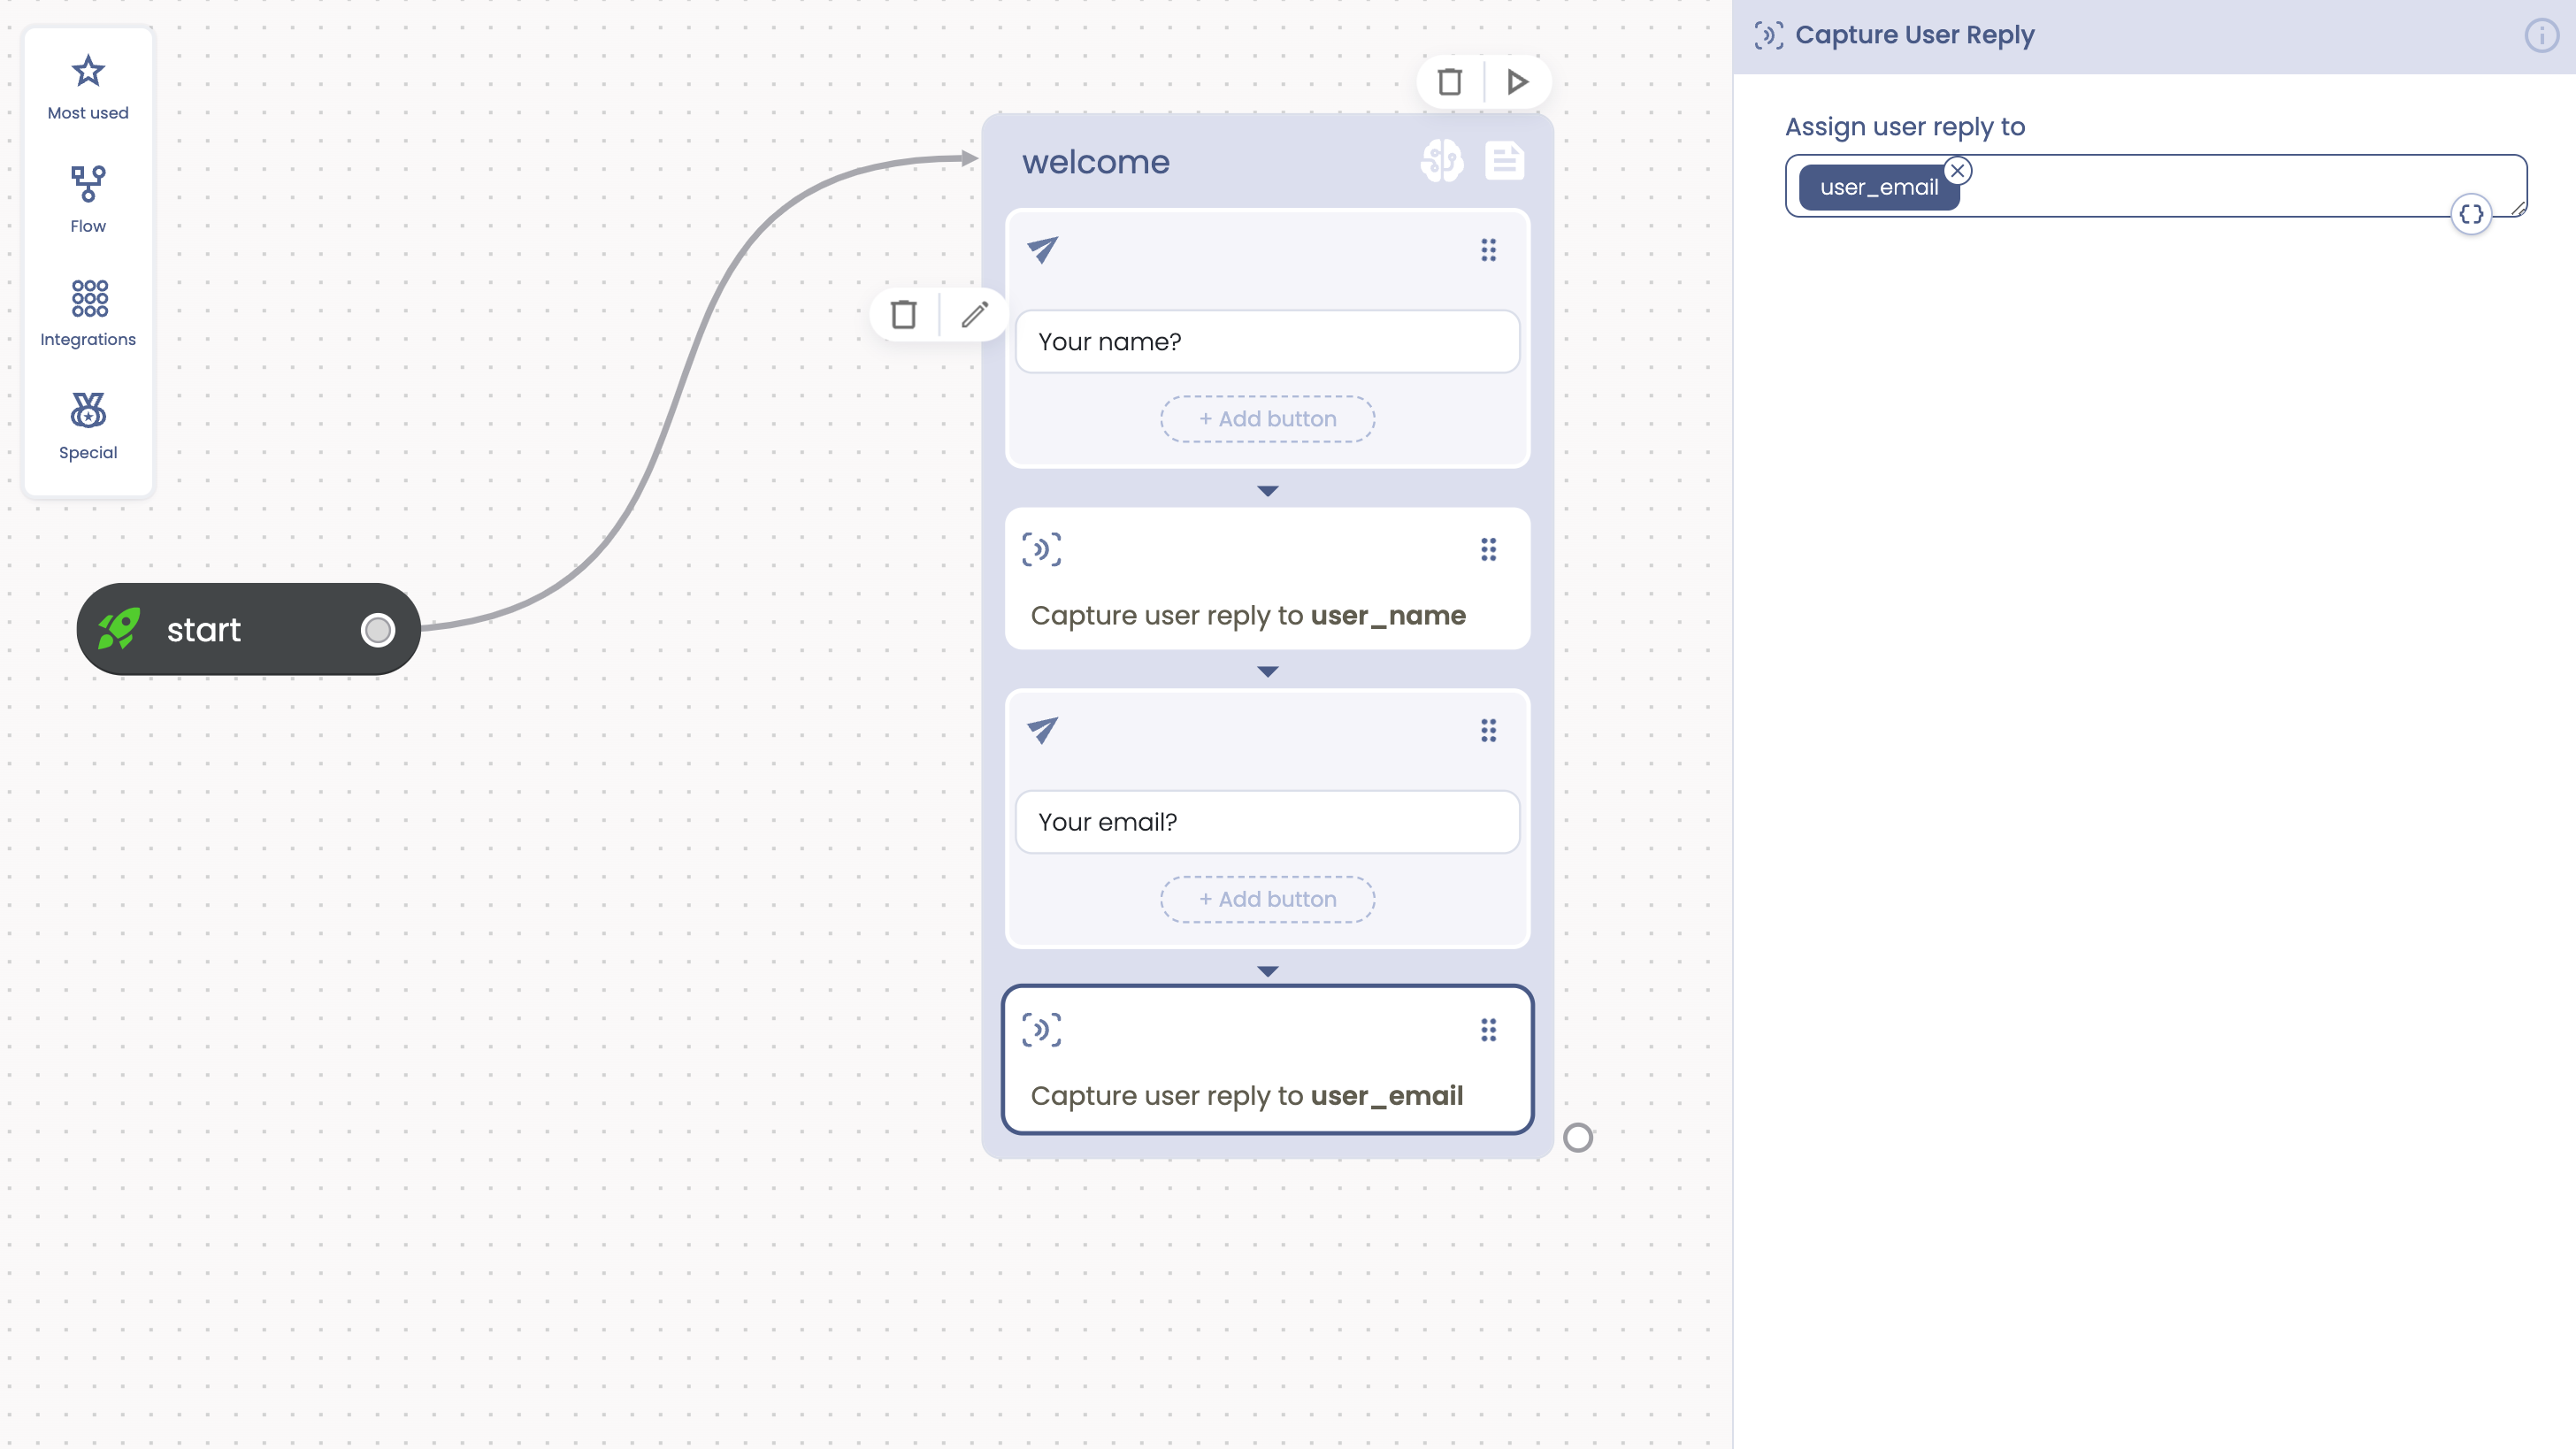 We added a new CUR as well as a new attribute: user_email. We added the new attribute exactly as we did with the previous user_name attribute.
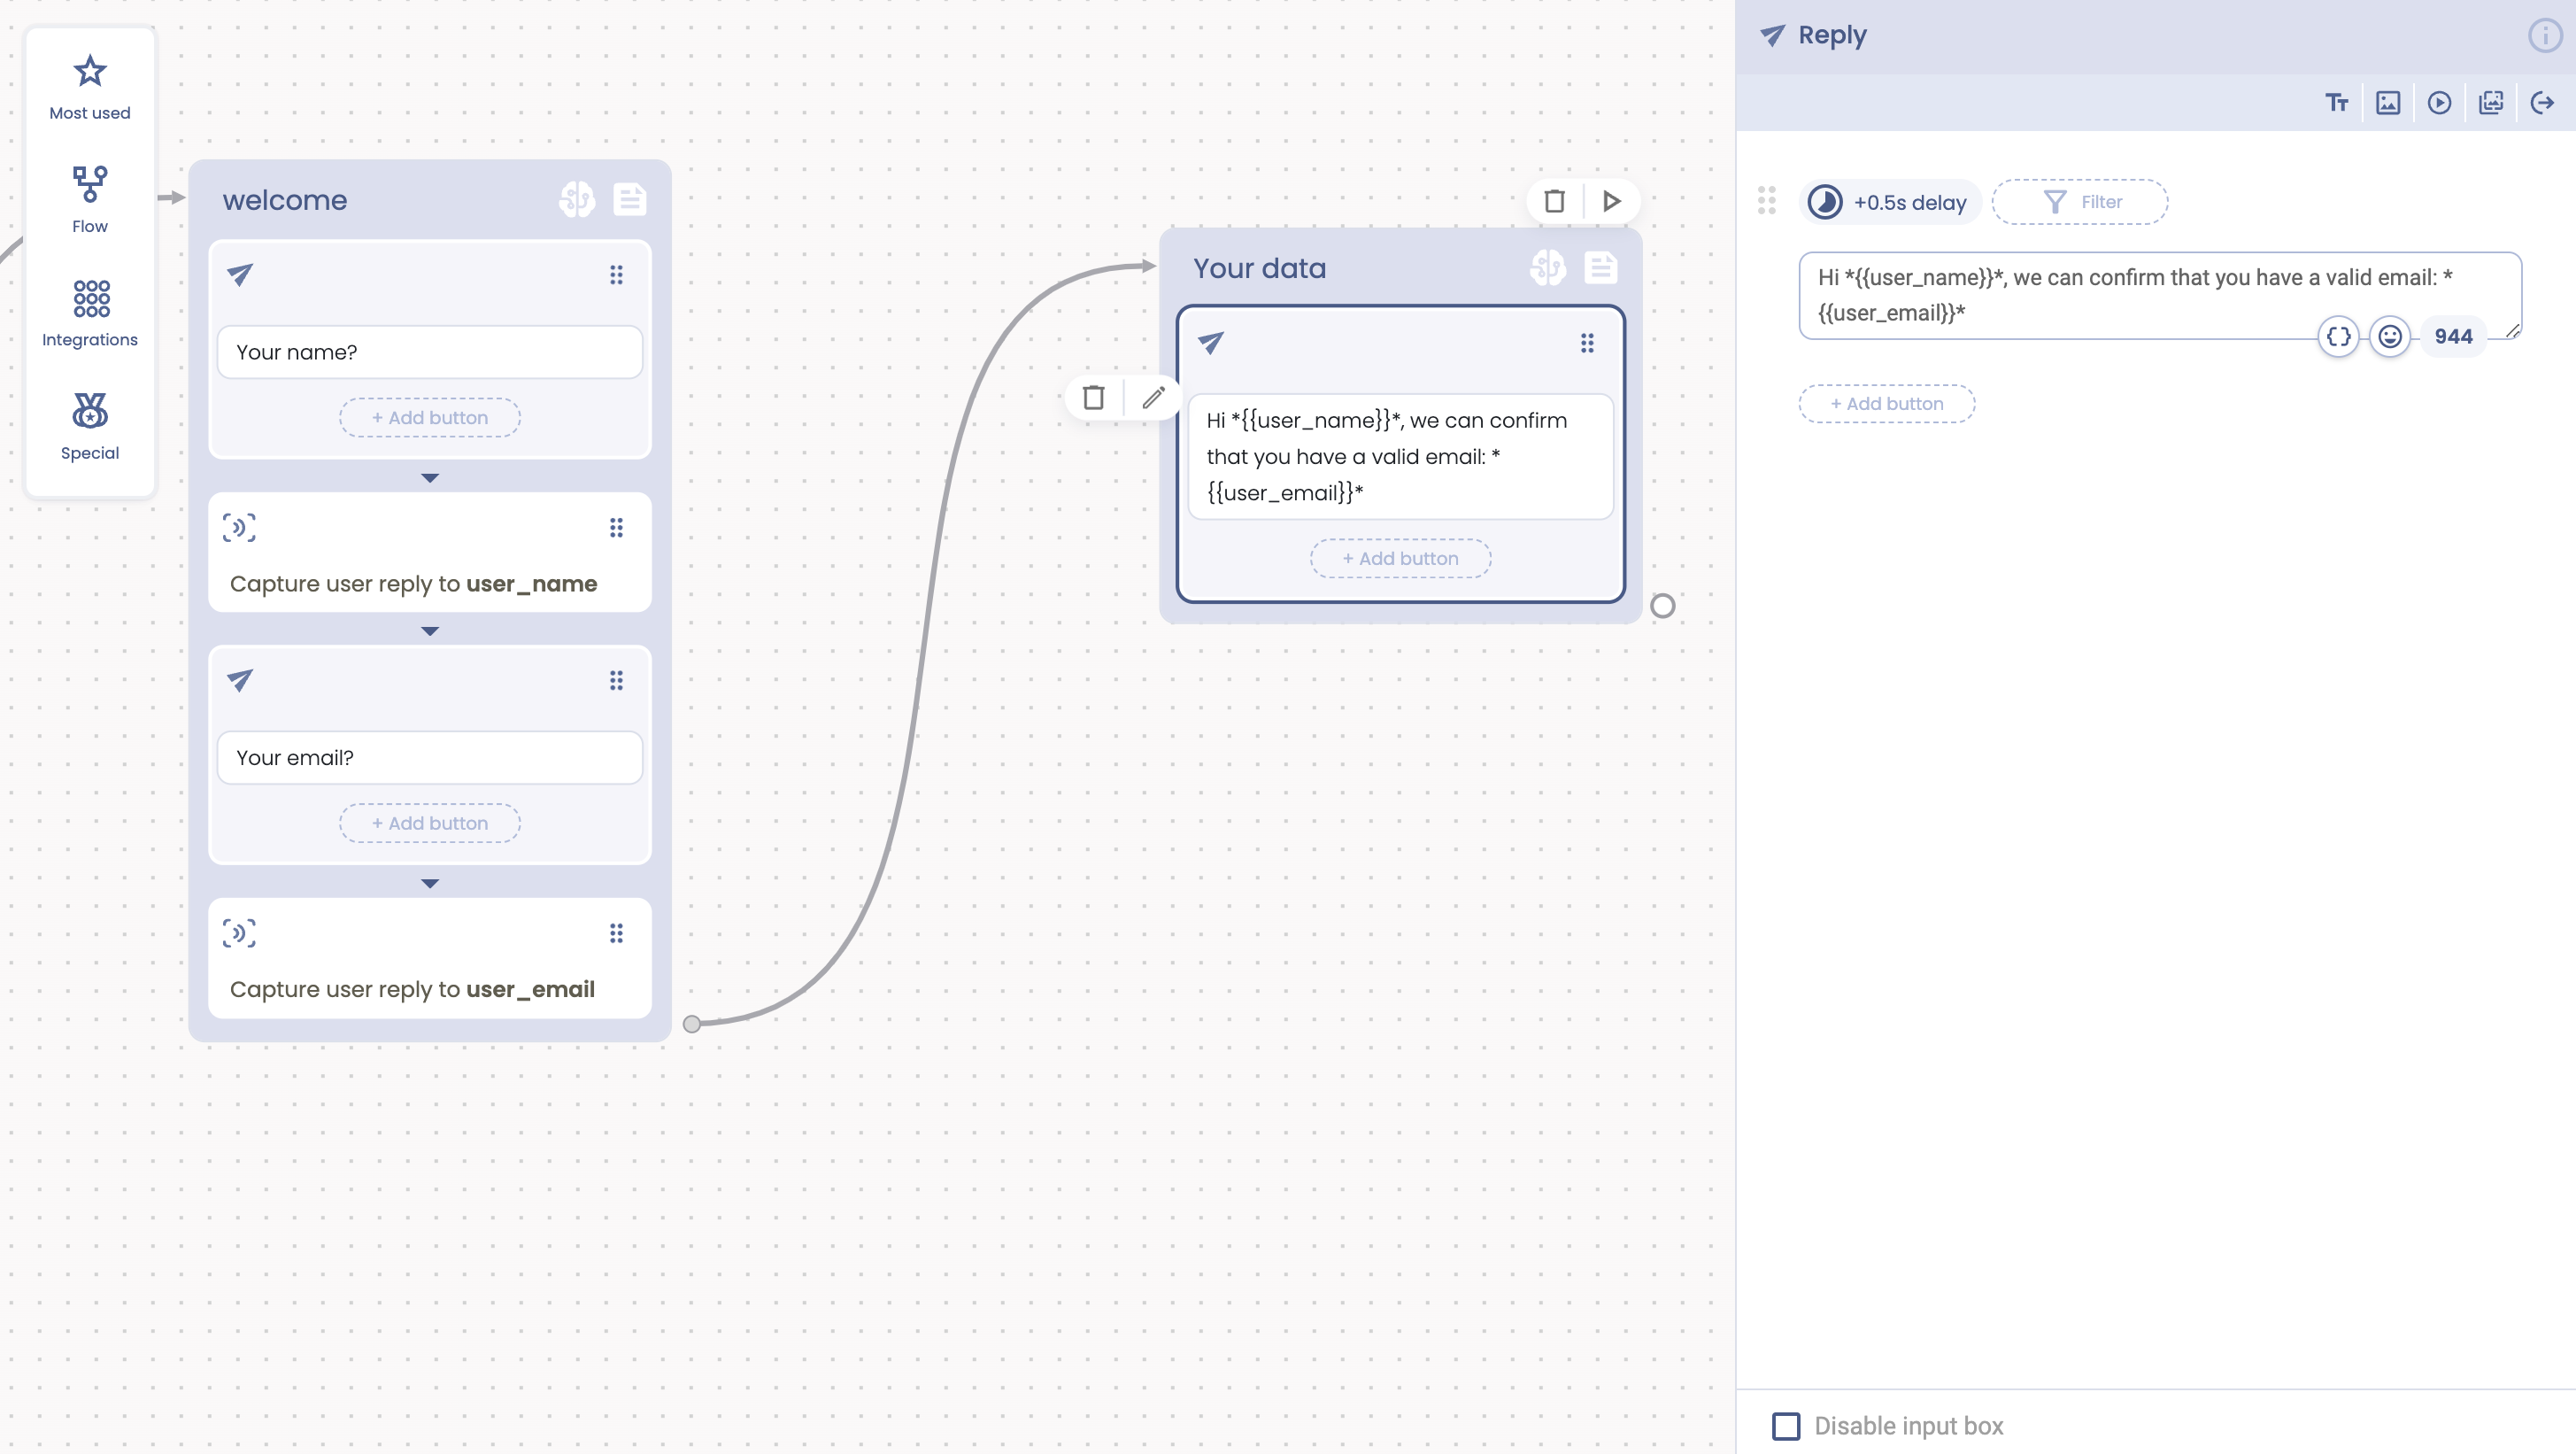
We can now add a new Reply block to certify the user that we have all the needed data:
Let's run this flow to see it in action.
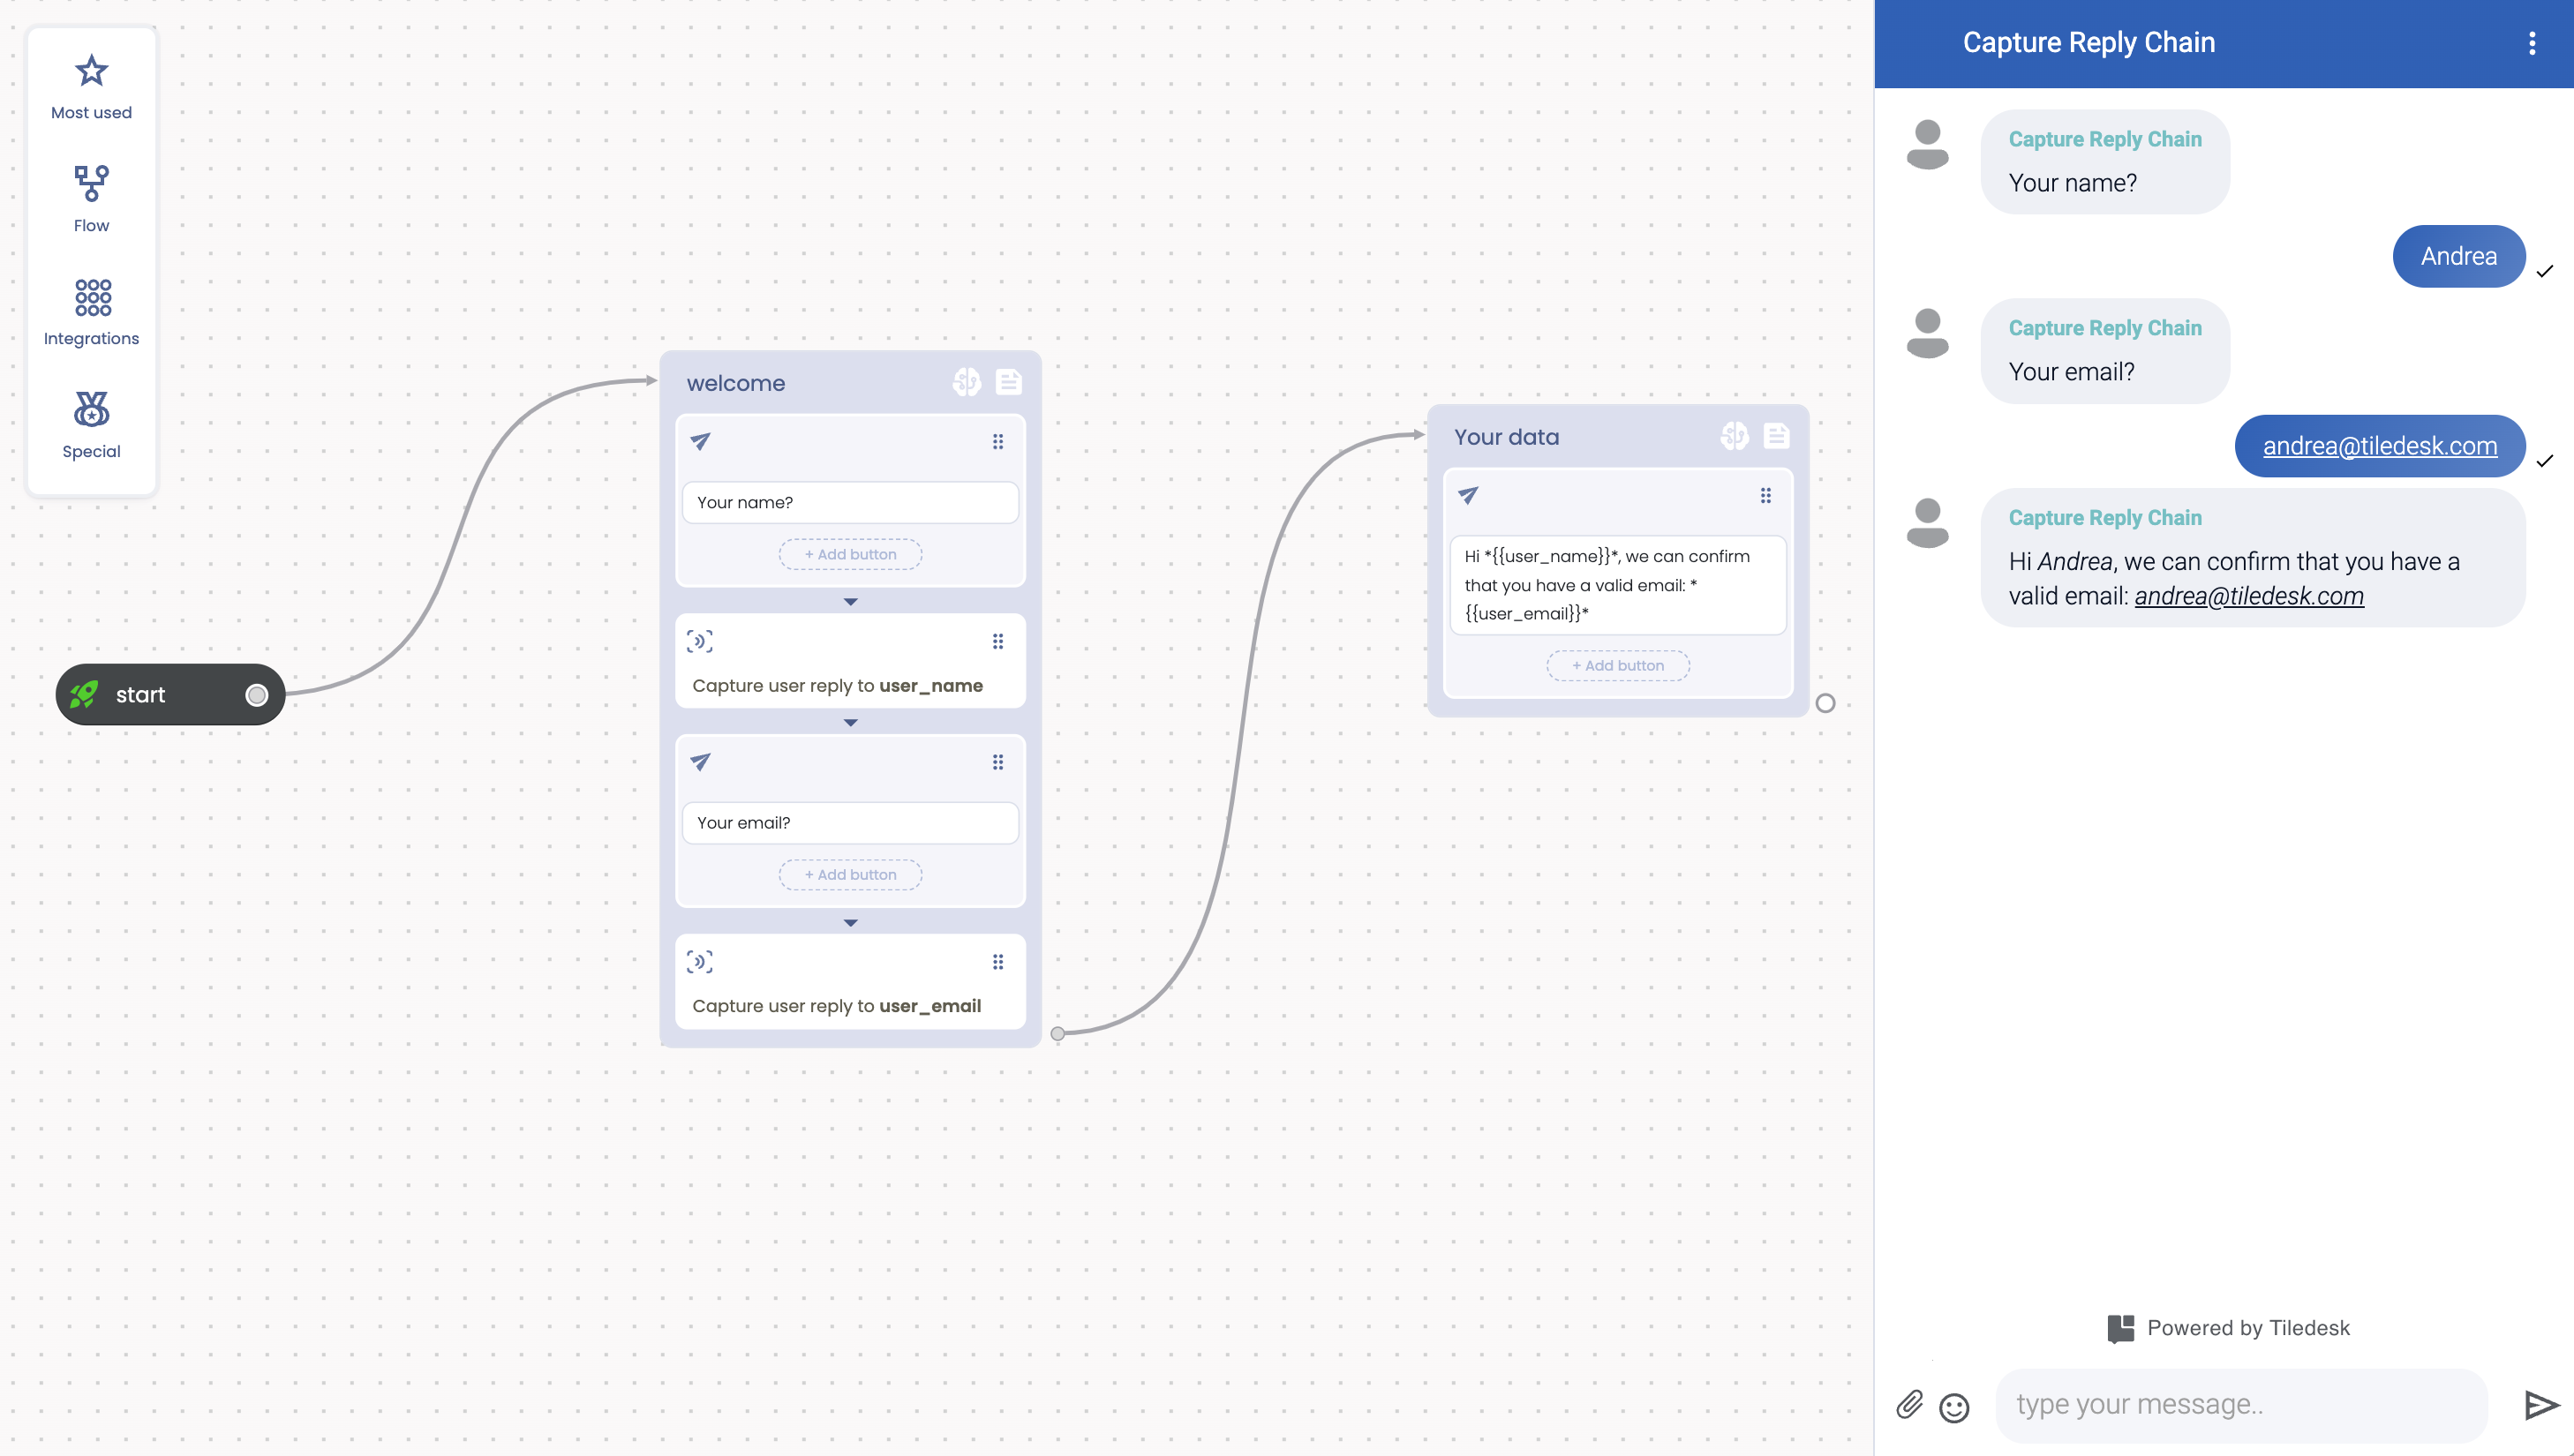
As you can see all the attributes are asked in sequence, exactly as we expected!
You can find the chatbot in this tutorial in the community: Capture Reply Chain
Happy Capture User Reply with Tiledesk!
If you have questions about the Web Request or other Tiledesk features feel free to send an email to support@tiledesk.com