.png)
Web Request Action
-

- Andrea Sponziello
 10 January 2024
The Web Request action is a fundamental component to connect with your own APIs and third party applications.
Web Request action supports many HTTP methods and allows you to invoke REST APIs, sending and receiving data in text and JSON formats. You can use the flow's attributes as data, put them in the JSON payload or in headers. You can also assign data coming from your API requests back to your attributes, in both text and JSON formats.
Let's take a look at the Web Request anatomy:
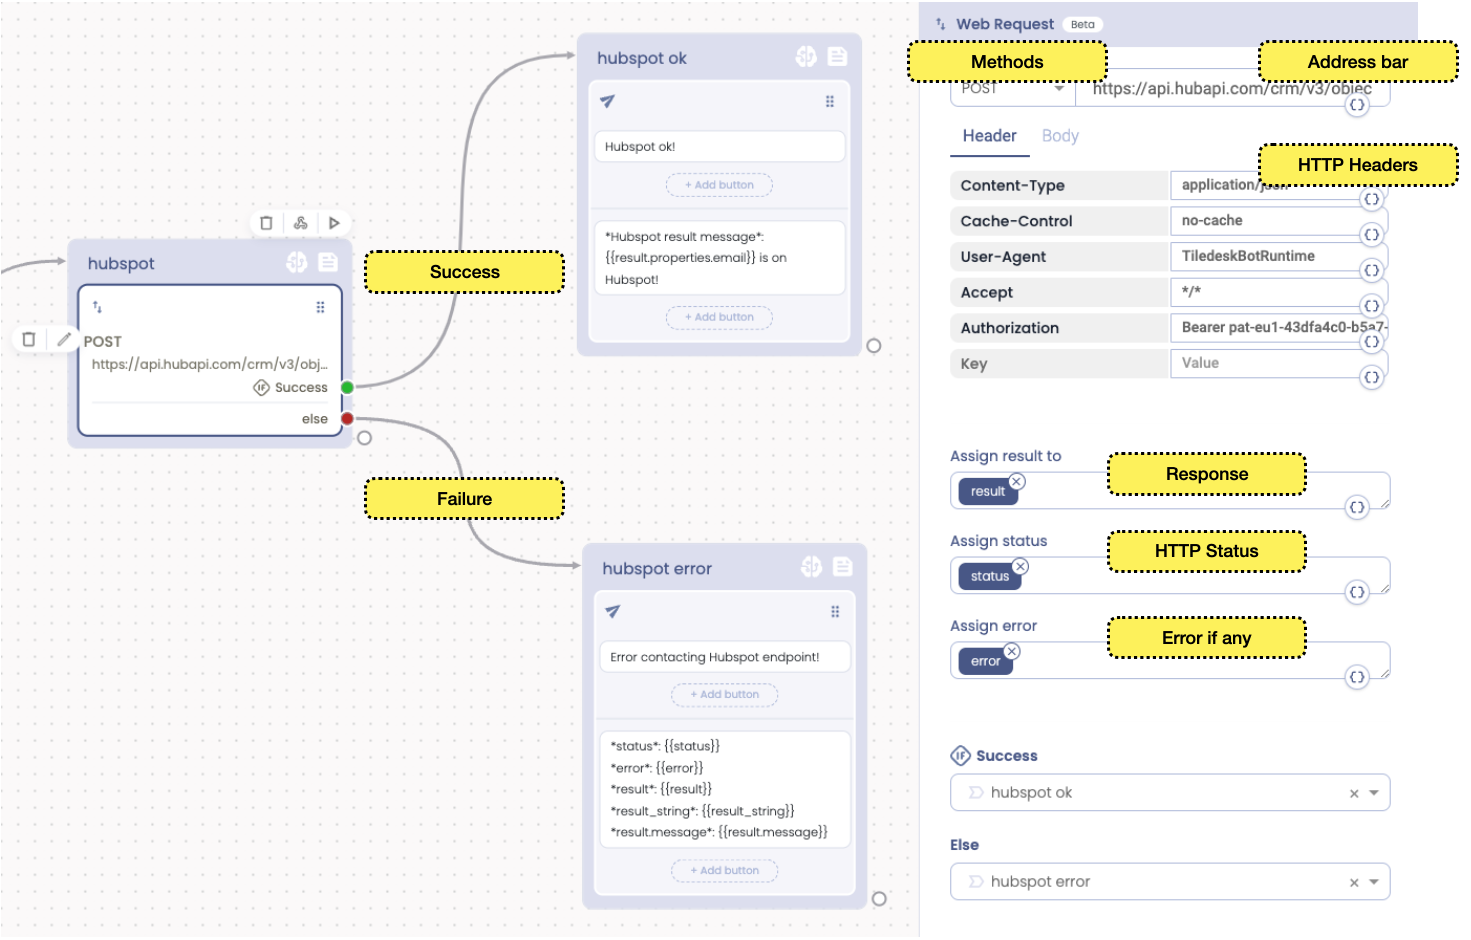
The Web Request, when invoked, automatically executes the HTTP request using the settings that you see in the picture above. The result is automatically assigned to the “result” attribute. You can optionally remove all the default response attributes - result, status and error - and rename them as you prefer.
Setup the Request's URL
The top section of the Web Request is the place where you setup your HTTP Method + URL endpoint address of your API invocation. You can select your preferred HTTP method choosing one from the methods dropdown menu.
You can also setup your URL. This can be a totally static piece of text or include some dynamic parts. Take care of url-escaping your attributes to be suitable for a URL composition. You must use the for your url parameters to keep them consistent with the HTTP URL request specification, as in the following example:

Setup the Request
The other important part of Web Request is the Body section. Here you setup your JSON to send to your API endpoint. If you set the JSON payload take care to check that the corresponding "Content-type" header will be automatically set to “application/json”.
Working with your JSON body
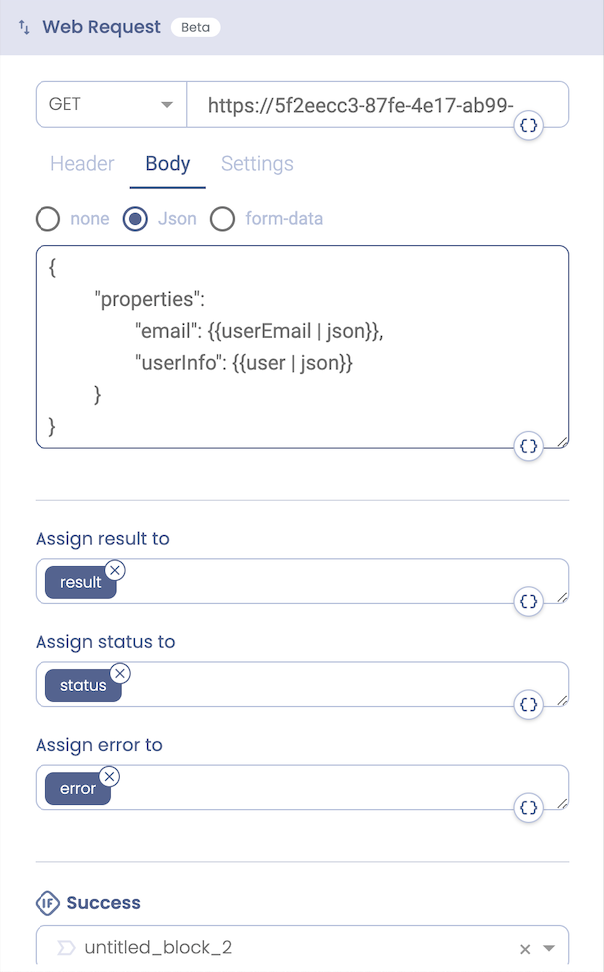
You can setup your JSON body in the “Body” tab of your Web Request Action, like in the following figure:

Rarely the JSON body for your API endpoint is a simple static document with fixed data. You often want this structure to be dynamic using the attributes that you collected during your flow (i.e. attributes coming from user interactions like Set Attribute or Capture User reply or from other API calls using the Web Request action itself).
In your JSON you can set attributes of various types:
- String or Numeric attributes
- JSON format attributes
- Sub properties of JSON attributes
As you can see in the image below, feel free to use your flow attributes in your JSON payload but always use the syntax (we use LiquidJS for attribute rendering) , to correctly render the attribute in the JSON document based on his native type. With this syntax the render engine will treat the attribute in the right way, adding quotes for string and removing them for JSON or Numbers, as in the followinf example:
Take note that it is unnecessary to wrap Attributes fo type "string" in the quotations since the LiquidJS json filter we used before will add them for you, if necessary. This filter also escapes quotes as needed inside those outputs.
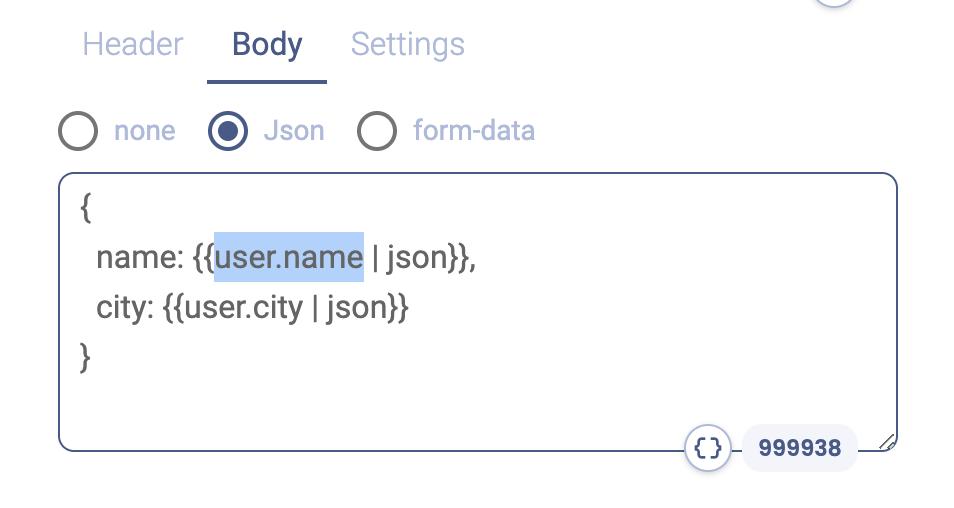
You can also use sub-properties of your json attributes. As in the following case we used user.name and user.city of the “user” JSON attribute.
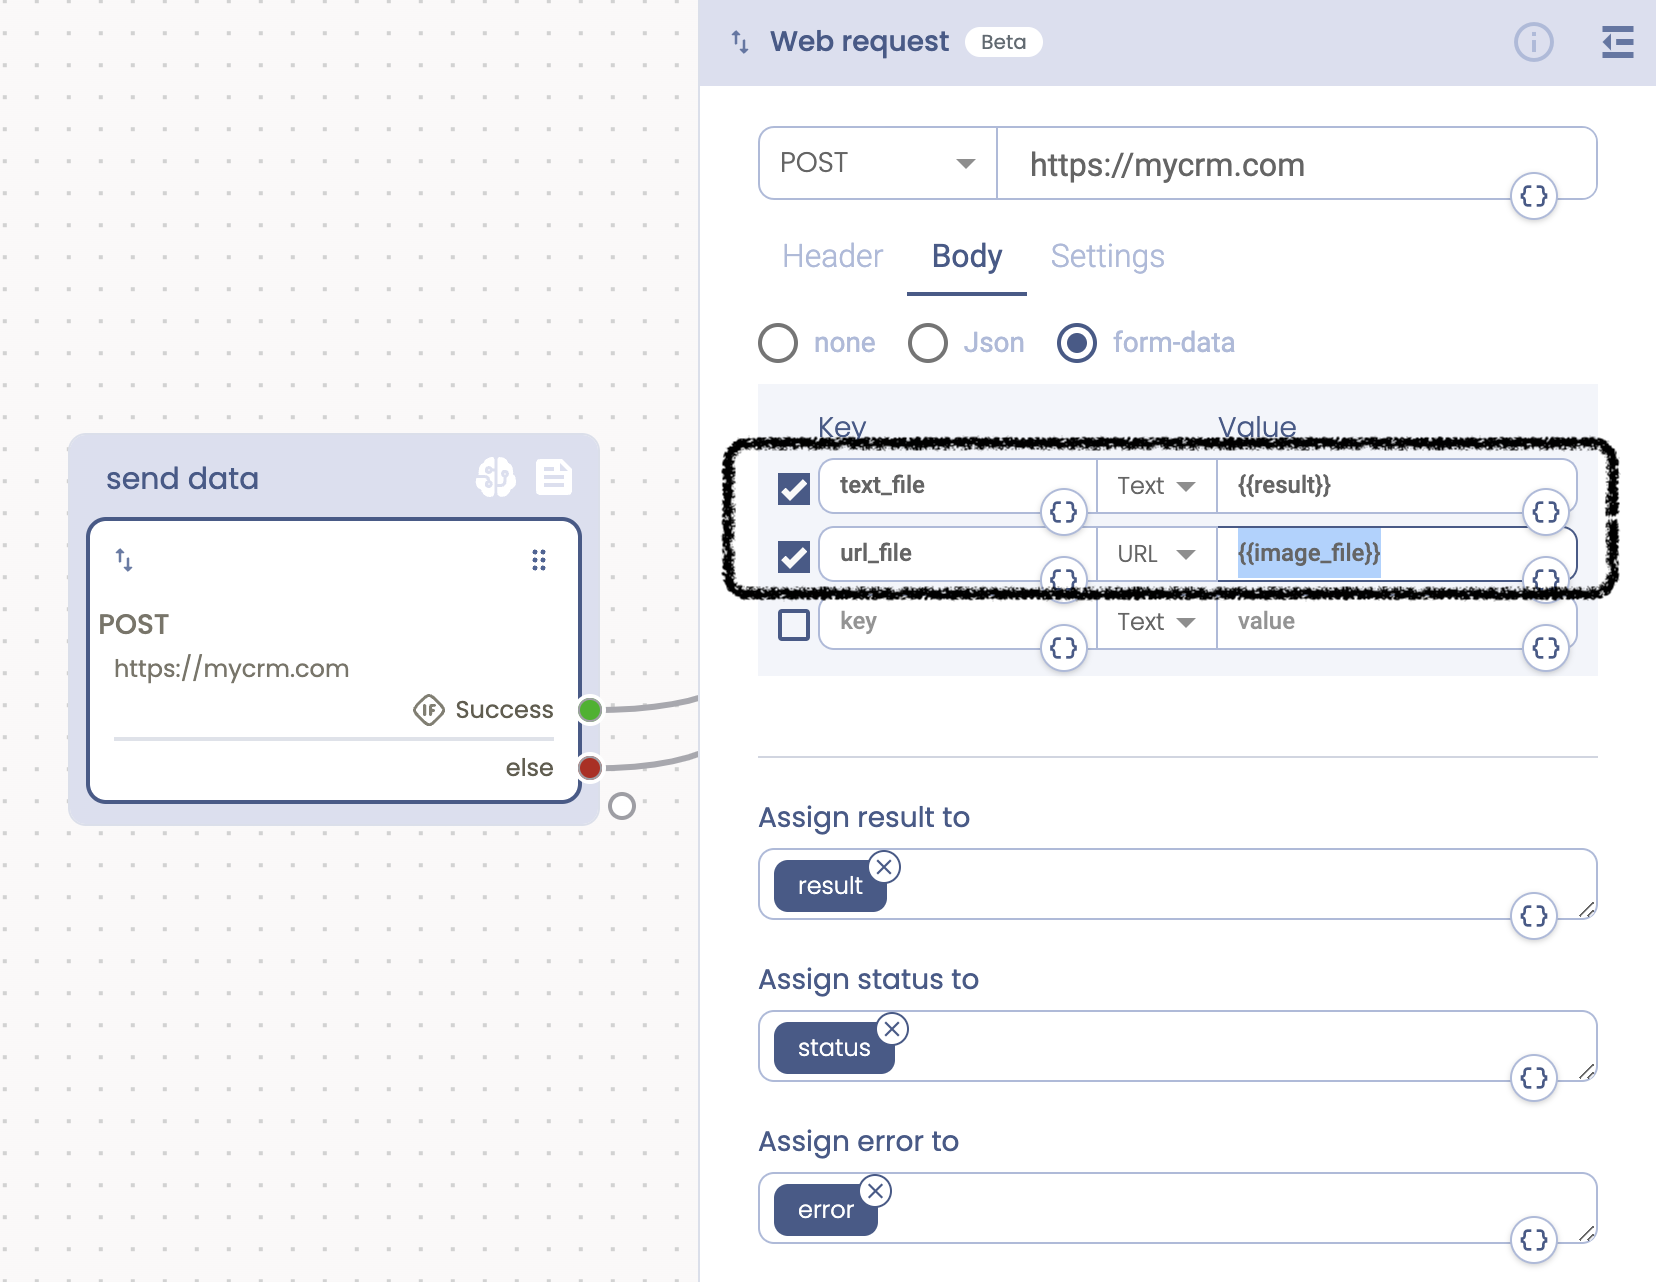
Working with files
You can send files to your API endpoints. Simply move to the form-data tab. Use the multi-field section to upload your files. You can send text or a file gor from a publicly accessible URL.
Get Web Request output
You can get back your data from the remote services invokation in text or JSON format. These two are actually the only supported formats available.
The data type is automatically decoded by the response content-type.
In the case of JSON you can get sub fields of your JSON structure using the “." notation, as highlighted in Attributes.
For practical reasons we prepared a tutorial in our community, that you can import with a simple click.
Tutorials
You can find some interesting tutorial (that you can import with just one click) on our community. There are many tutorials using the the Web Request but the following two are designed for an easy quick start.
Web Request tutorial for POST method (in our community): Connect to Hubspot using a Web Request.
Web Request tutorial for GET method (in our community): Weather.com API call to get city conditions info.
If you have questions about the Web Request or other Tiledesk features feel free to send an email to support@tiledesk.com