.png)
Learn how to use the ChatGPT Task feature
-

- Jovana Ugrinic
 09 October 2023
Tiledesk Design Studio allows you to create chatbots that generate pertinent responses using the ChatGPT Task feature. With this feature, you can enhance your conversation flow with the power of ChatGPT. Some use cases for this feature include:
- Generating answers based on customer feedback
- Prioritizing and categorizing customer inquiries
- Sentiment analysis
- Generating emails and much more
This feature enables you to leverage the power of different OpenAI models, including the most recent one - ChatGPT-4o, to make your conversations more diverse, human-like, and automate many manual tasks.
How to Use ChatGPT Task in a Conversation Flow
Before you start, it’s essential to have a clear use case in mind. For this example, let’s say you want to create a bot that handles feedback requests.
First, navigate to the Tiledesk dashboard and then to the Design Studio.
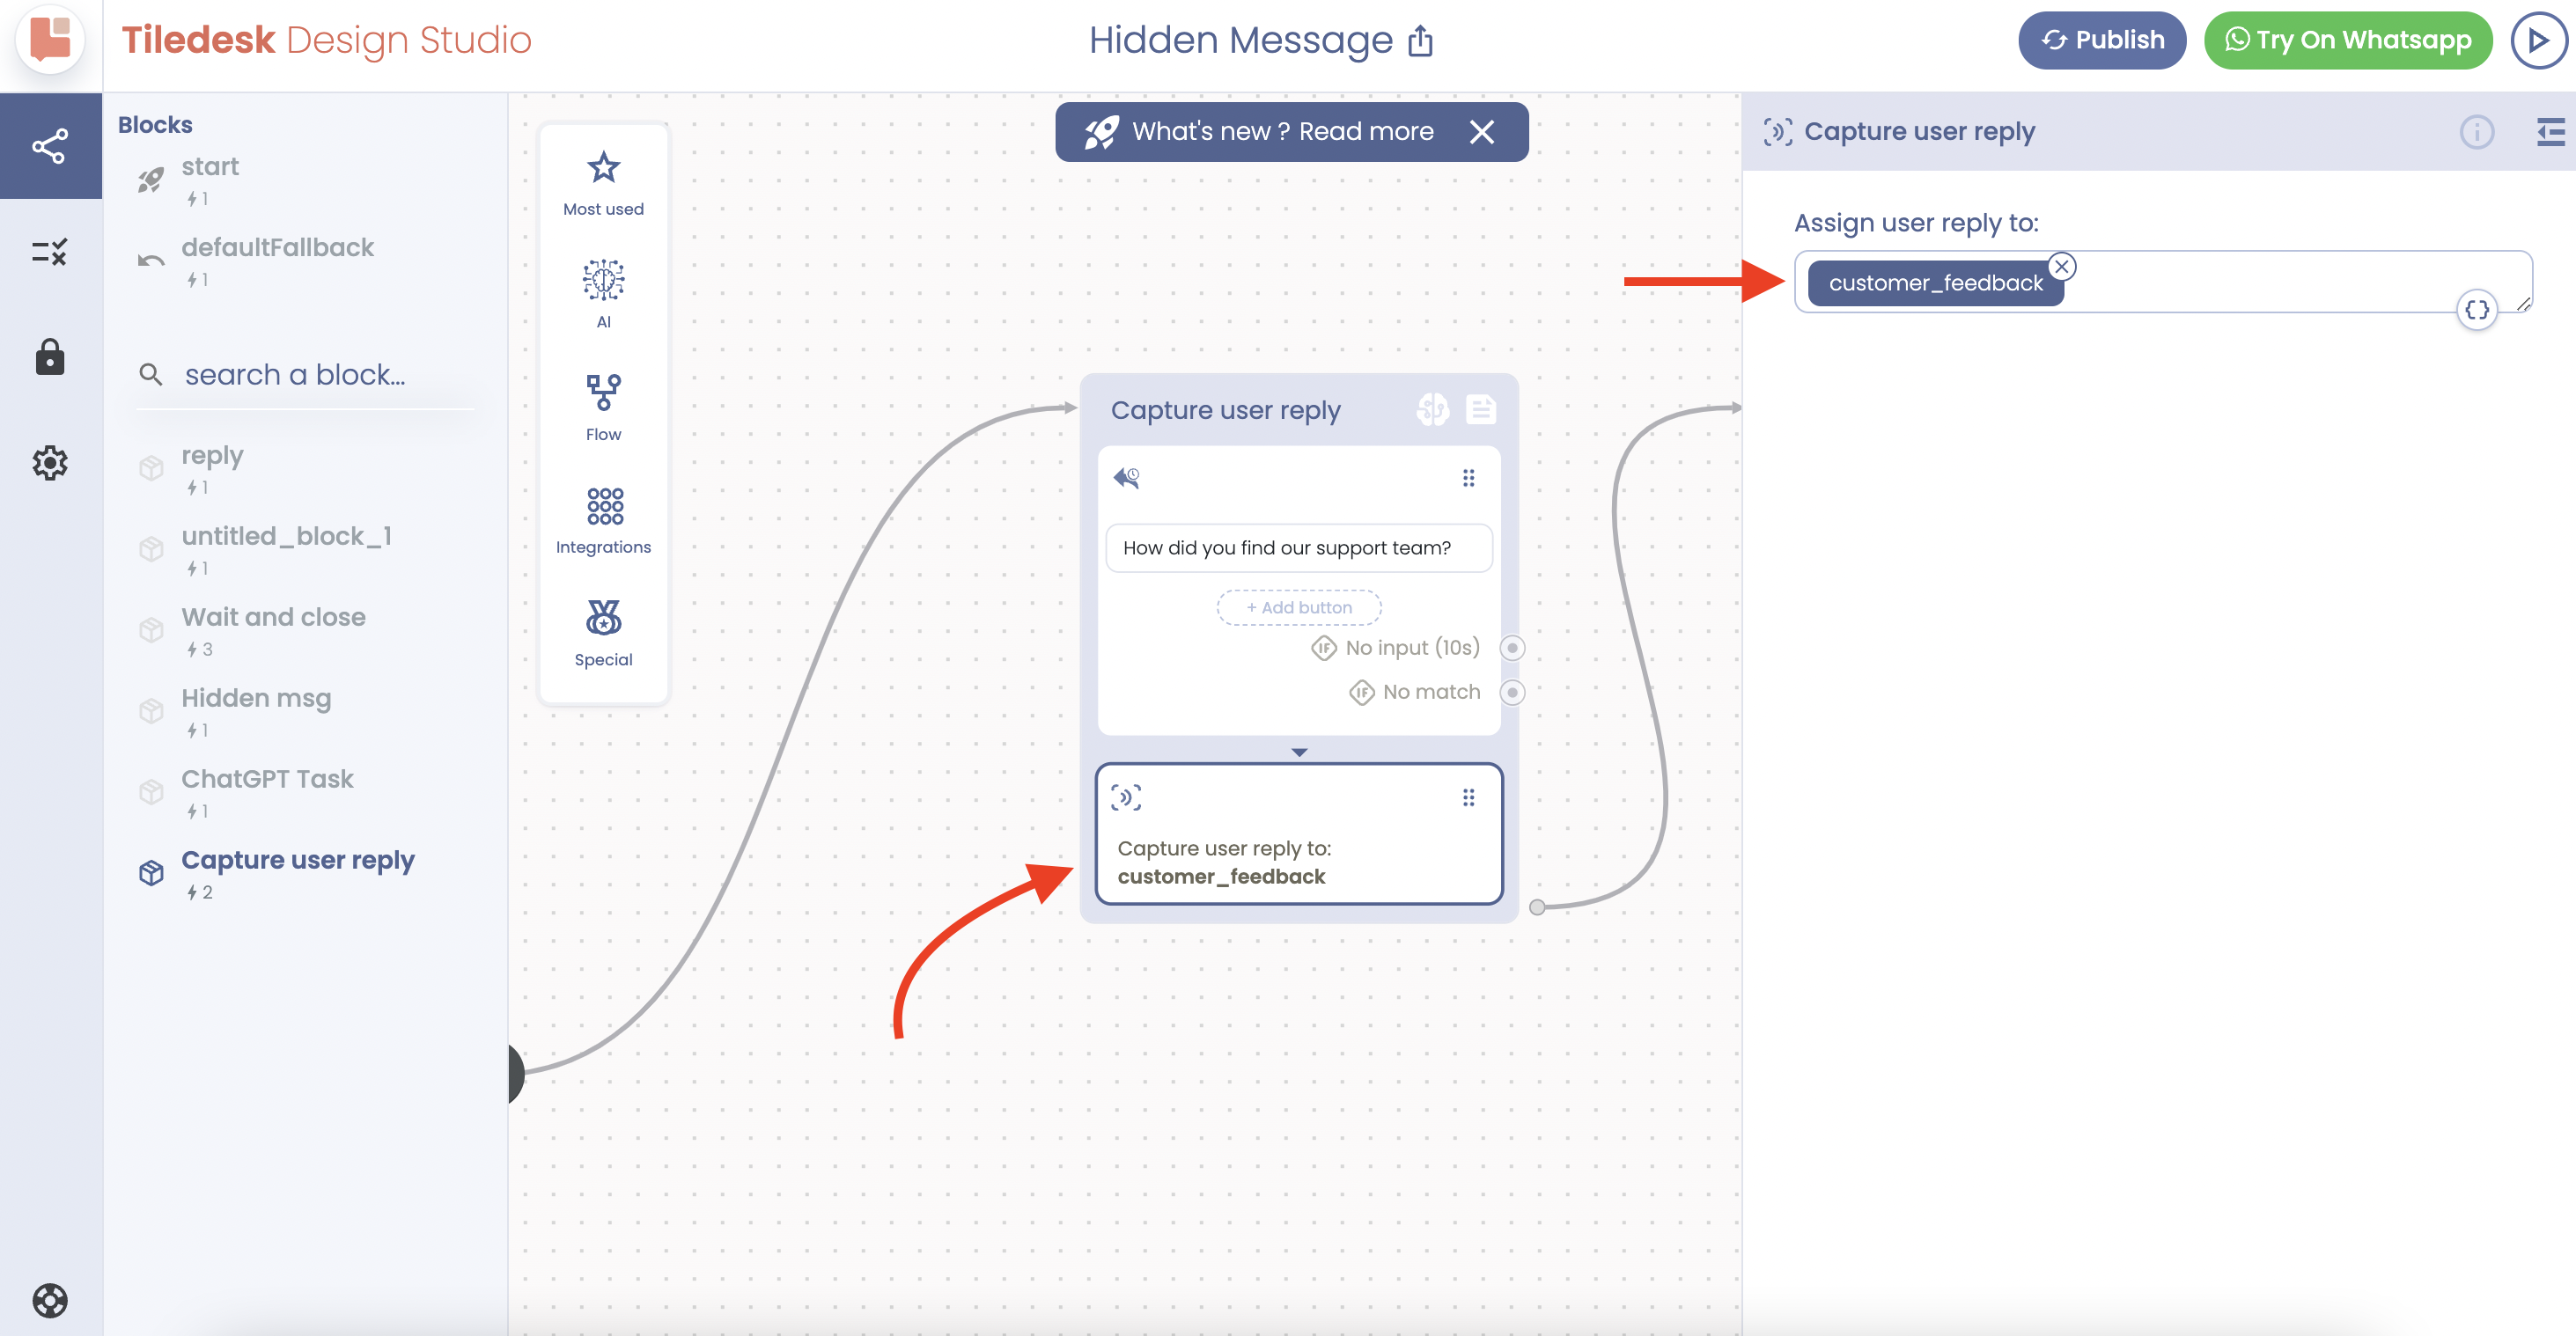
Next, we need to create a new attribute to record the user feedback. To do this, ask the user, “How did you find our support team?” and then use an action called “Capture User Reply” to save the user’s response in a new attribute called .
That's it! You've successfully created a chatbot with Tiledesk Design Studio that uses the GPT Task feature to generate pertinent responses based on customer feedback. This can greatly enhance your chatbot's ability to provide relevant and context-aware responses to users.
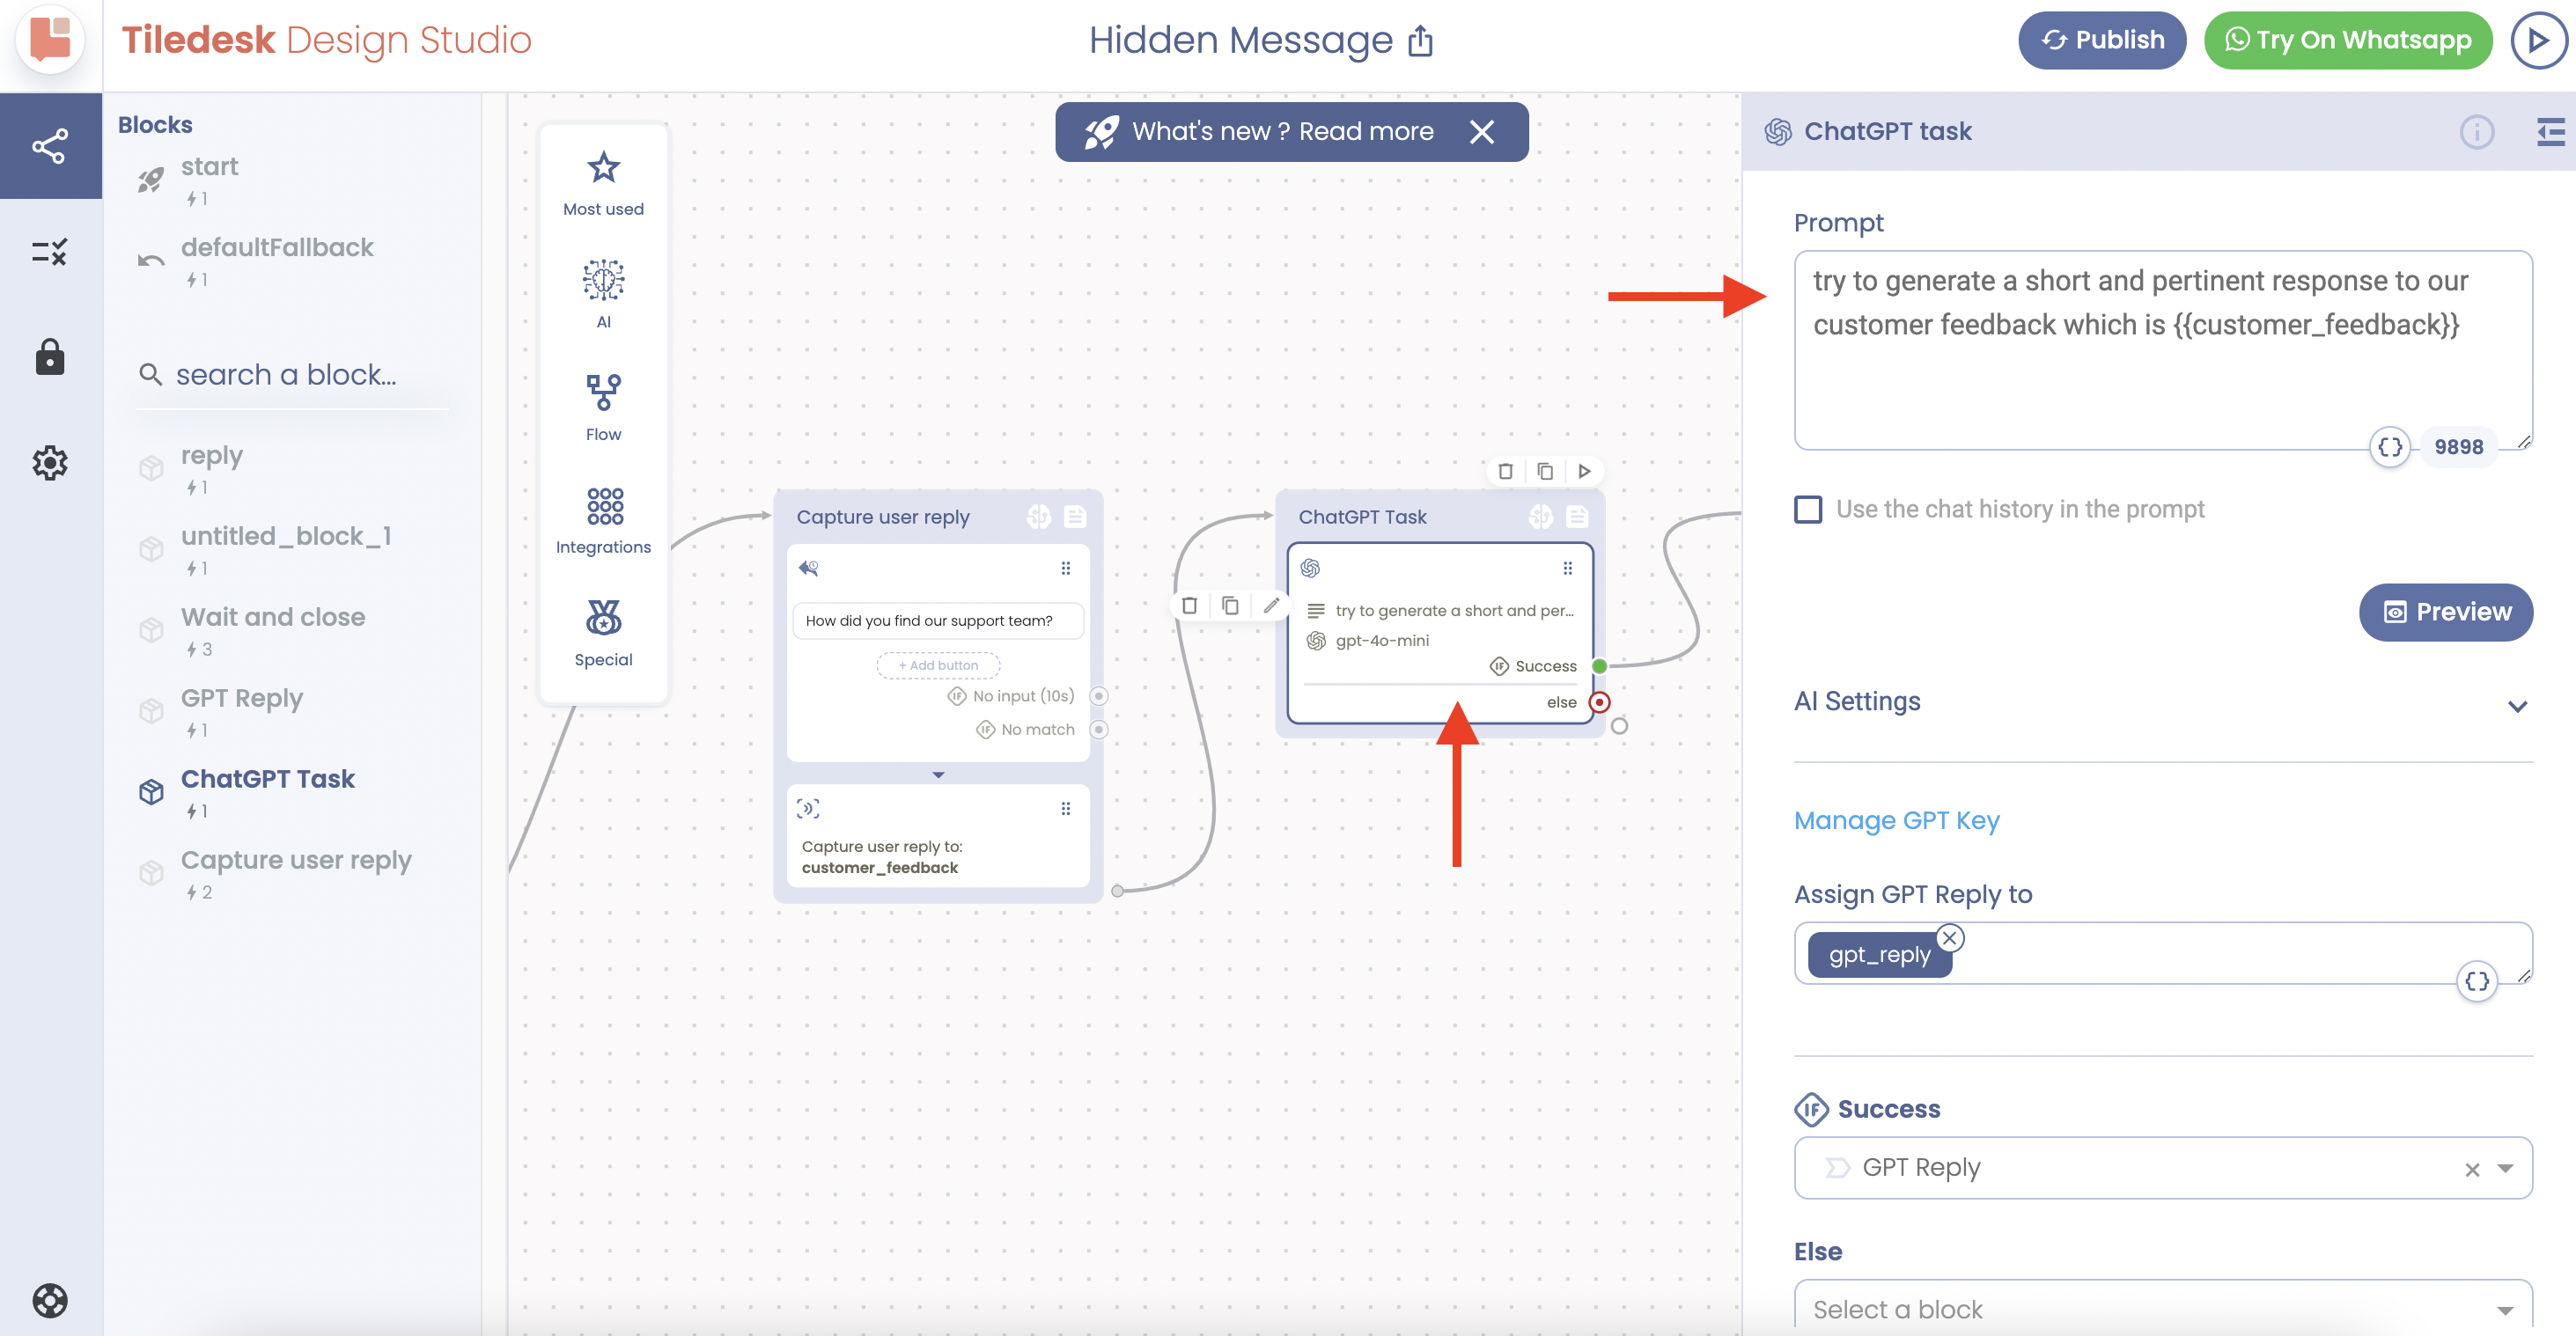
Next, drop the “ChatGPT Task” into a new block. By clicking on the block, a right top-up menu will appear, allowing you to insert your prompt. Use the following prompt:
Try to generate a short and pertinent response to our customer feedback, which is .
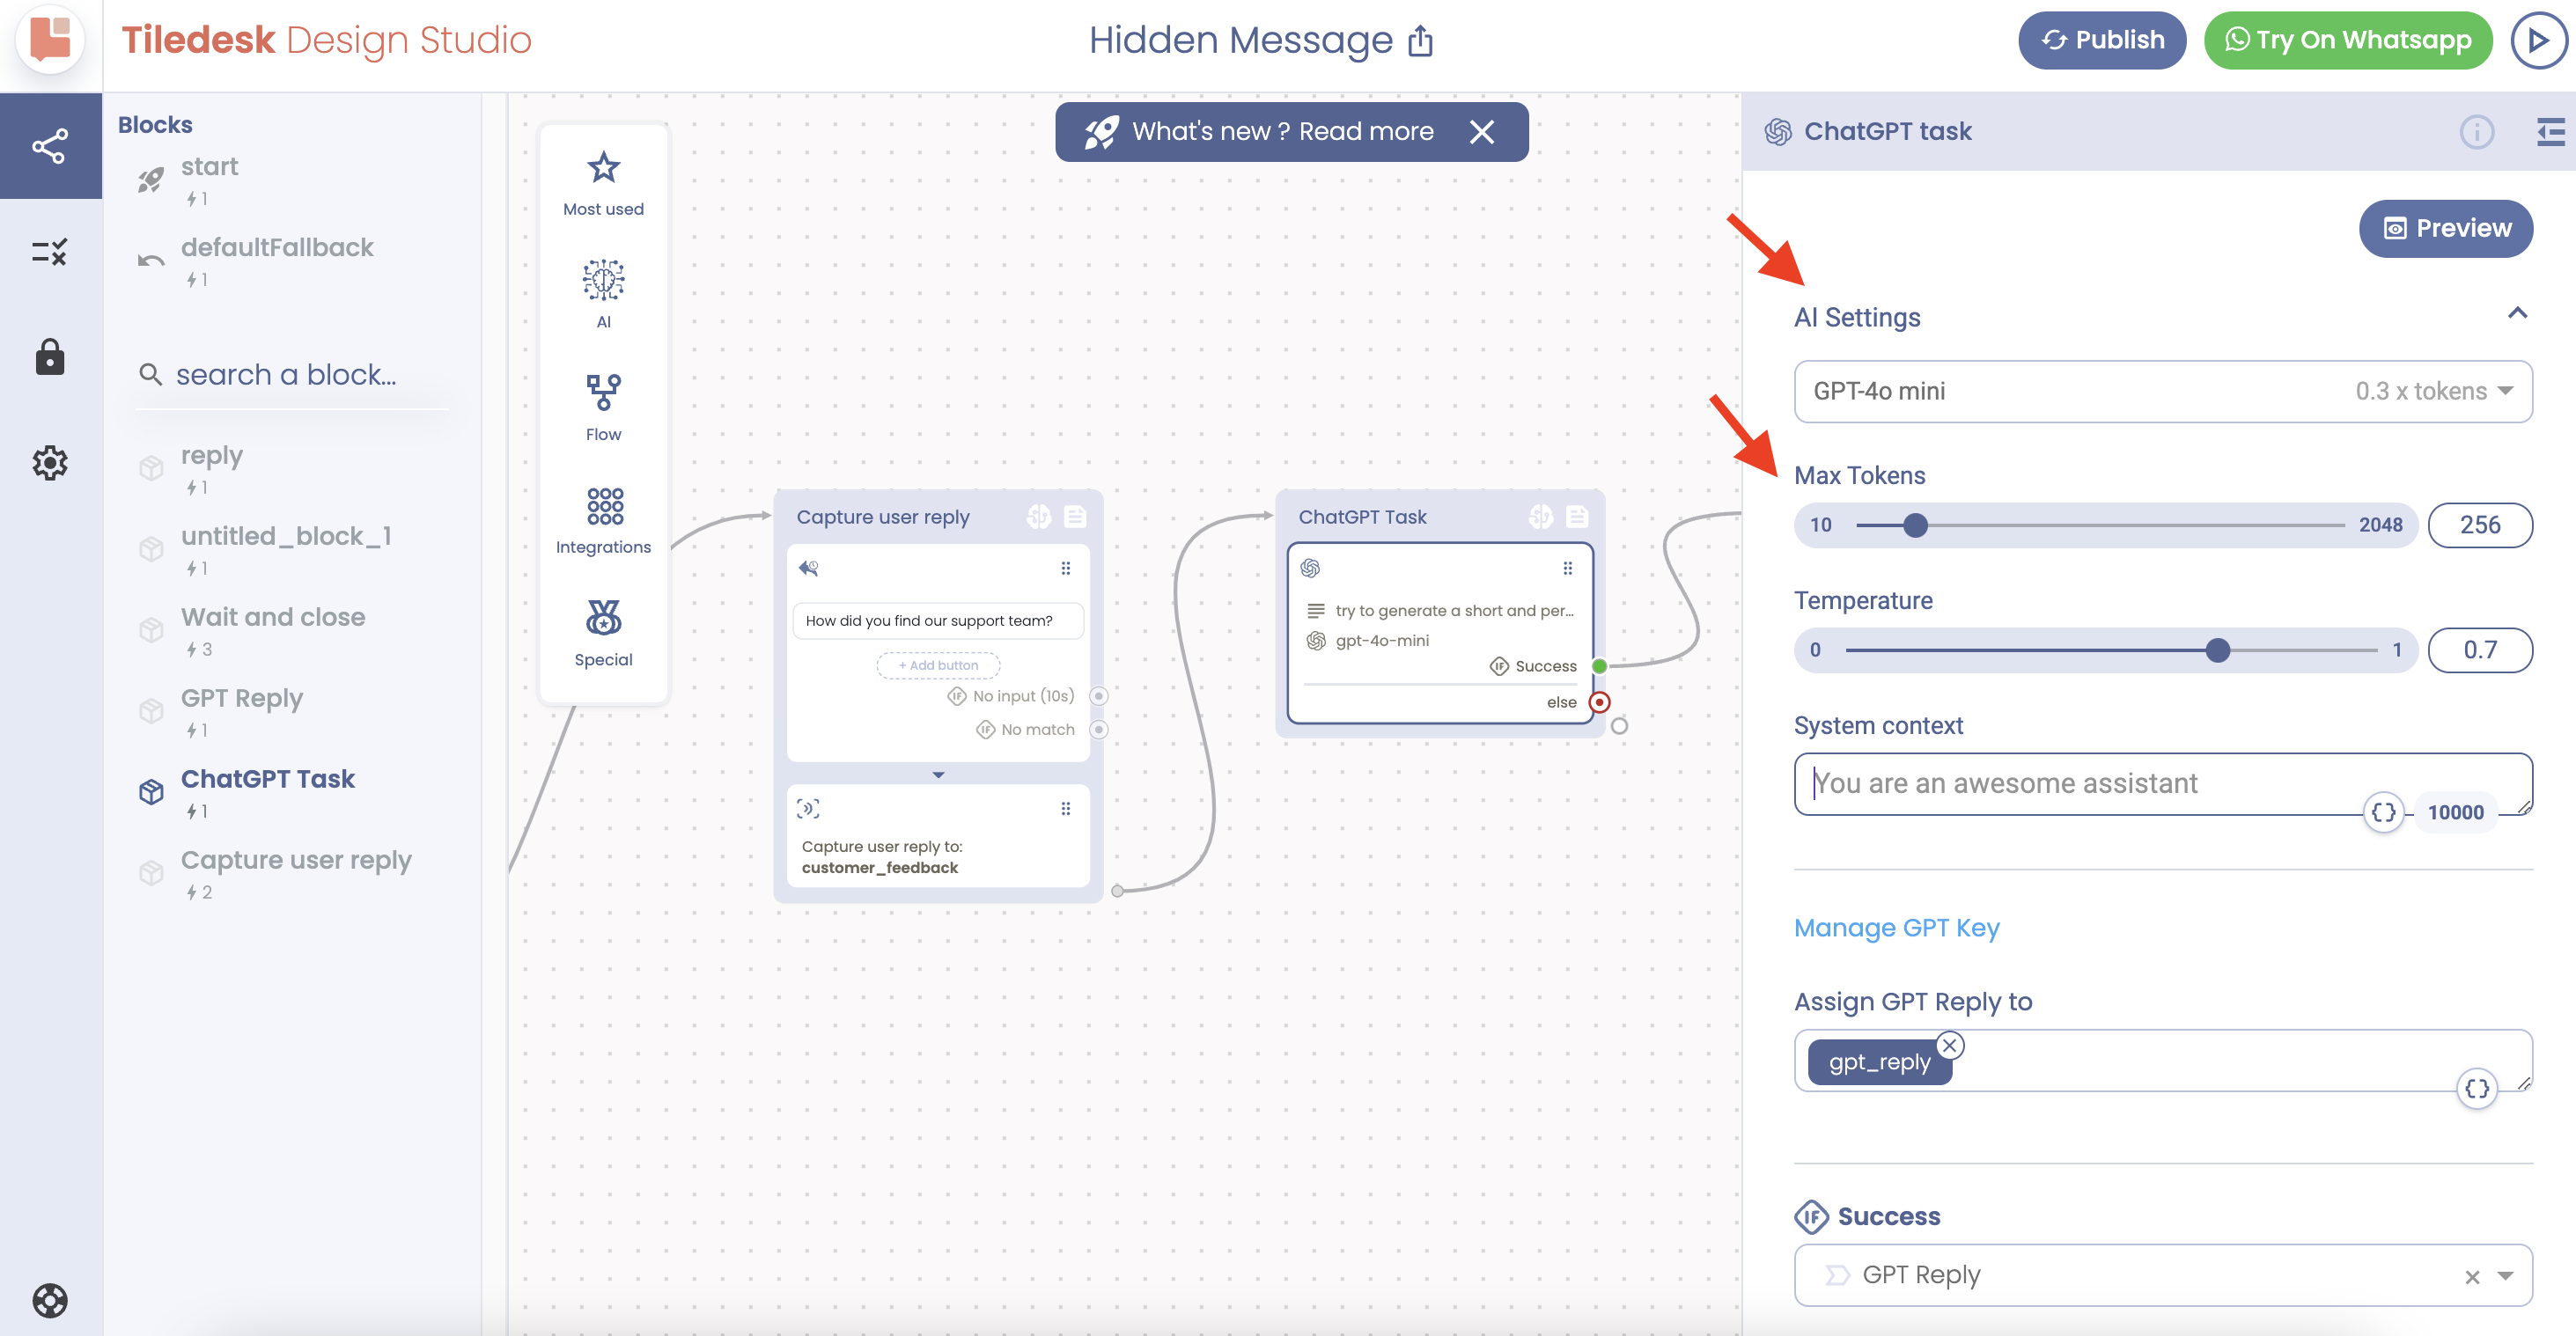
By clicking on the AI settings in the right-side menu, you can define the OpenAI model you prefer and the number of AI tokens.
Decide the maximum number of tokens you want the GPT response to have.
Tokens are chunks of text, and limiting their number can help control the length of the generated responses.
Determine whether you want shorter or longer responses based on your use case. For example, if you want concise responses, you might set the max number of tokens to 50. If you want more detailed responses, you can set it to a higher value, like 150.
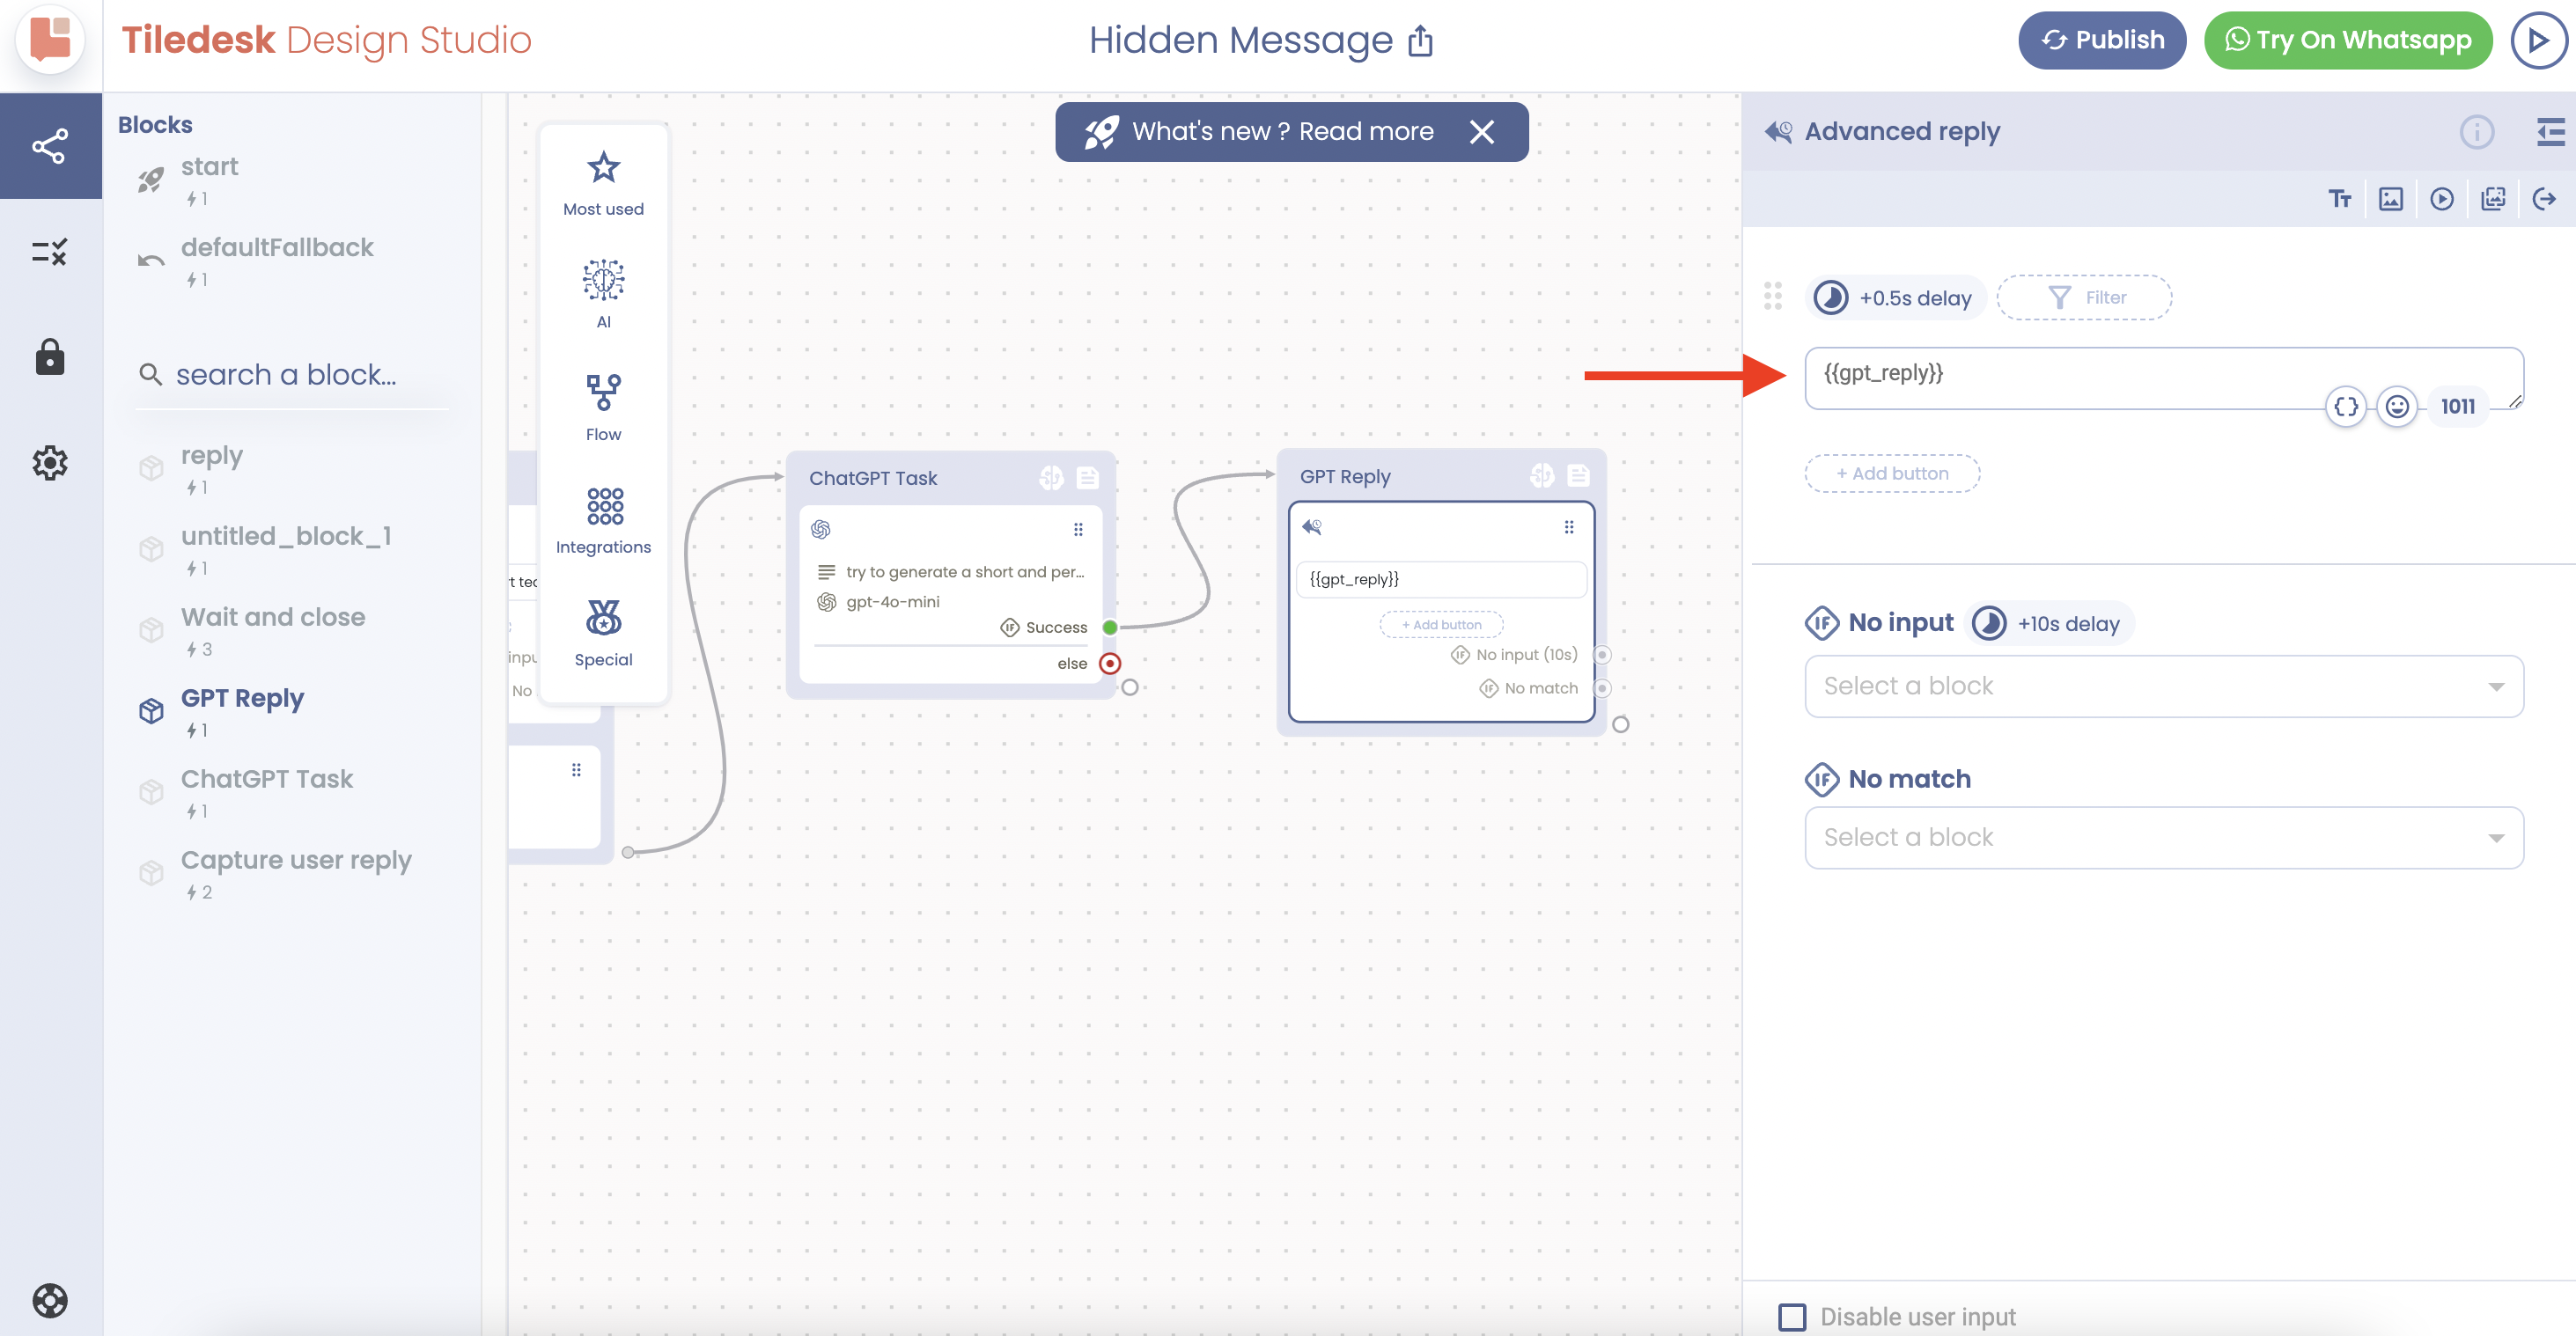
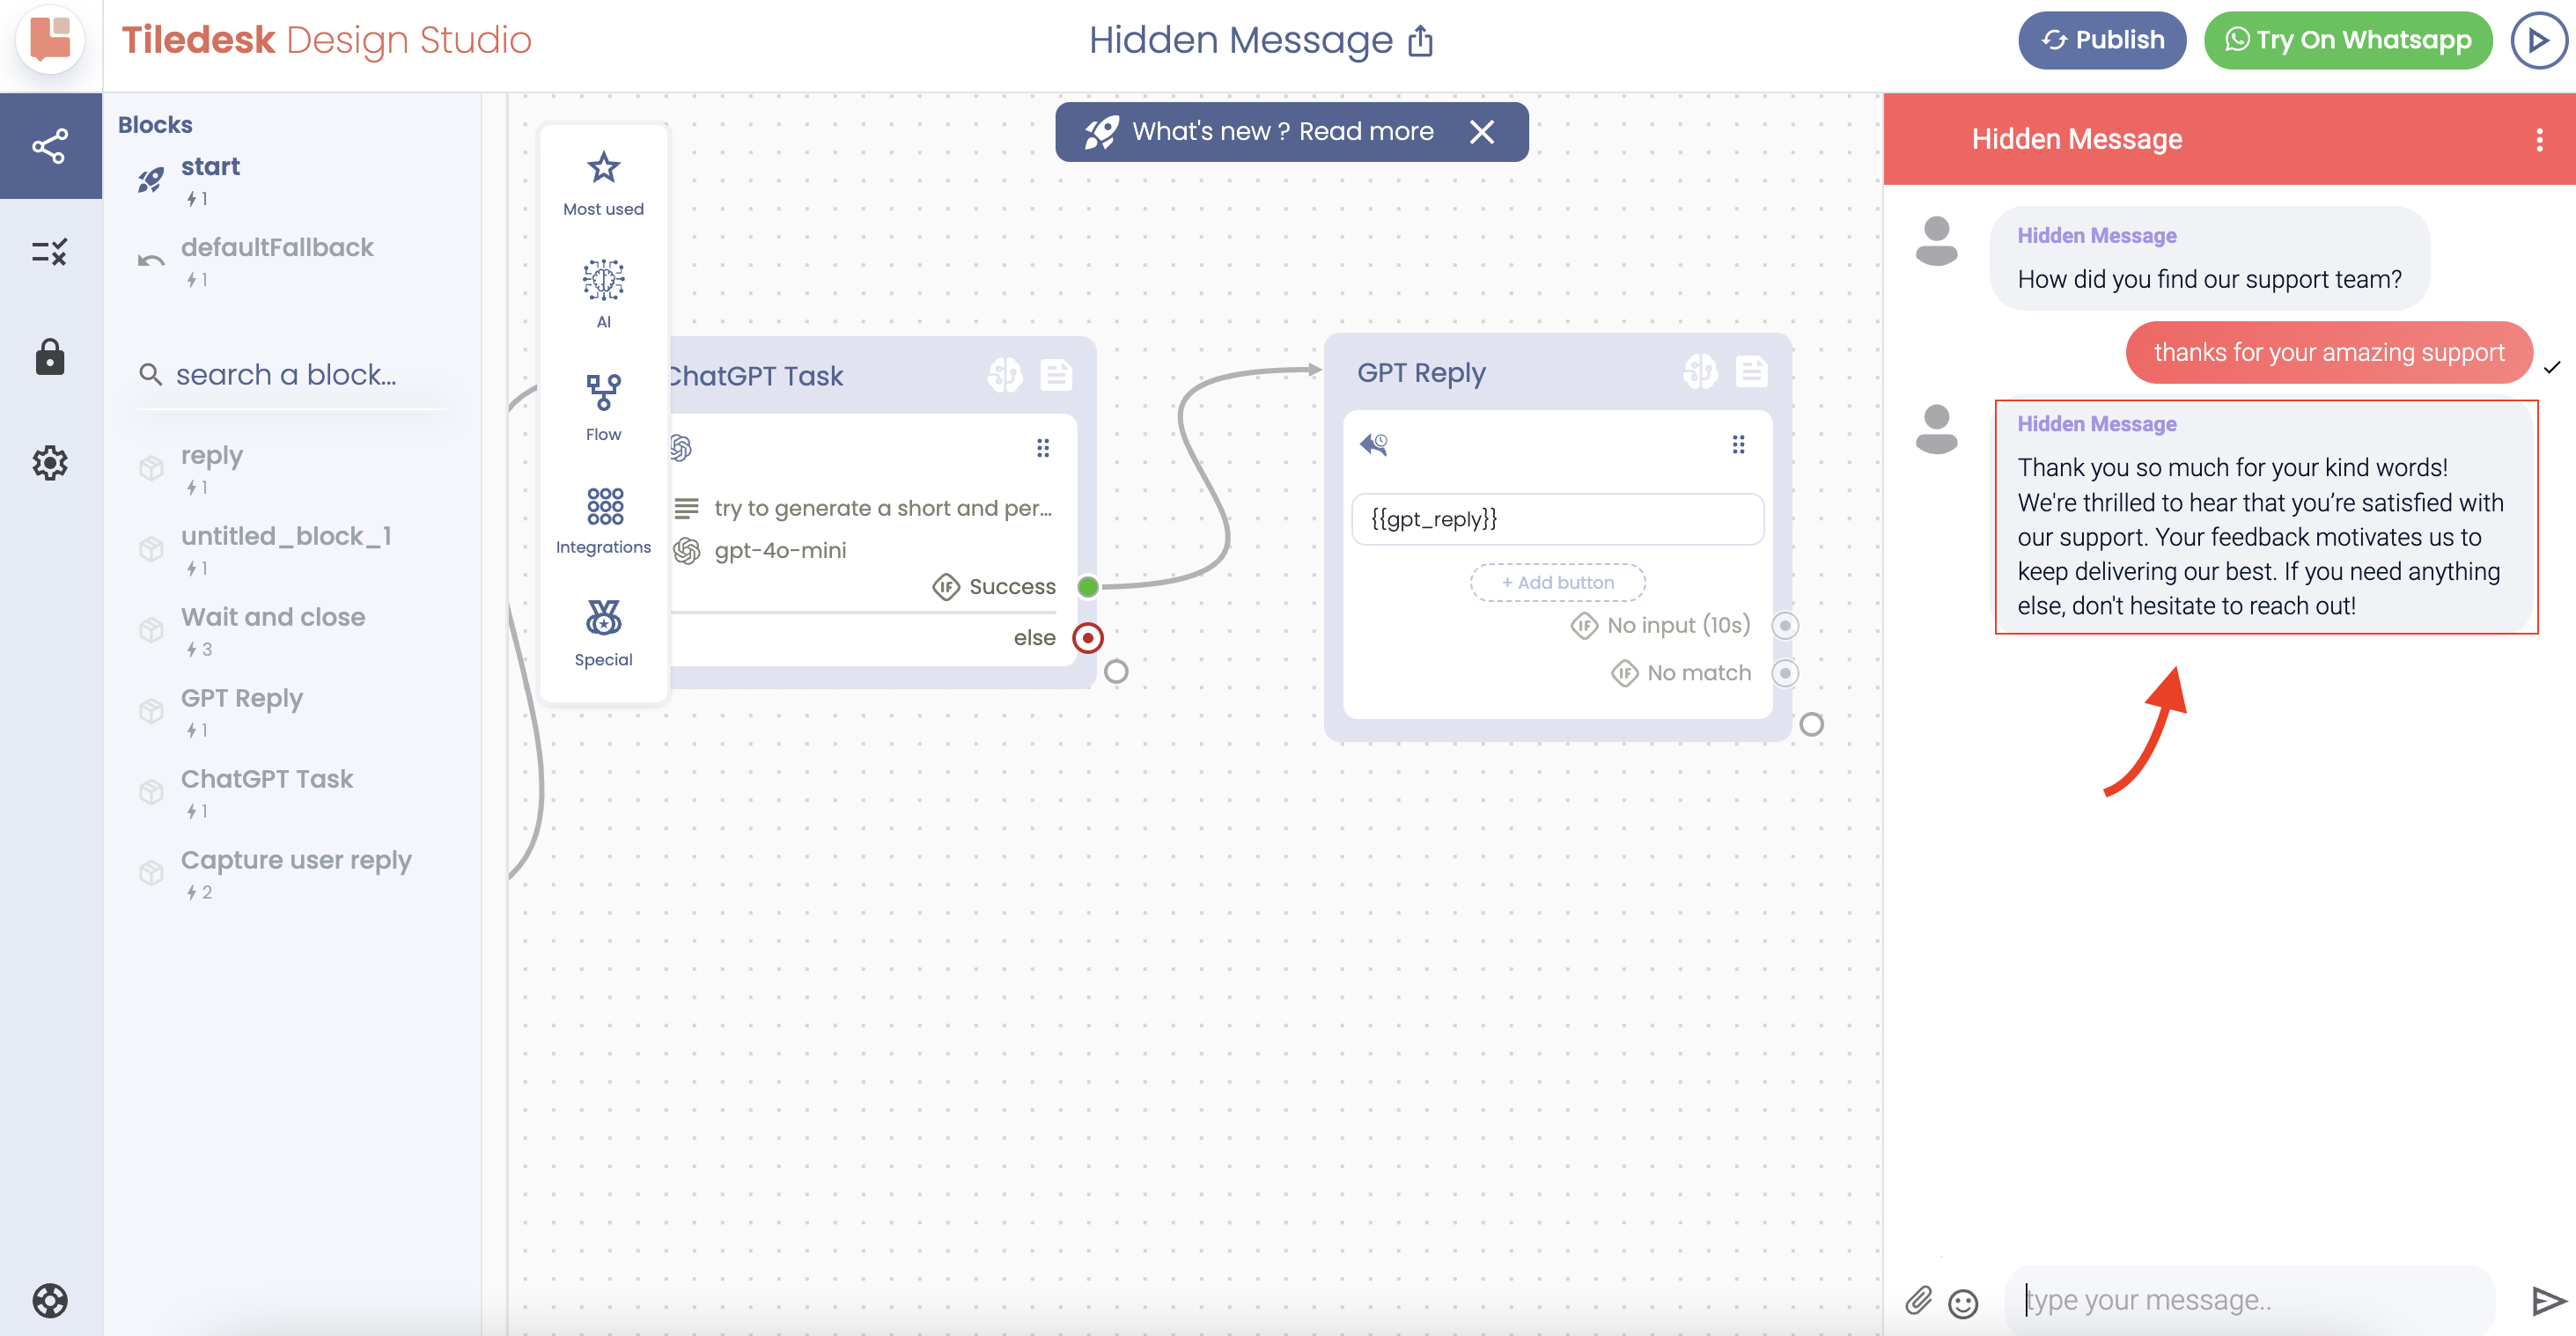
Next, create a “Reply” action with the GPT attribute.
Create a new block or use an existing one where you want to generate GPT responses. Within the block, create a “Reply” action to generate the response. In the “Reply” action, add the attribute to store the generated response.
Test your chatbot to ensure it generates pertinent responses based on customer feedback. Provide feedback in the chat to see how the GPT-generated response is handled.
I hope you found this helpful.
If you need assistance, do not hesitate to contact us via support@tiledesk.com.
For more details, please visit www.tiledesk.com.
If you haven’t created your free account yet, start here.