.png)
Enhancing conversation flows with Replace Bot action
-

- Saeid Kajkolah
 04 June 2024
Tiledesk Design Studio offers a unique feature known as the “Replace Bot” action.
This action allows you to recall different bots as needed, significantly enhancing your conversation flow design.
Imagine having a bot specialized for sales and another for support. This approach allows you to deal with smaller, more understandable, and customizable bots instead of a single large and complicated bot. Enhancing these bots is easier, and their behavior is more predictable.
Implementing the Replace Bot Feature
To implement this feature, you first need to create different bots for different purposes. When you want to recall another bot, you need to drag the “Replace Bot” action as shown in the image below:
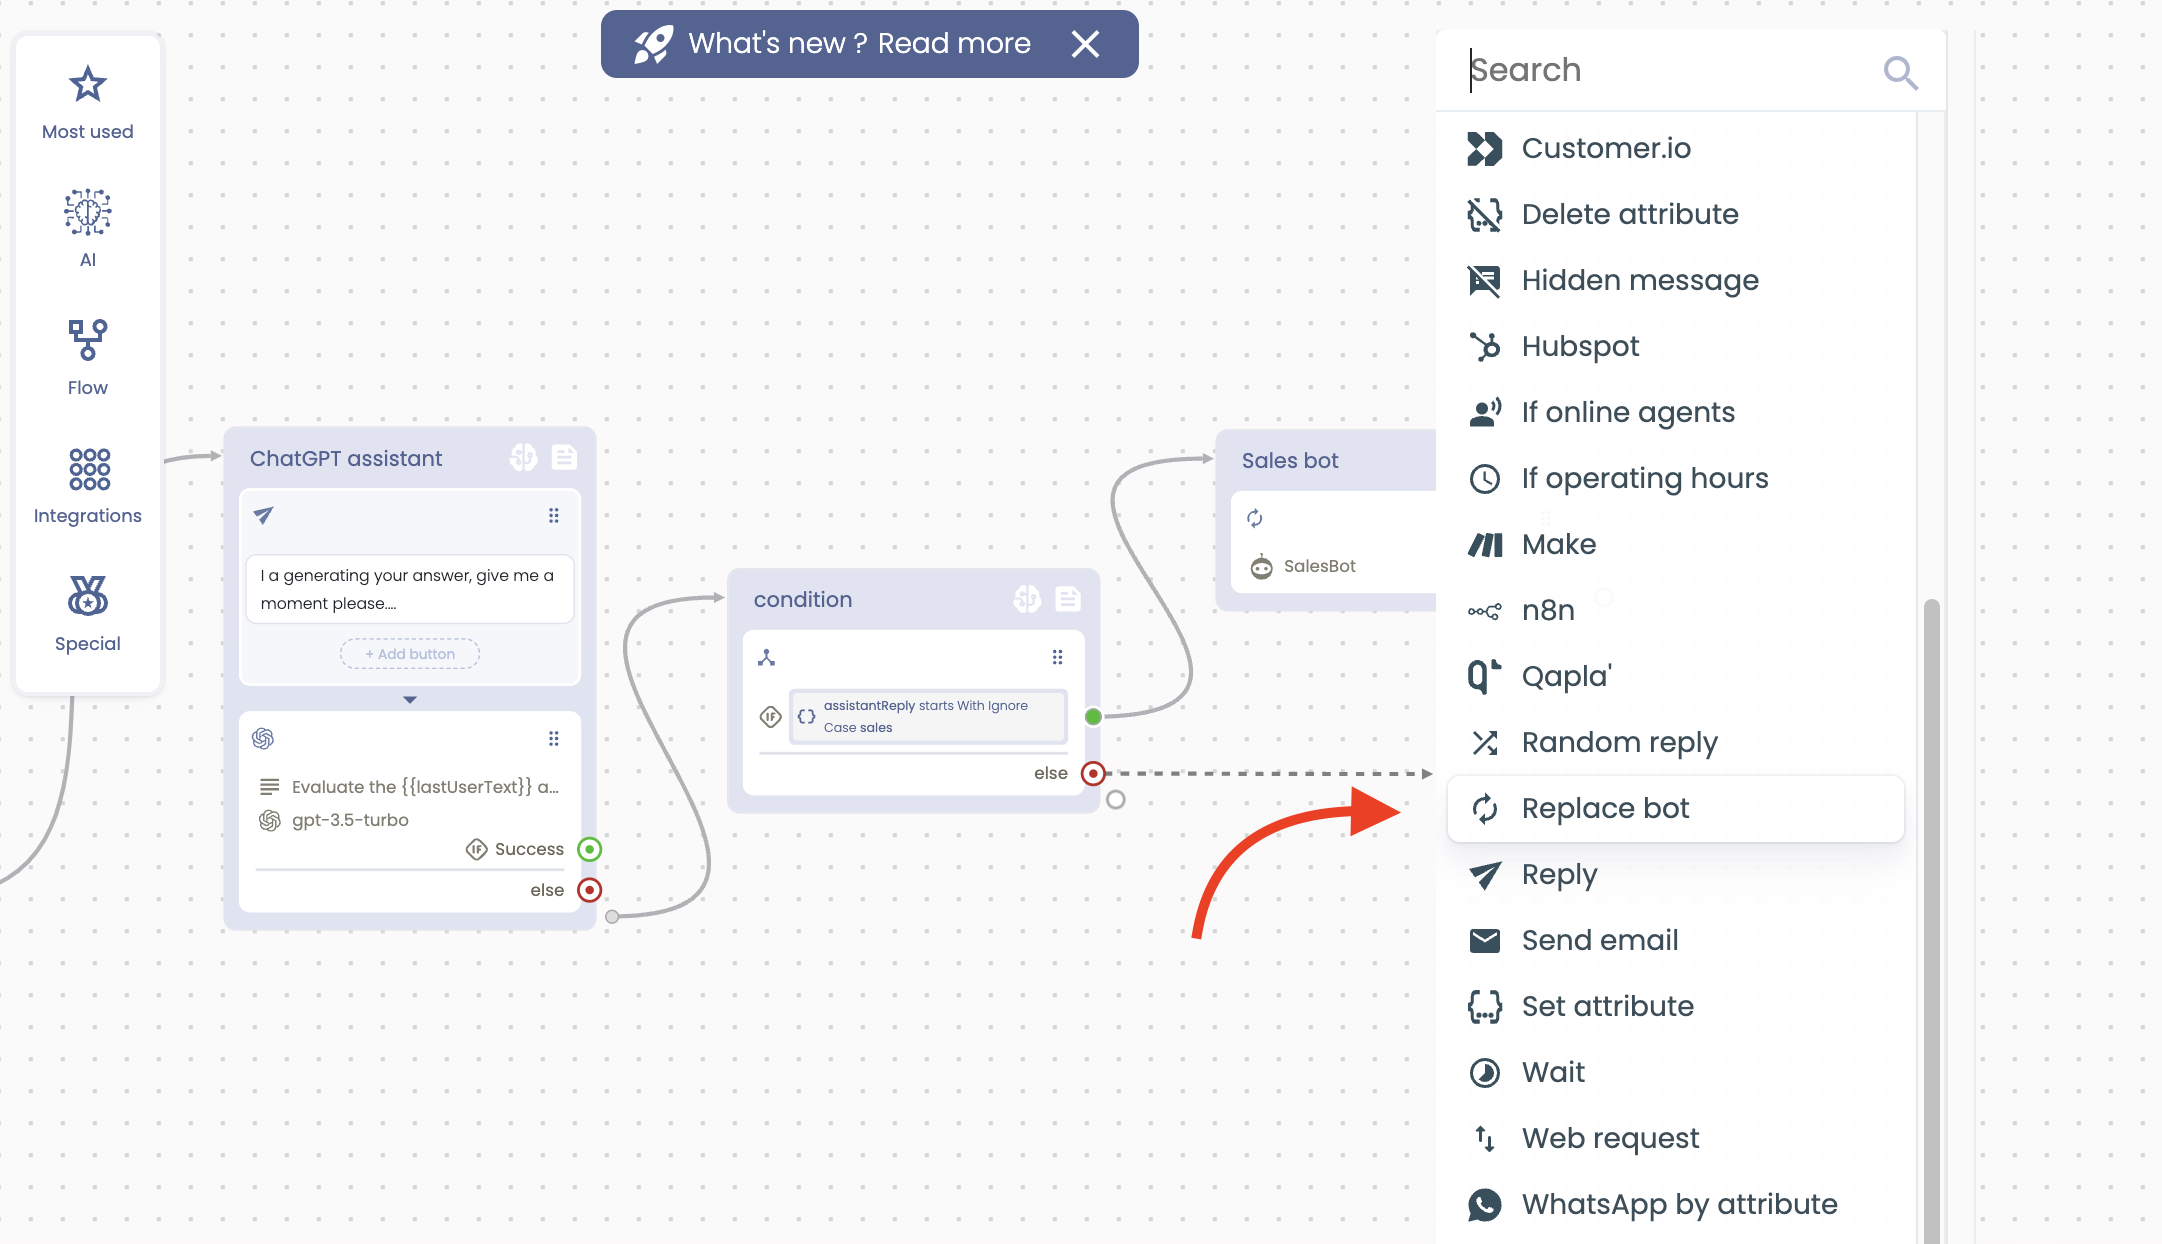
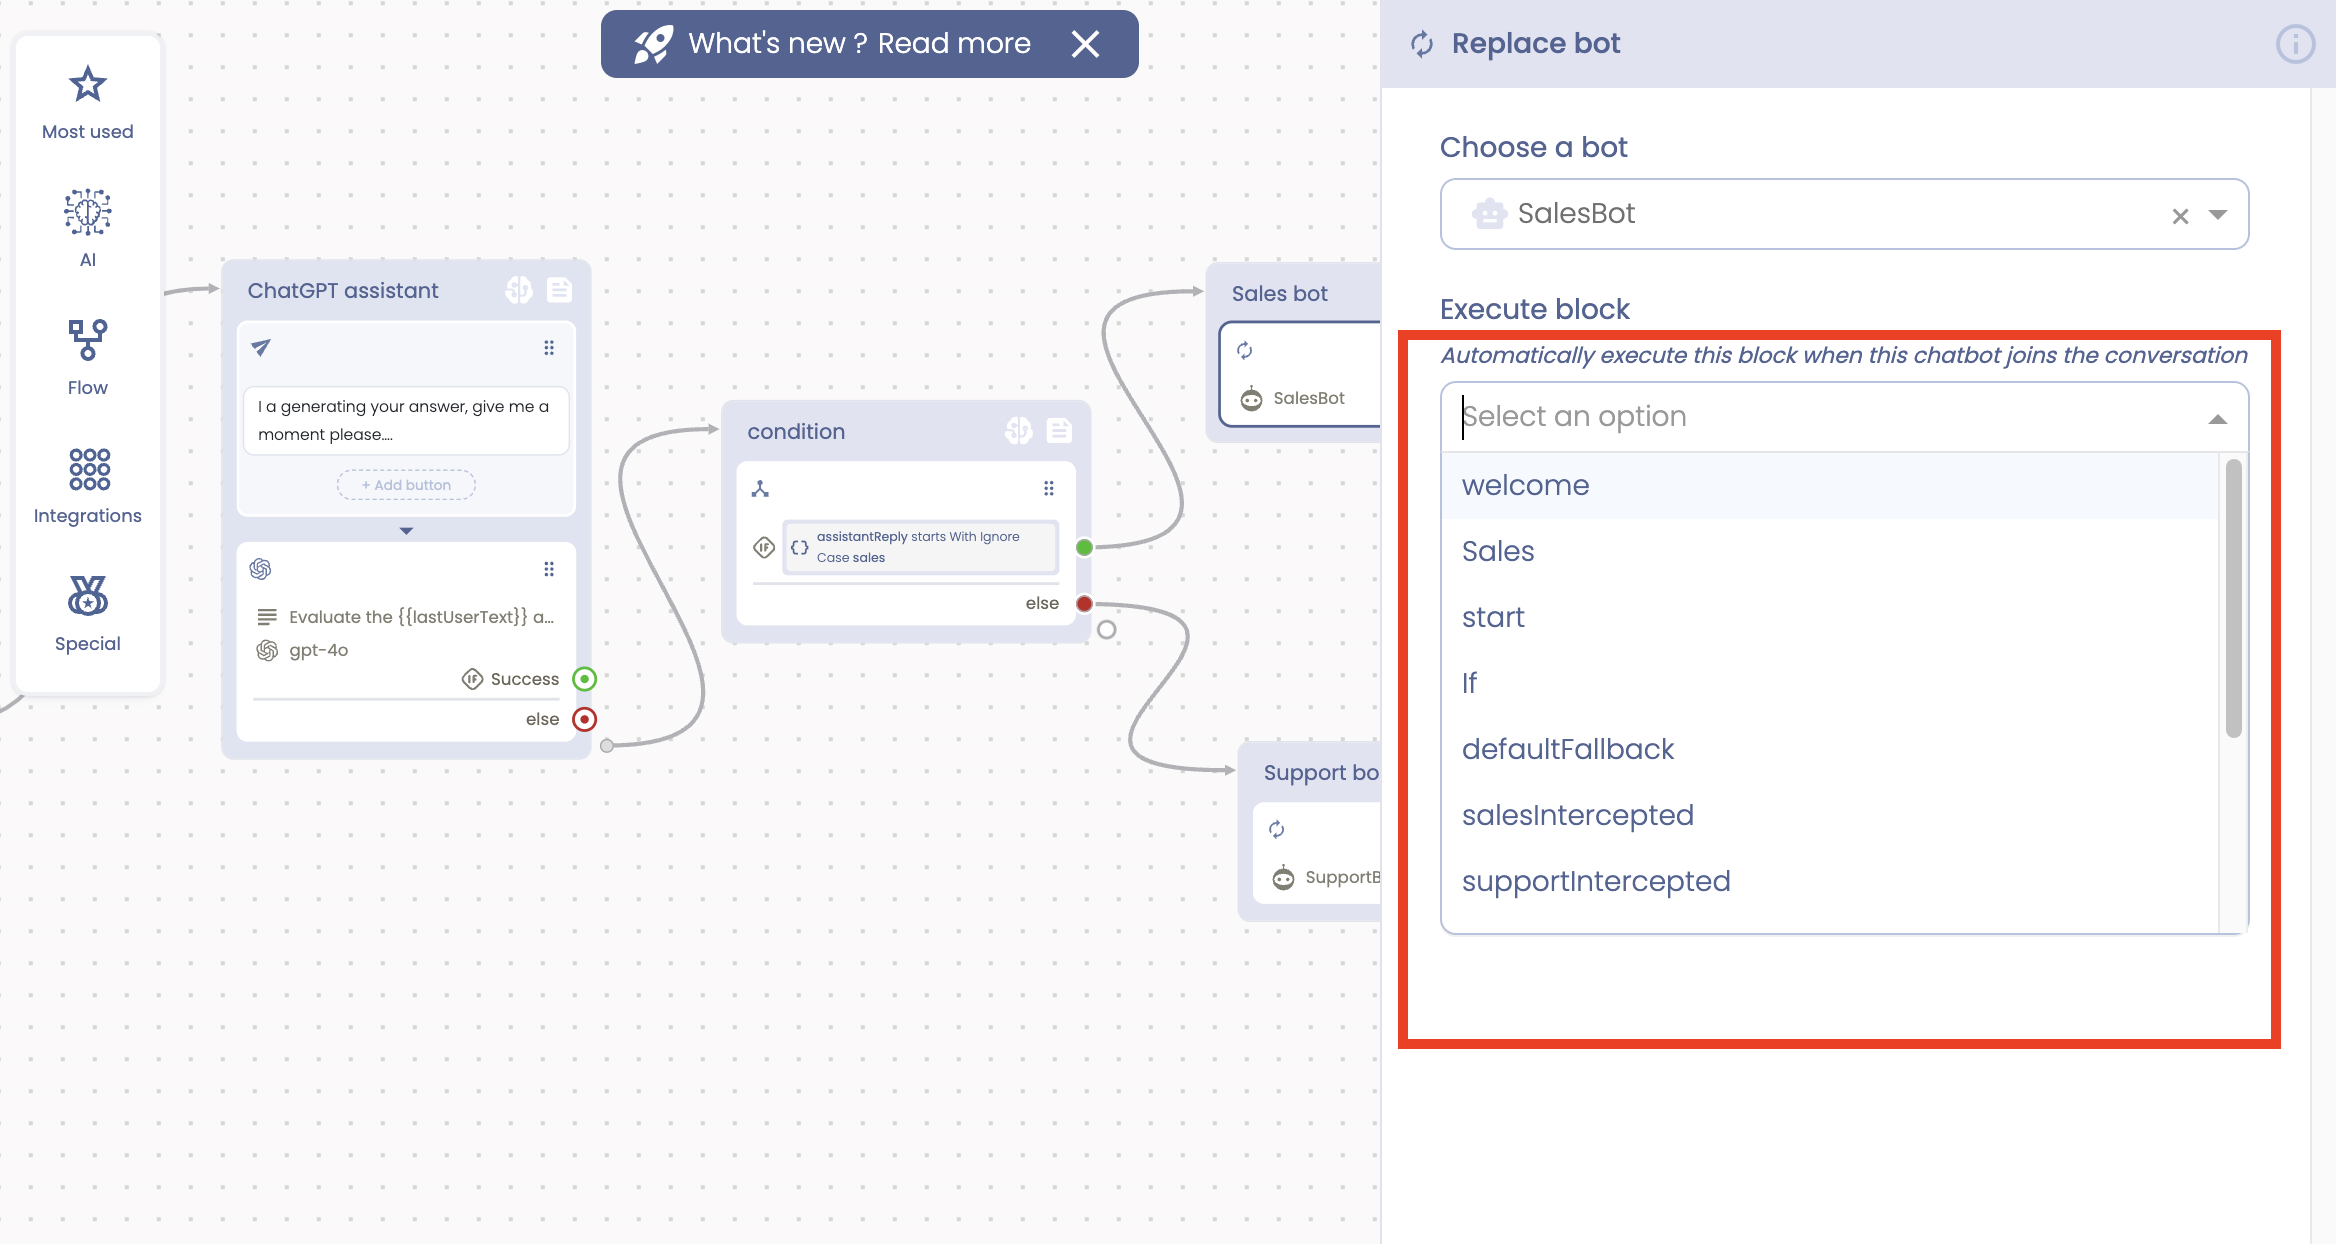
As you can see, I used a ChatGPT Assistant and Condition actions to categorize inquiries into “Sales” and “Support”. For each category, I used a “Replace bot” action to recall the specific bot. You also need to define which Block of the recalled bot should be activated, as shown in the image below:
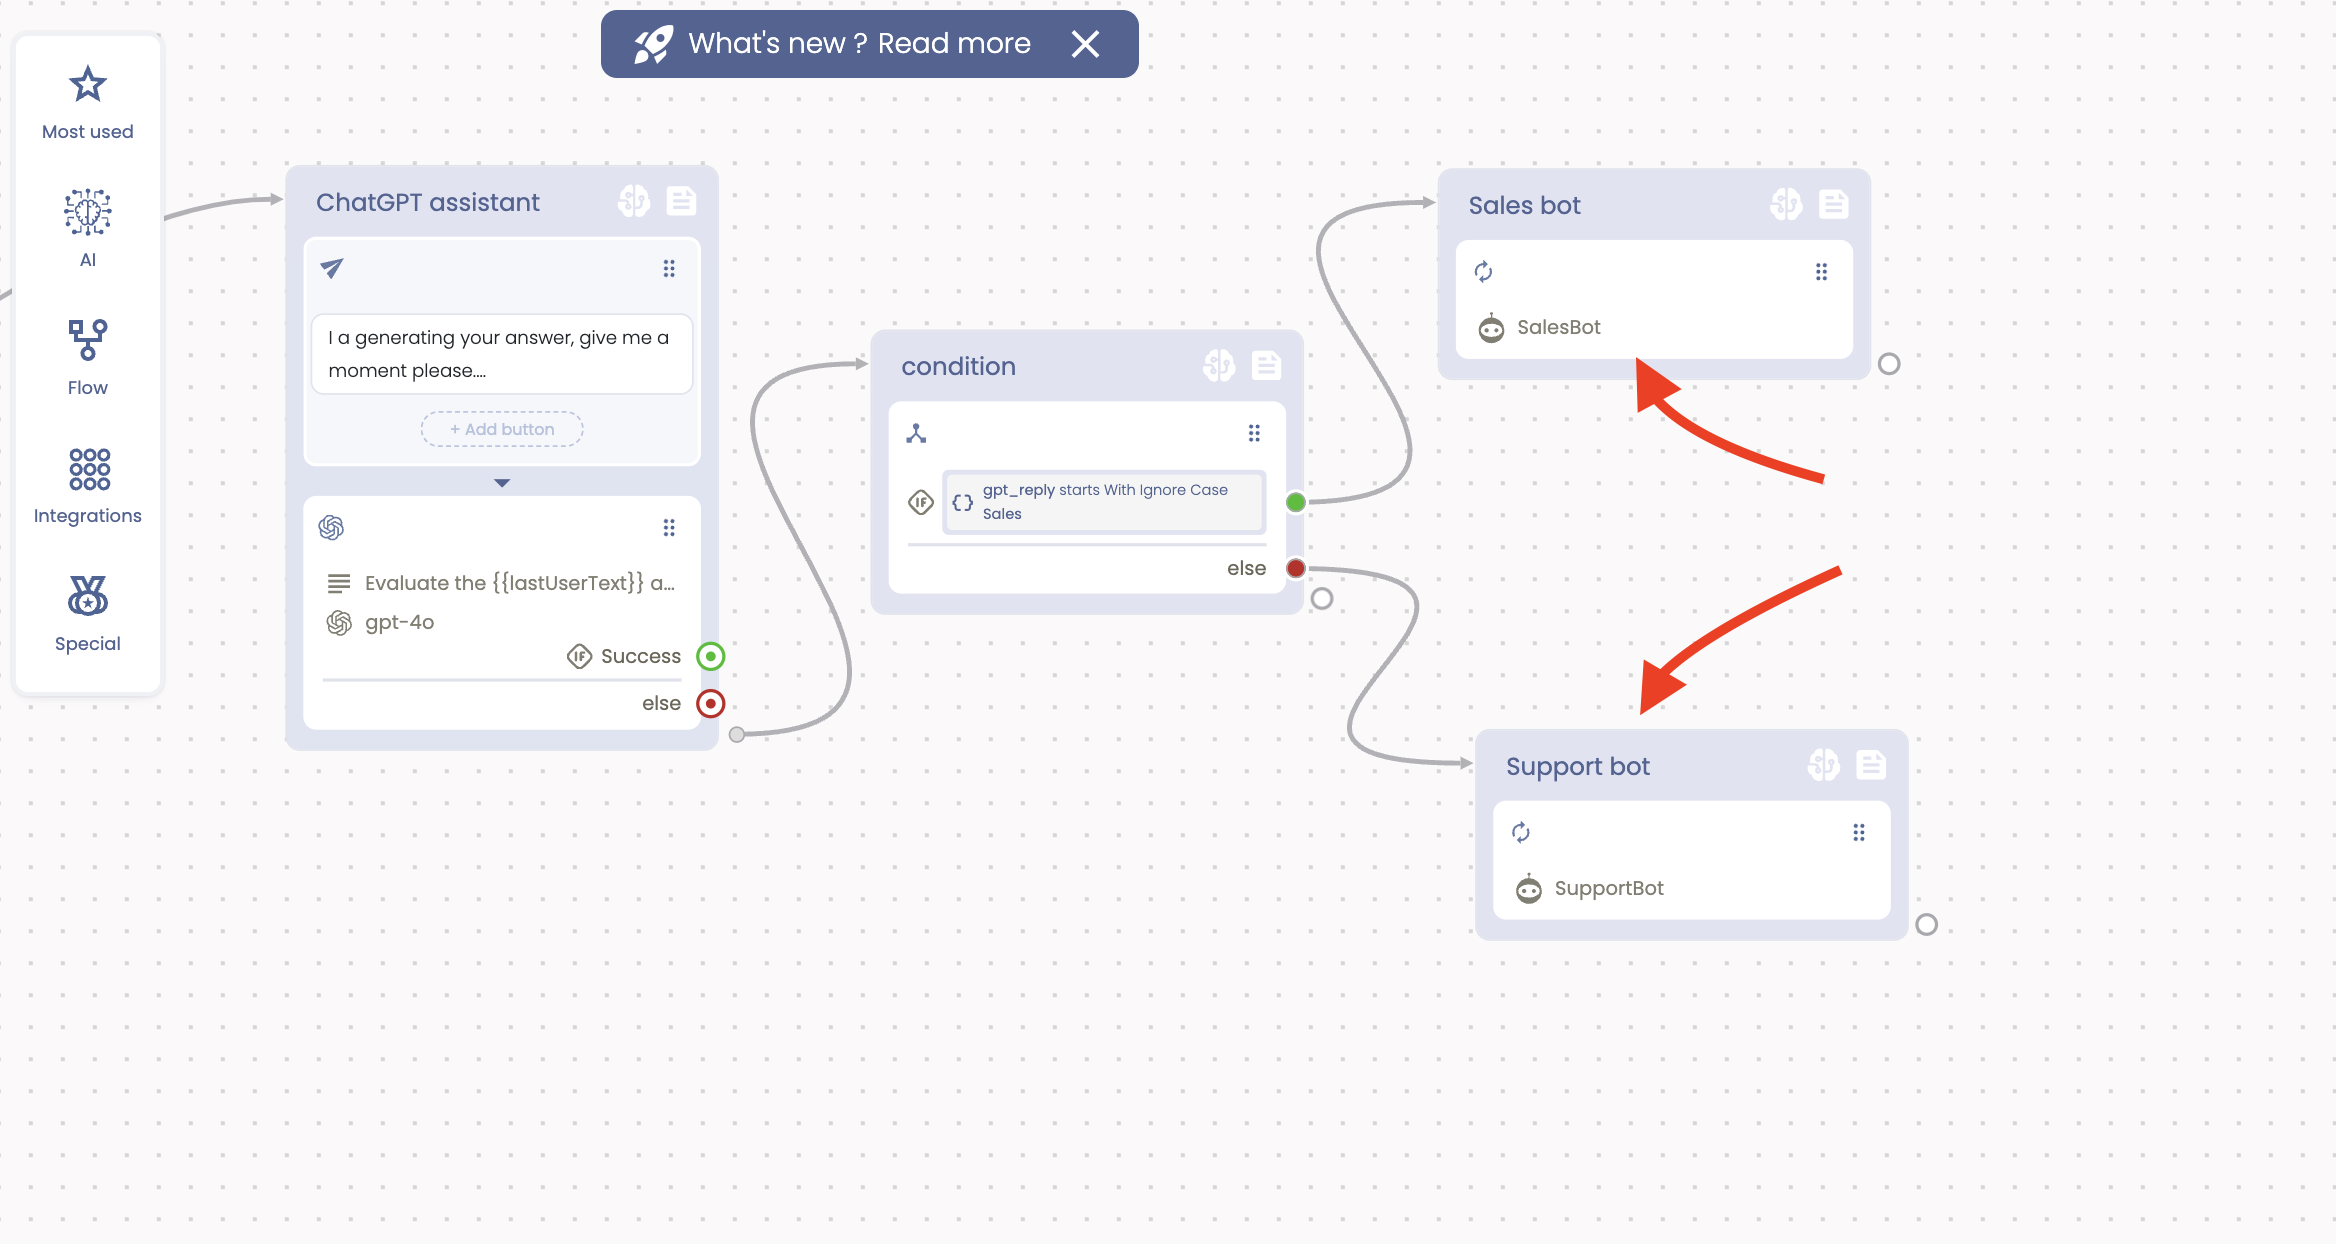
That’s all there is to it. You’ve created a bot that can recall the specific bot needed, whether it’s a support or sales-oriented inquiry based on our example. You can create different bots for different purposes, and there is indeed no limit.
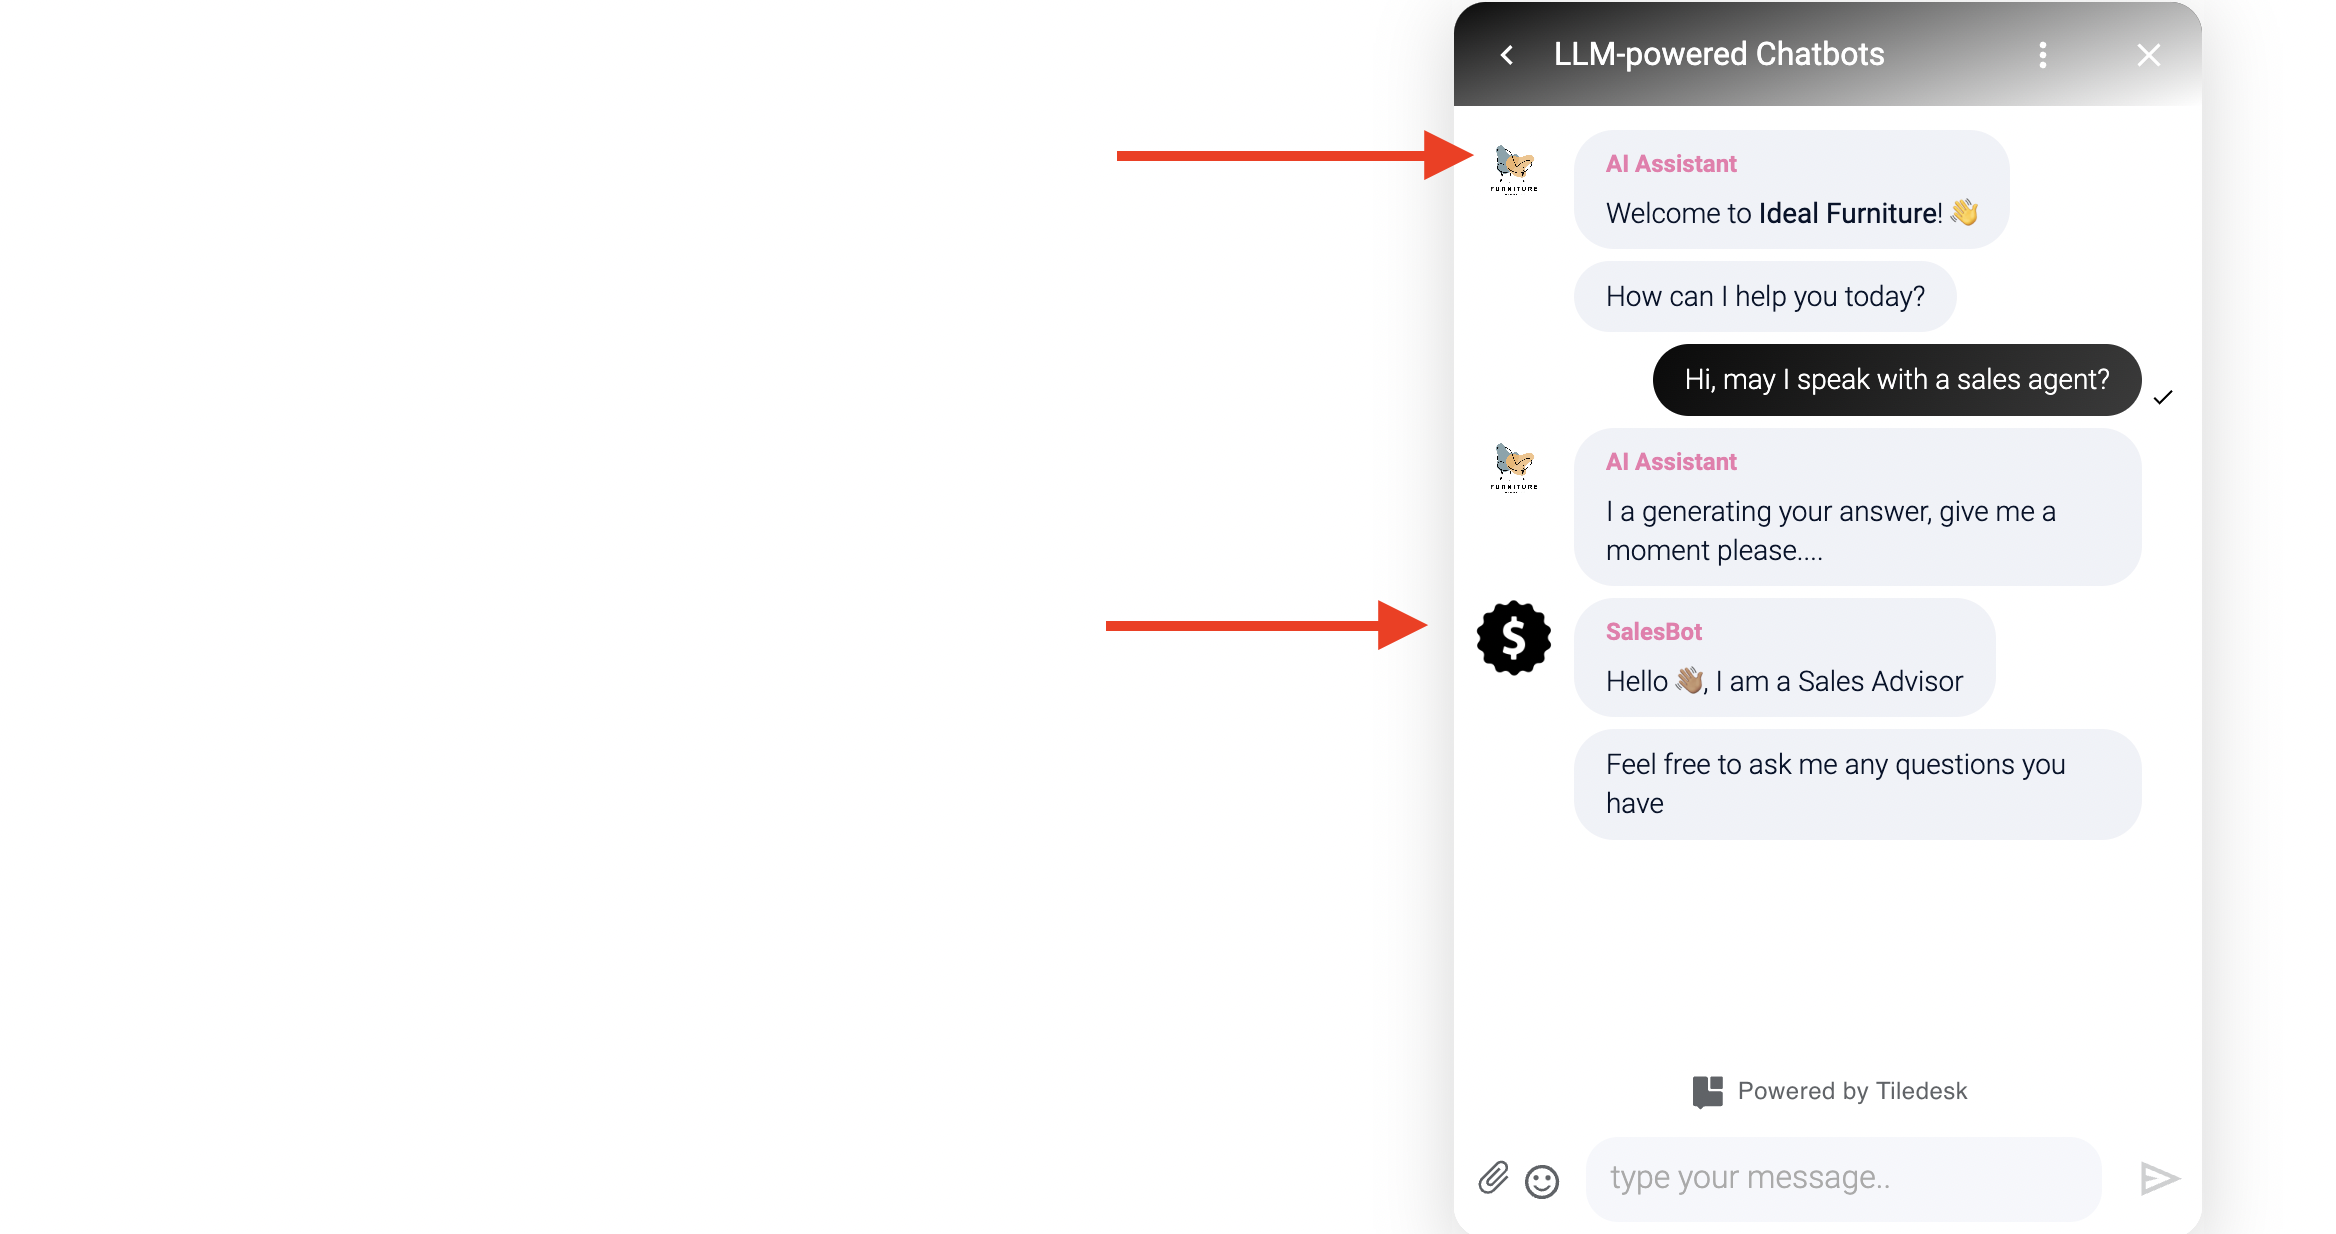
As shown in the image below, when the user inquiry is about Sales, the new bot called “SalesBot” steps in, which can perfectly guide the user.
We hope you find this tutorial helpful.
If you need to know more about chatbot design, please visit our website at www.tiledesk.com.
If you require further assistance, do not hesitate to contact us at support@tiledesk.com
If you haven’t created your AI agent with Tiledesk yet, start here for free.