.png)
Reply Action
-

- Andrea Sponziello
 03 January 2024
The Reply action is the “core” of conversational automations. It helps you to correctly reply to the user creating what, in fact, is the perceived end-user UI on his chat application. The Reply Action can send to the user different pieces of contents, some non-interactive as simple text or images, some others interactive like buttons or carousels. It can also send back to the user multimedia contents like video or (it depends by the channel obviously) entire small web applications contained inside an iframe.
Moreover consider that all the components sent back to the user can adapt automatically to the channel that the user is using to chat. For example, Whatsapp chats only support up to three buttons, but if you send more than three buttons the reply adapts the conversation automatically to show the buttons with a pop-up over menu instead of single buttons. Some other channels don't support buttons at all (i.e. SMS) and the Reply does an additional effort to apply more "energy" in inventing a solution for you, for example auto-creating a number based menu with all the options.
It's time to see how the Reply action works.
Working with replies
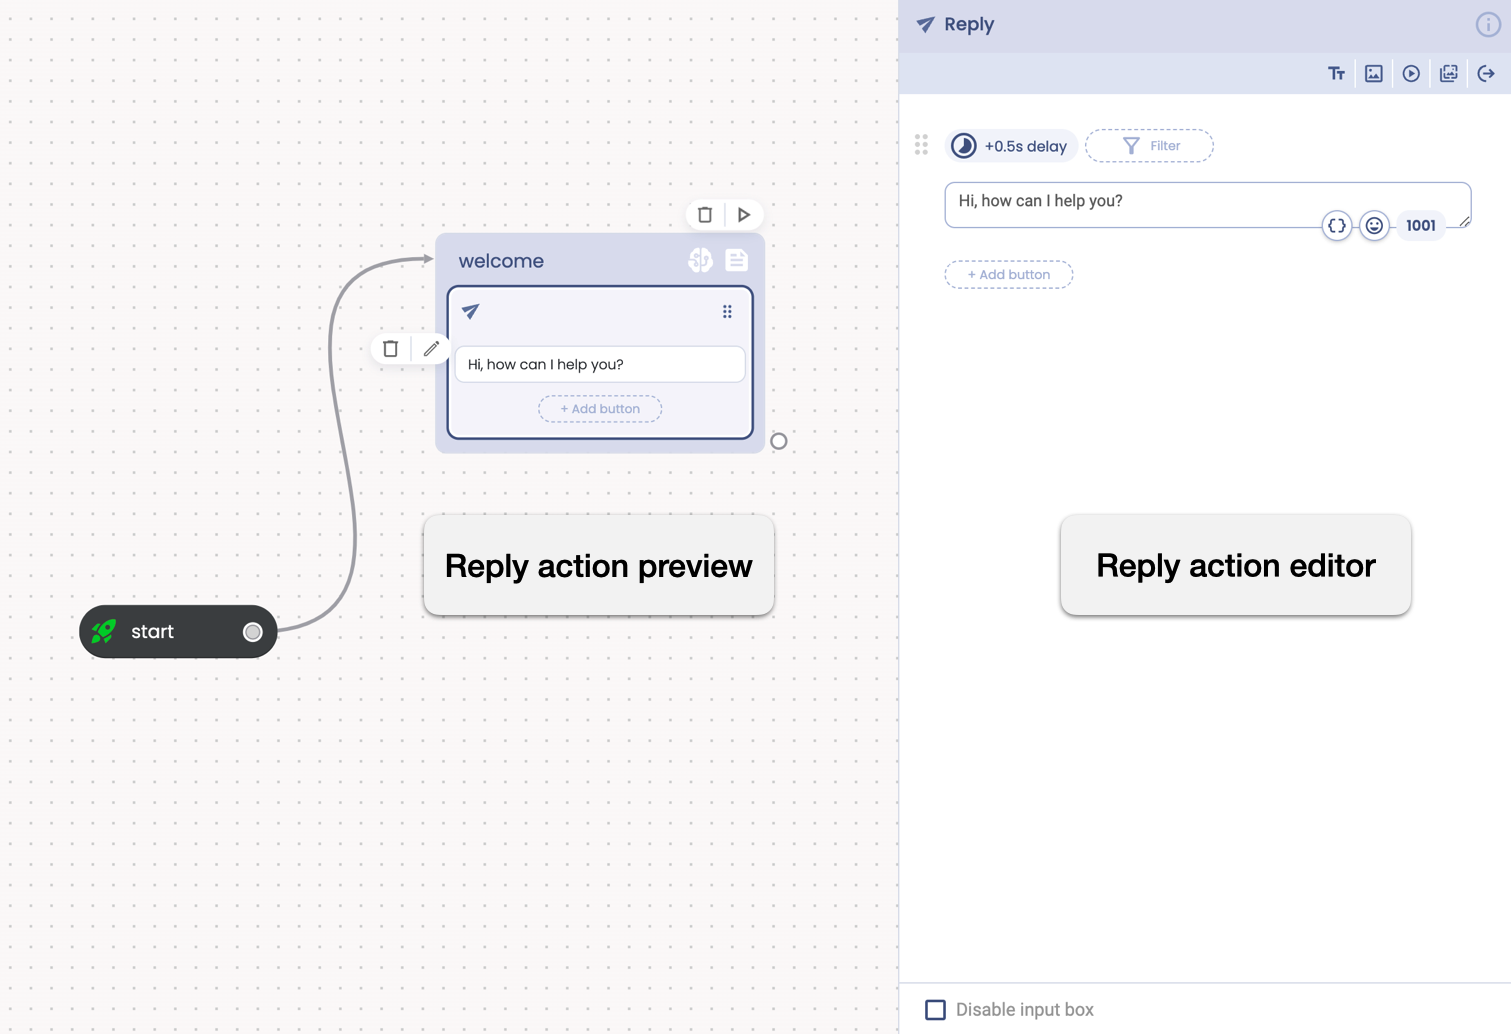
When you work with replies (and other Actions) you will always have two different “views” of the action.
- Action preview
- Action editor
The Action preview represents a syntetic view of the action inside the stage. It is very useful to have a good preview of the action in the stage to a get a good understanding of the whole flow when you have many blocks. Some action previews, like the Reply Action itself, are also interactive. For example you can easily create and connect a button directly from the preview, without the need to open the editor.
The Action Editor represents the detailed view of the action and allows you to edit and set up your actions with all the needed and supported details.
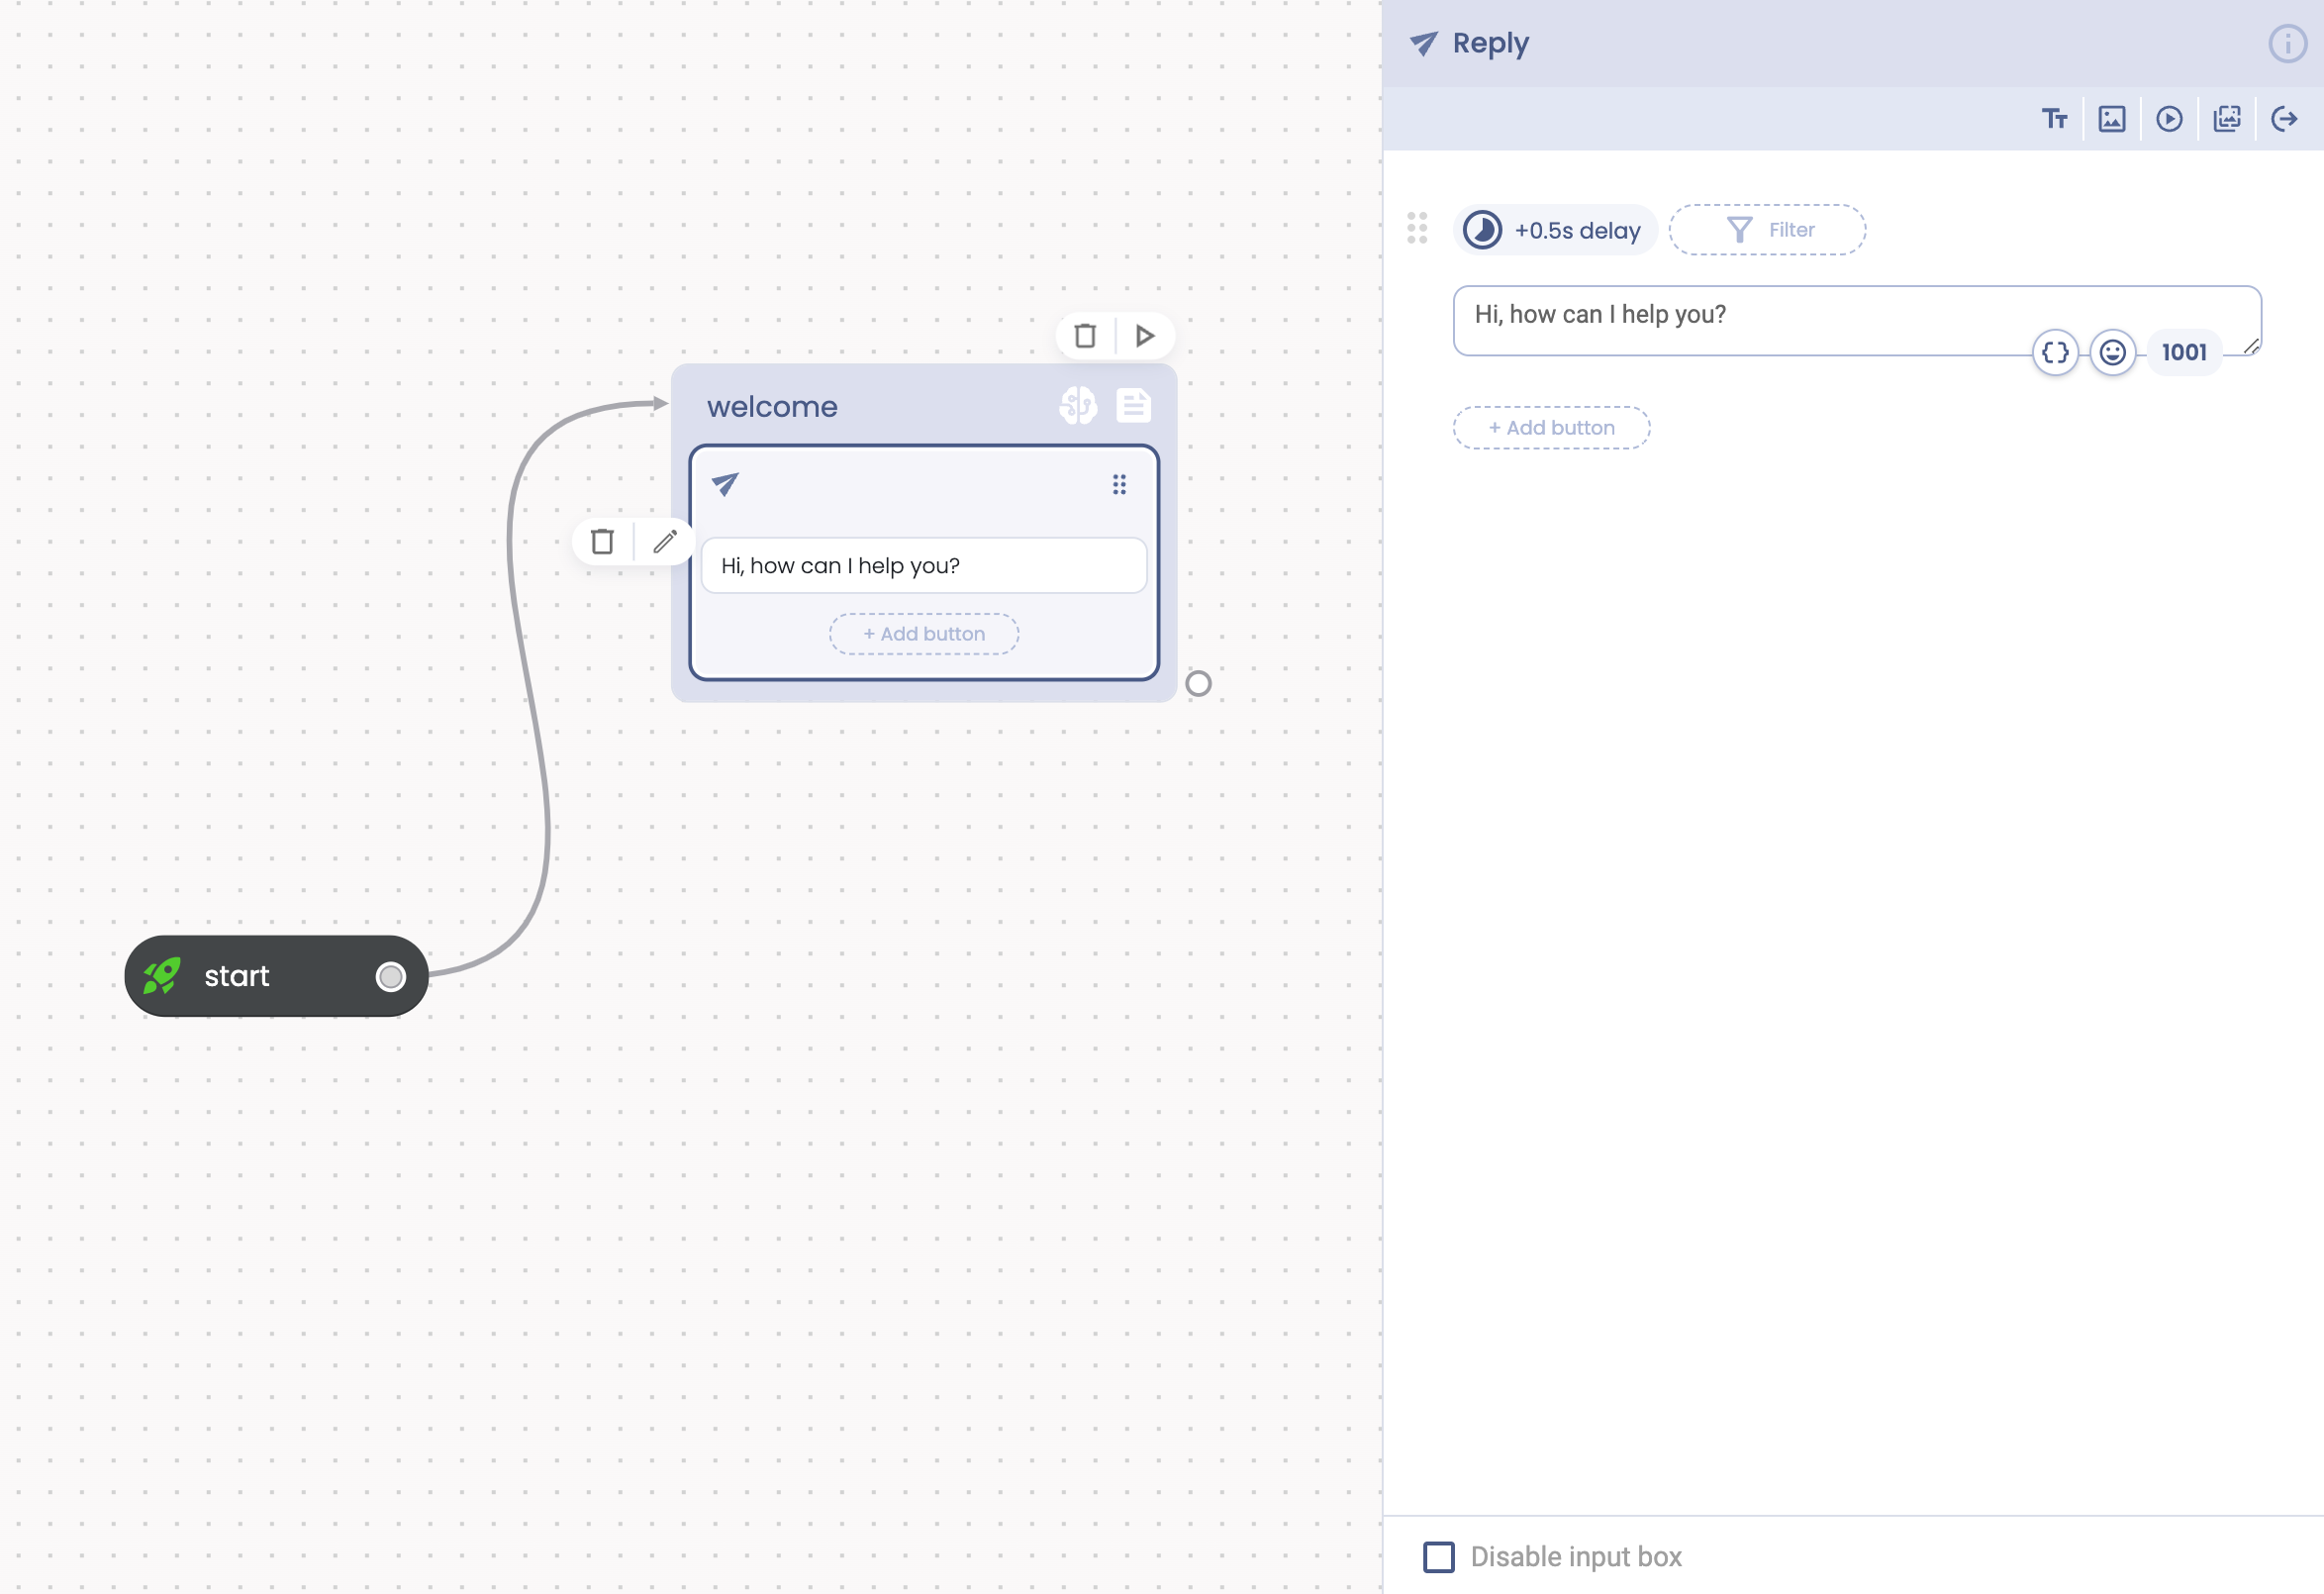
Text replies
If you want to reply simple text the default Reply dragged on the stage is ready for the task. You only have to fill out the shown text field with the desired phrase:
Let's try. Test it!
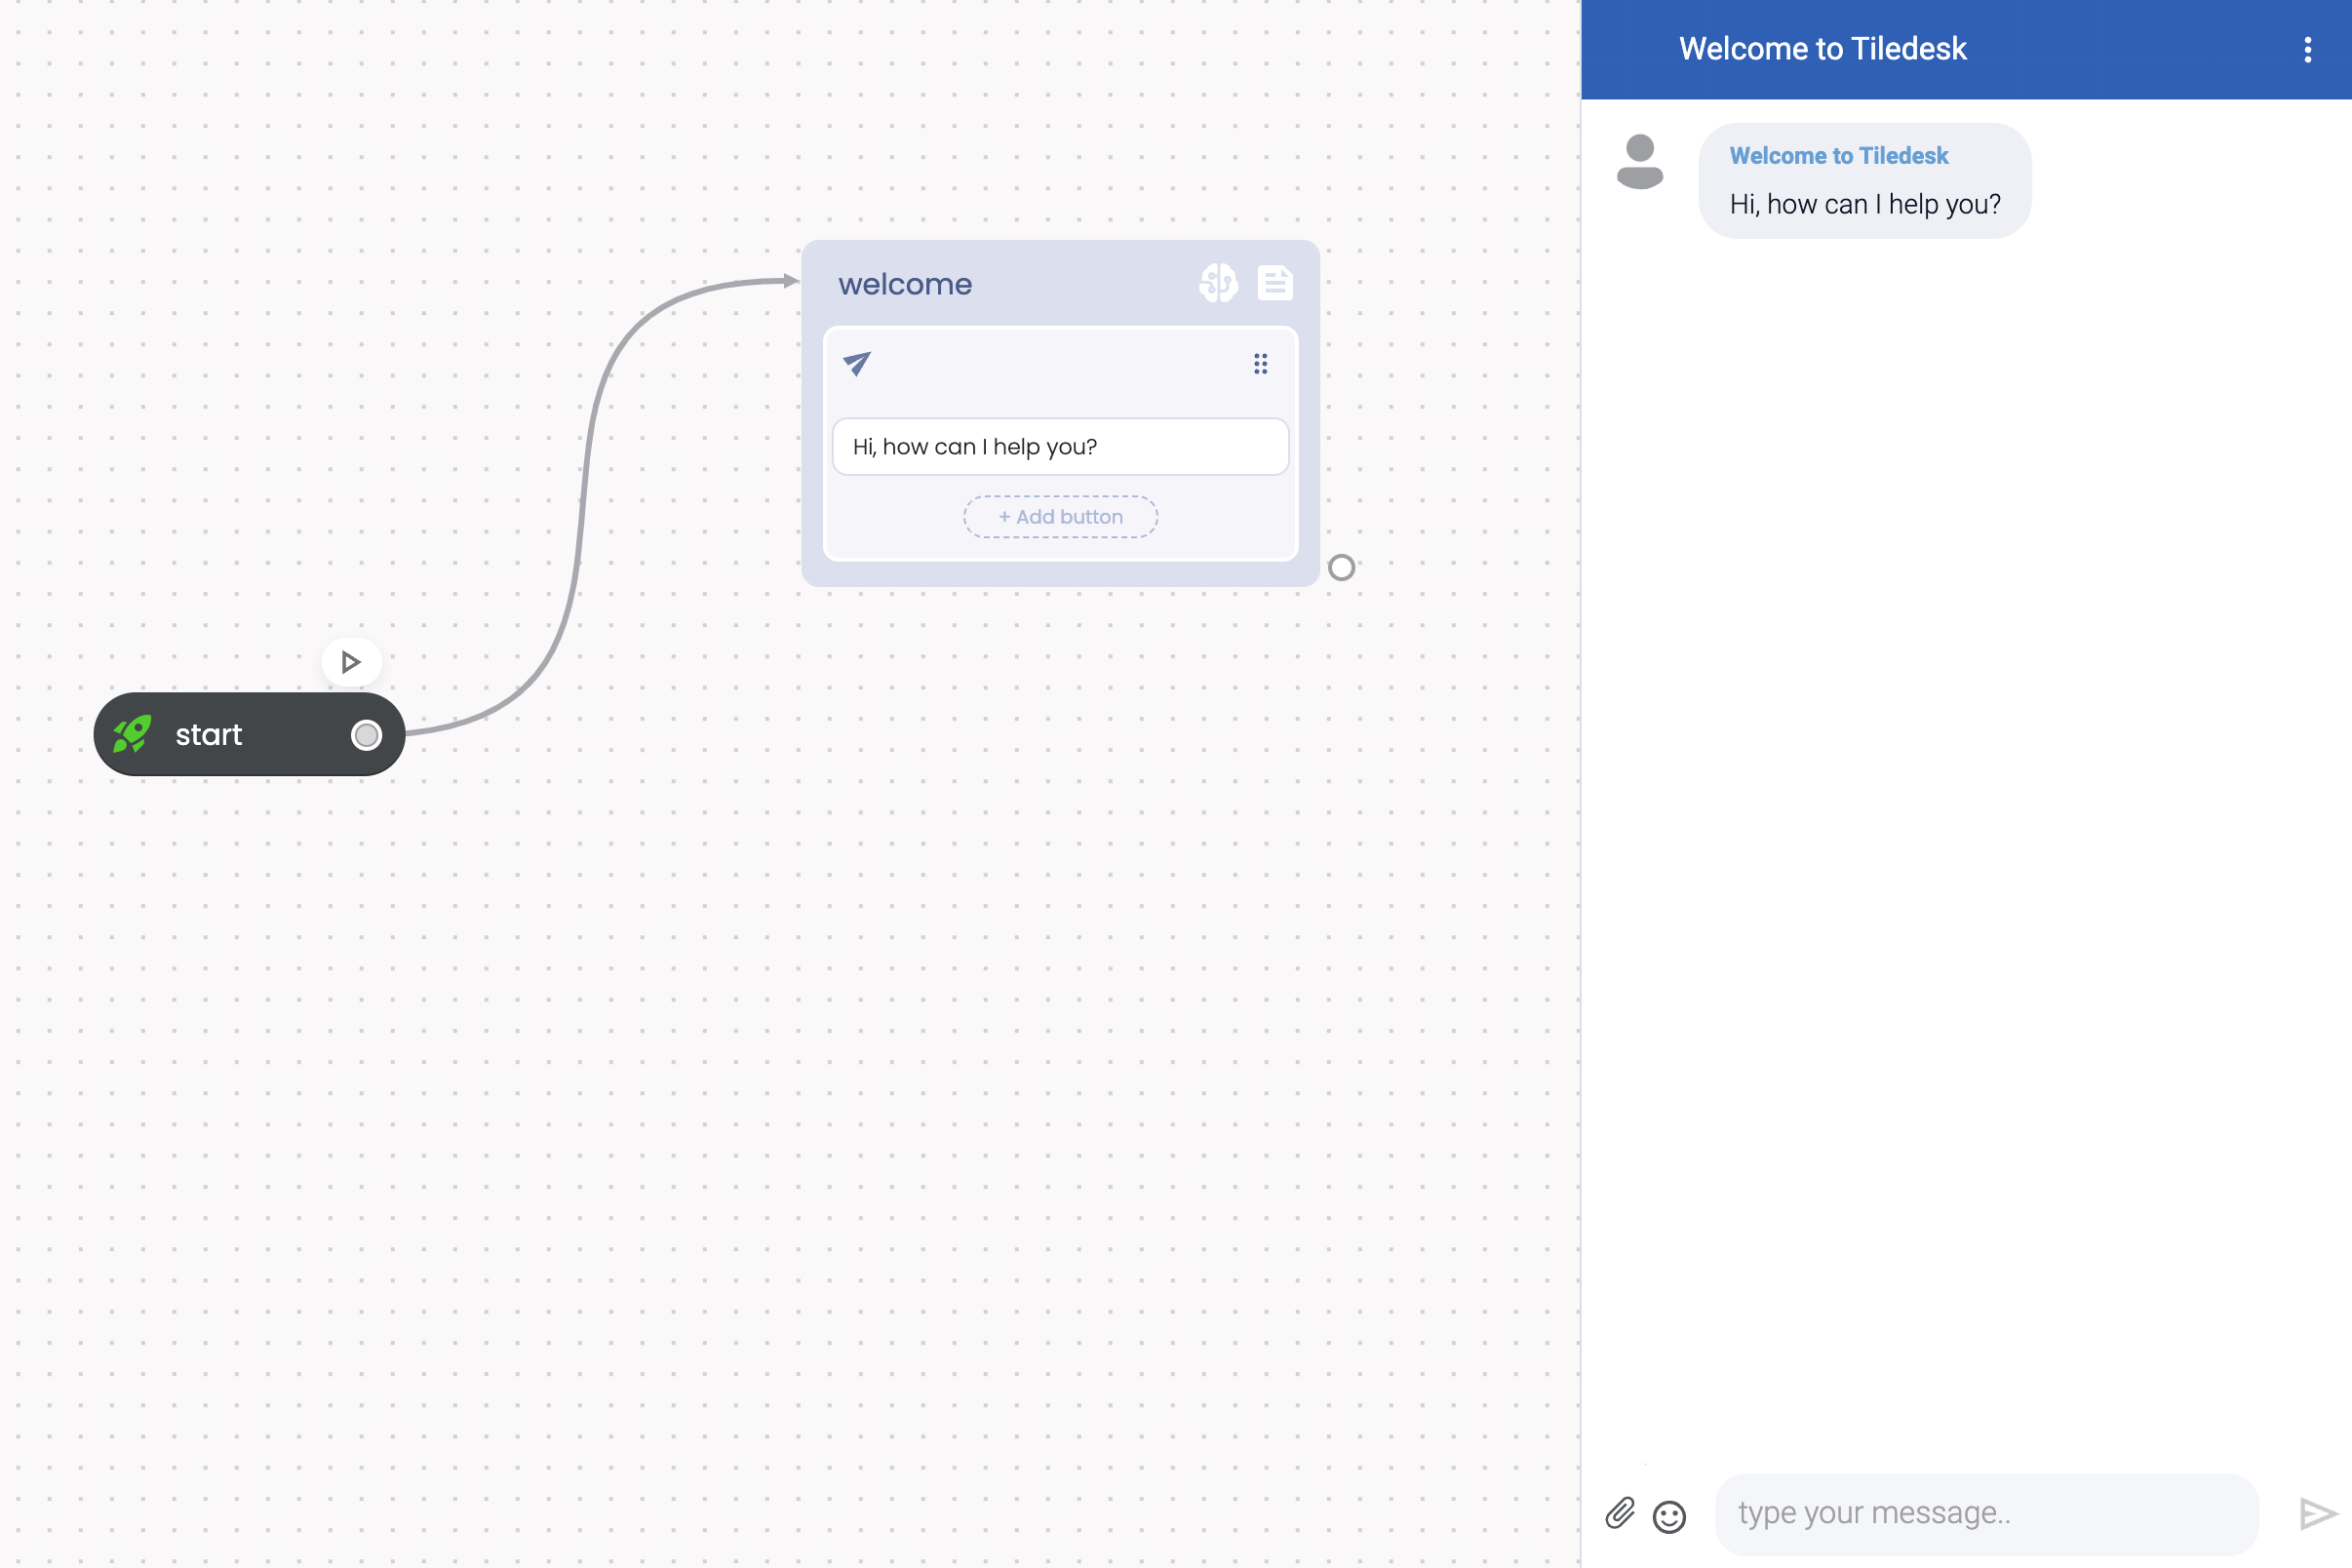
We got our text as the welcome message.
Images
Adding an image to your reply is very easy too. Simply use the toolbar and click on the image icon. An image component will be appear in the reply. You can now set up your image uploading it directly from your device.
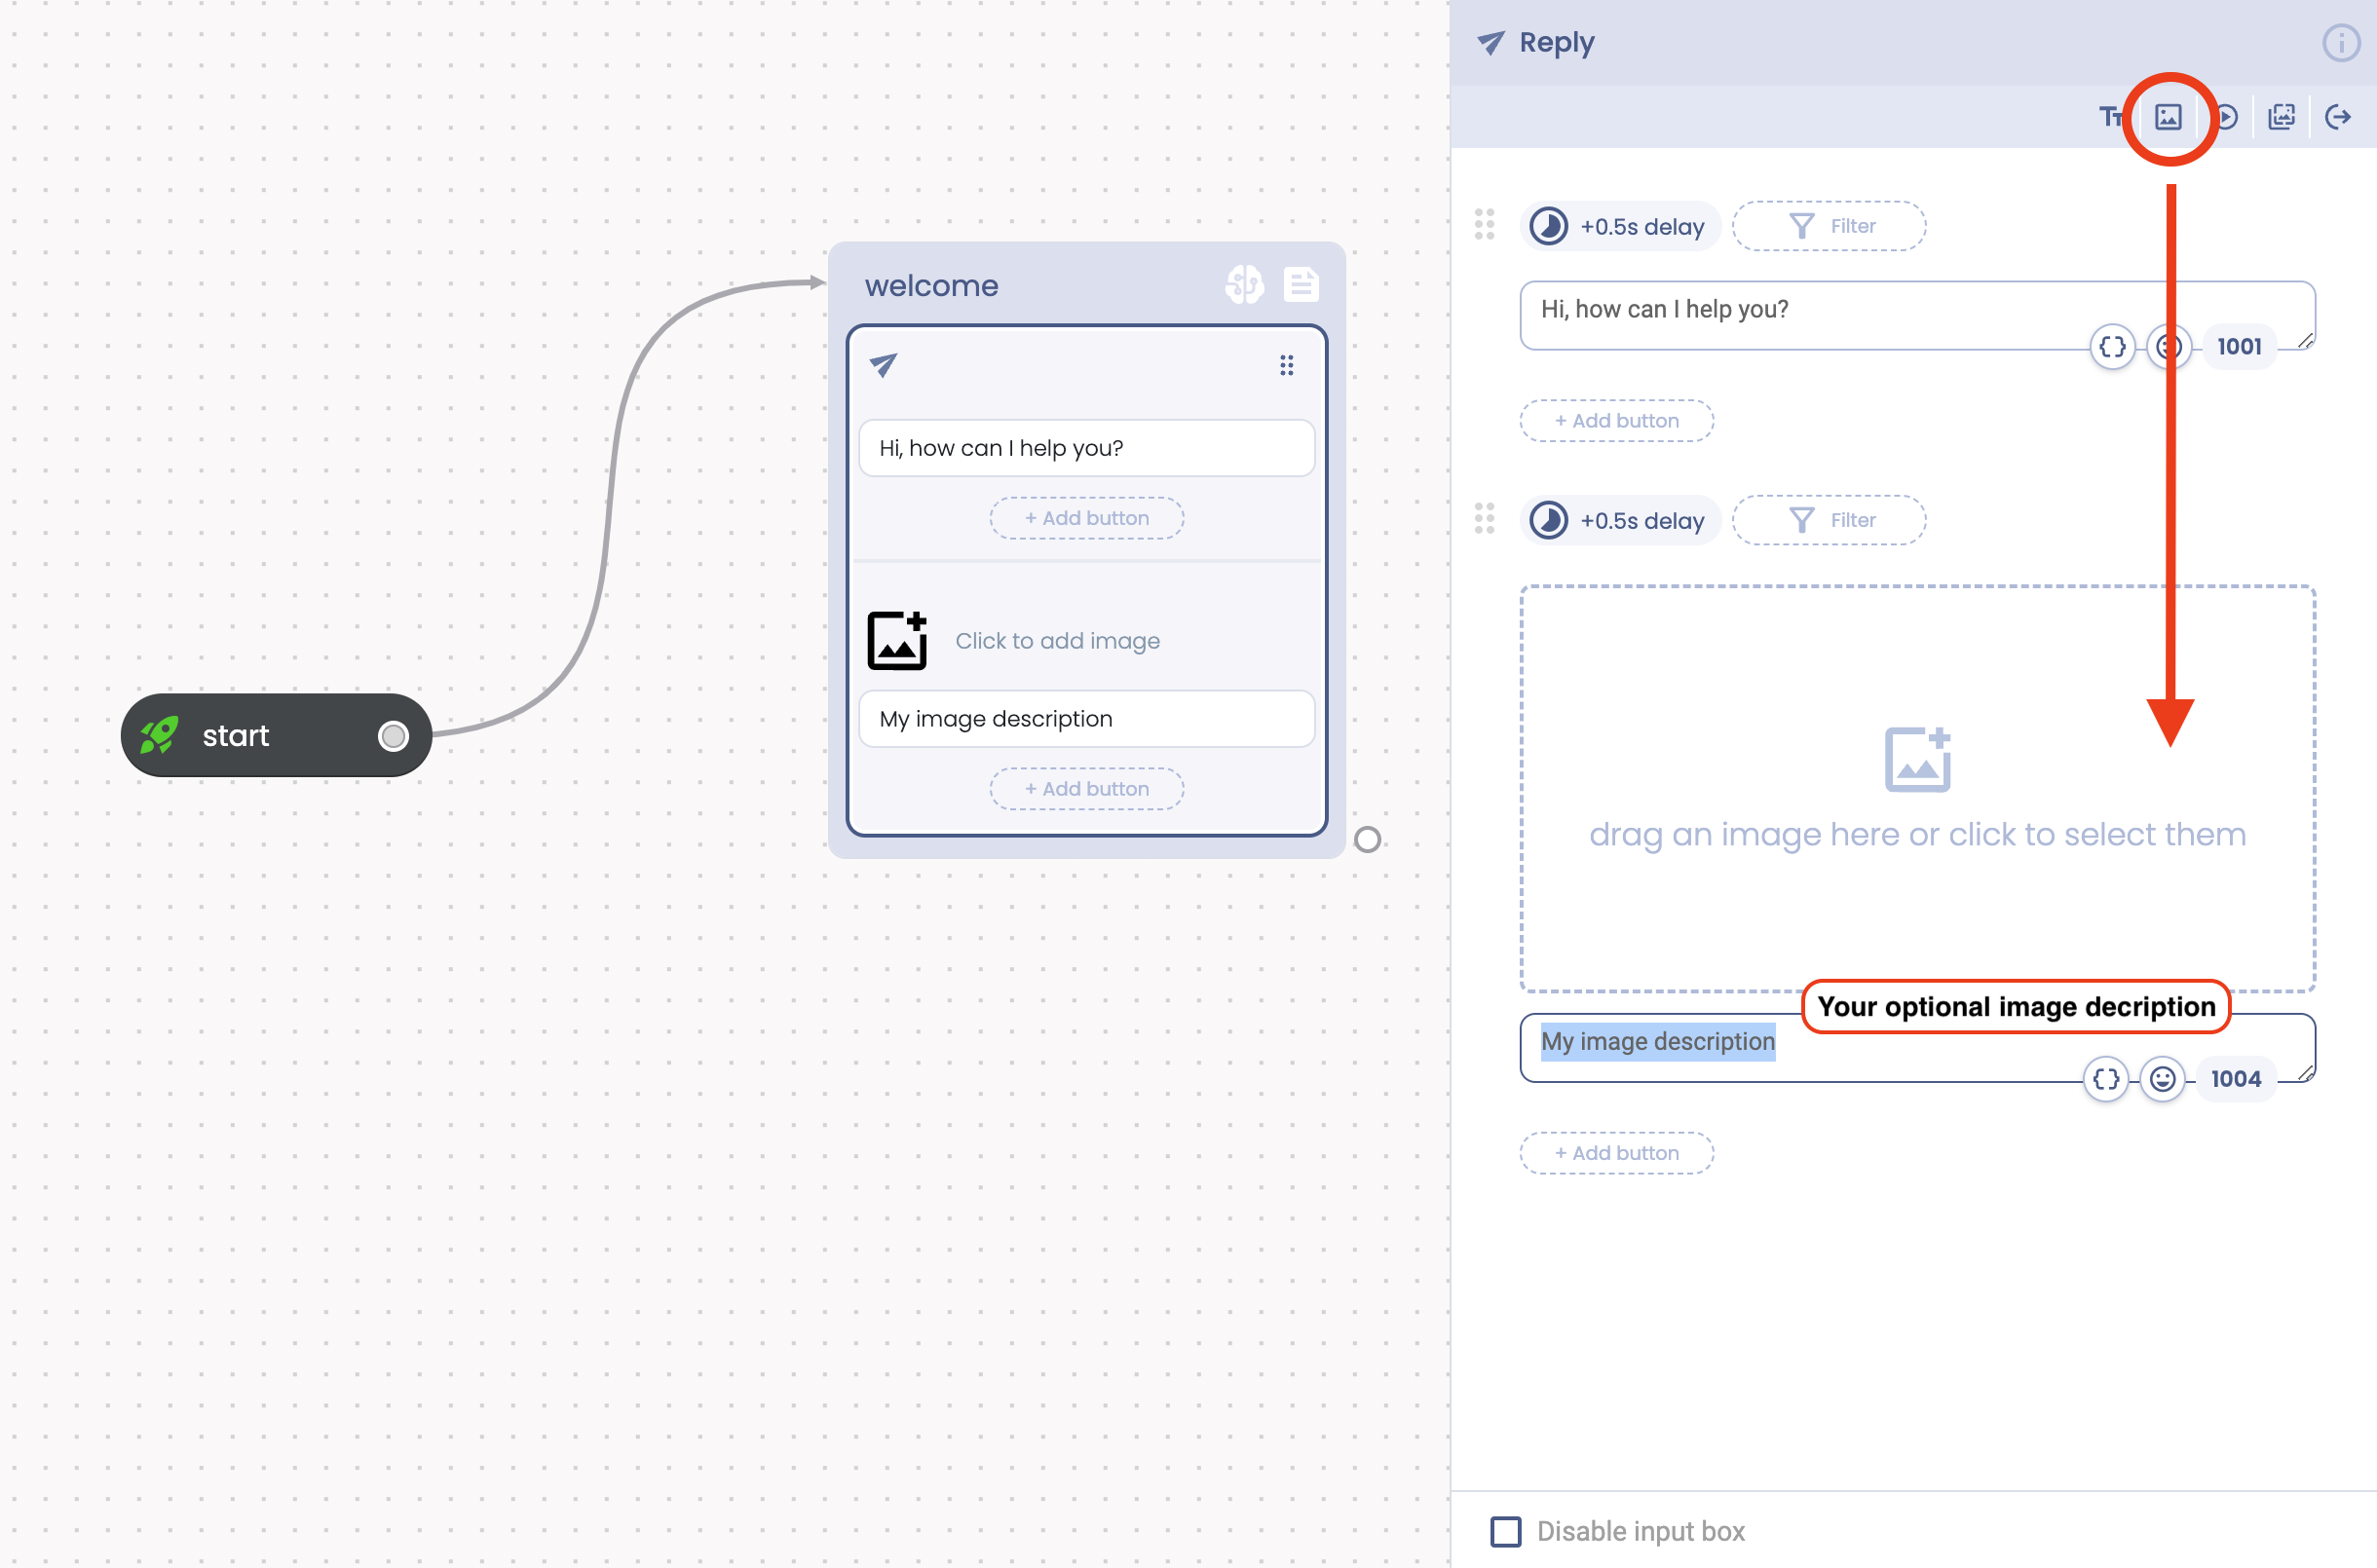
Setup your image.
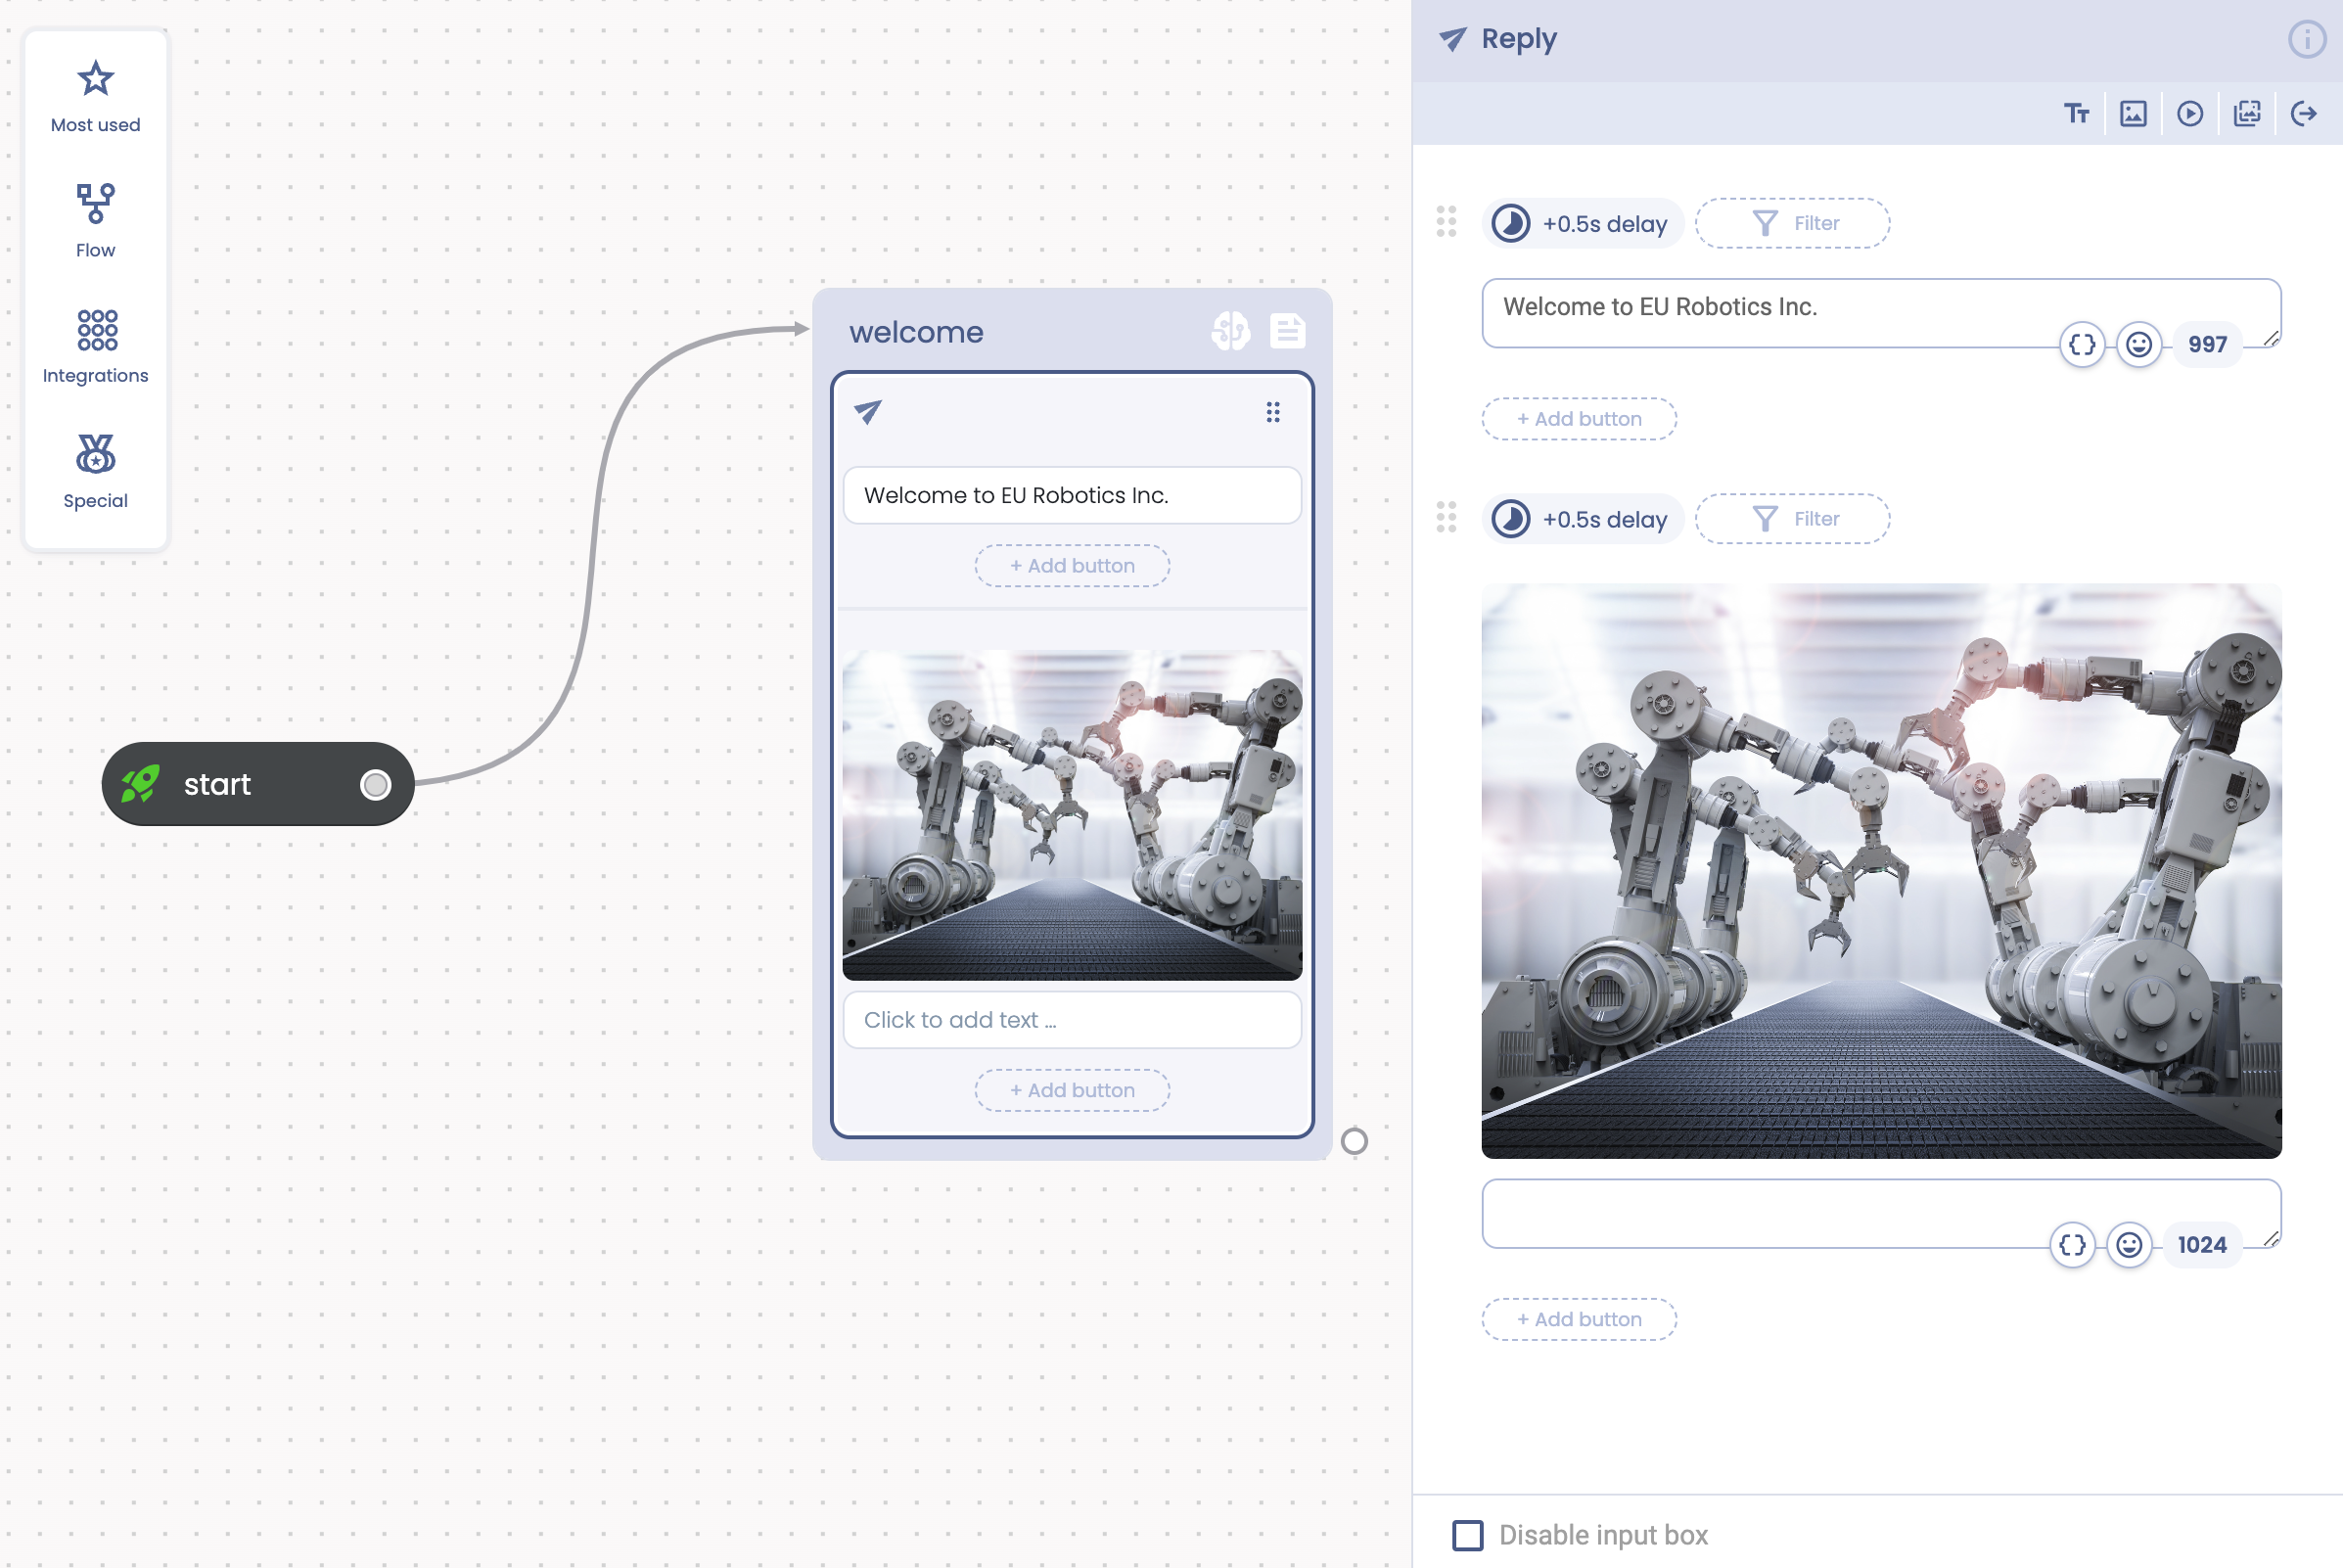
The test it again. Your image displays in the welcome message.
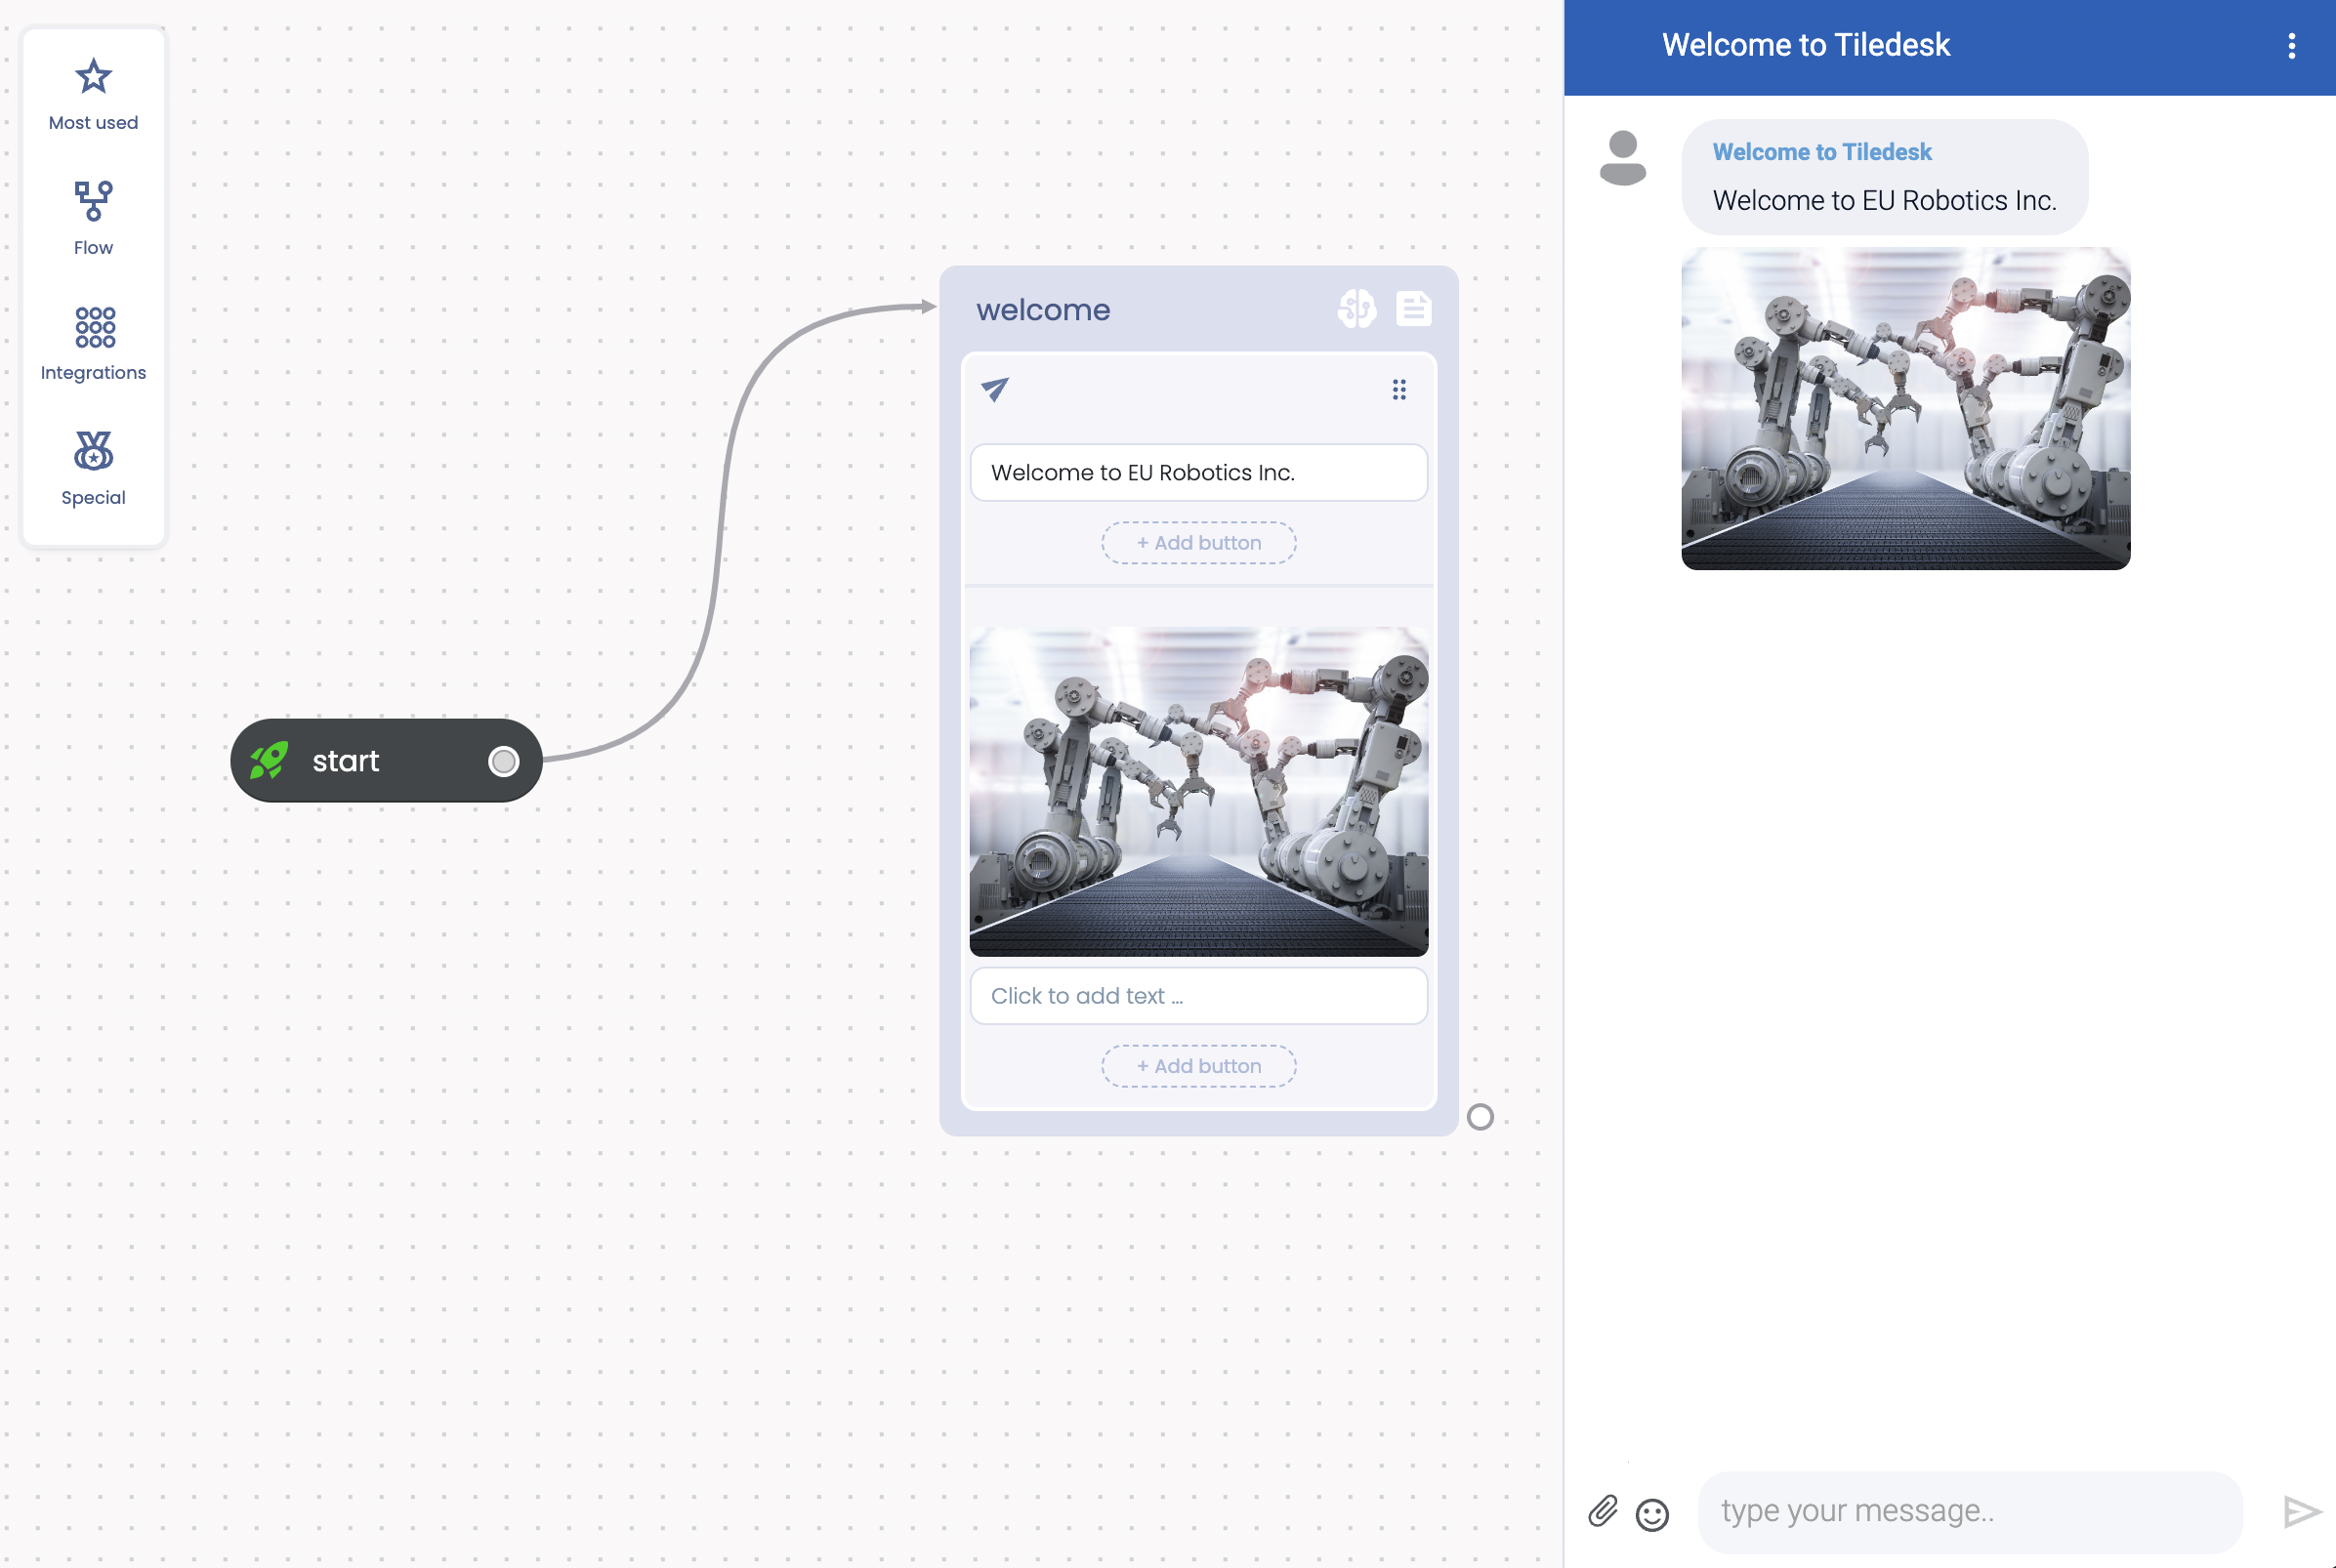
We have our image following to our text.
Buttons
Buttons, also known as Quick replies, are a main element in user interaction. They provide the user a quick way to reply to your chatbot. You can add one or more buttons attached to some reply elements (text, images, frames etc.).
Buttons can three main actions in Tiledesk:
- Move to another block
- Send a predefined text
- A clickable web url shaped like a button
You can add a button in two main ways.
- Adding a button from the Reply action editor
- Adding a button from the preview
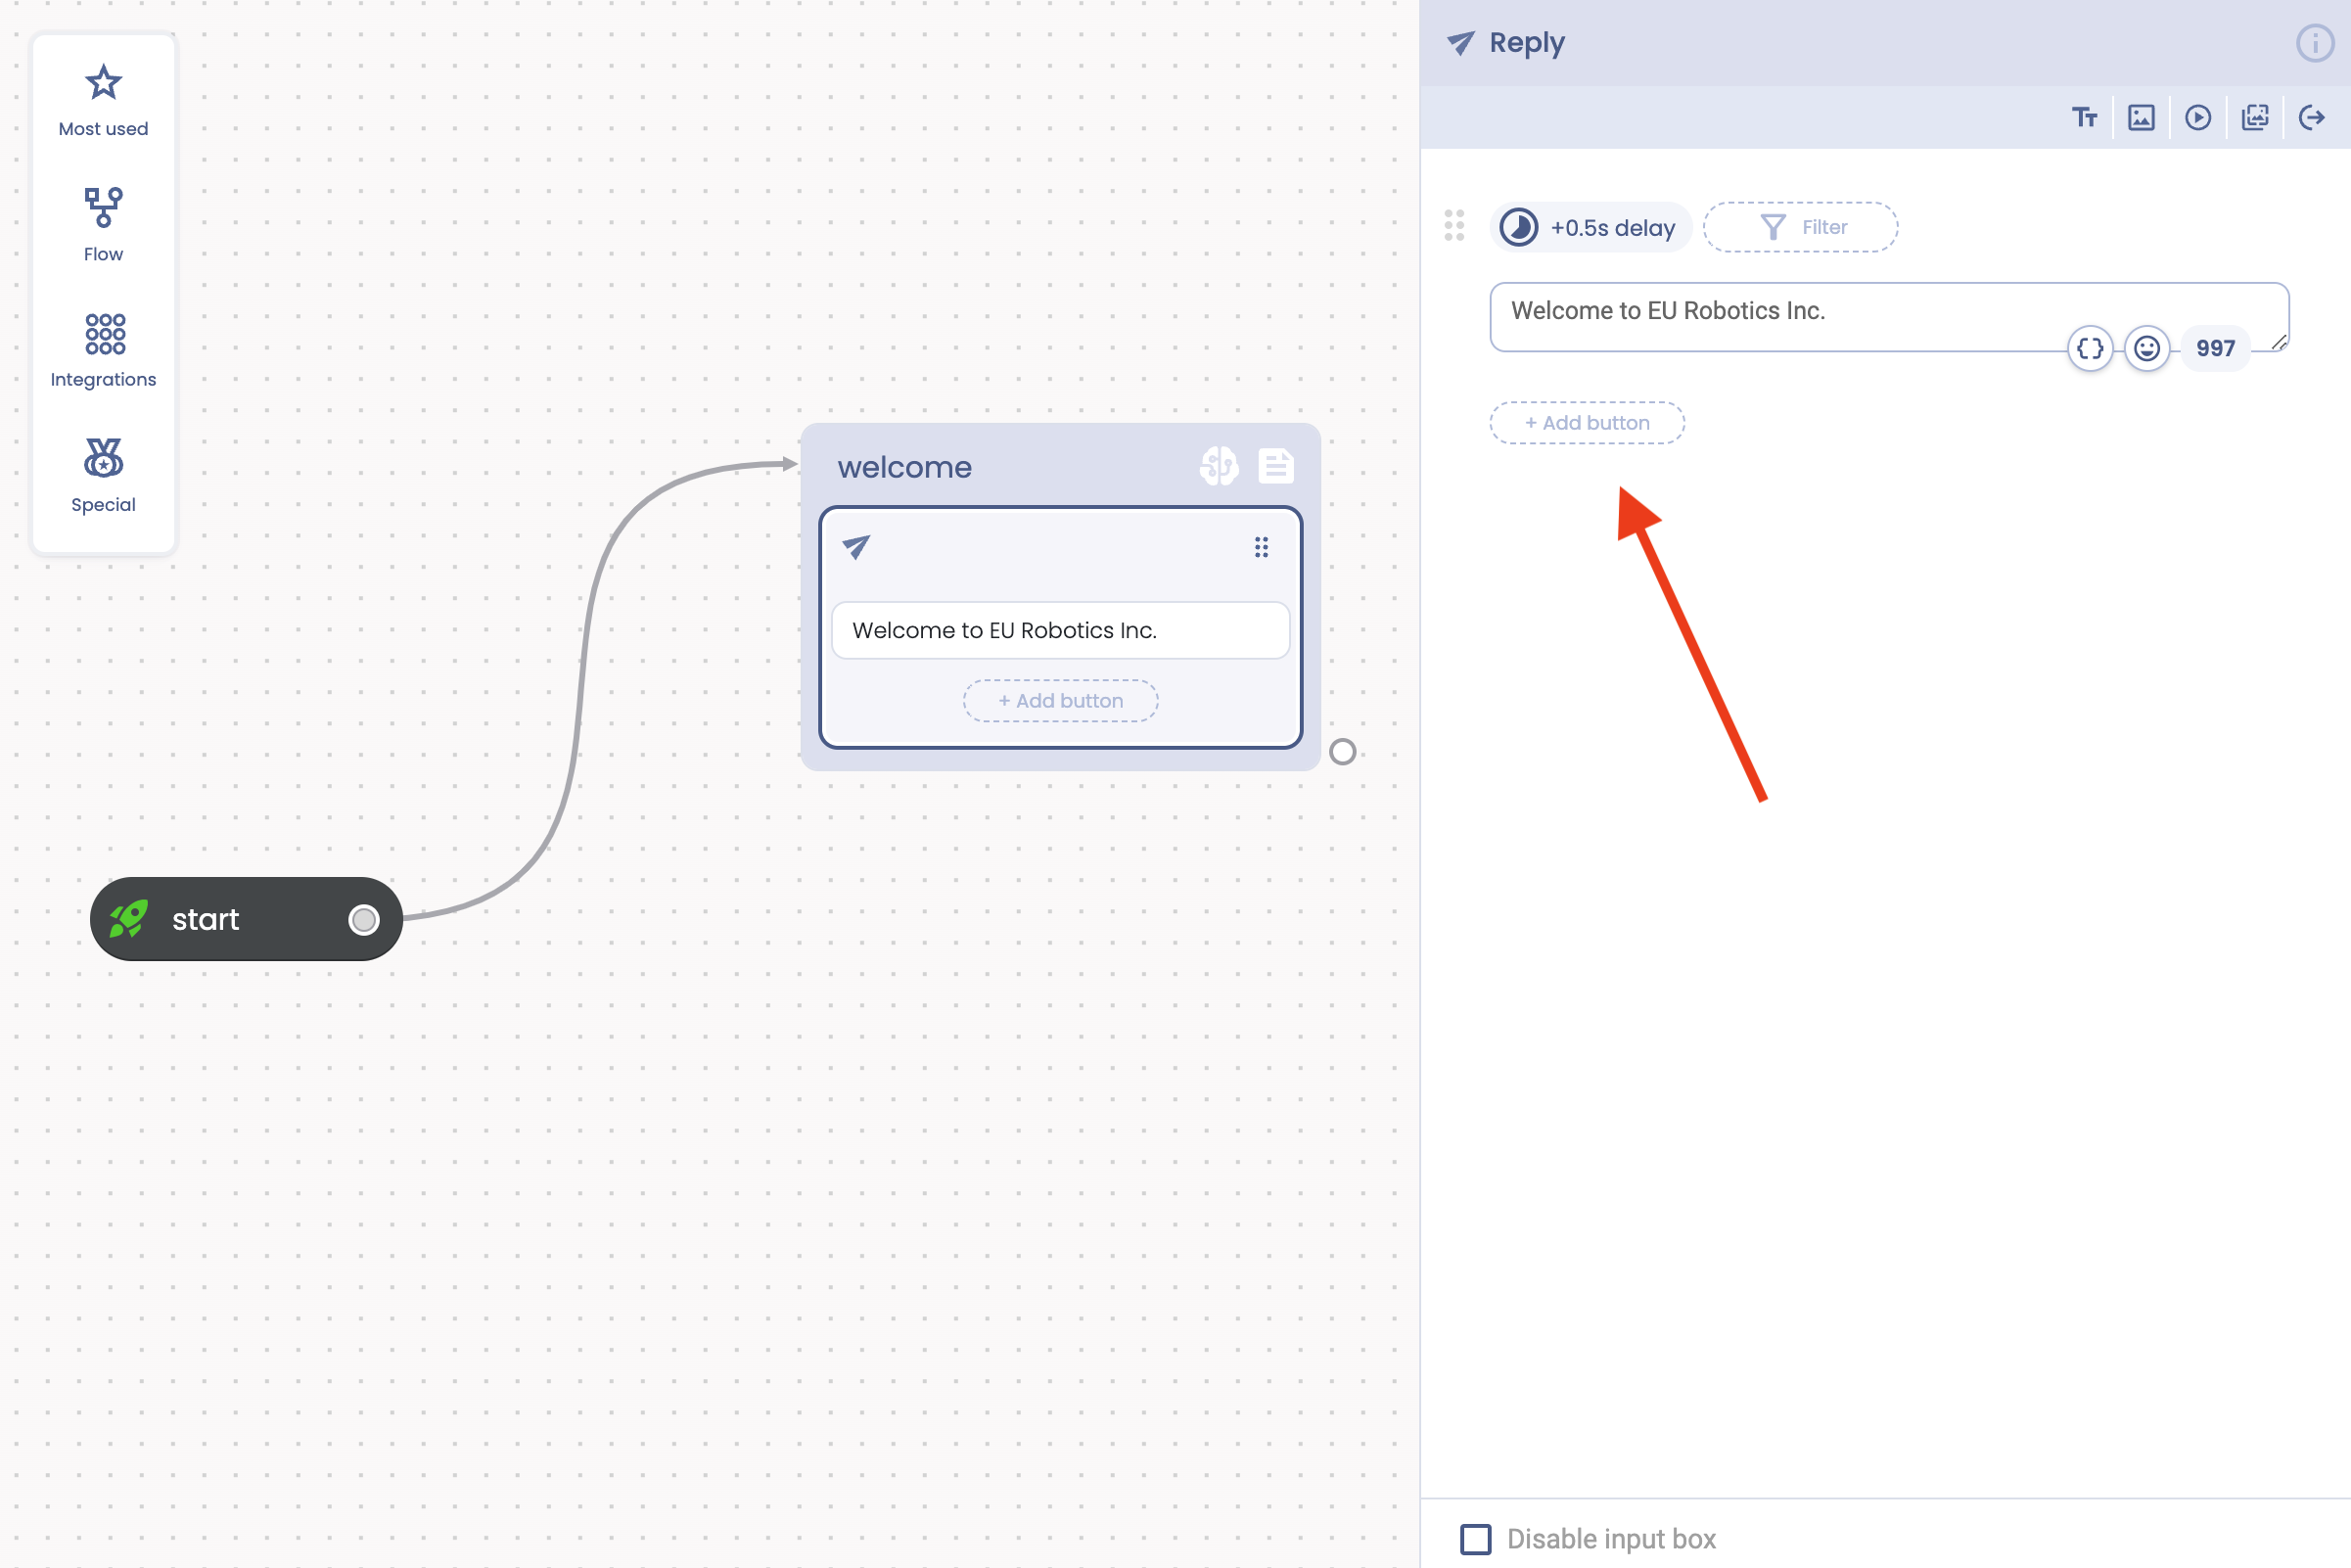
Adding a button from the Reply action editor
When in the editor, you can easily add a button pressing the + Add button placeholder below the selected element. In this example we'll add a button attached to the welcome message.
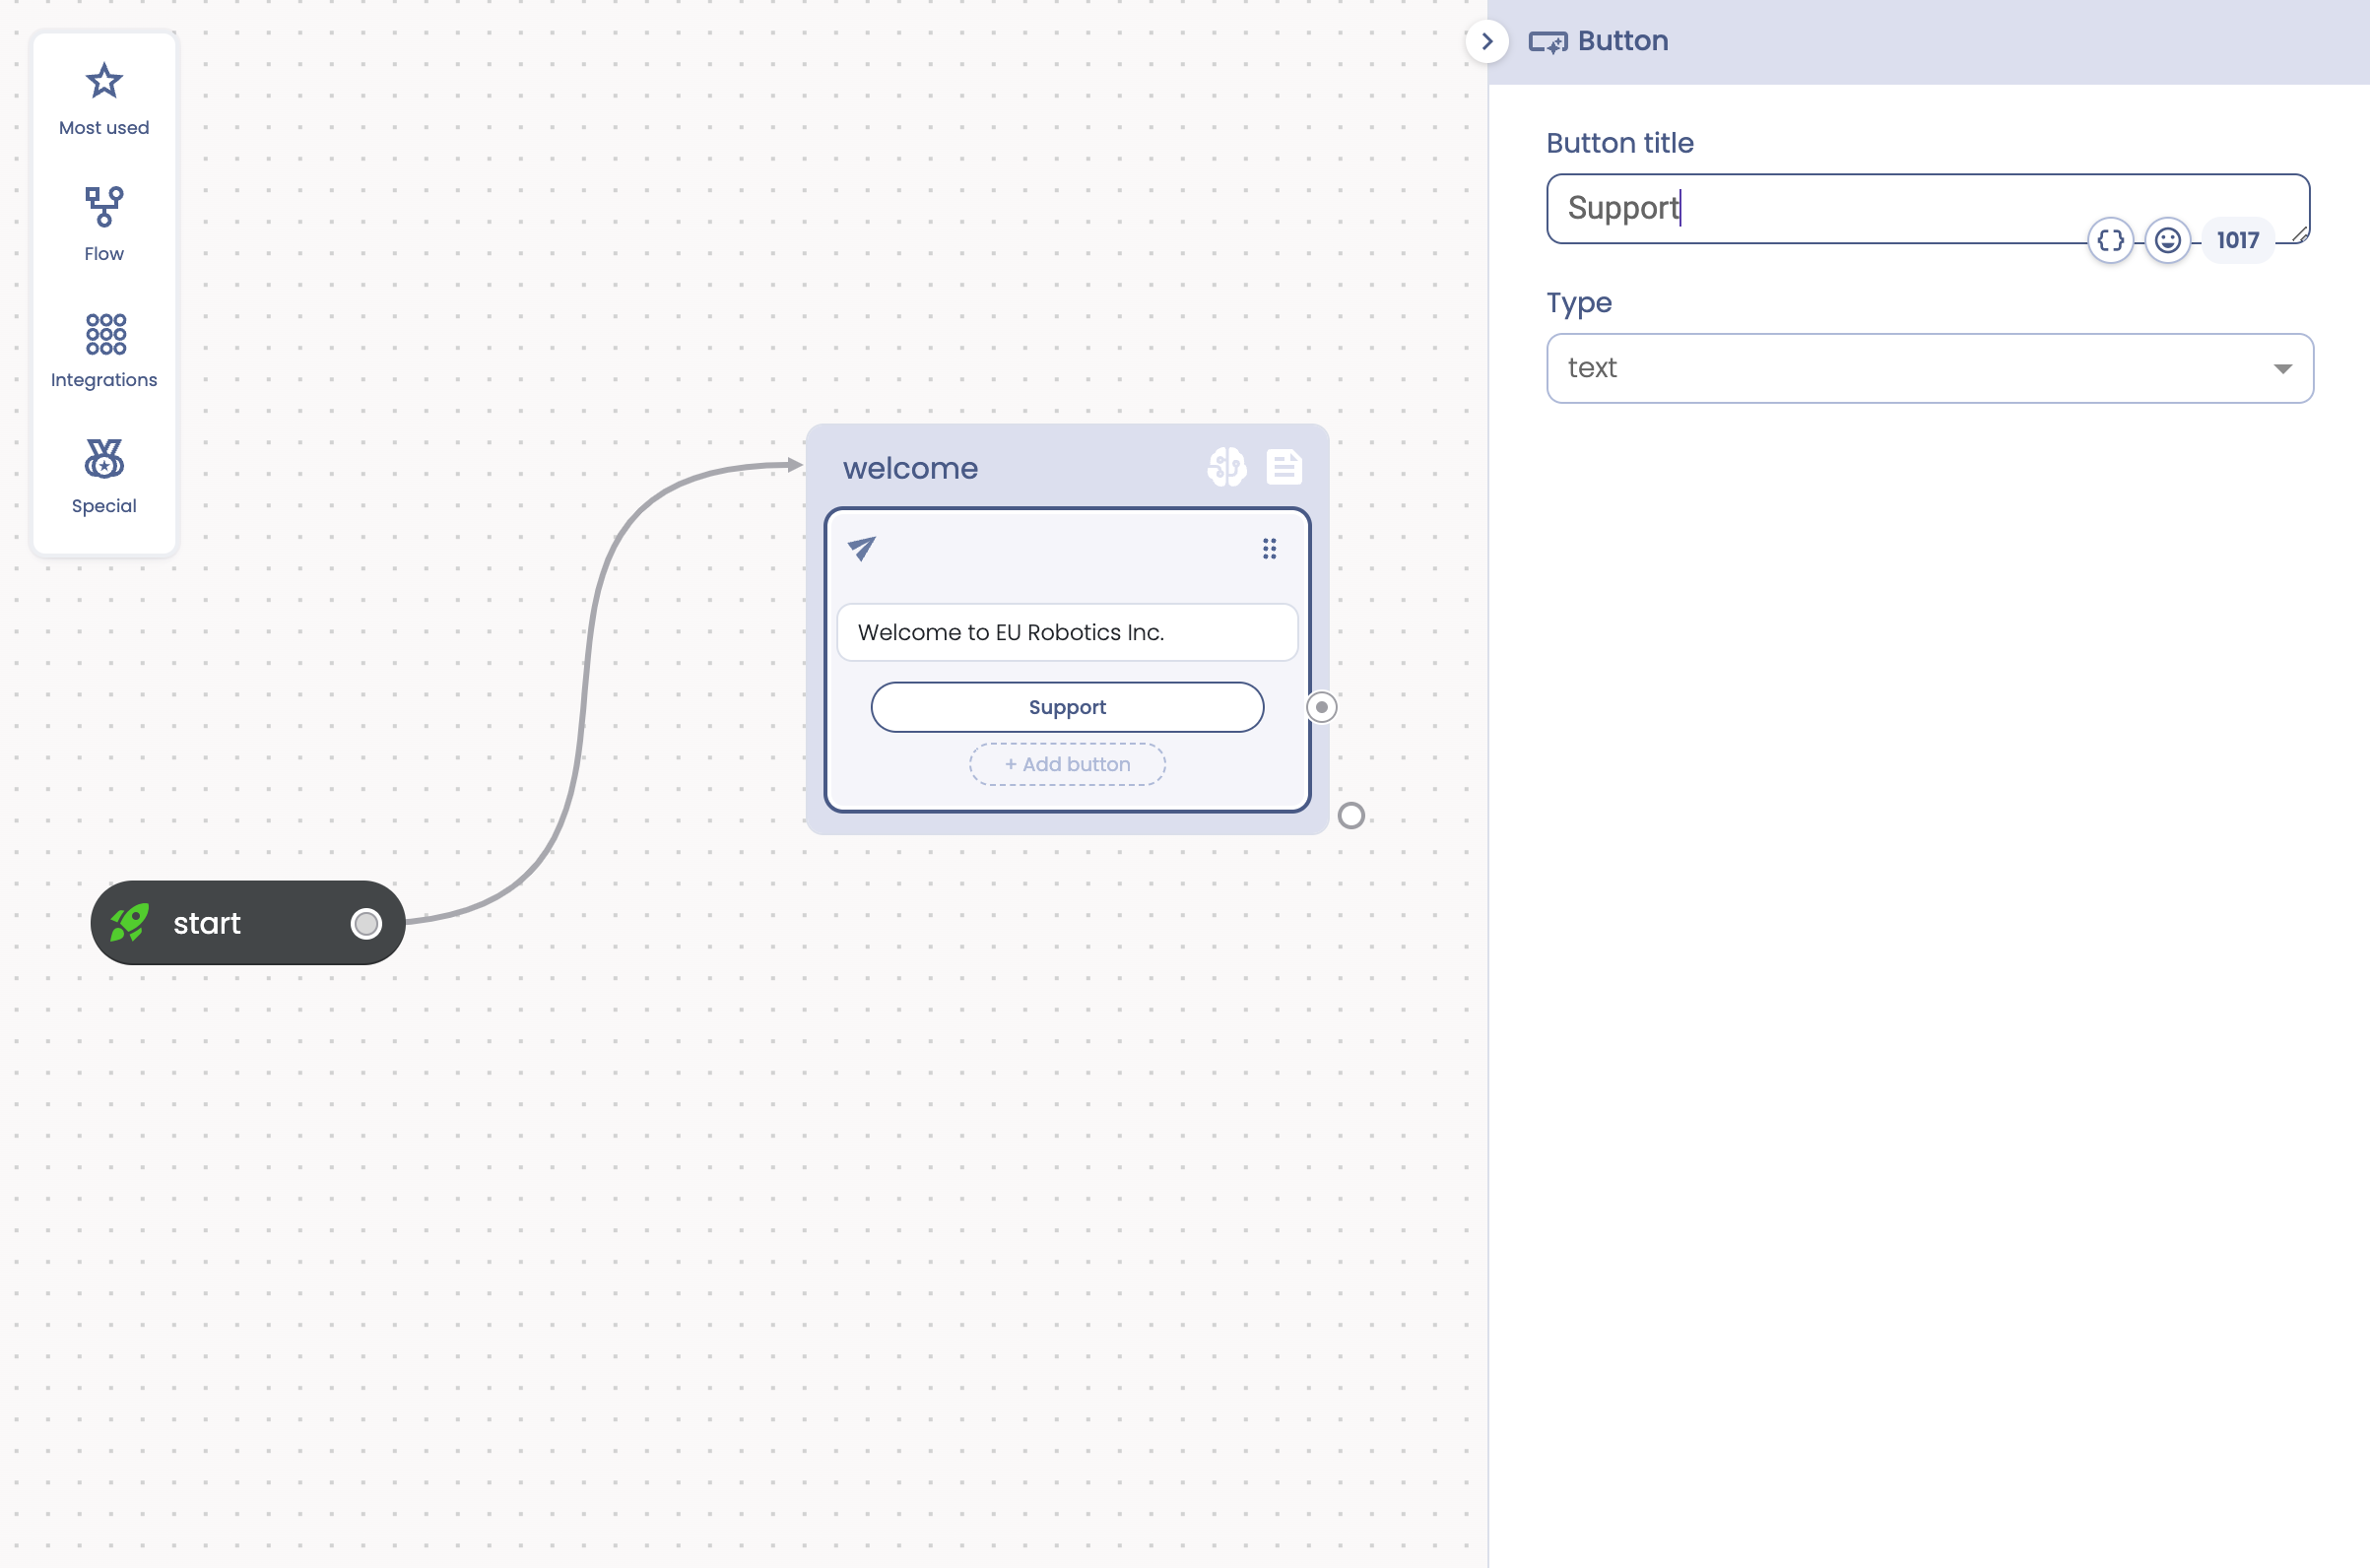
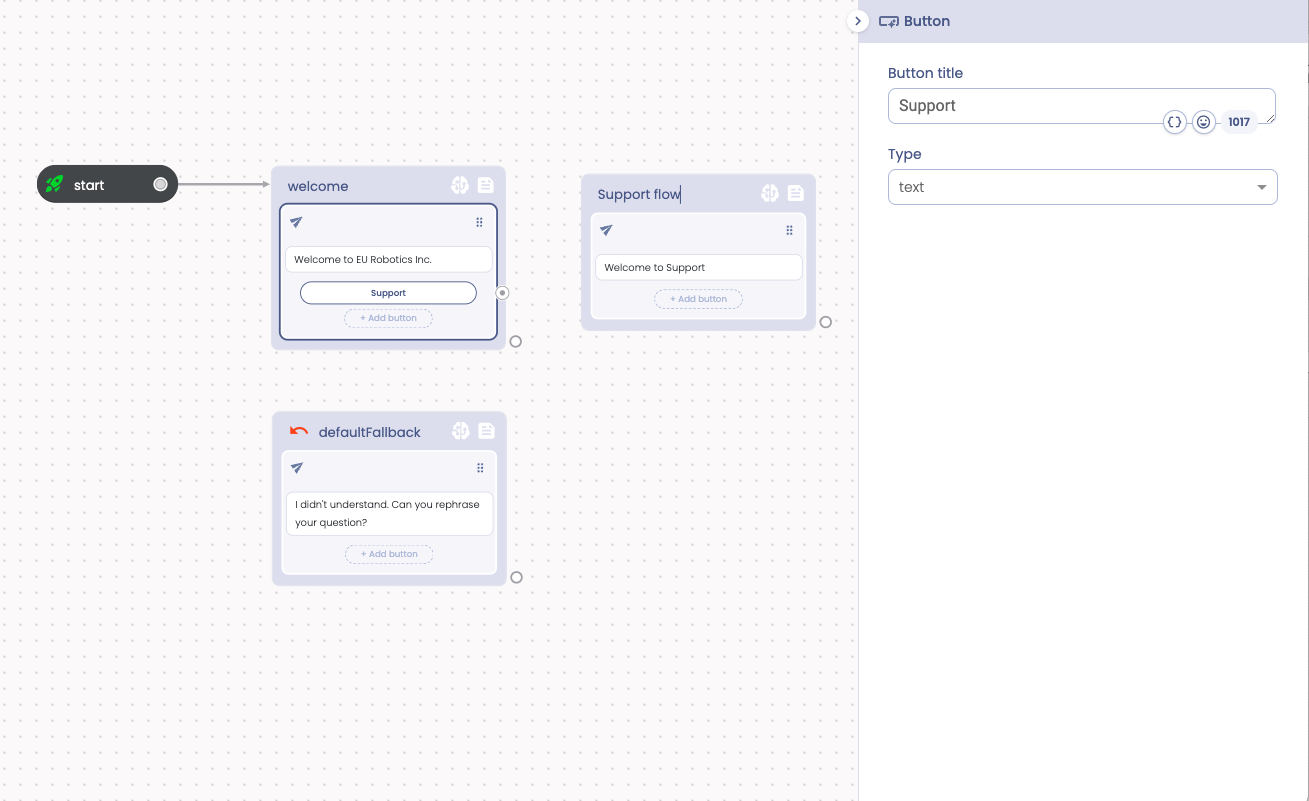
As soon as you click a button is added with a basic prefilled text “Button”. You can change the text of the button clicking on it. The button detail editor appears, where you can choose the text of you button and his type. We'll talk about button types later. For the moment we will limit ourselves to change the button name. For example “Support” (an ideal button that can move the user to another “Department”). We can leave the standard type “text” for the moment. This means that the text of the button will be sent back to the chatbot as soon as the user clicks on it.
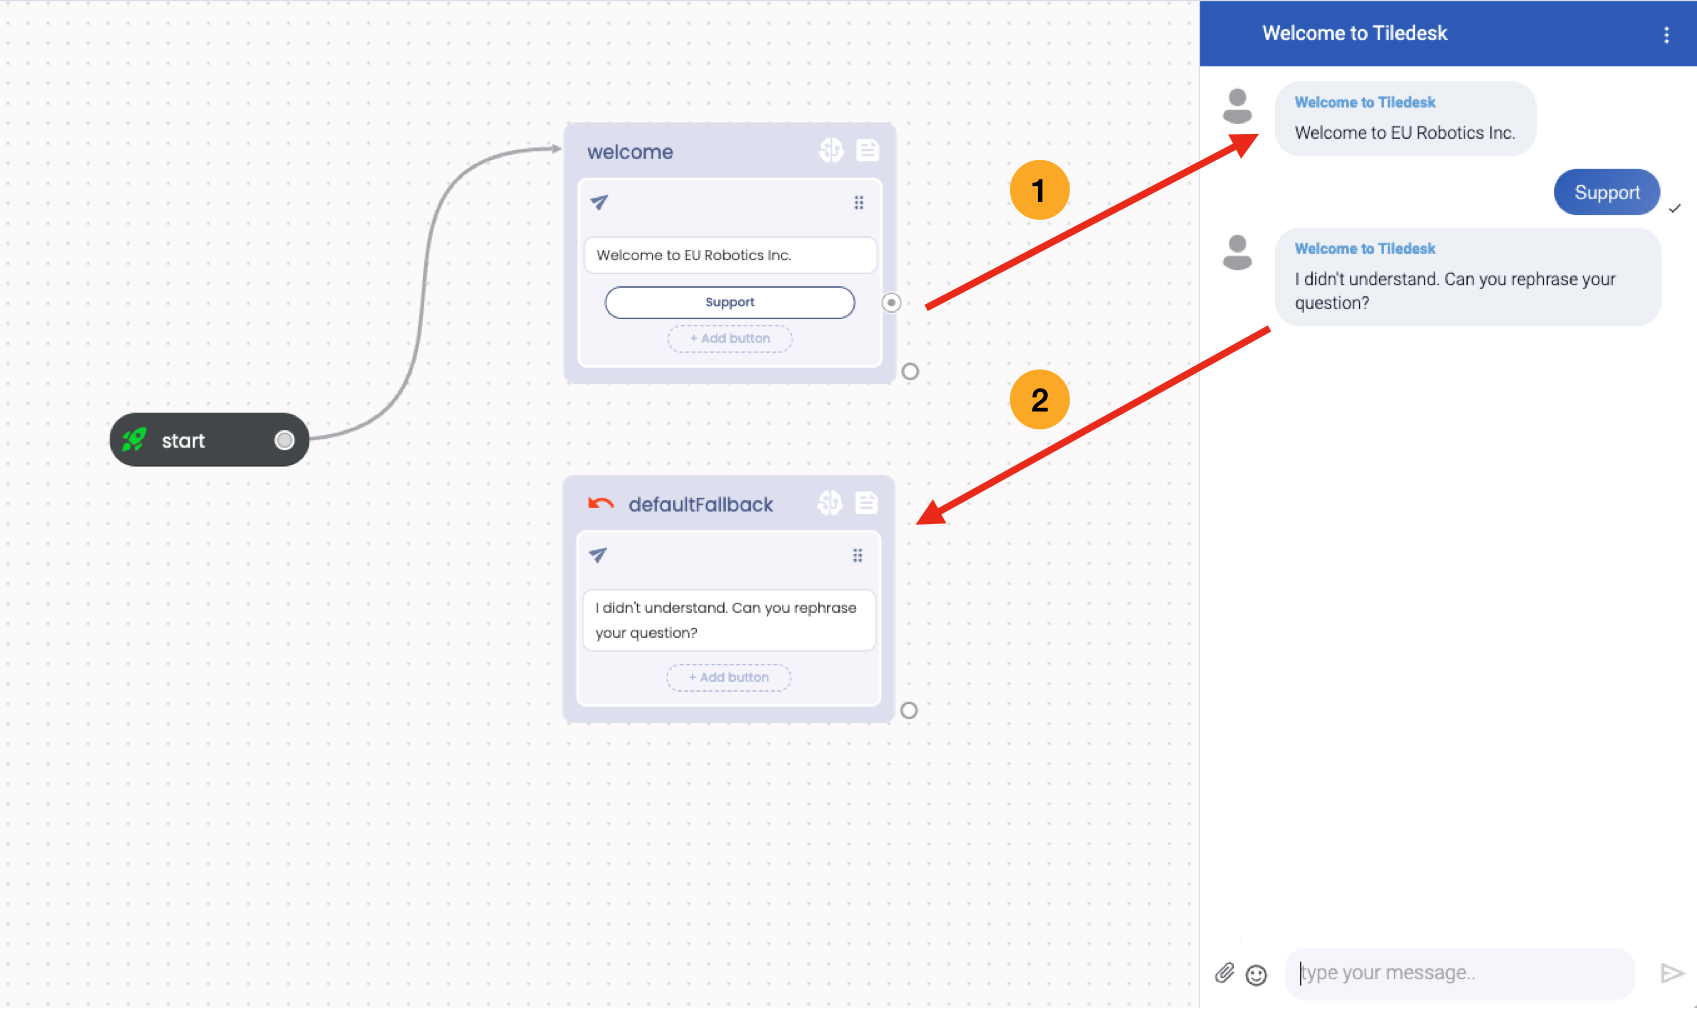
We can see this in action. Just press the the Test button and let's see what happens:

The button appears following the text reply. If you press the button you will get a default message of “not understanding” what you said. This is because no blocks were trained with the text sent by the button and when this happens the defaultFallback block is automatically executed (the defaultFallback block was also available in the previuos designs images, I simply hide it for the sake of semplicity). Let's try:
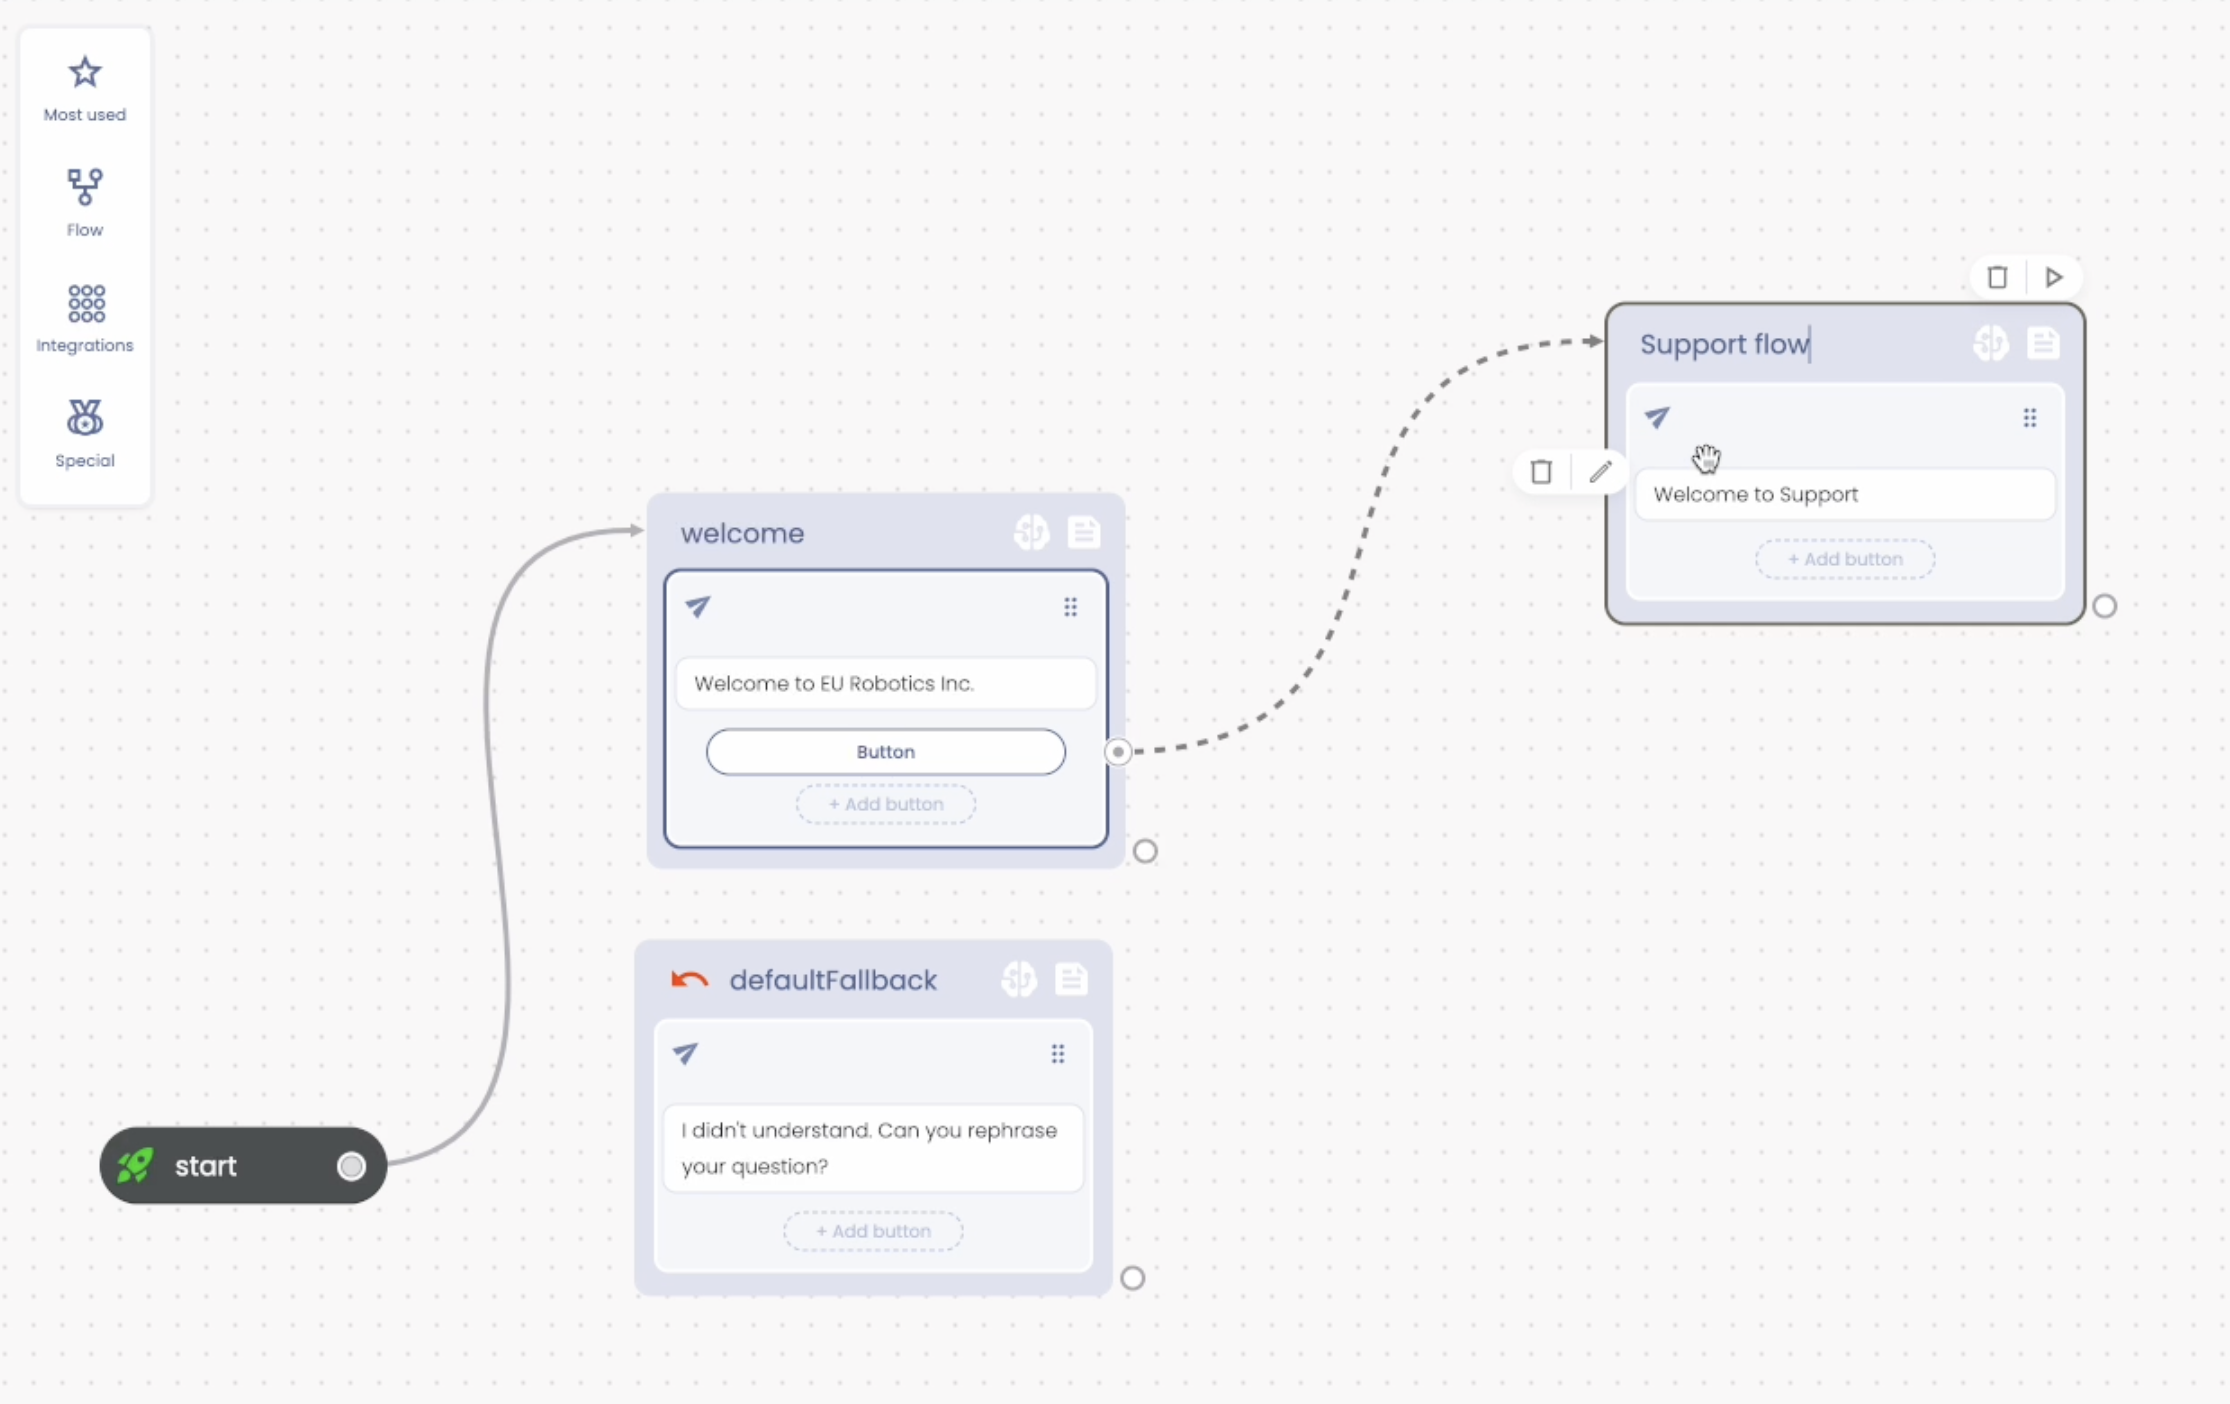
Now we can try to add a new reply action on the stage and connect it to the button. Open the Actions menu on the left and drag the action on the stage:
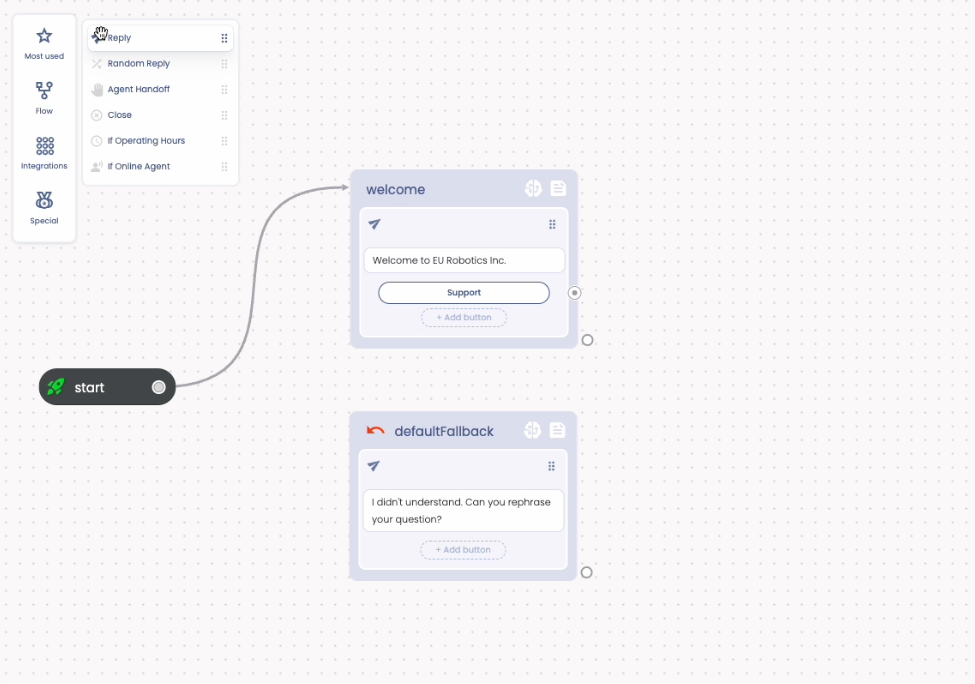
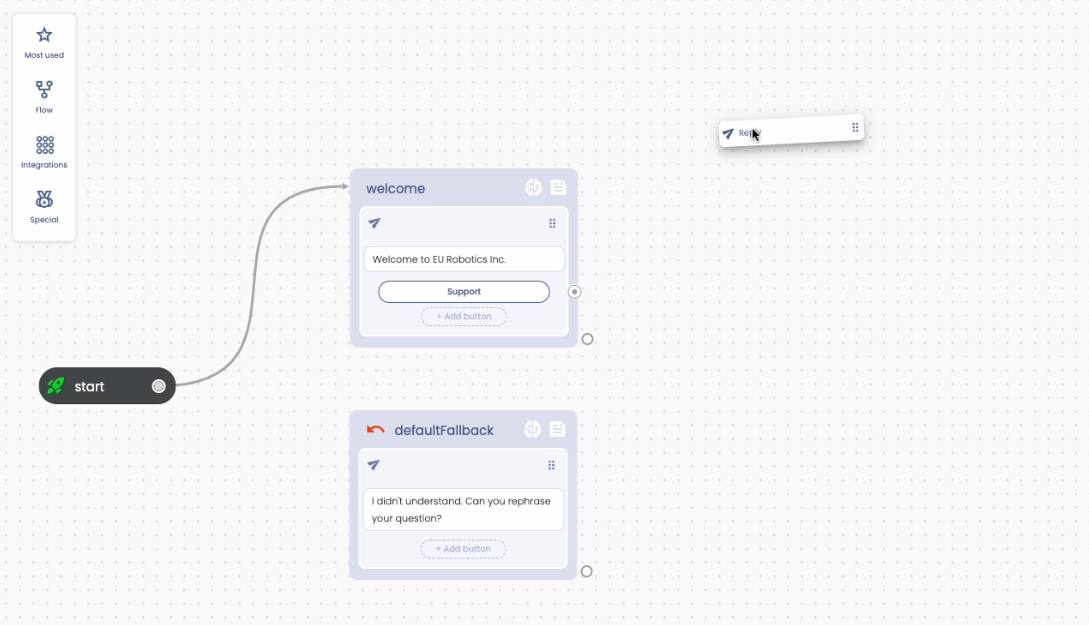
As soon as you release your mouse button a new block is put the the stage with a Reply action inside. We can customize the action with a welcome message for the Support department:
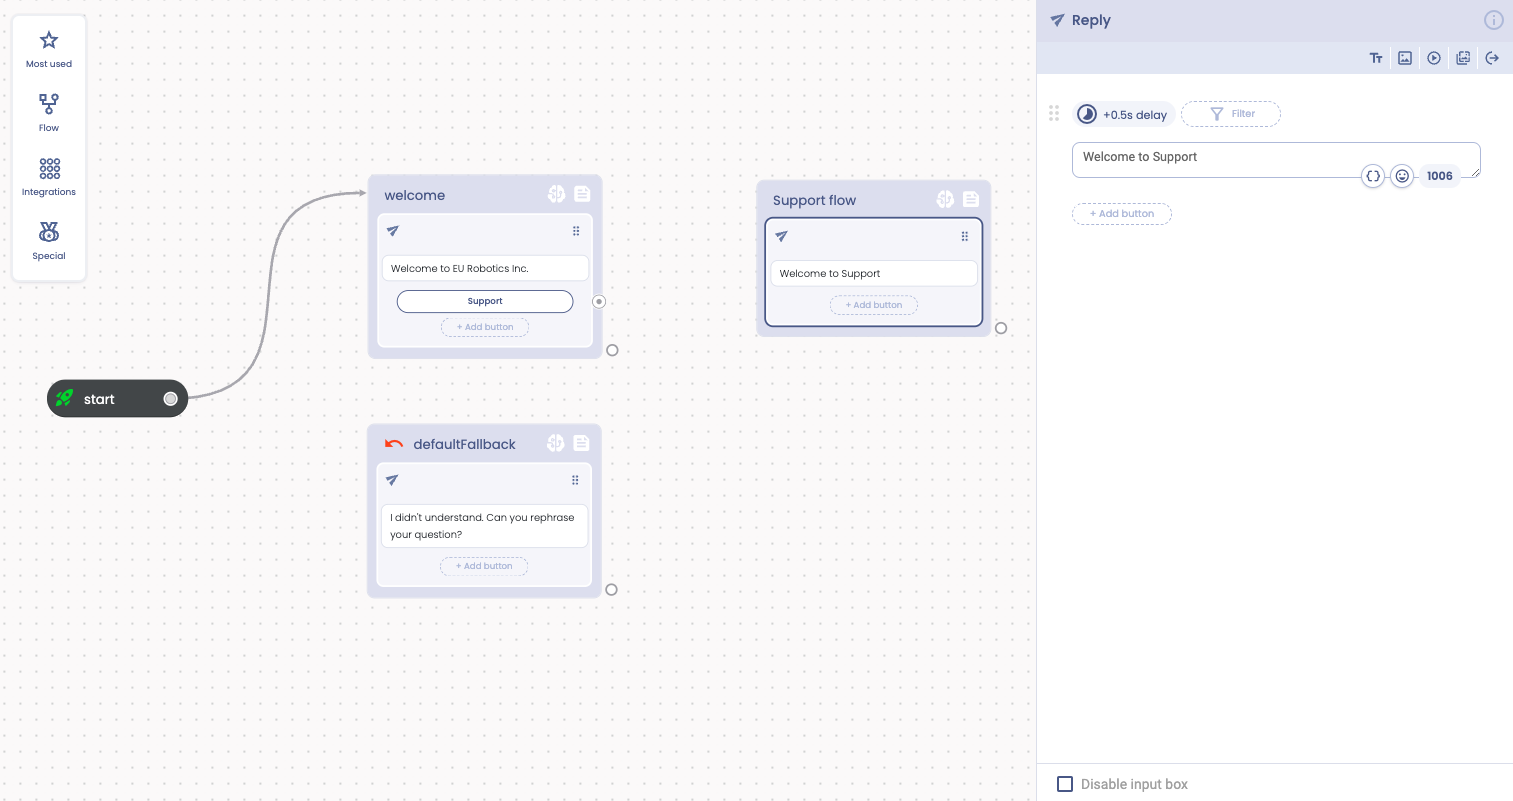
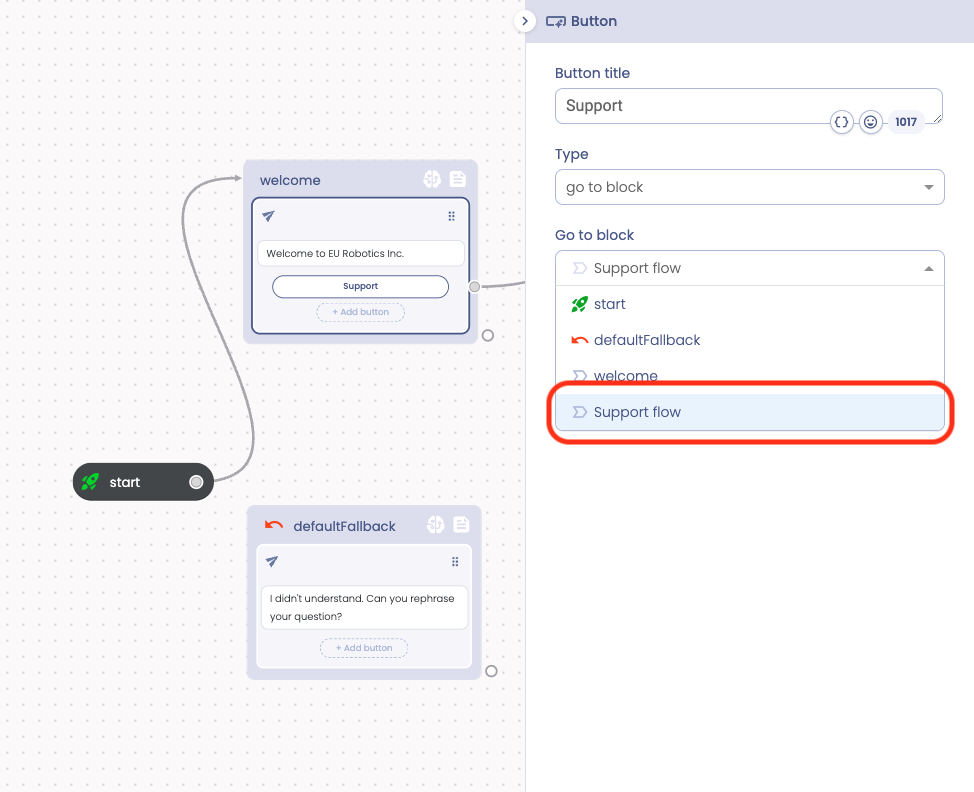
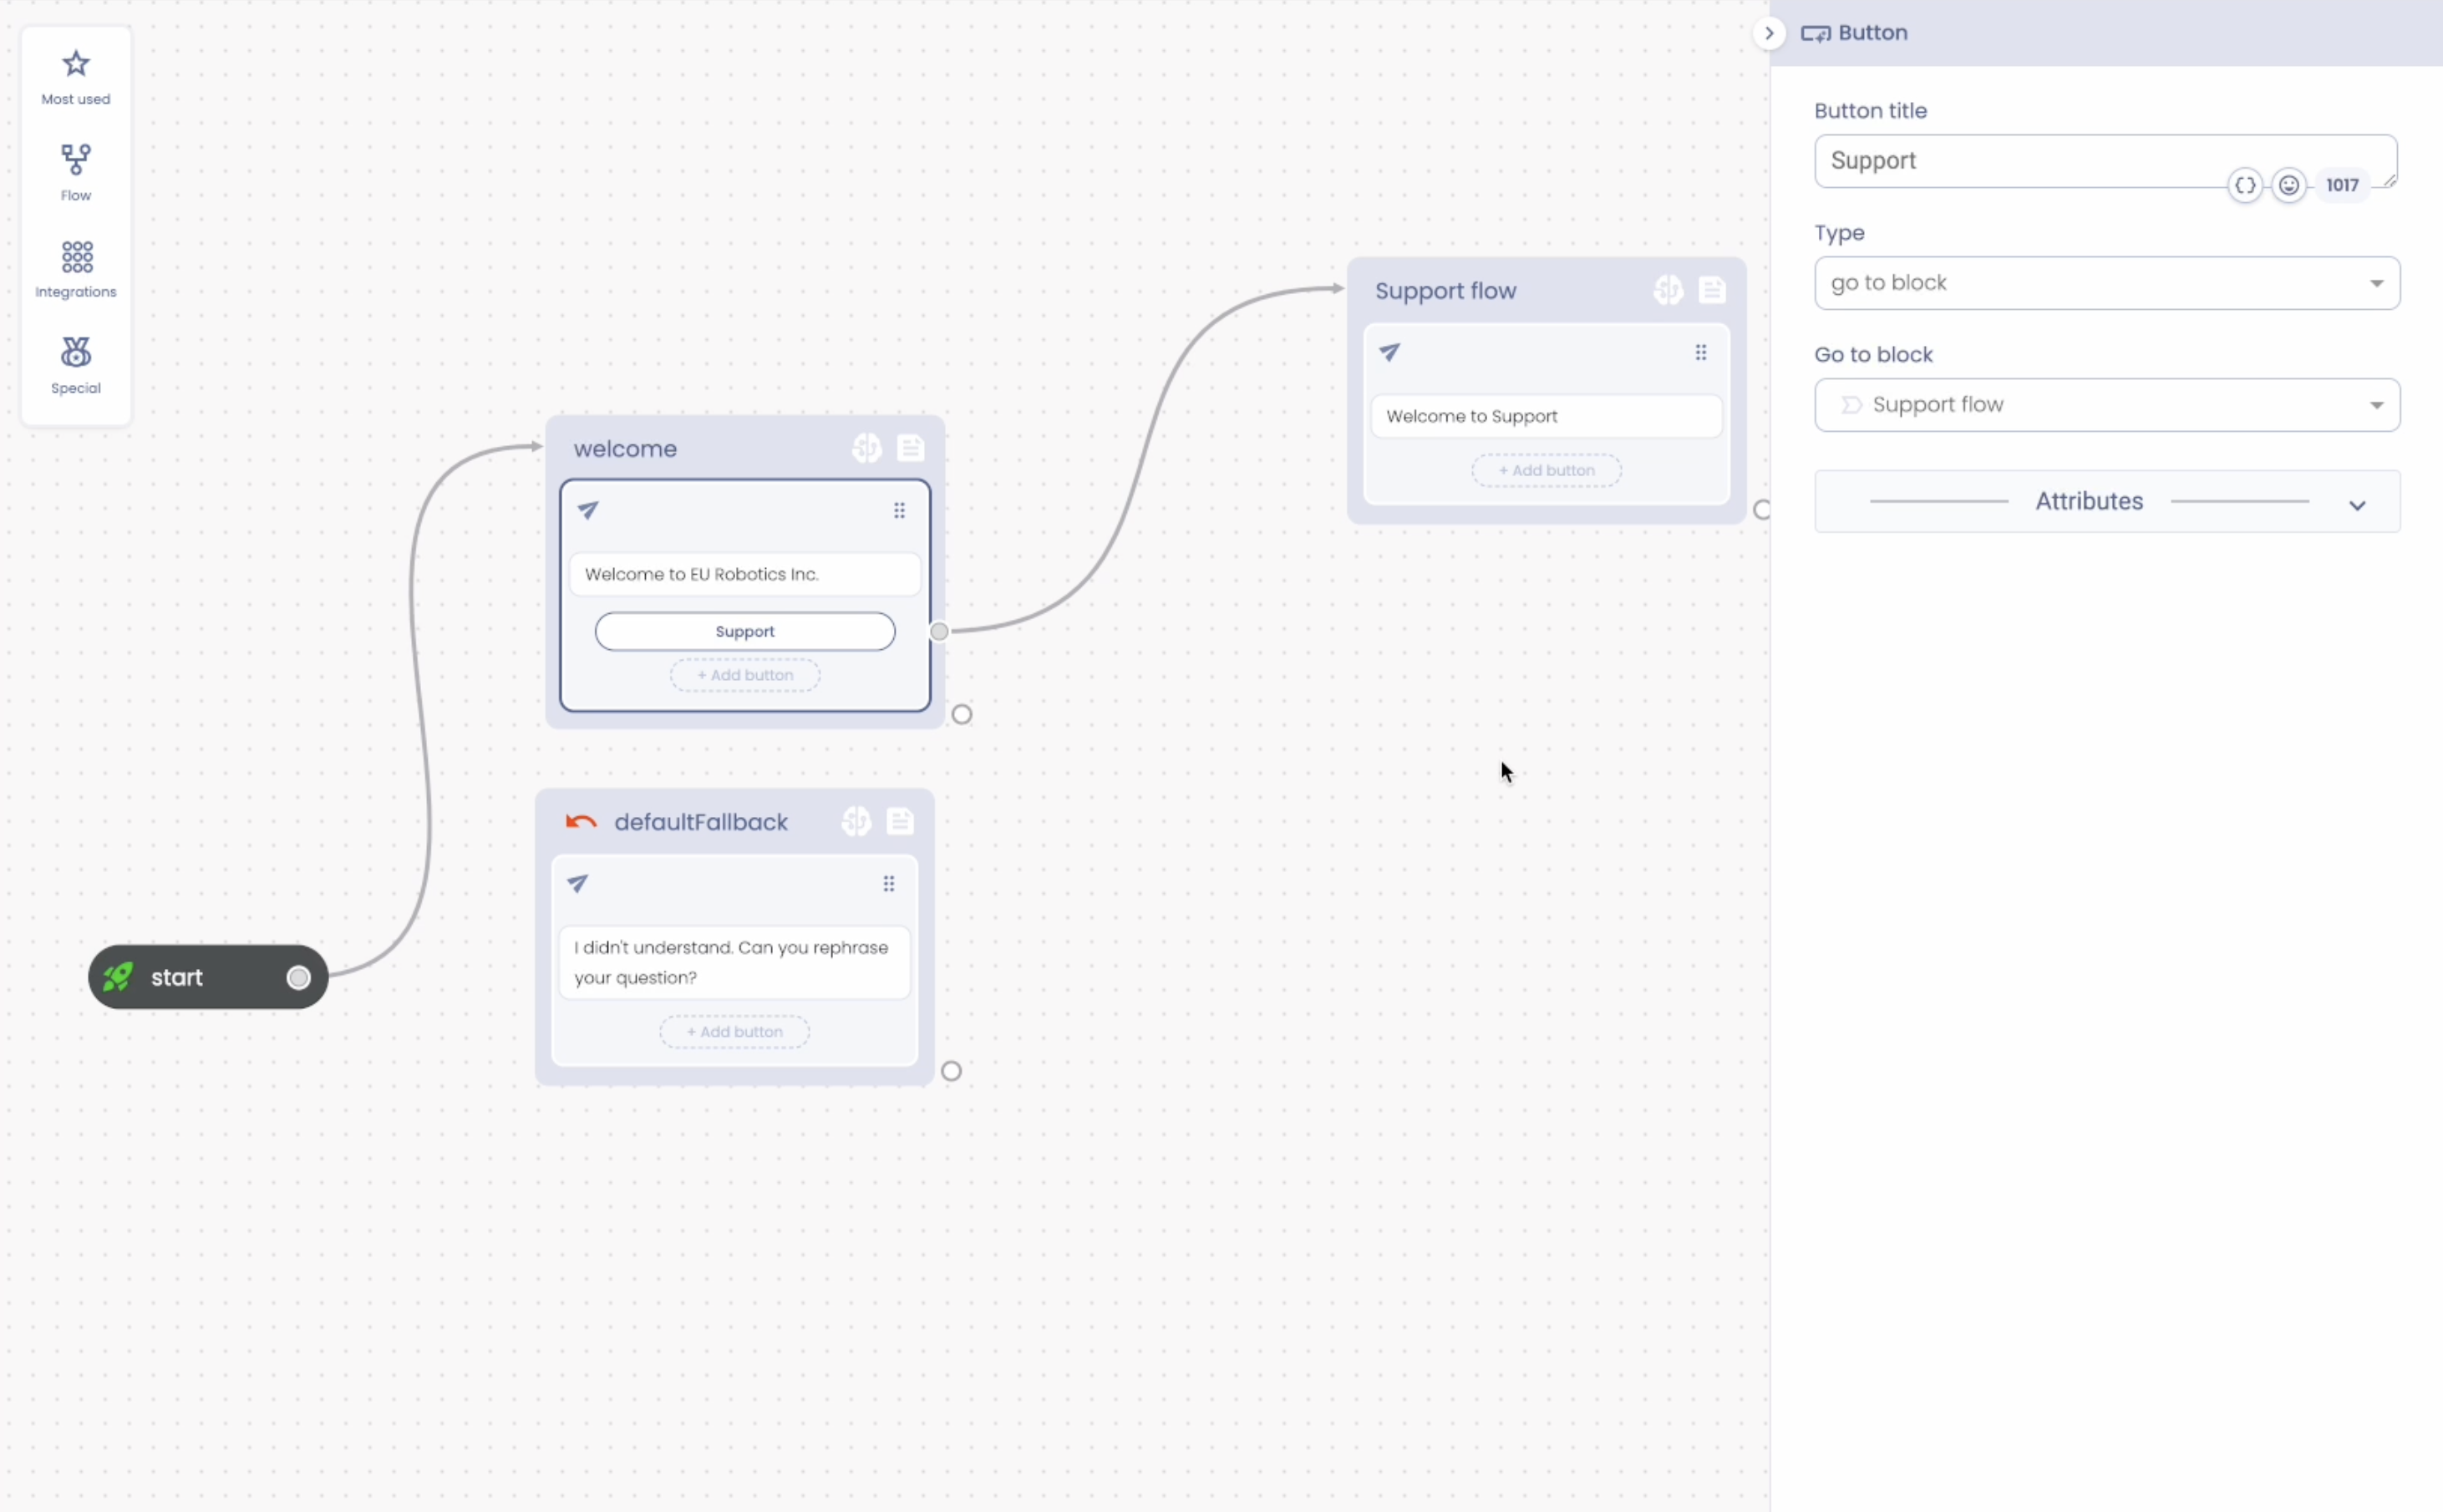
But how to connect the button to the block? Simply click on the Support button. The button detail editor will open:
Now change the button type to “go to clock” from the Type selector. The Go to block selector appears. Find the destination block of the button from the list. In our case it is “Support flow”.
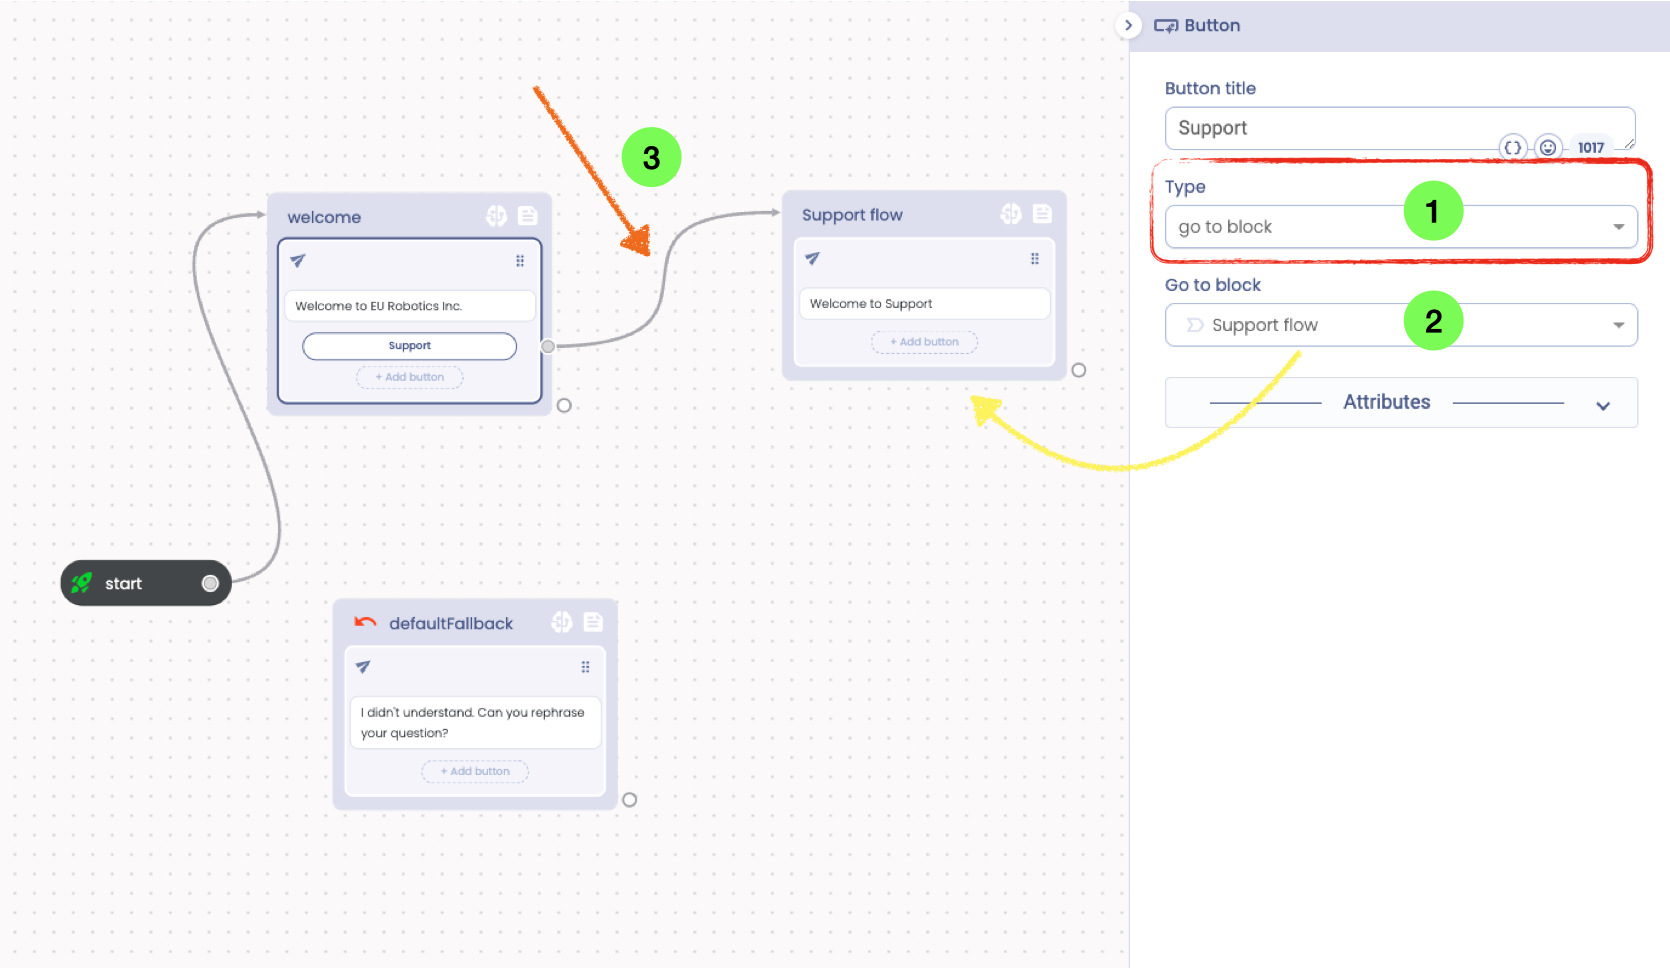
As soon as you choose the destination block an arrow appears on the stage (3) connecting the button directly to the block.
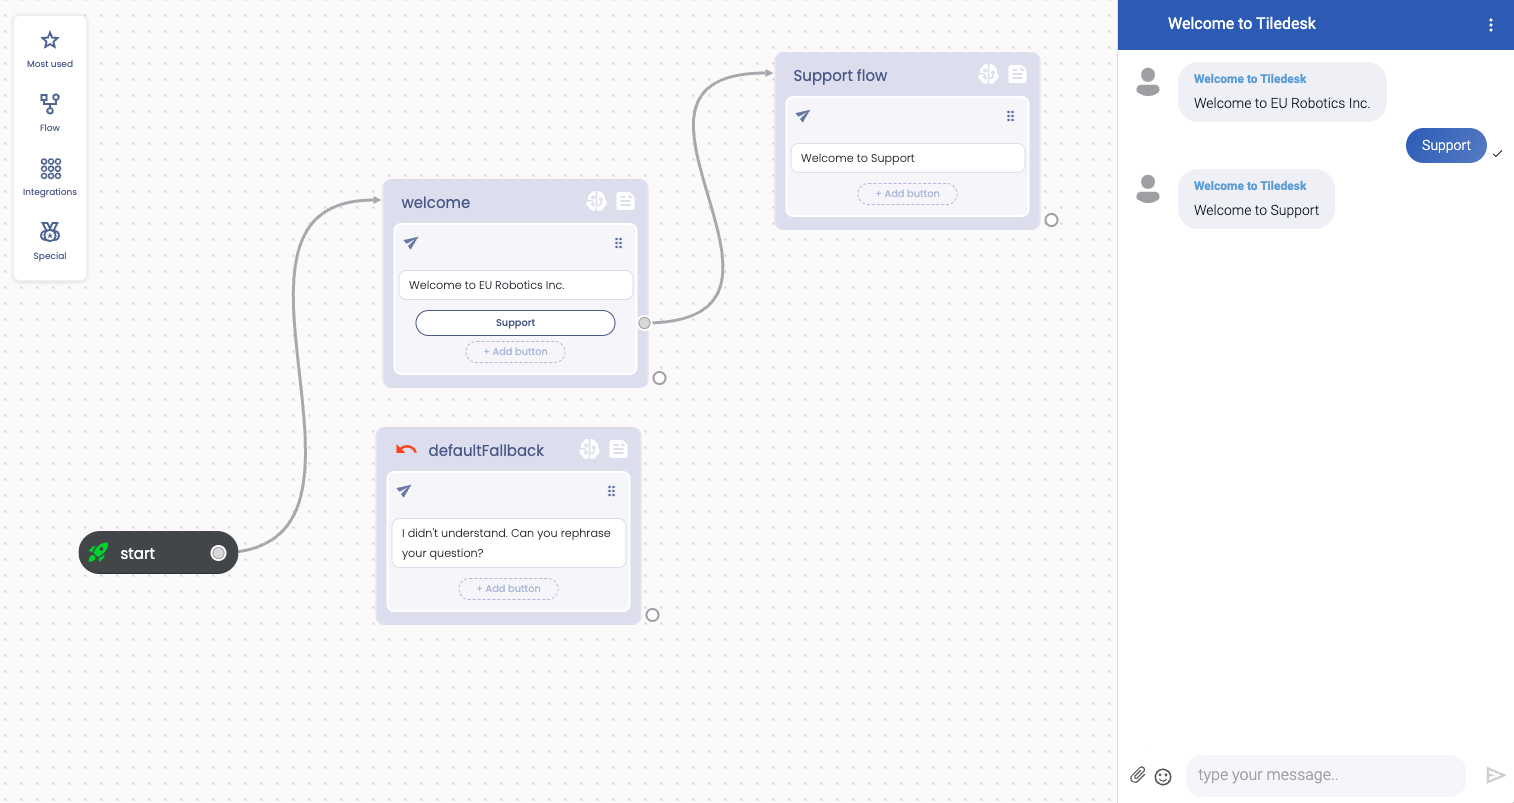
Running the flow we will get the block replying with the configured text inside as soon as we press the Support button:
Adding a button from the preview
You can easily add a button from directly from a reply action on the stage. Press “Add button” directly and a button will be added. You can now connect the button to the block you want simply clicking on the small button tag on the left and then dragging the row to the selected block.
Once connected you can setup the button name simply clicking on it, using the button editor that will appear on the right of the stage:
Filters
Filters are a special way to hide/unhide specific sections of a Reply Action based on flow attributes values.
You can use Filters to reduce the number of branching in the flow, simply building a Reply that automatically adapts the shown contents based on the values of some attributes.
A good Use case to understand Filters is for Multi language. You can create a single Reply “serving” multiple languages. In this way, when the Multi language use case is not too complex, you can approach a viable solution with Filters.
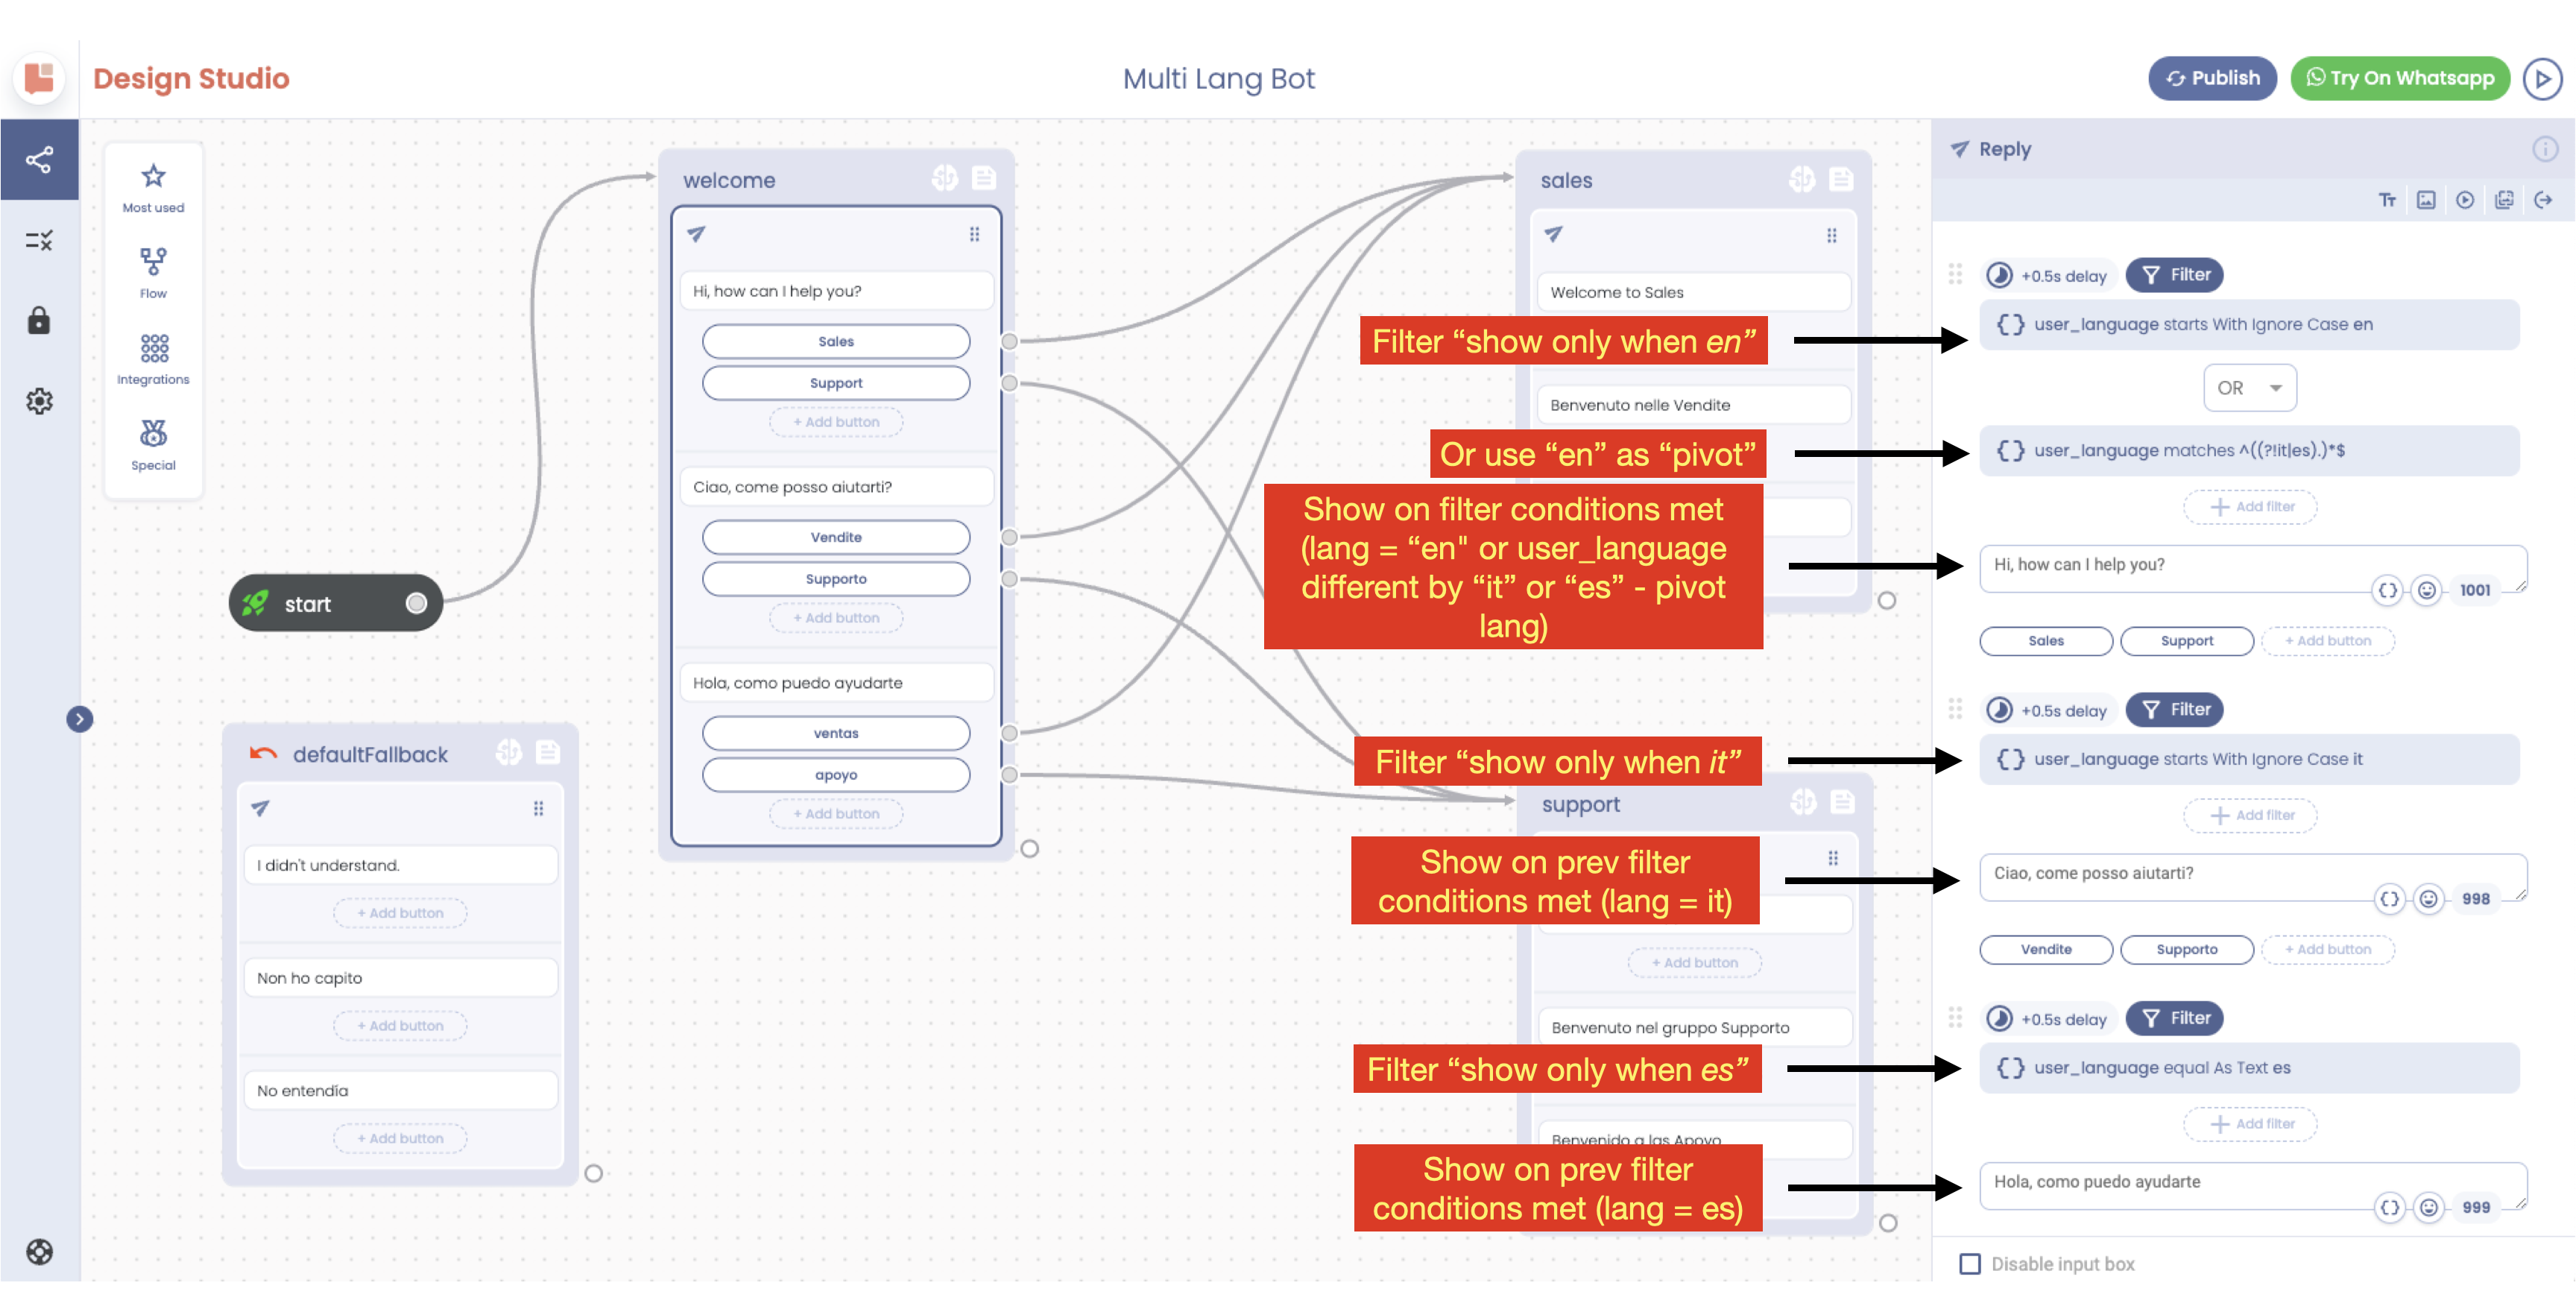
To better understand Filters we created a good documented chatbot in our community. Please take a look at the tutorial at the following URL:
https://tiledesk.com/community/search/getchatbotinfo/chatbotId/65acd812484b9f0013c13e9c-Multi-language-chatbot-example-using-Reply-Filters
If you have questions about the Reply Action or other Tiledesk features feel free to send an email to support@tiledesk.com or leave us a feedback