.png)
Brevo Action
-

- Mirco Leo
 30 April 2024
Intro
With this action, you can directly invoke Brevo automation from Tilesdesk. This integration allows Tilesdesk to automatically create a new contact in Brevo.
Get an API Key from Brevo
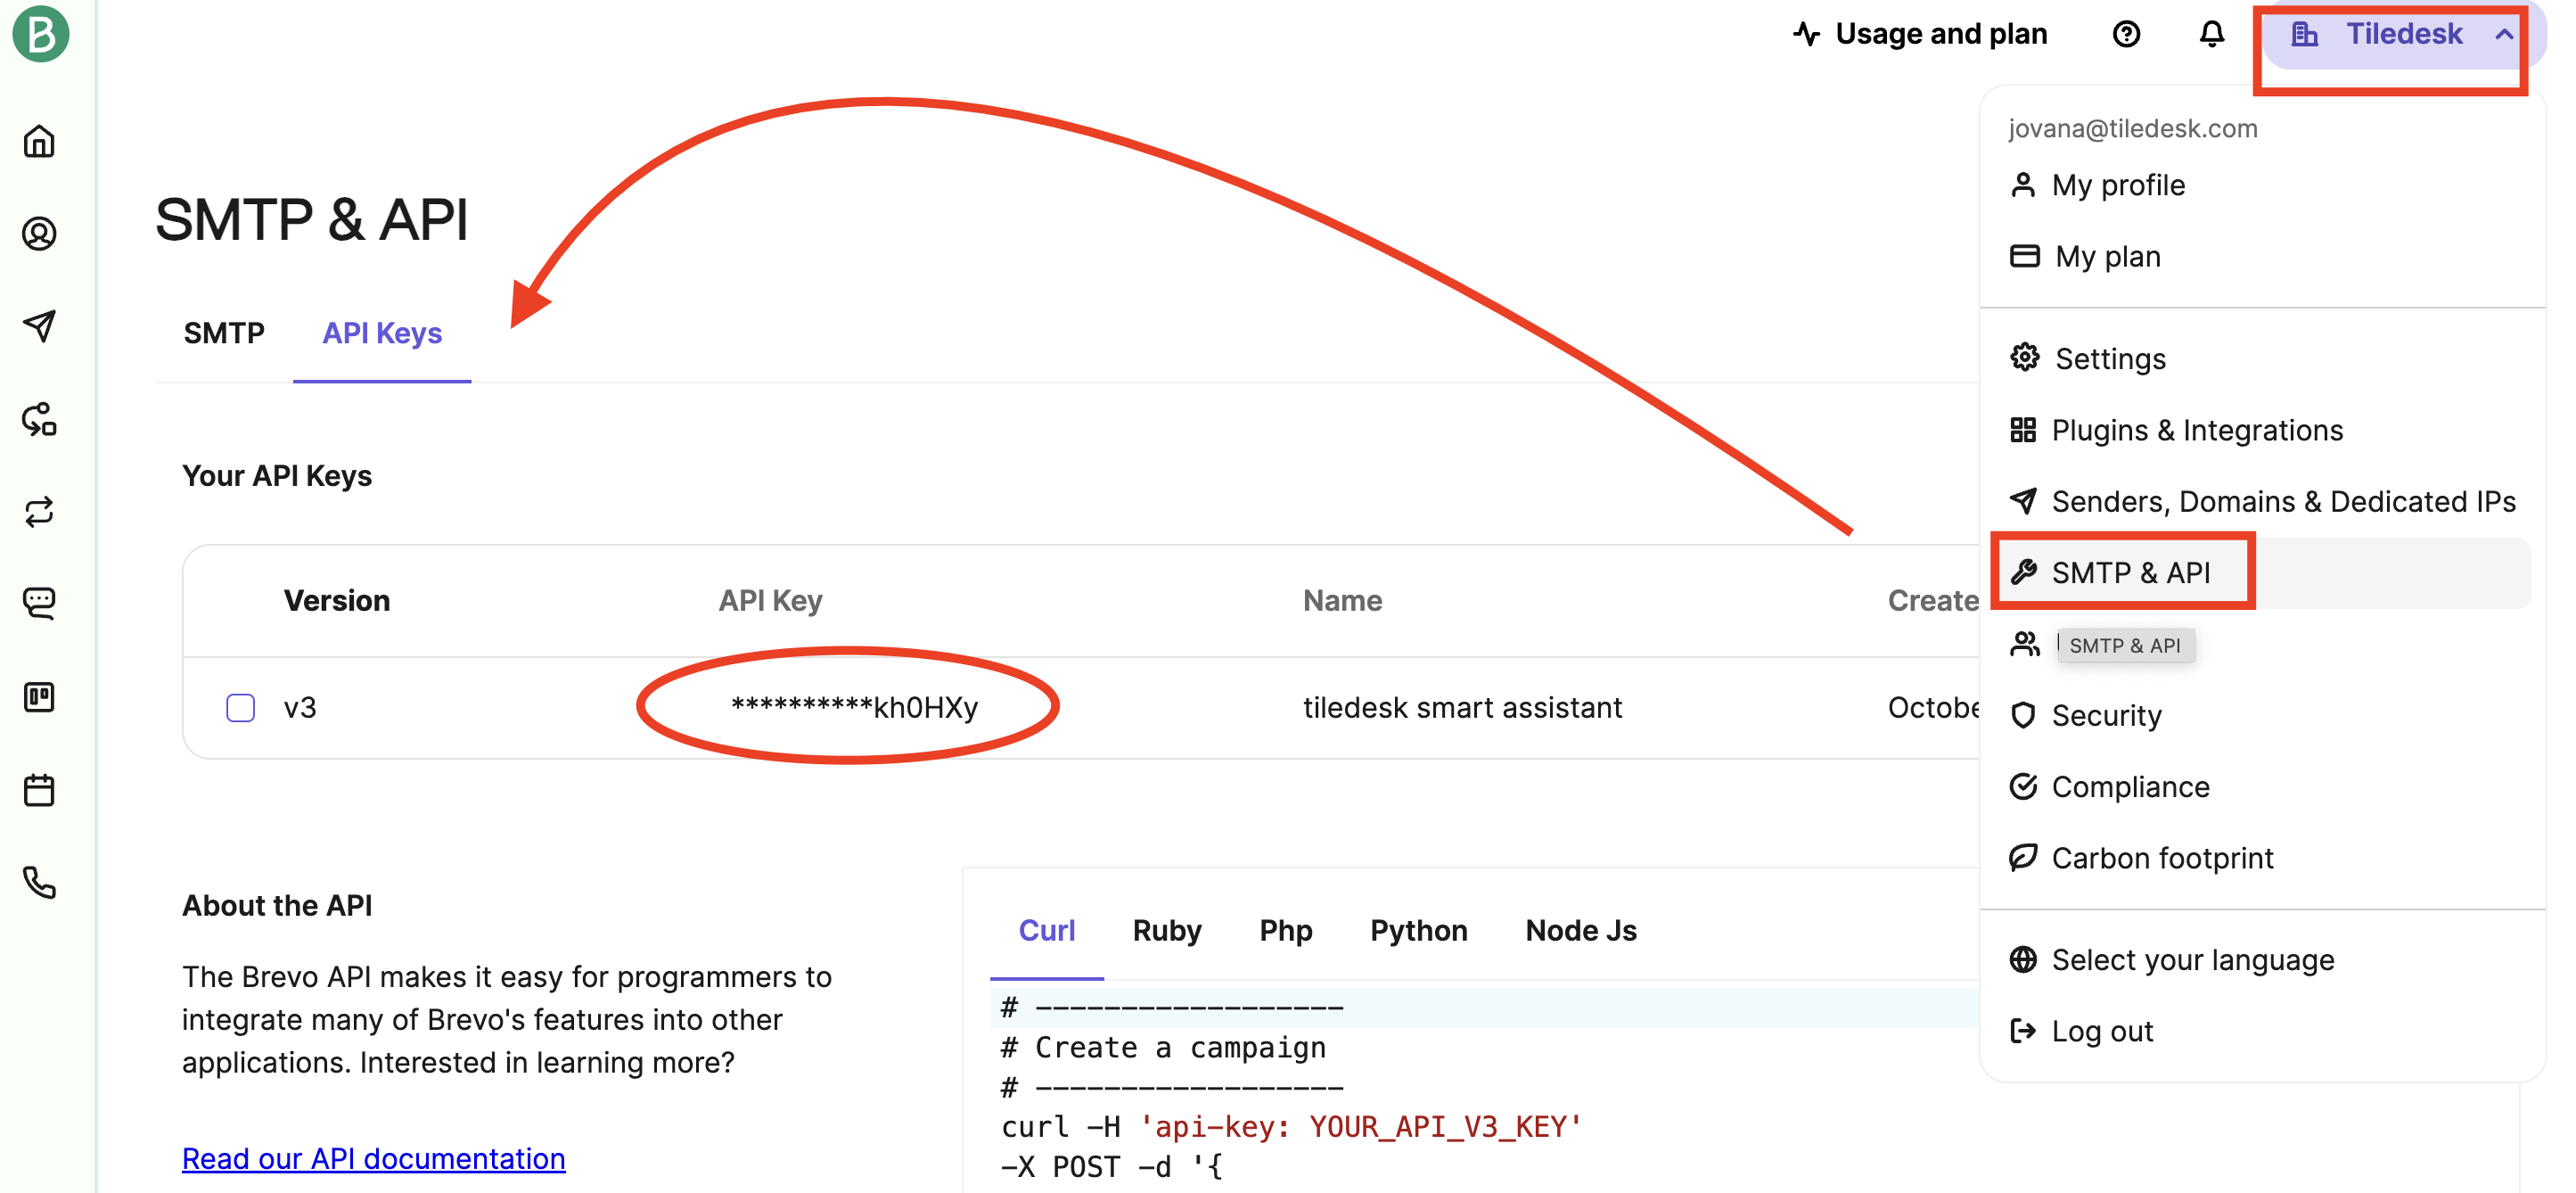
Click on your profile name in the upper right corner and pick SMTP & API option from the drop-down menu. Then choose the API Keys tab and create your API key.
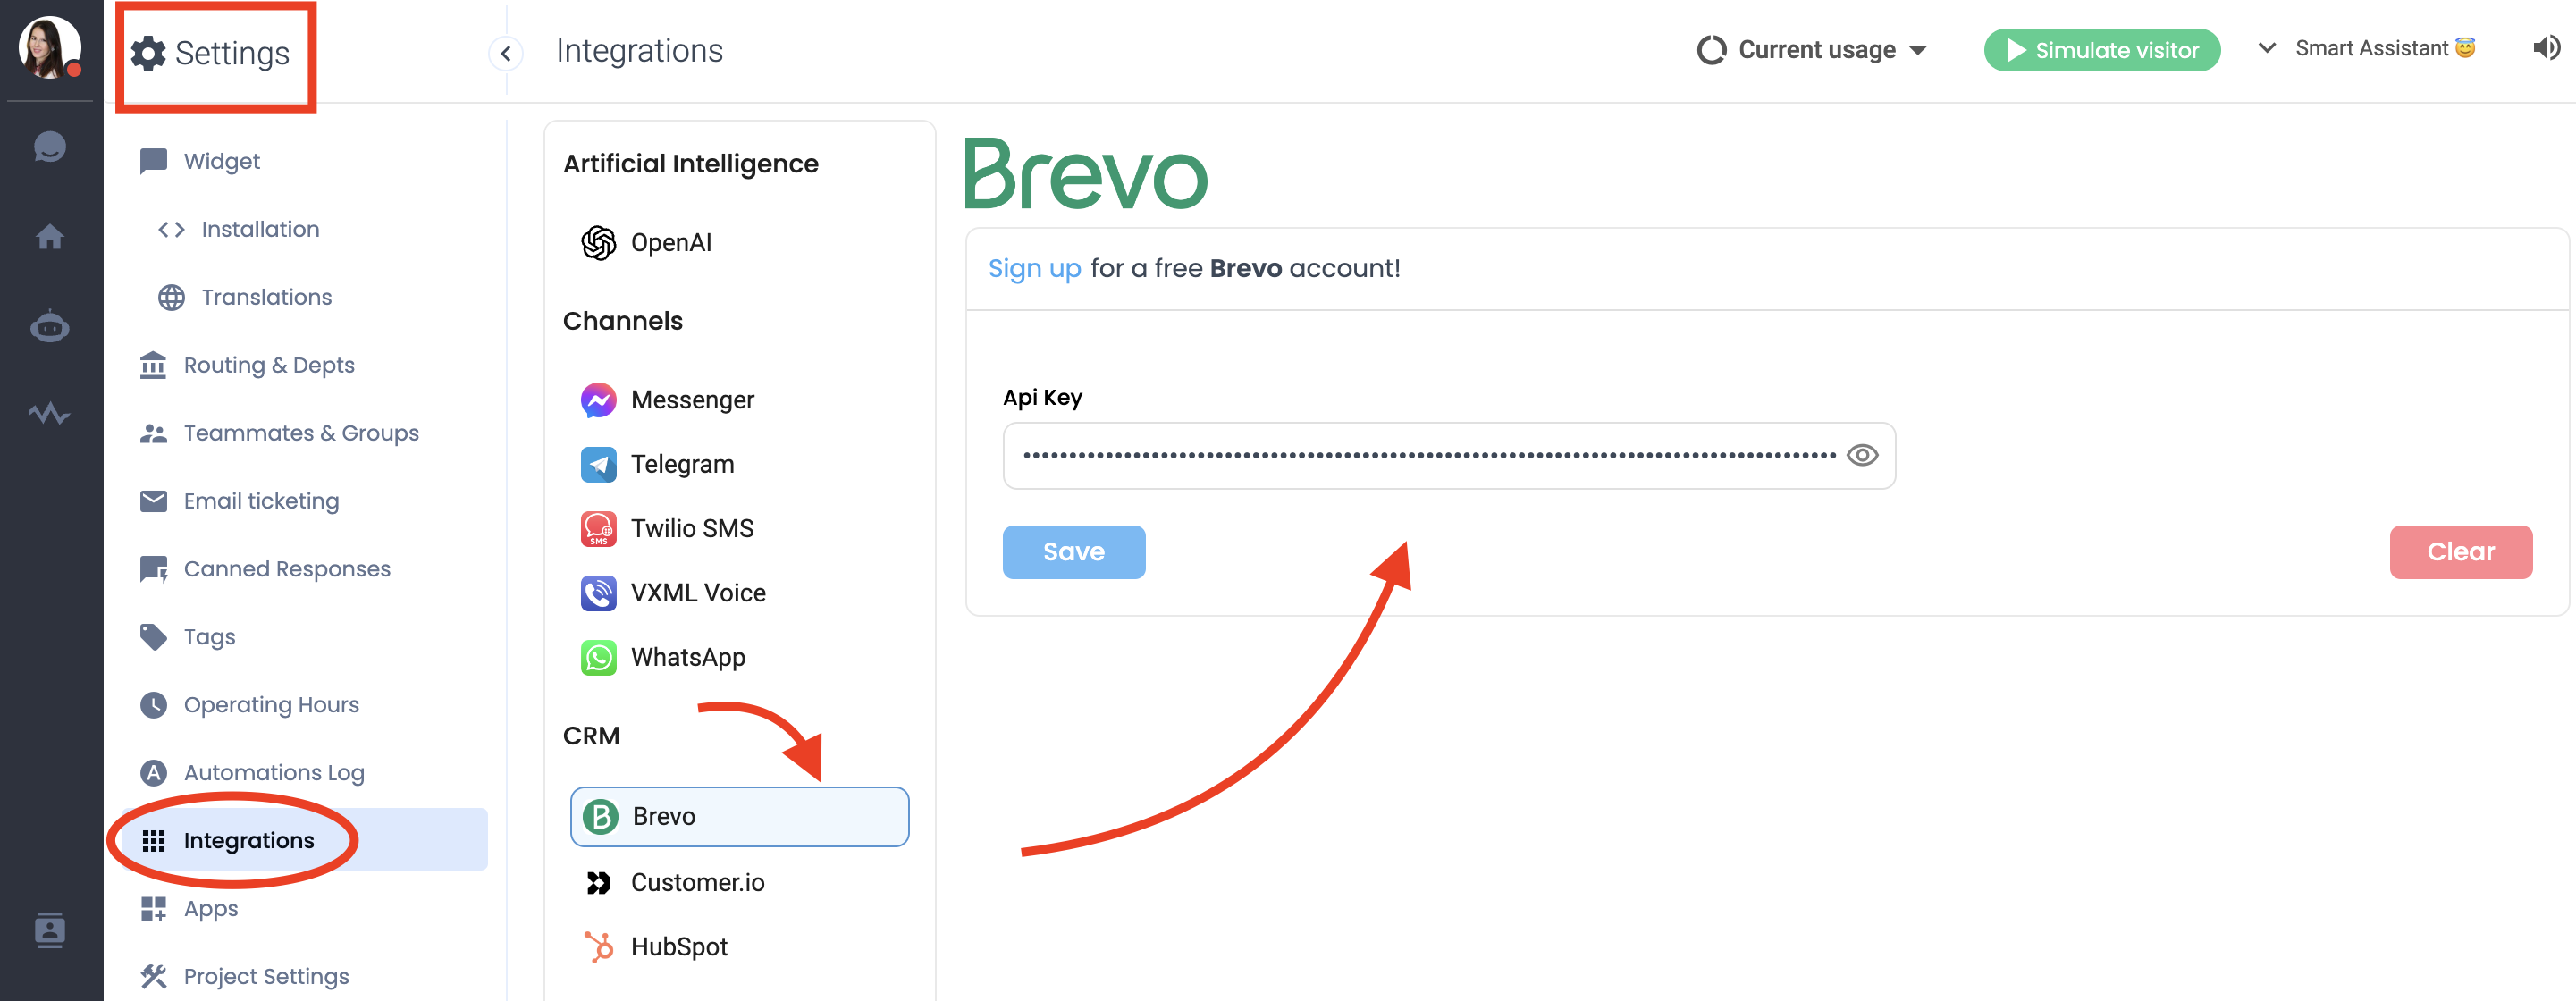
Once copied, paste the API Key in the Integrations section under Settings, as below.
Get the Brevo Action from the Design Studio
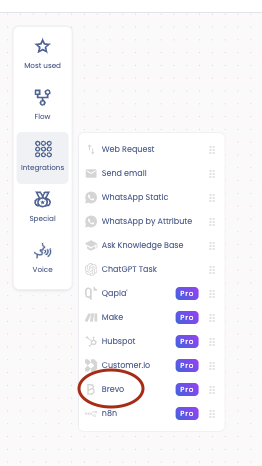
Once in the Design Studio, simply drag & drop the Brevo action on the canvas from the side menu “Integrations”, as shown in the picture below:
Once you drag the action you can configure it. The main part is to set up the Brevo webhook and populate all the fields to send to the Brevo API endpoint using the right flow attributes:
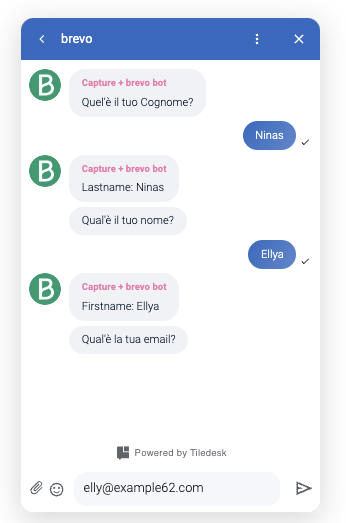
In the following example, we configure four fields: first name, last name, and email address, as well as the telephone number (SMS), for the contact that will be created in the Brevo database.
A new contact will be transmitted to Brevo with the values "custom_firstname", "custom_lastname", "custom_email" and “custom_SMS”. The Brevo action will trigger a Brevo API call (https://api.brevo.com/v3/contacts), which will create a new contact using the transmitted information.
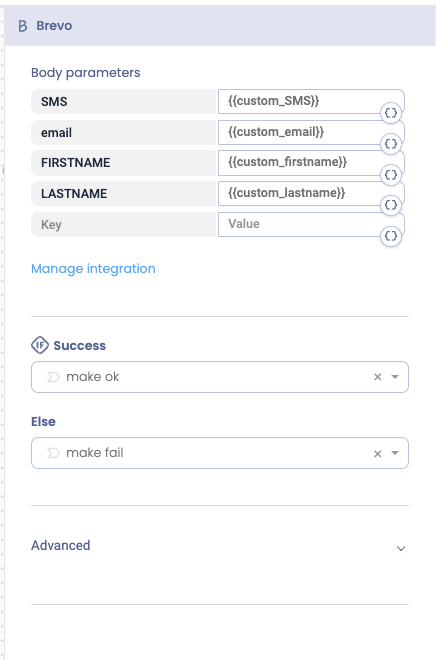
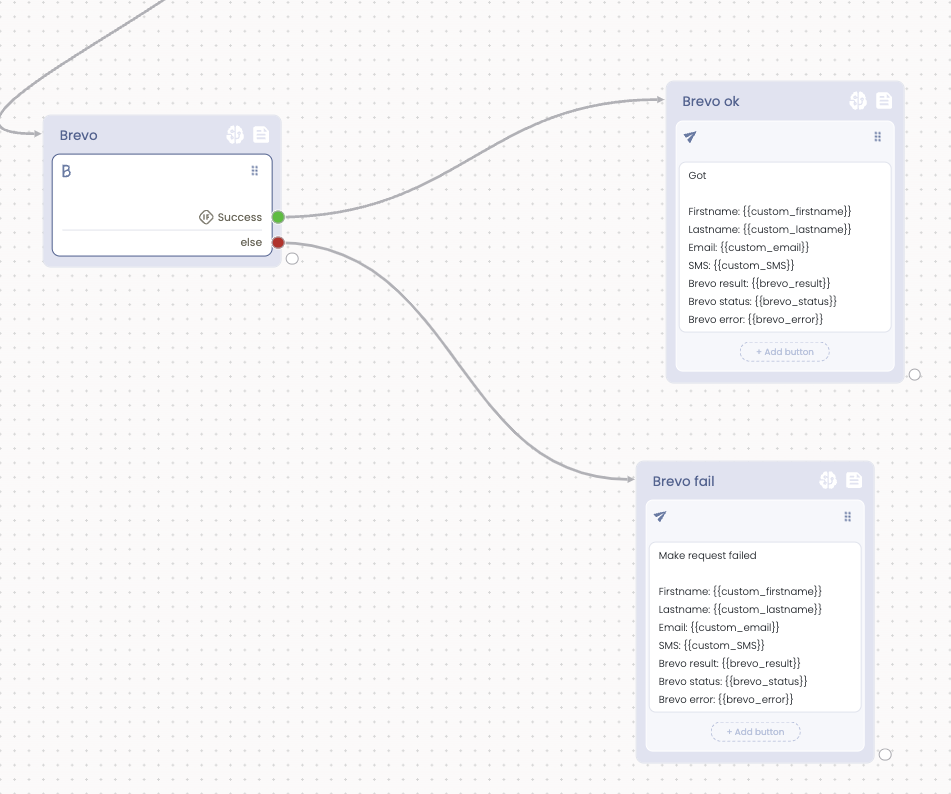
You can connect various blocks to extend the automation's actions created on Brevo. Specifically, two blocks can be linked with the Brevo block, which will trigger upon the success or failure of the webhook invocation on the Brevo platform. In the example depicted in the image below, we've merely connected two blocks to the Brevo block: "Brevo ok" and "Brevo fail," which handle the information sent to and received from the Brevo API, respectively.
How to retrieve the result of the invoked automation
To view the response from the invoked automation, you need to open the "Advanced" section within the "Brevo" block and assign a new variable to the "Assign result to" field, naming it, for example, "Brevo_result". Upon completion of the execution, the created variable will be populated with the JSON formatted result of the automation.
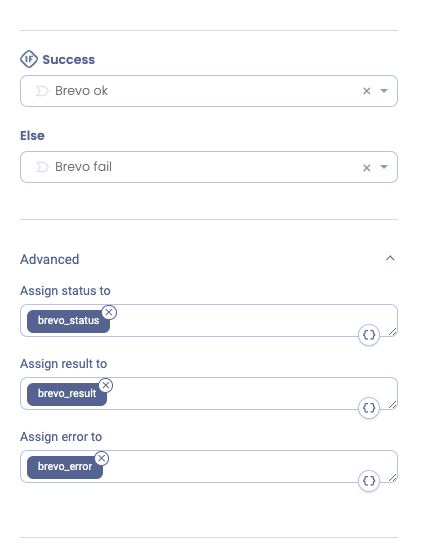
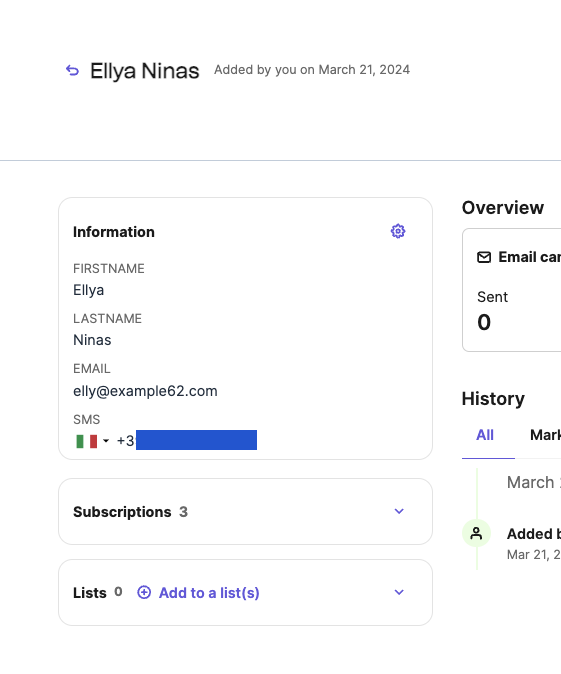
The automation creates a new contact in the Brevo database and returns the inserted information to Tilesdesk in the 'Brevo_result' variable as JSON data.
The following is a contact created in the Brevo database using the automation described in this article.
If you have questions about the Brevo Action or other Tiledesk features feel free to send an email to support@tiledesk.com or leave us feedback.