.png)
How to Create, Delete and Manage Categories
-

- Giovanni Troisi
 25 August 2022
Tiledesk Help Center allow you to organize articles in categories and section. This helps people find useful content easier based on the topic they are interested in. You can save articles without a category, but note that in order to publish articles, they must be belong a category, instead using sections are optional.
Below we'll show you how create categories and sections and how organize articles in them.
Create a category
When you install the Help Center Dashboard or when you Create a New Workspace a default category, name Default, is automatically generated and selected for the new articles.
However, we recommend you to create new categories, at least one for main topic to make easier the people navigation inside the Help Center.
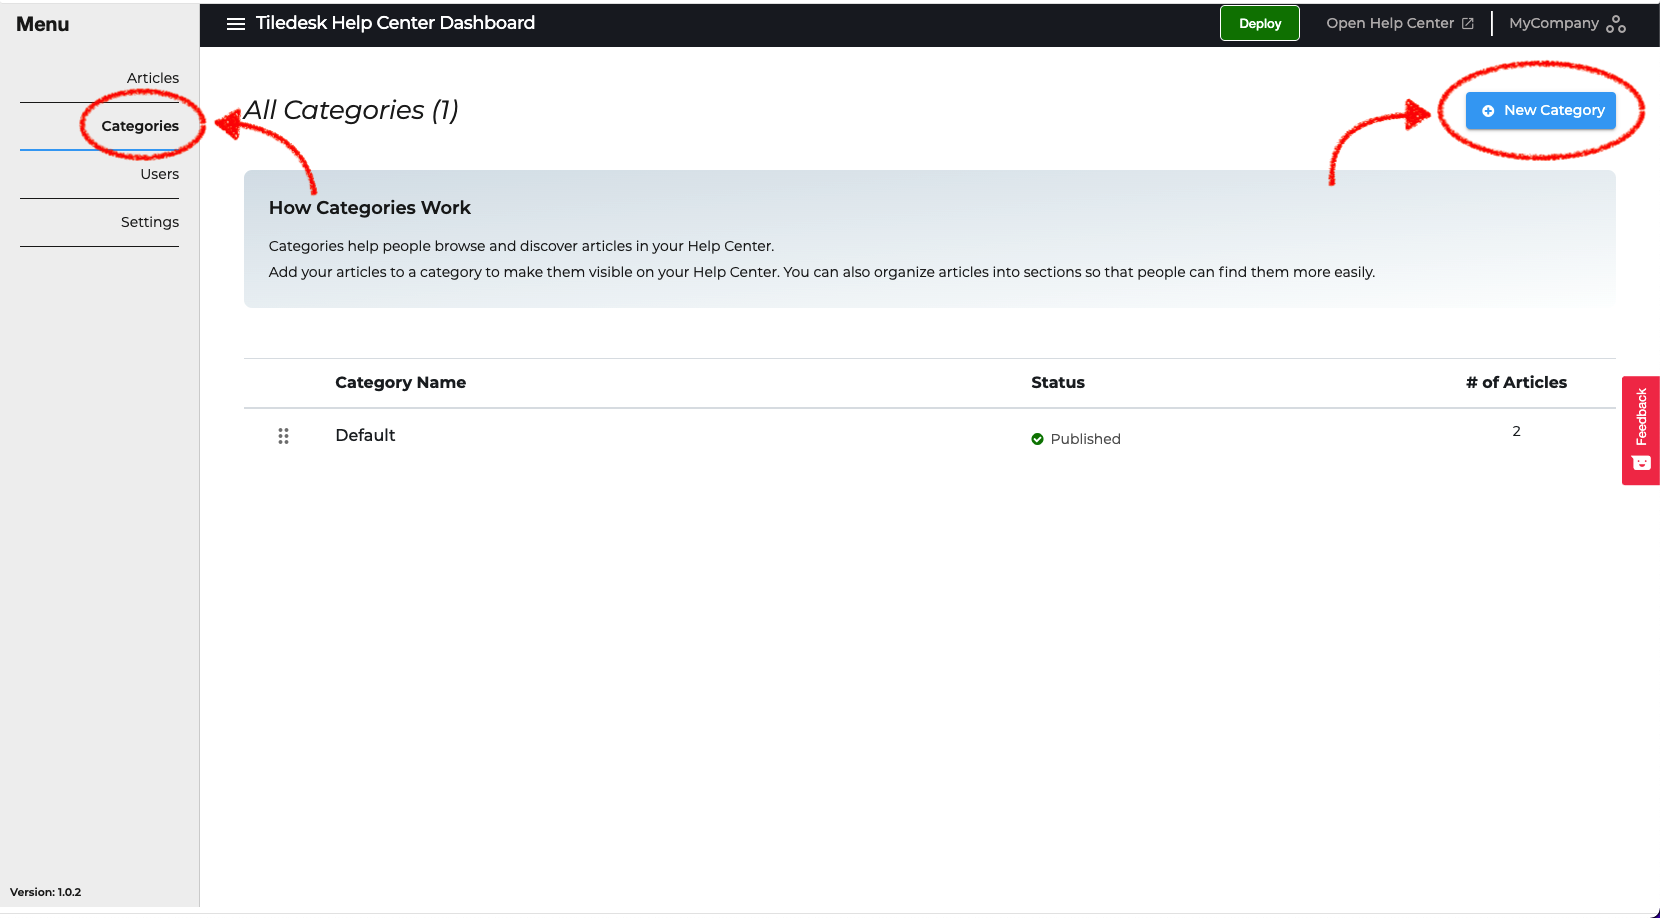
To create a new category, click ‘Category’ on the left sidebar, then click on the ‘New Category’ button.
To create a category you need to enter a few, but fundamental, information, like the name of new Category, a short description for it, and the slug which will compose the public address of your new category. The slug is automatically generated from the name of the category, but you can change it easier editing this field.
Optionally, you can choose an icon for your category, but not that this will bel visible only when the view style is set in "Categories Cards" or “Both”. For more information about the styling of the Help Center, please read How to style the Help Center.
You can choose also a custom label for the button for complete customization of the Help Center.
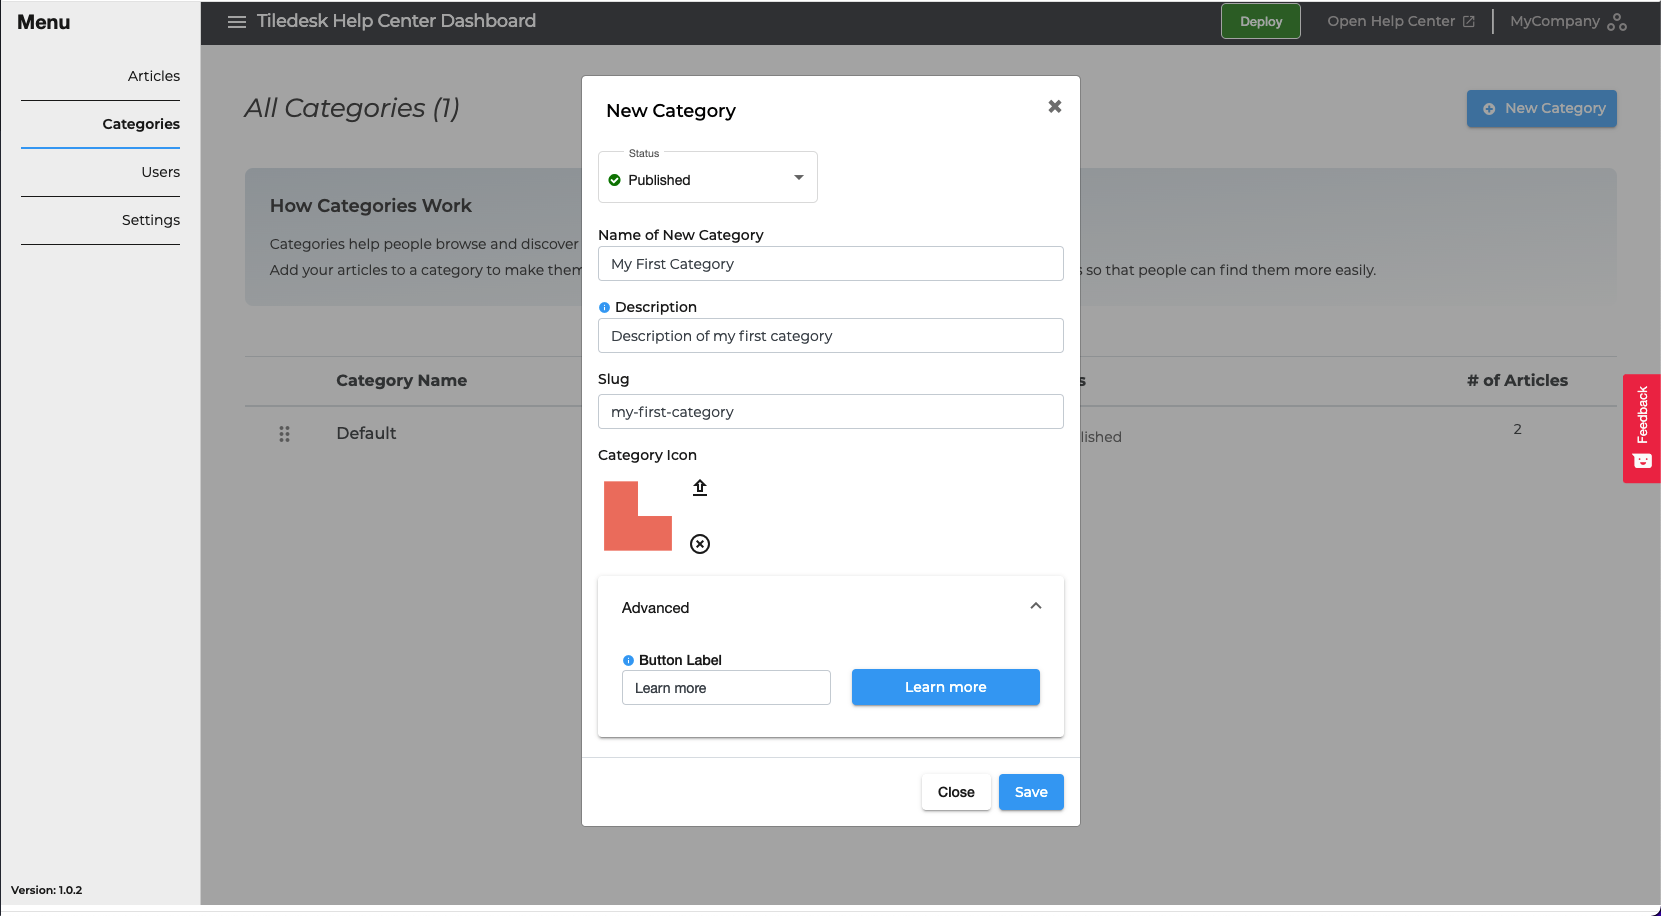
Well, click on ‘Save’ to start working with your new category.
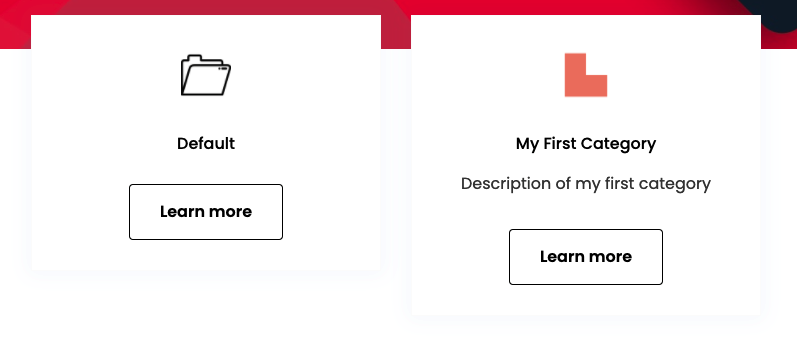
This new category will be visible on your Help Center at the new Deploy (read Deploy your Help Center for more information.) if there is at least one article inside it. This is the result of your configuration for this new category.
Edit a category
If you want to change or update a category information, click on ‘Categories’ from the left sidebar, then choose the category that you want edit and then click on the ‘Edit’ button on the top right side.
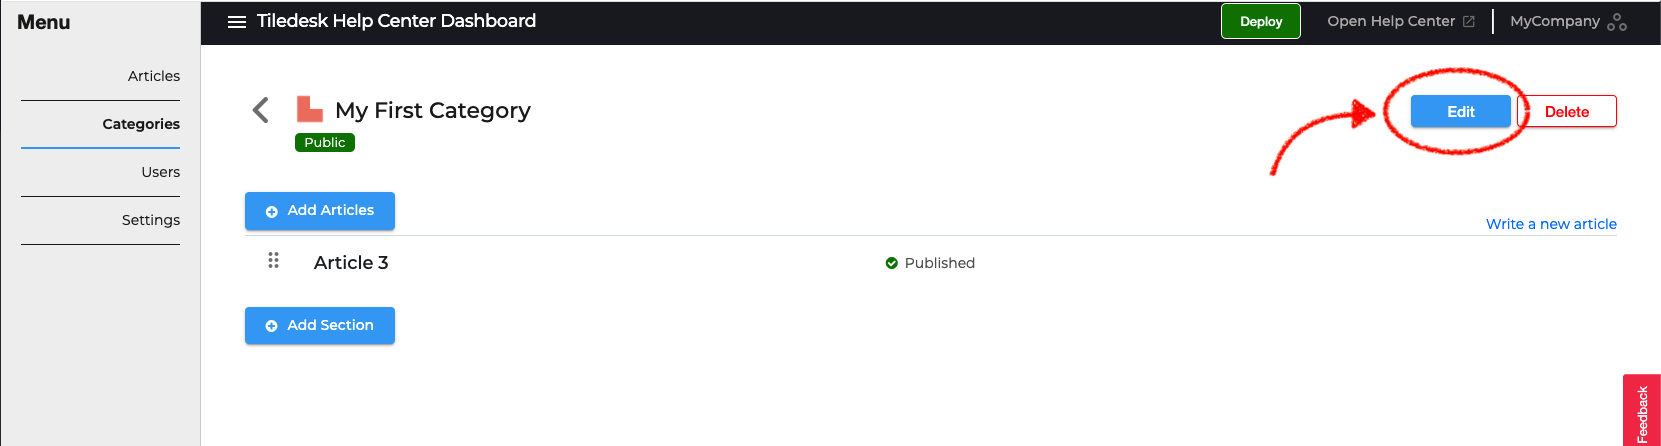
Edit the informations listed above then click on ‘Update’ button.
Again, the edited category will bel visibile on your Help Center at the new Deploy.
Delete a category
If you want to delete a category, click on ‘Categories’ from the left sidebar, then choose the category that you want delete and then click on the ‘Delete’ button.
What if there are articles and section below the deleted category?
Sections: all the sections below the category will be deleted too.
Articles: all the articles below the category will become uncategorized. This means that articles will be no longer visible on your Help Center until until they are reassigned to another category.
Well, this is all about creation, editing and deletion of category. How said before, categories can be divided in sections, so it might be useful to take a look at Create, Manage and Delete Sections.
Or maybe you want to know How articles reordering works.
Enjoy!
Please feel free to send feedback about this tutorial to support@tiledesk.com. Thanks!
Finally, check our Blog to discover how a chatbot can interact with the knowledge base to automate customer service.