.png)
How to create more workspaces in the Tiledesk Help Center
-

- Giovanni Troisi
 25 August 2022
Tiledesk Help Center offer a powerful functionality that allow you to create and manage multiple workspaces. Each workspace corresponds to a different public Help Center. So the workspaces allow you to keep separate the Help Centers that refer to different unrelated areas of your company, or vice versa, allow you to create more versions of the same workspace, for example for a multi-language porpouses.
Create a new Workspace
Create a new Workspace is a very simple operation. Click on the name of your current Workspace on the top right side. Then click on the ‘New Workspace’ button.

A popup will open that allow you to type the name of your new workspace.

Click on ‘Save', then the new workspace will be created and loaded. You now have a new, empty workspace in which to work.
Settings import
When a new workspace is created the default settings will be set. This new workspace may be related to another one, so is possible to import the style settings from a workspace belong the current project.
Click on the name of you current Workspace on the top right side. Select the new workspace created or any workspace on which you want to import the settings.

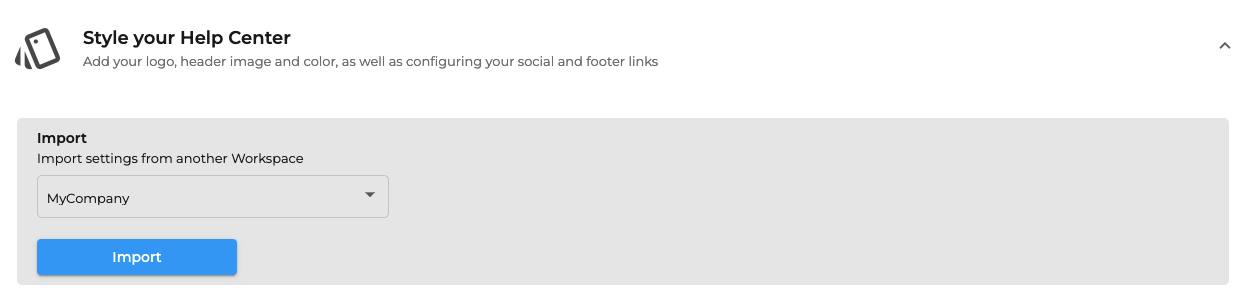
When the workspace is loaded, click on ‘Settings’ on the left sidebar, then expand the Style you Help Center section.
Choose from the dropdown the workspace from which you want to import the settings, then click ‘Import’.
Once the operation is completed you will see the settings on your new Workspace.
Note that the new settings will be visible at the next Deploy. Read Deploy your Help Center for more information.
Enjoy!
Please feel free to send feedback about this tutorial to support@tiledesk.com. Thanks!
Finally, check our Blog to discover how a chatbot can interact with the knowledge base to automate customer service.