.png)
How to install Tiledesk on Wordpress
-

- Dario De Pascalis
 20 September 2022
Find out how to install Tiledesk on your website. You can install it simply by adding the Javascript code to your web page. Follow the instructions.
You can add a Tiledesk widget to your Wordpress site by adding the chat manually.
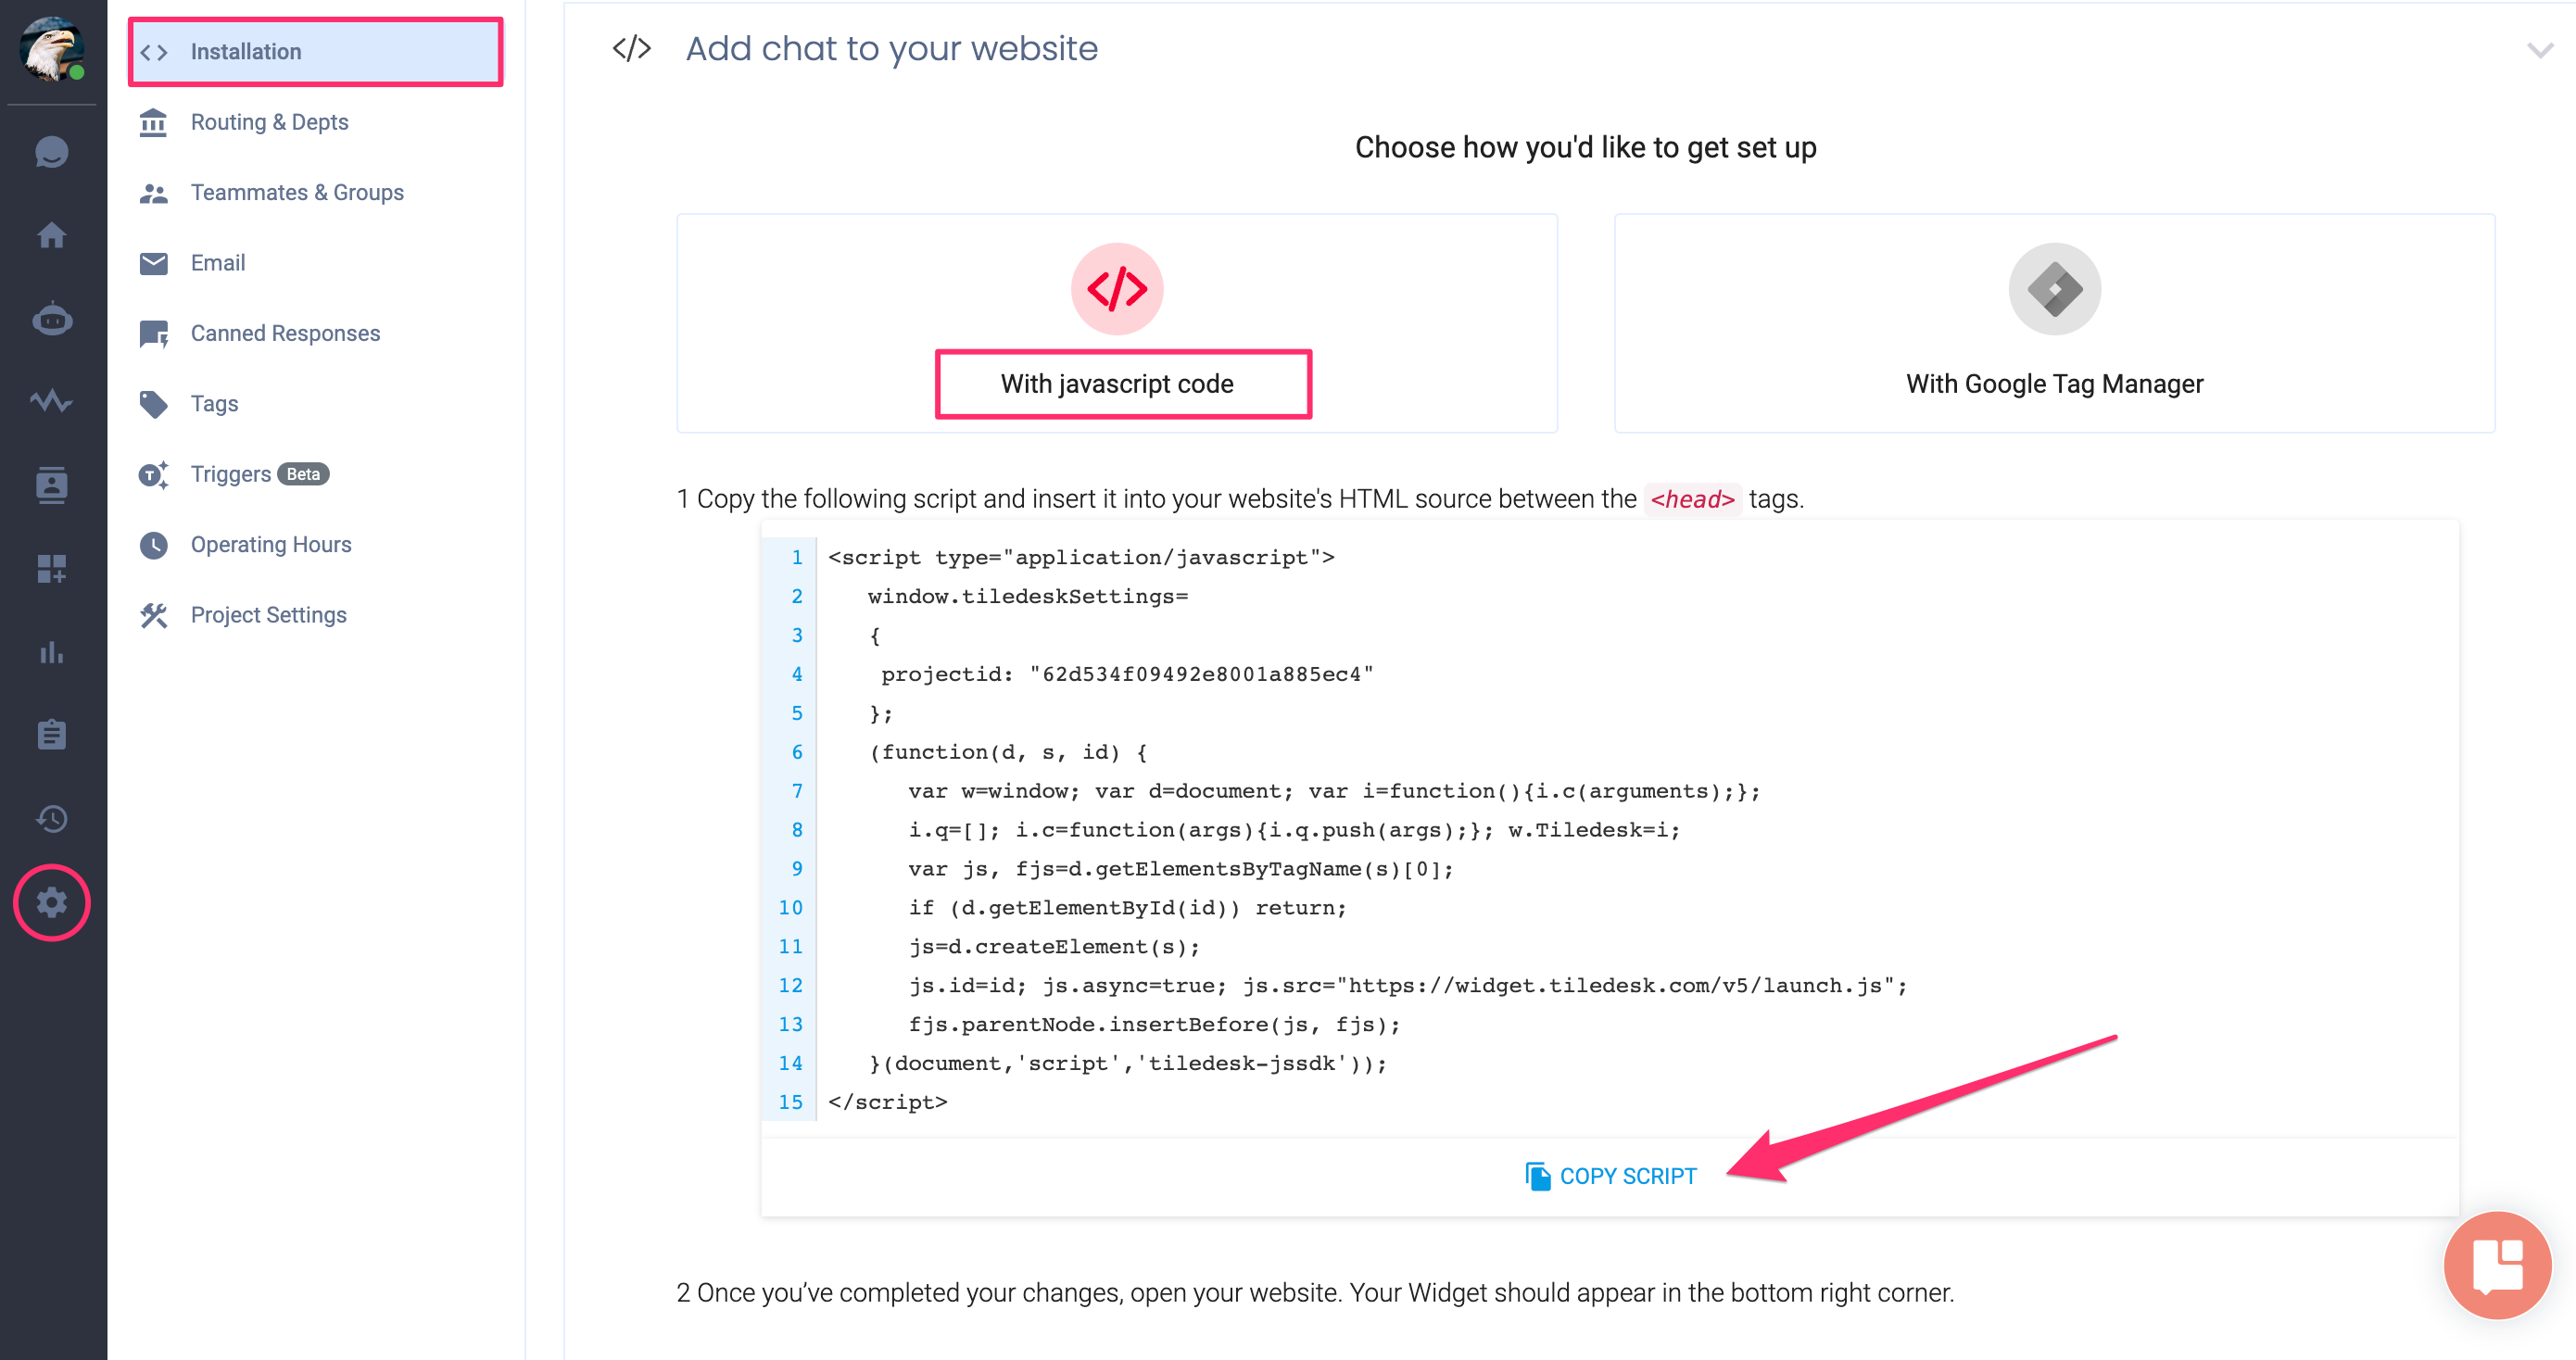
To do this, open the console, select the project to integrate, go to settings > installation and select integration with javascript code, now press on copy script to copy the entire code. See the screenshot below.
- Log in to the Wordpress panel.
- In the Wordpress Dashboard select Tools > Theme File Editor, select the active theme and then select the footer.html file and paste the JavaScript code at the end of the page. See the screenshot below.
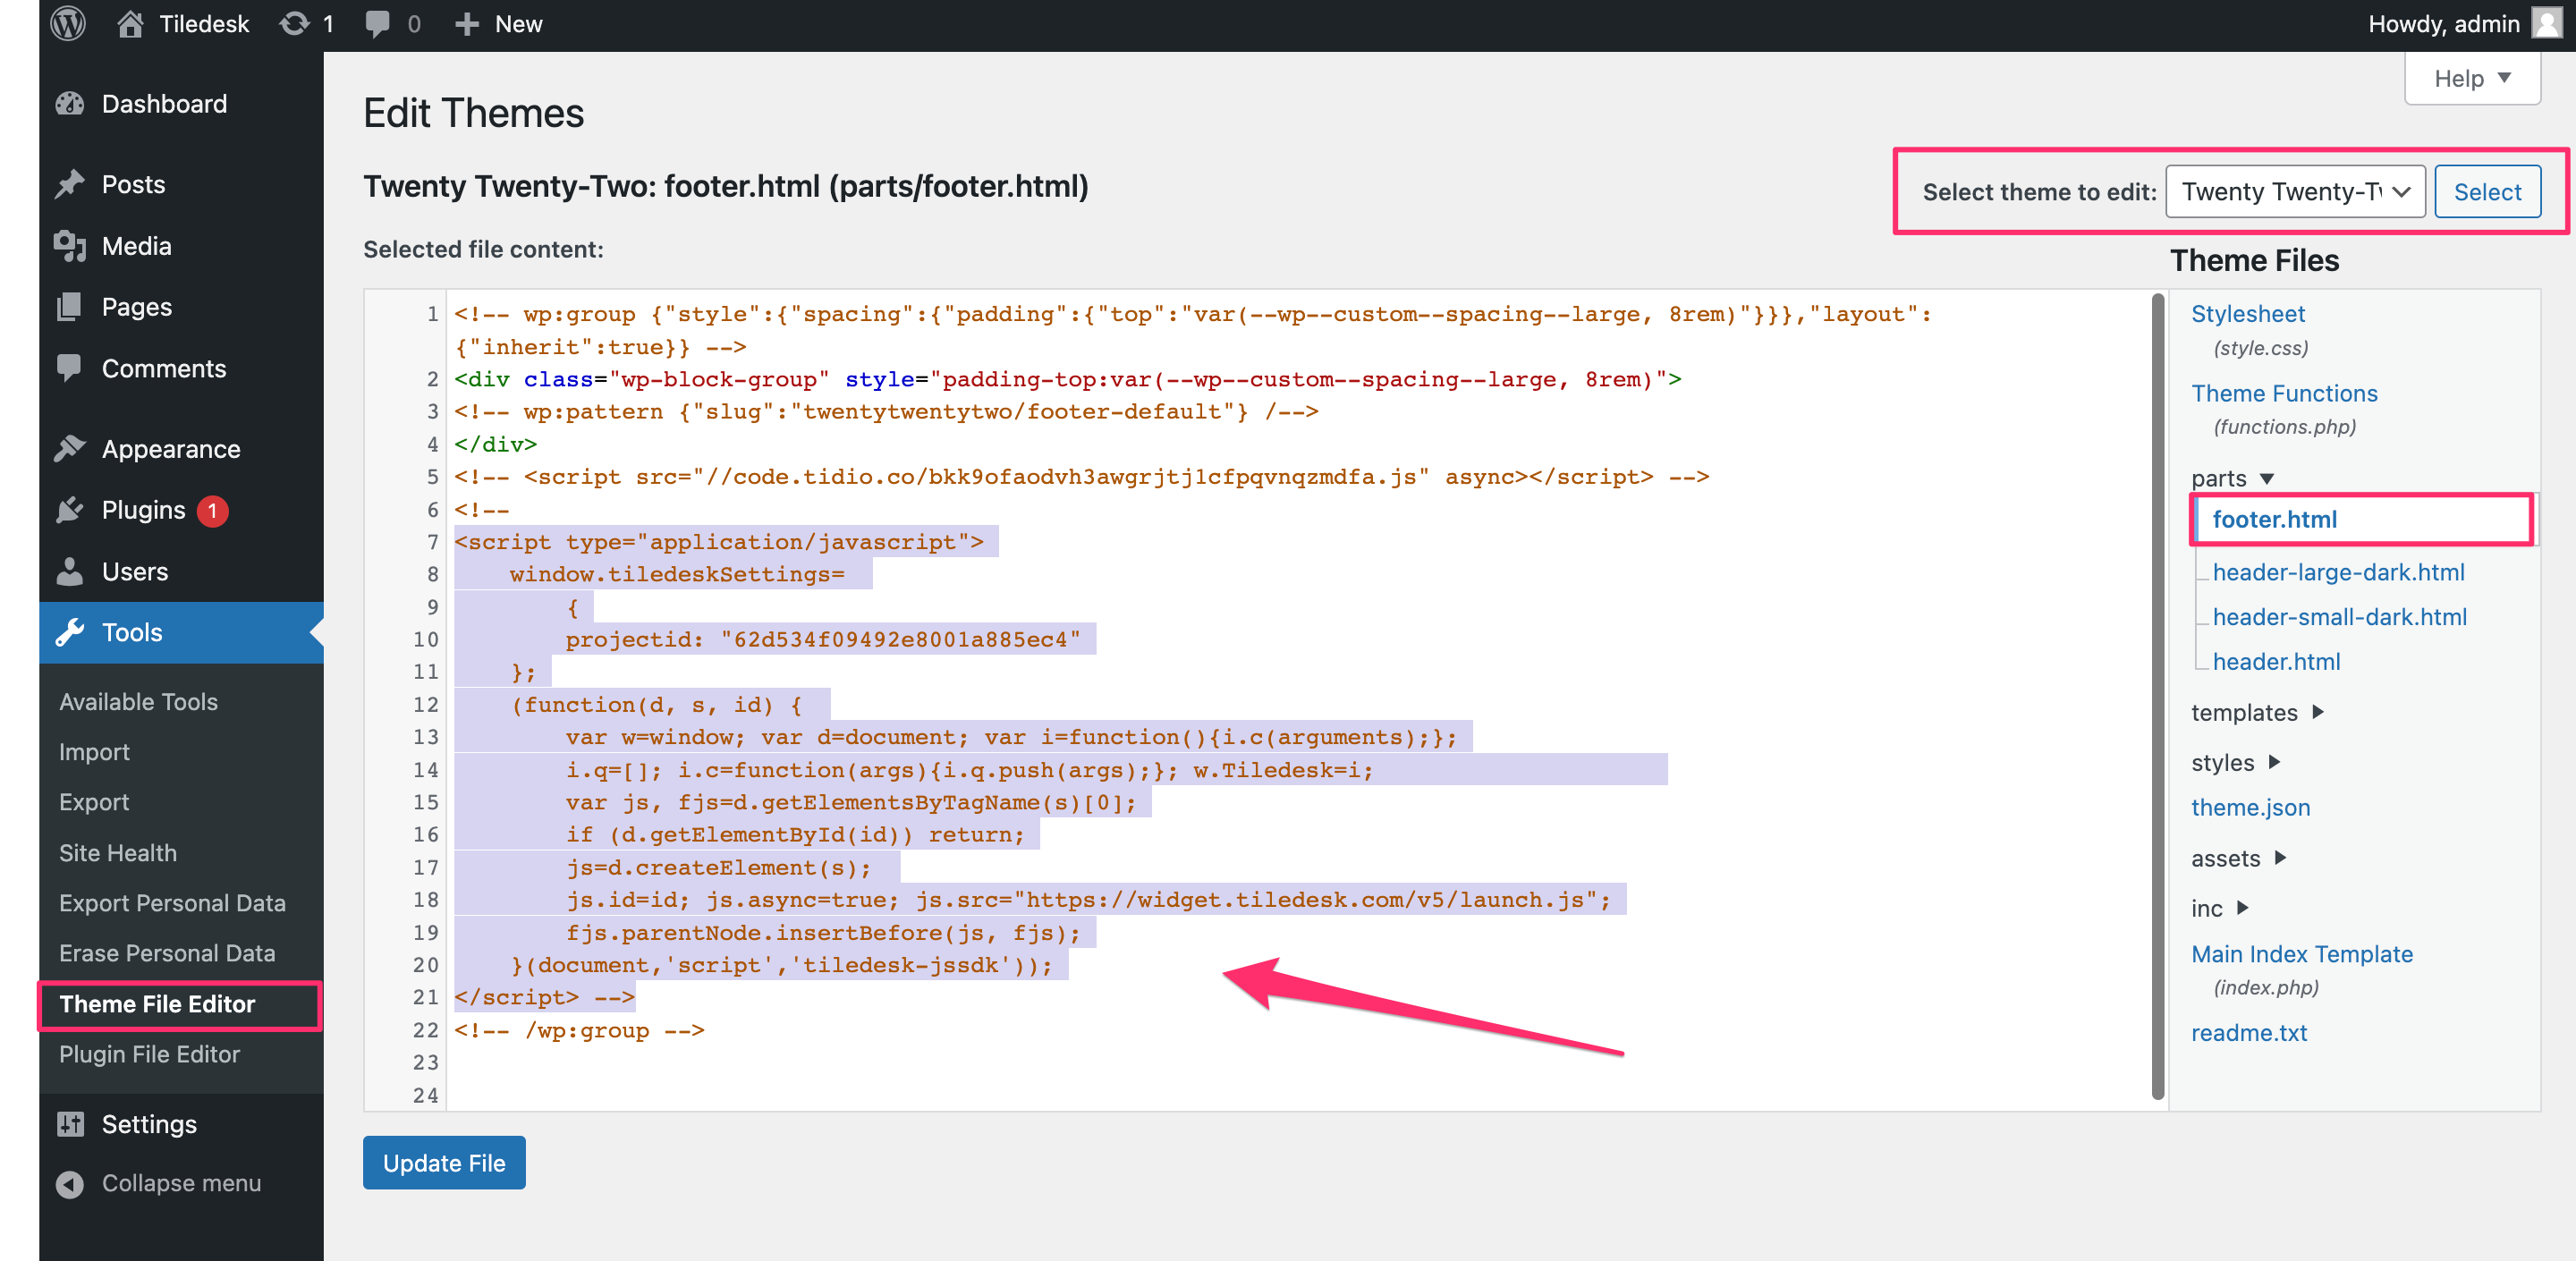
- Remember to press the Update File button at the bottom left of the page to save your changes.
- Go to your Wordpress website and check if you can see the Tiledesk widget.

Now Tiledesk is officially part of your website 🎉
If you have had a chance to check this tutorial on YouTube, don't forget to subscribe to join our amazing Community! We greatly appreciate your support.