How to install Tiledesk on Prestashop
Find out how to install Tiledesk on your website. You can install it simply by adding the Javascript code to your web page. Follow the instructions below, or have a look at this video tutorial. You can add a Tiledesk widget to your Prestashop site by adding the chat manually.
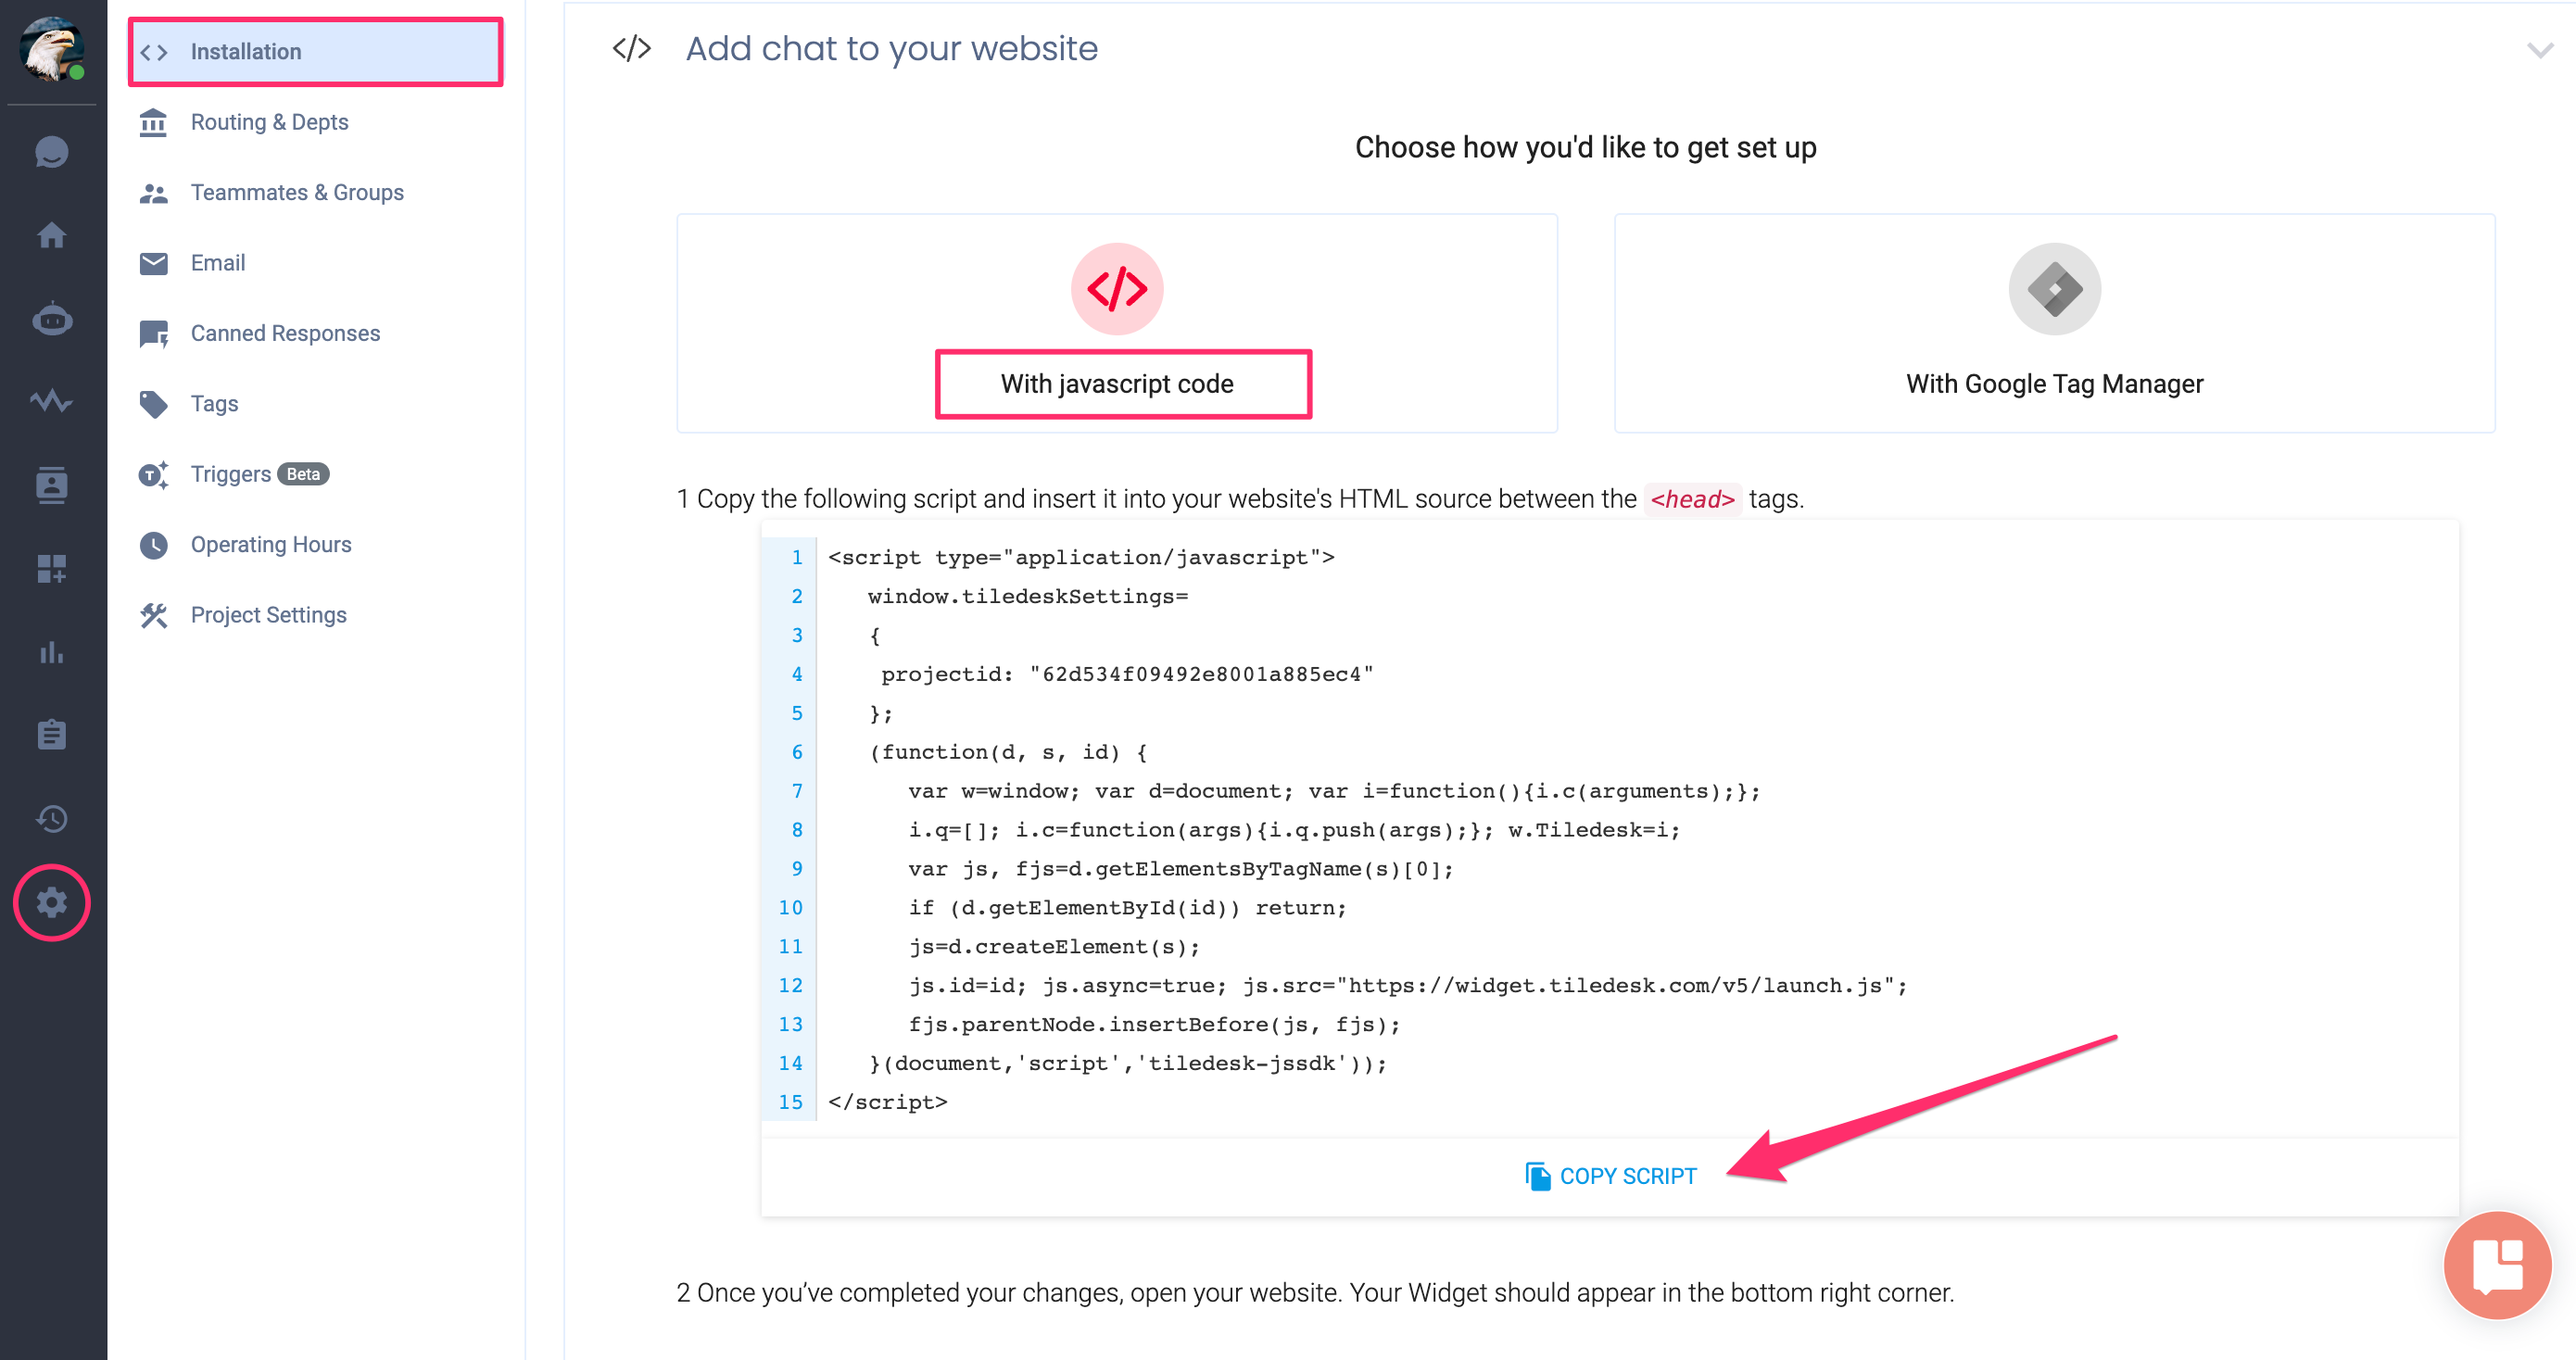
To do this, open the console, select the project to integrate, go to settings > installation and select integration with javascript code, now press on copy script to copy the entire code. See the screenshot below.
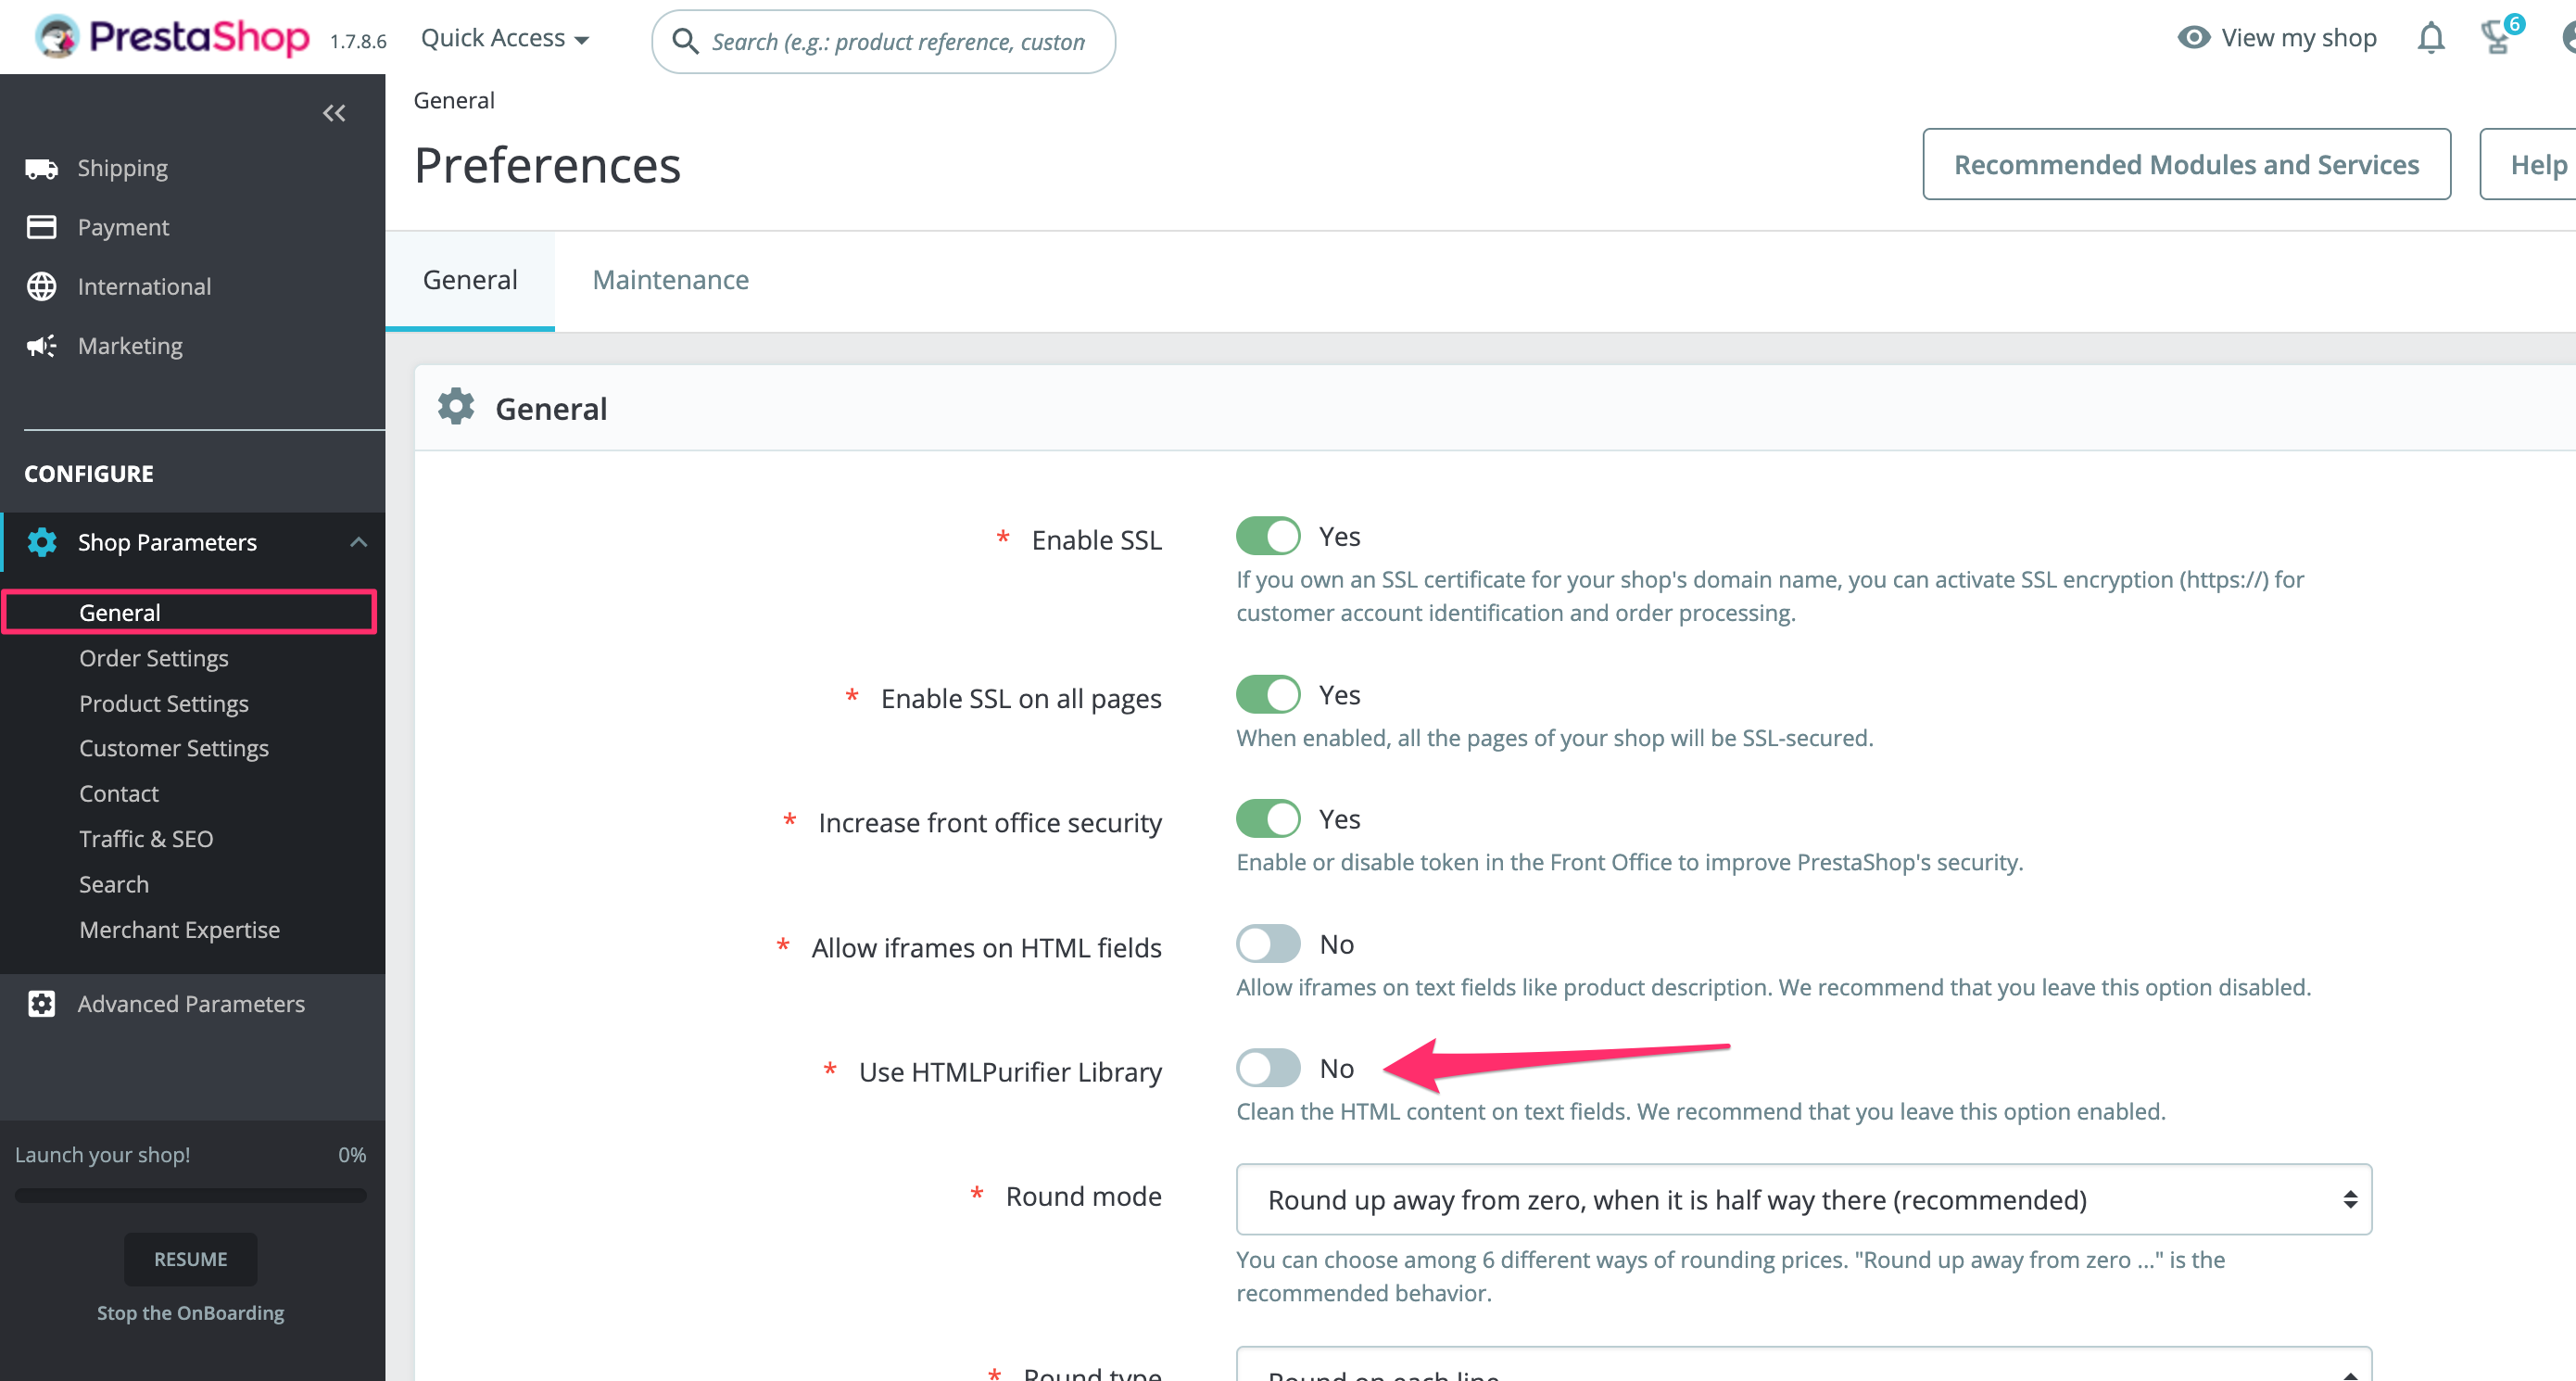
- Before integrating the widget, you need to disable HTML purifier in your PrestaShop admin area.
To do this go to Shop Parameters > General and disable Use HTMLPurifier Library. See the screenshot below.
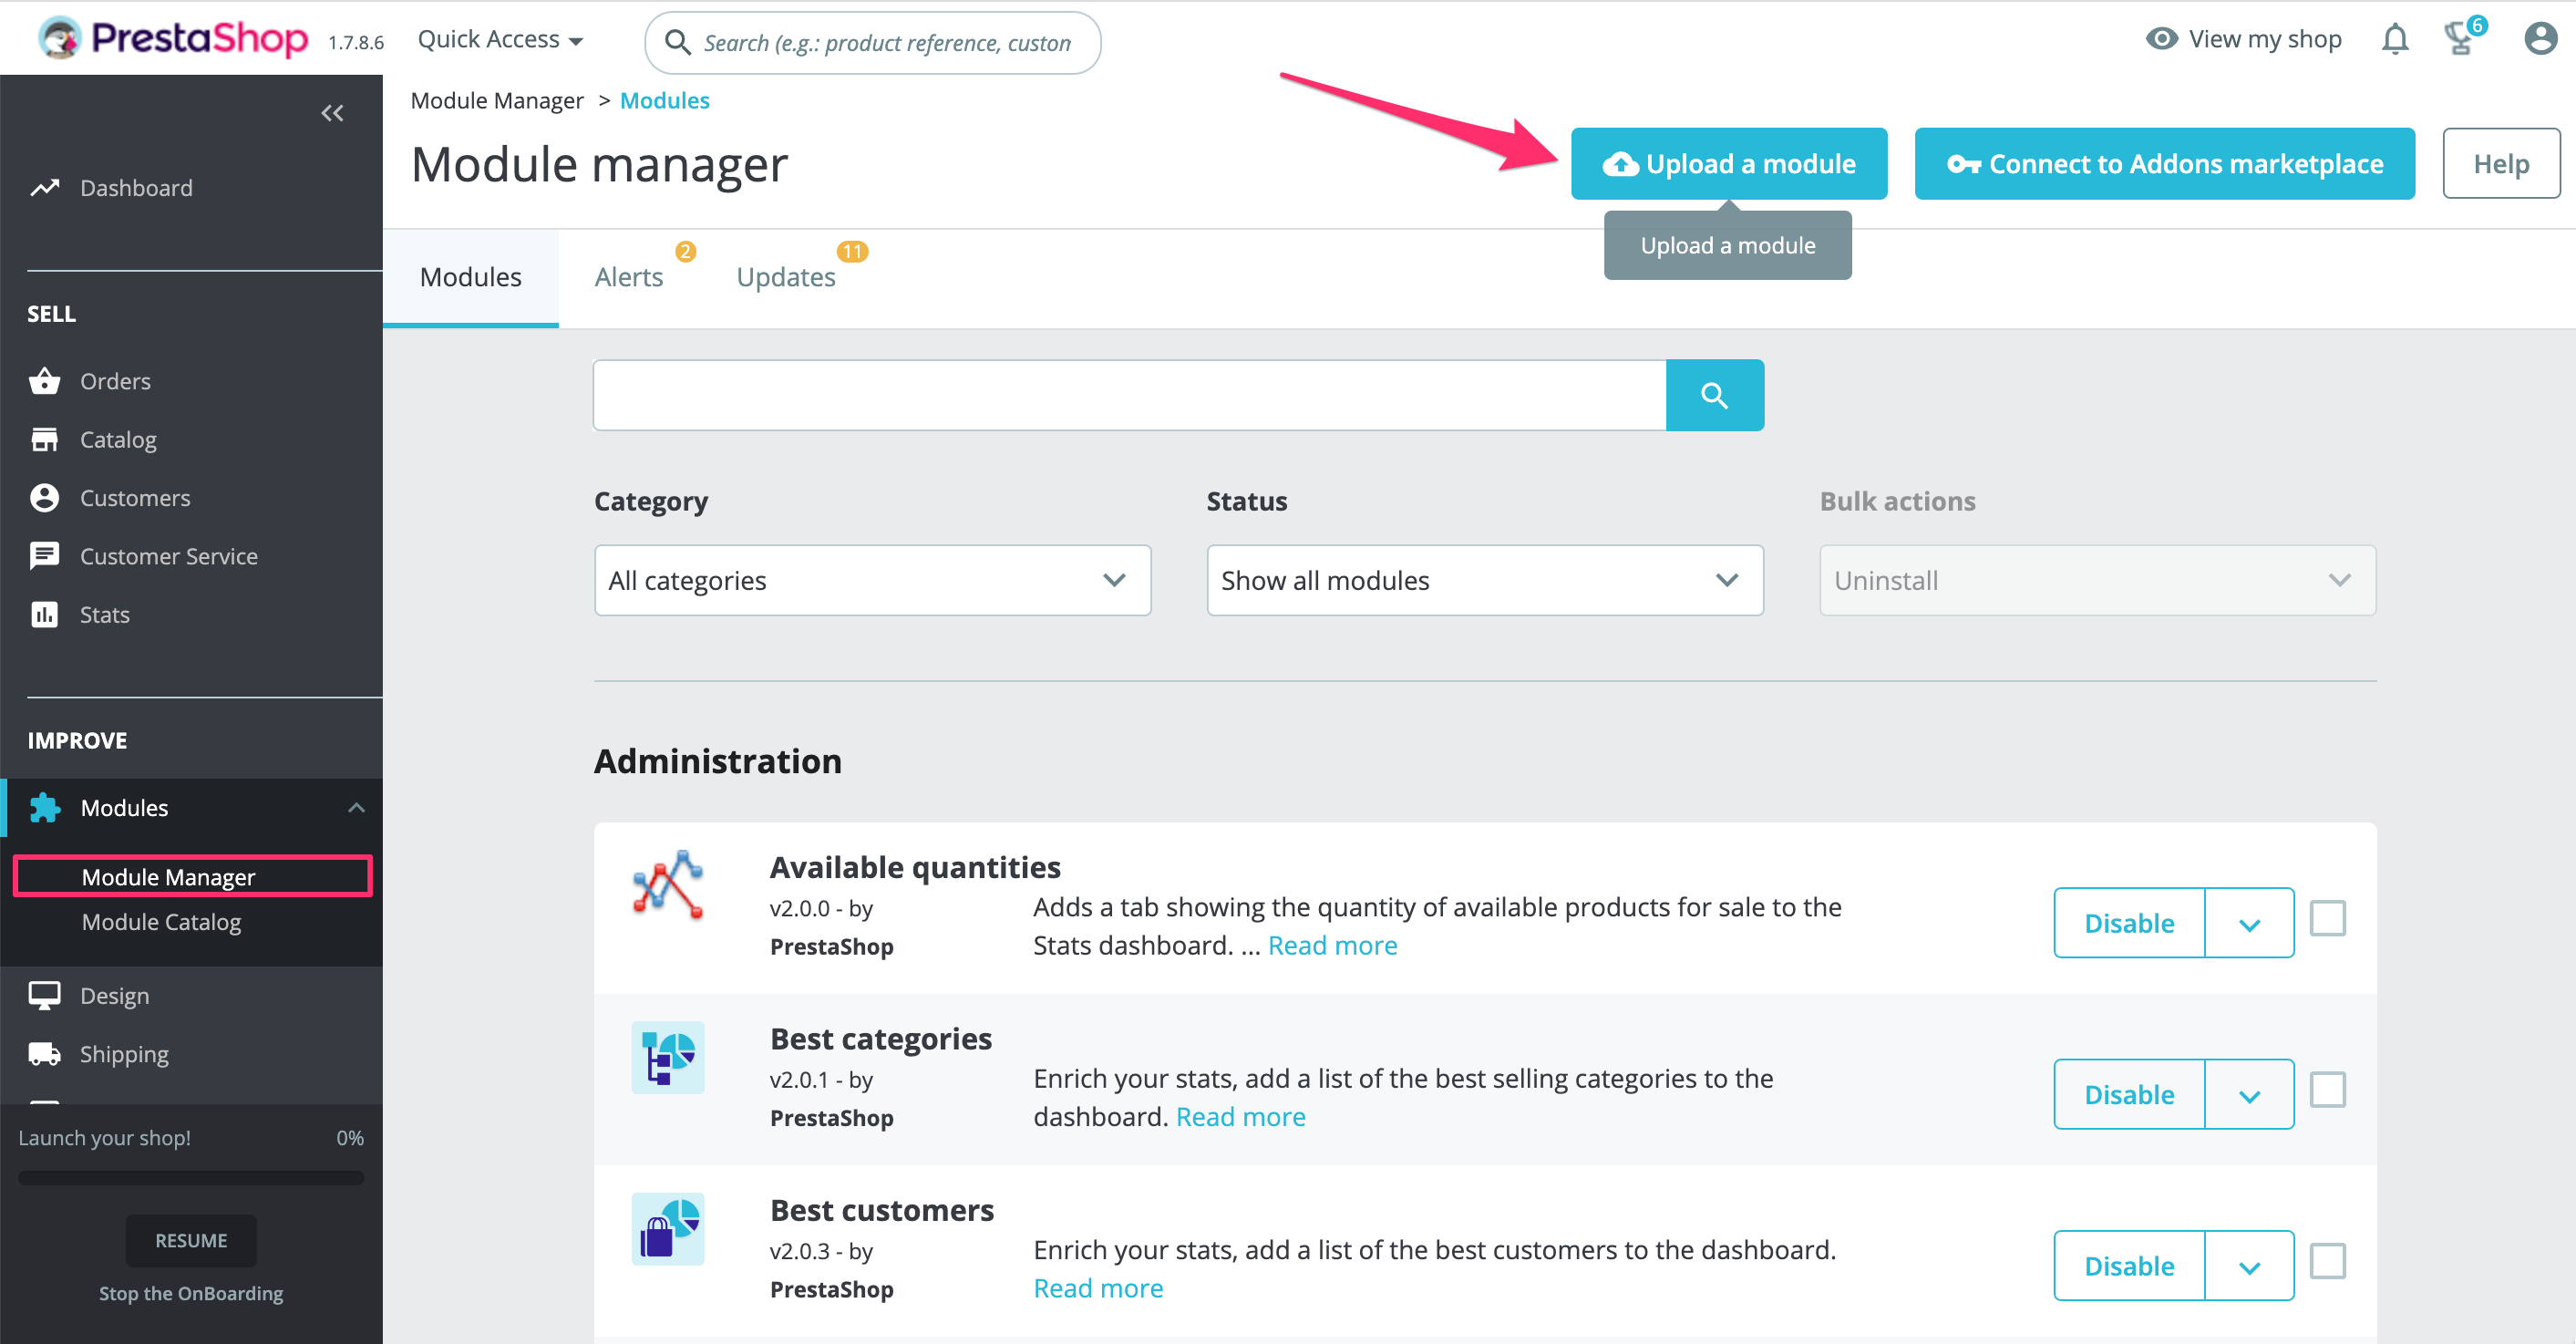
- Download the HTMLbox form from here.
- In the PrestaShop panel select Module Manager and then Upload a module, to upload the HTMLbox module. See the screenshot below.
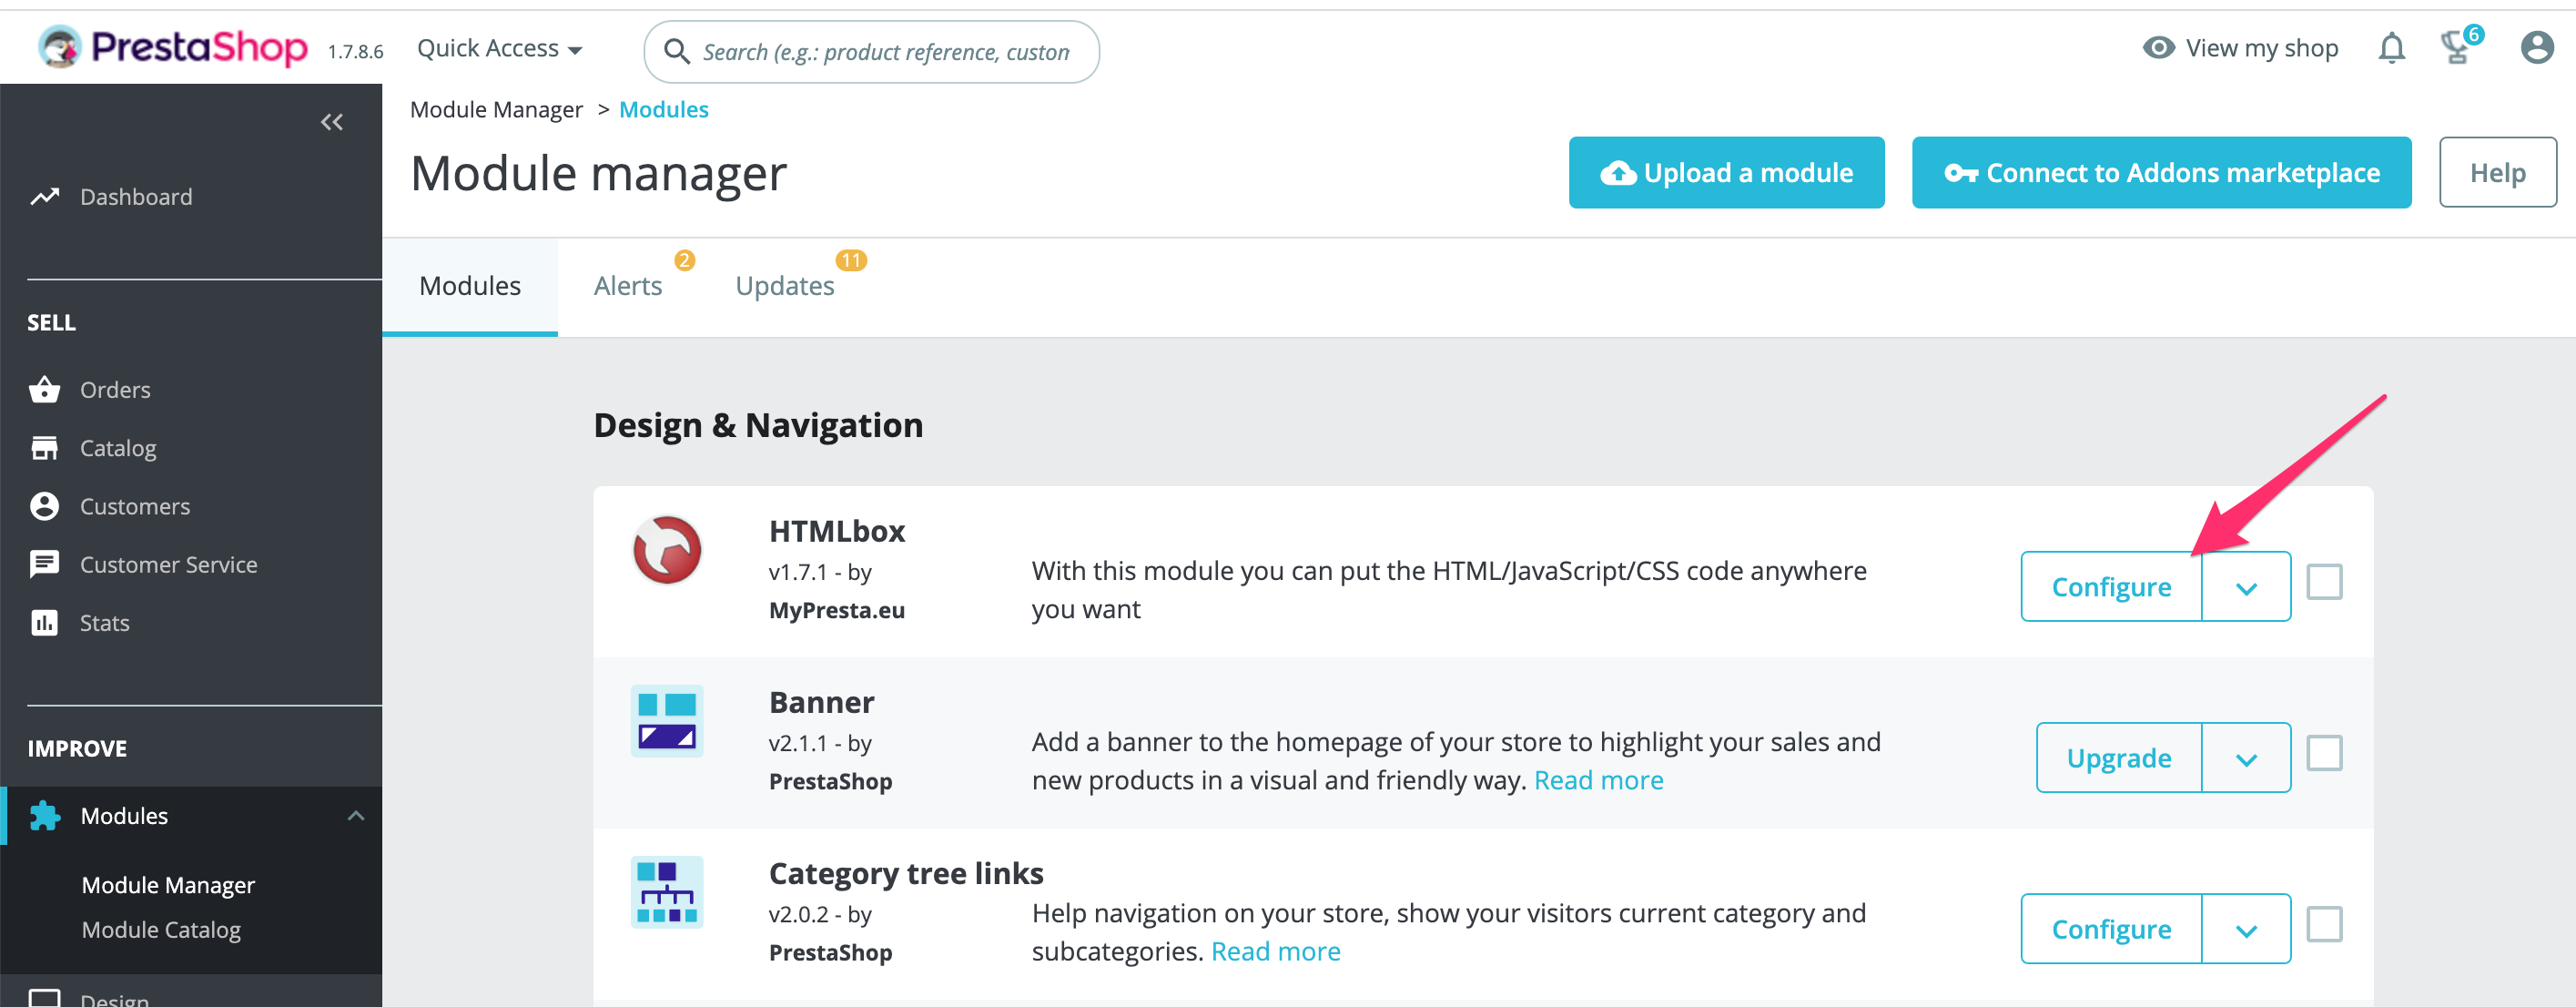
- Once the module is loaded it, goes to the configuration. See the screenshot below.
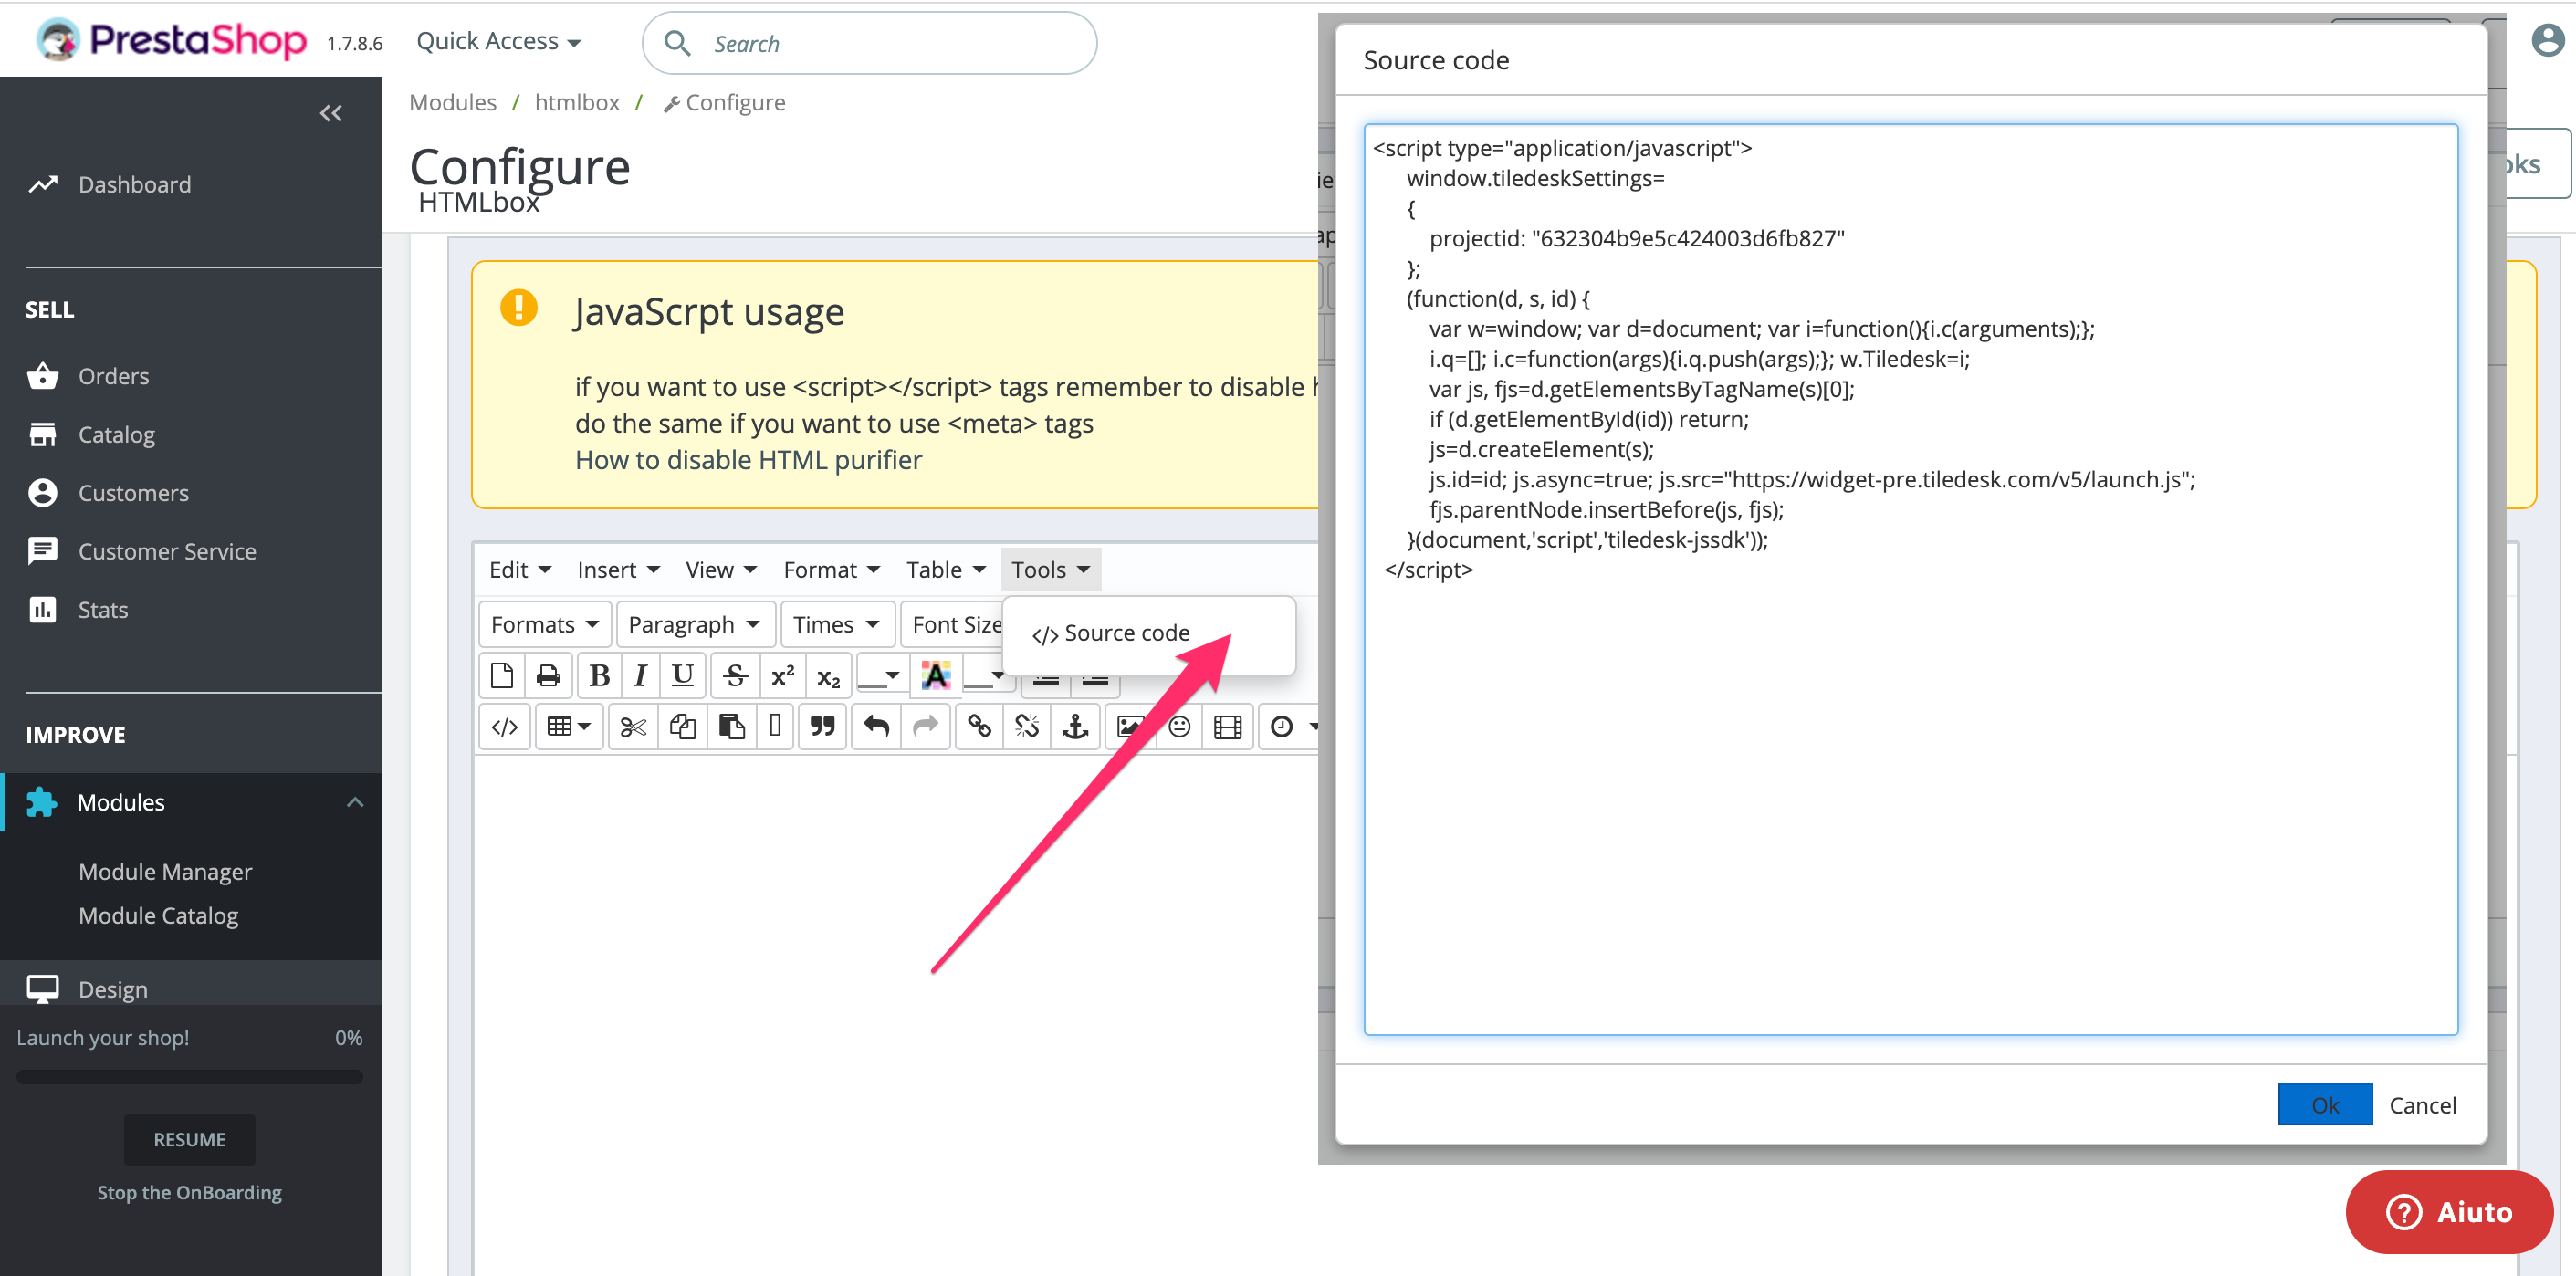
- Select Tools > Source Code and paste the JavaScript code of the Tiledesk widget. See the screenshot below.
- Remember to press the Save button at the bottmo right of the page to save your changes.
- Go to your Prestashop website and check if you can see the Tiledesk widget.

Now Tiledesk is officially part of your website 🎉
If you have had a chance to check this tutorial on YouTube, don't forget to subscribe to join our amazing Community! We greatly appreciate your support.
.png)

