.png)
Define the Operating Hours
-

- Saeid Kajkolah
 15 October 2021
At Tiledesk, you can define your Operating Hours. If a customer contacts you outside of these hours, the bot will inform the visitors that you will contact them later. This is an important and helpful action to prevent your customers from waiting too long in a conversation.
Set Your Operating Hours
Operating hours settings determine when the service is open. When operating hours are enabled, agents cannot receive messages from end-users outside of the scheduled work hours, regardless of the agents’ availability.
If operating hours are enabled and a customer gets in touch outside of your office hours, a new unassigned conversation is created.
How to Define Operating Hours
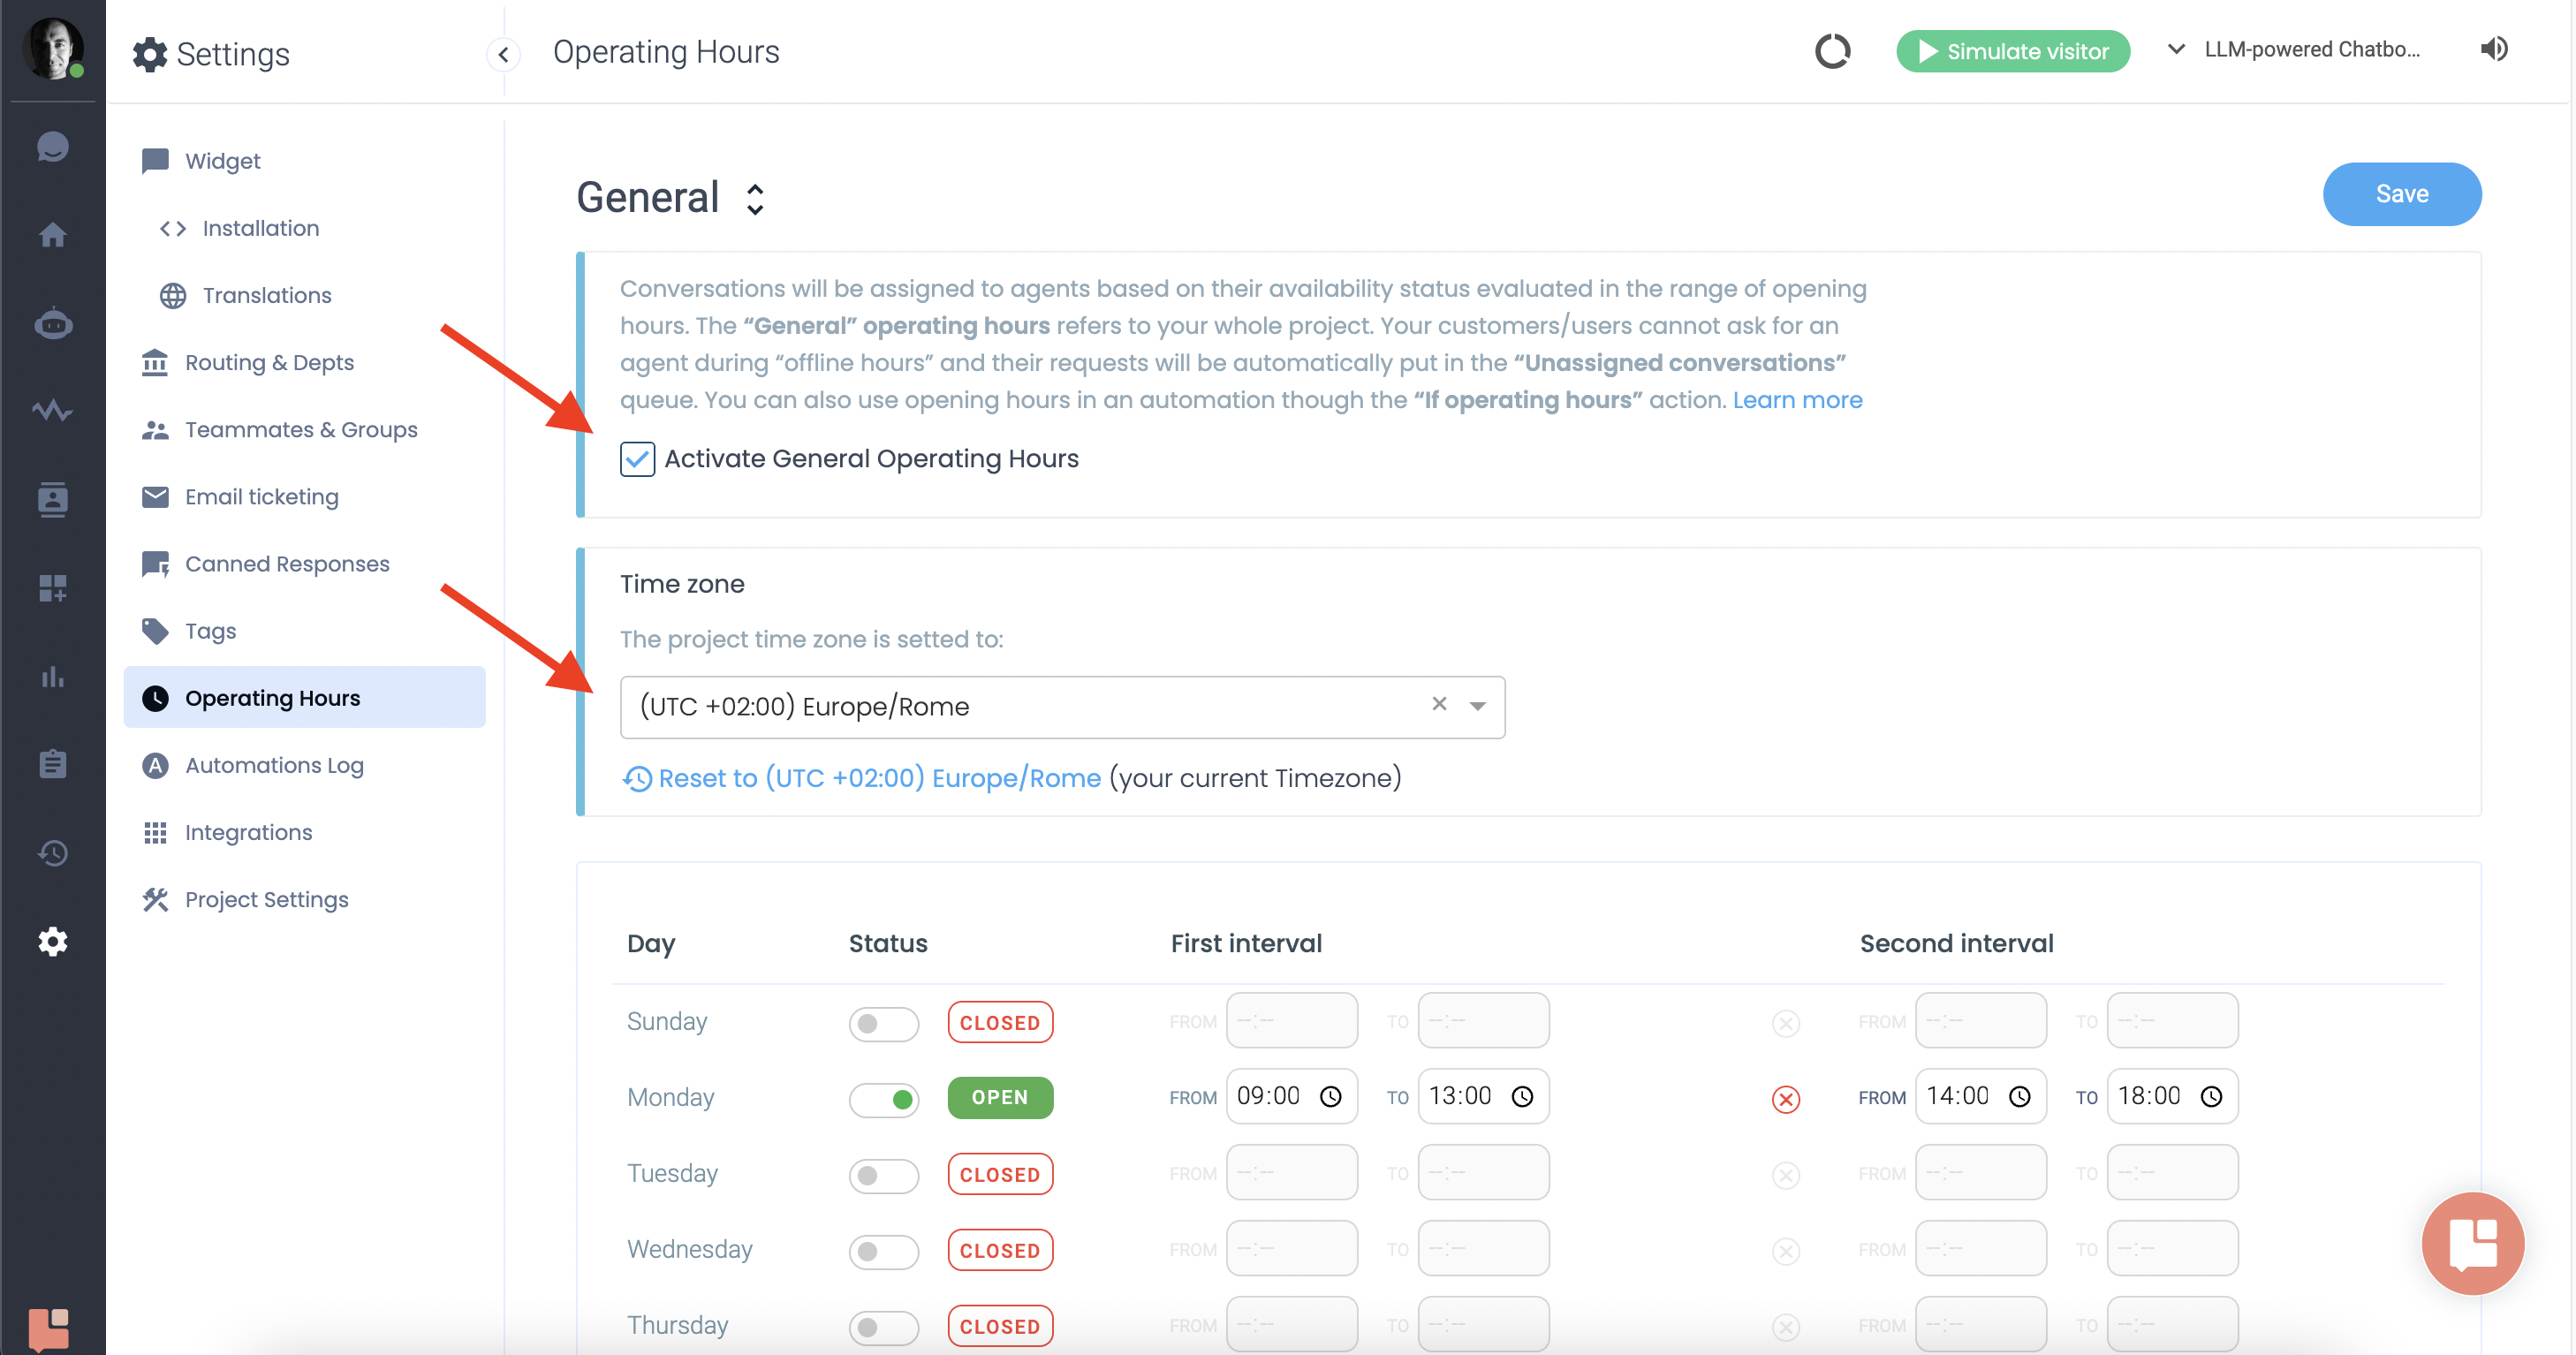
Head to the Tiledesk dashboard. Click on “Settings” and then “Operating Hours”.
First, you need to activate “Activate General Opening Hours”, set the “Time Zone”, and define the operating hours at the bottom of the page.
Hit “Save”.
Create Different Operating Hours Slots
Another cool feature in this section is the ability to define different slots. For example, if your customer support team works in a different time zone, this feature will be very handy. With it, you can have a time slot for your support team and another for your sales team.
Let’s create a new slot, and later I will show you how to use it in the Design Studio.
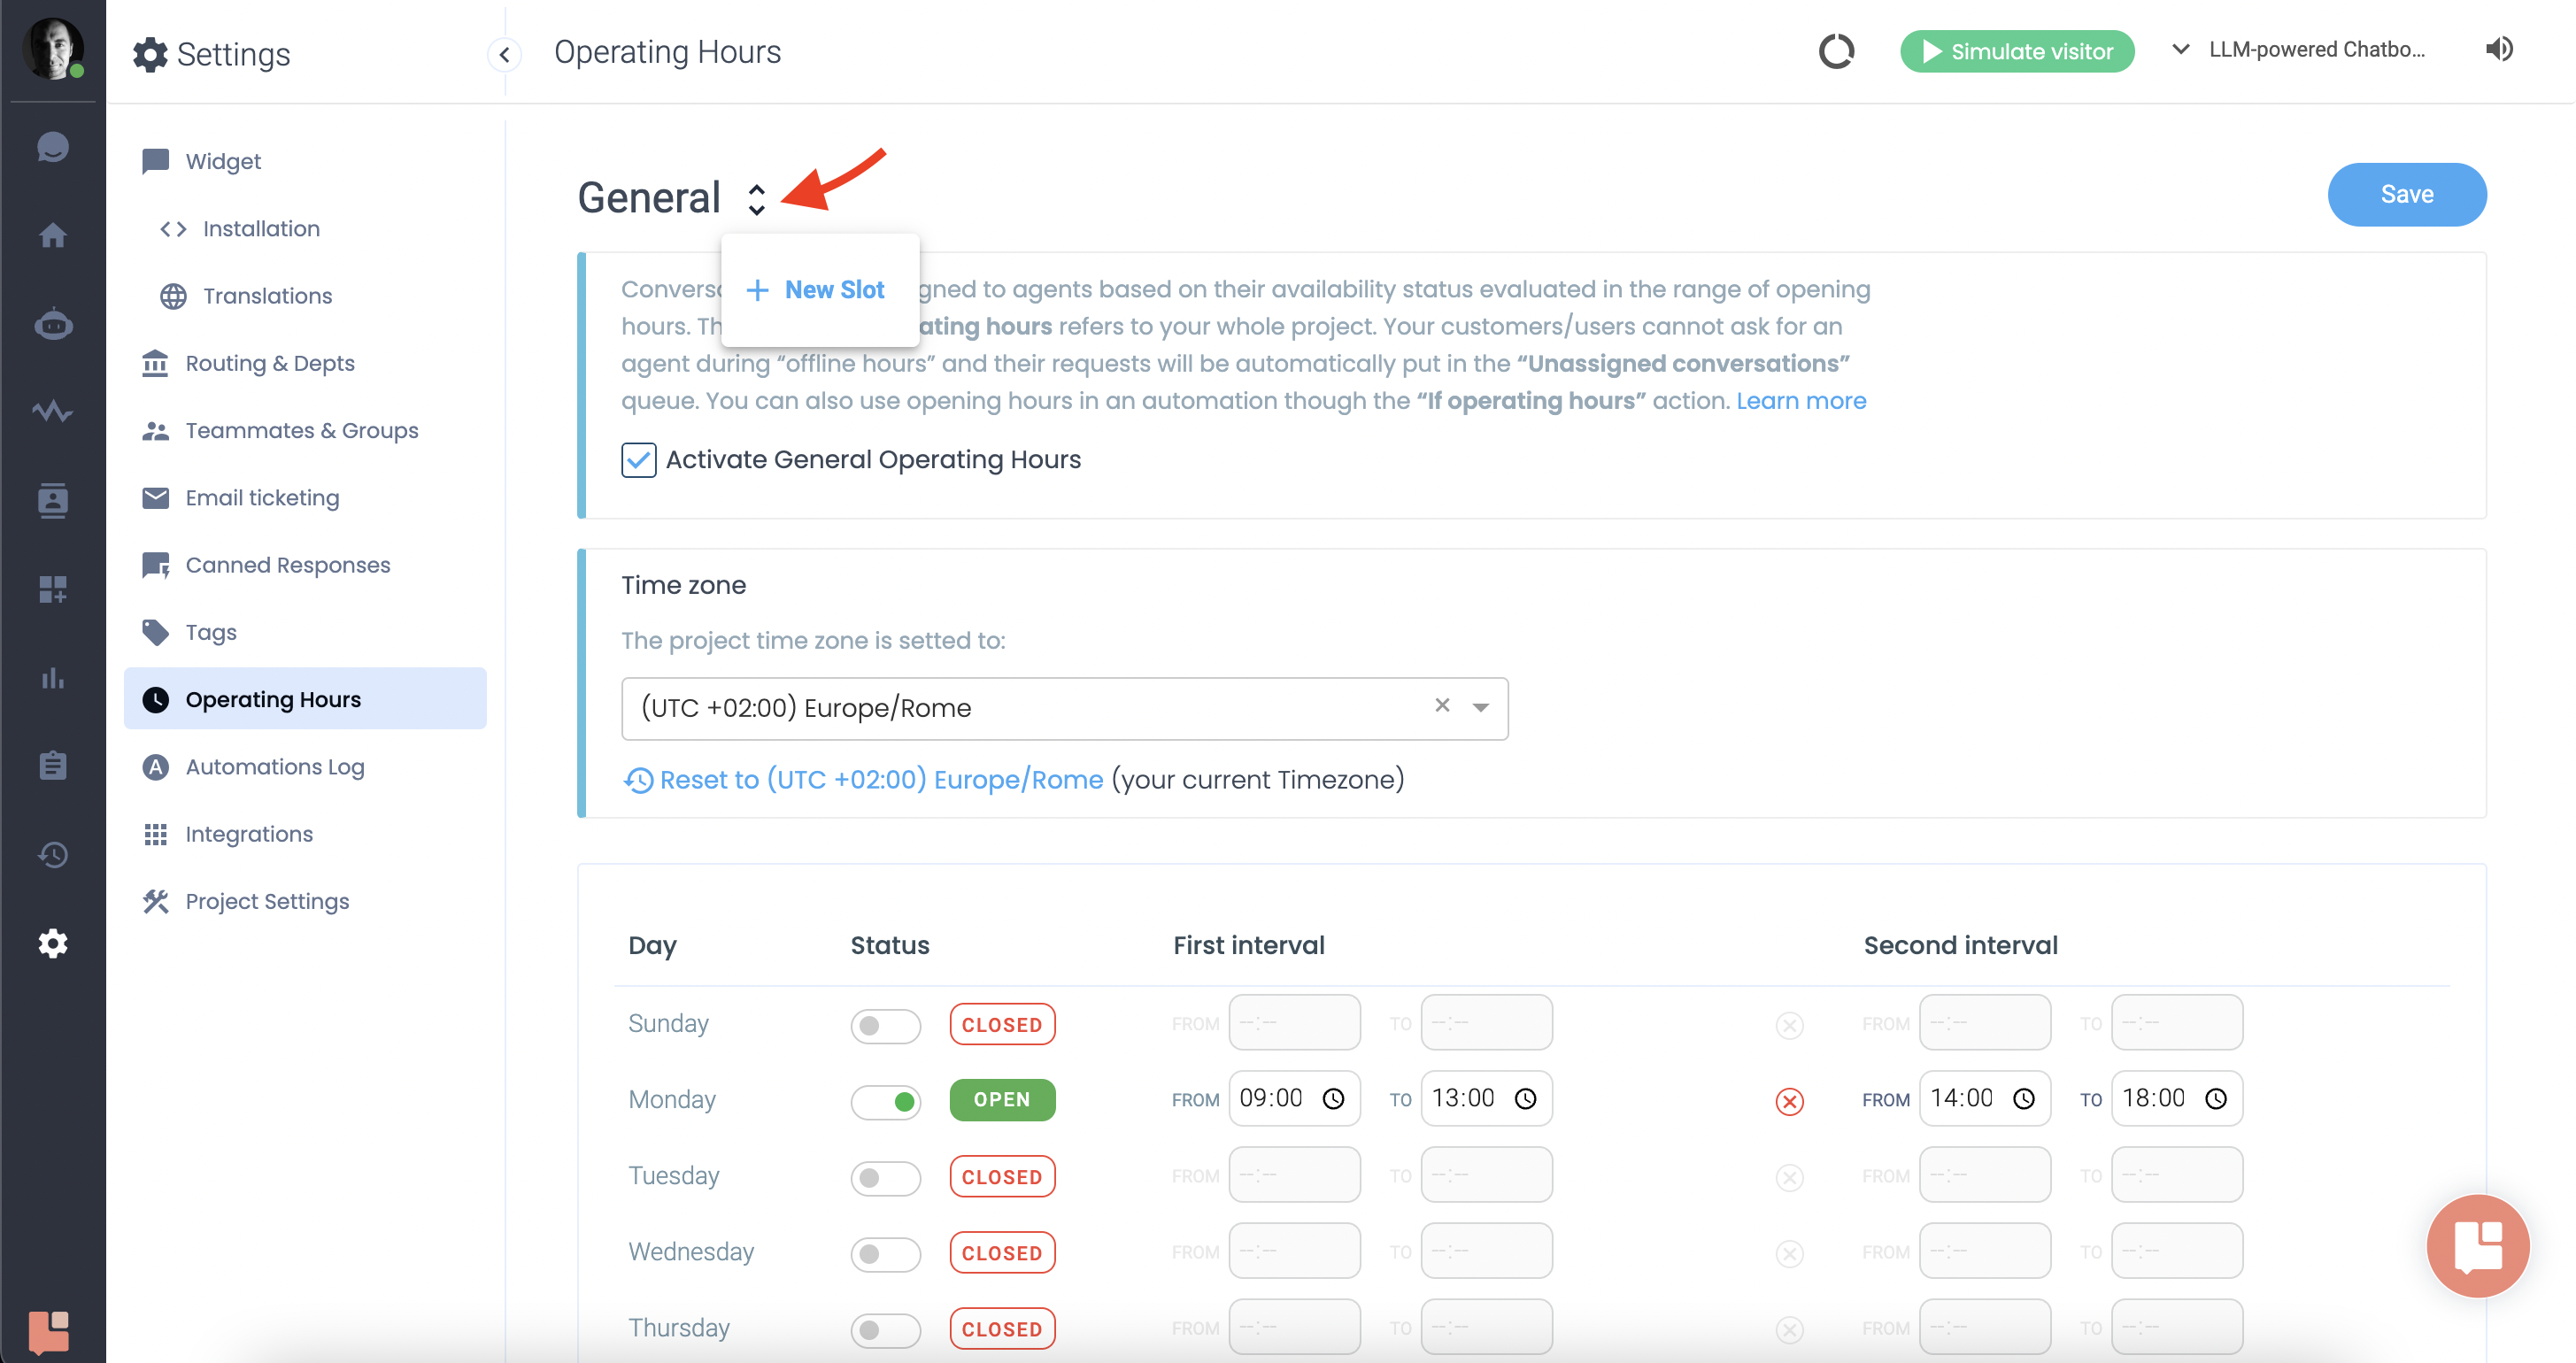
To add the new time slot, click on the “double arrowhead” next to the General title, as you can see in the image below, and click on “New Slot”. Choose a name for the new slot and click on “Create”.
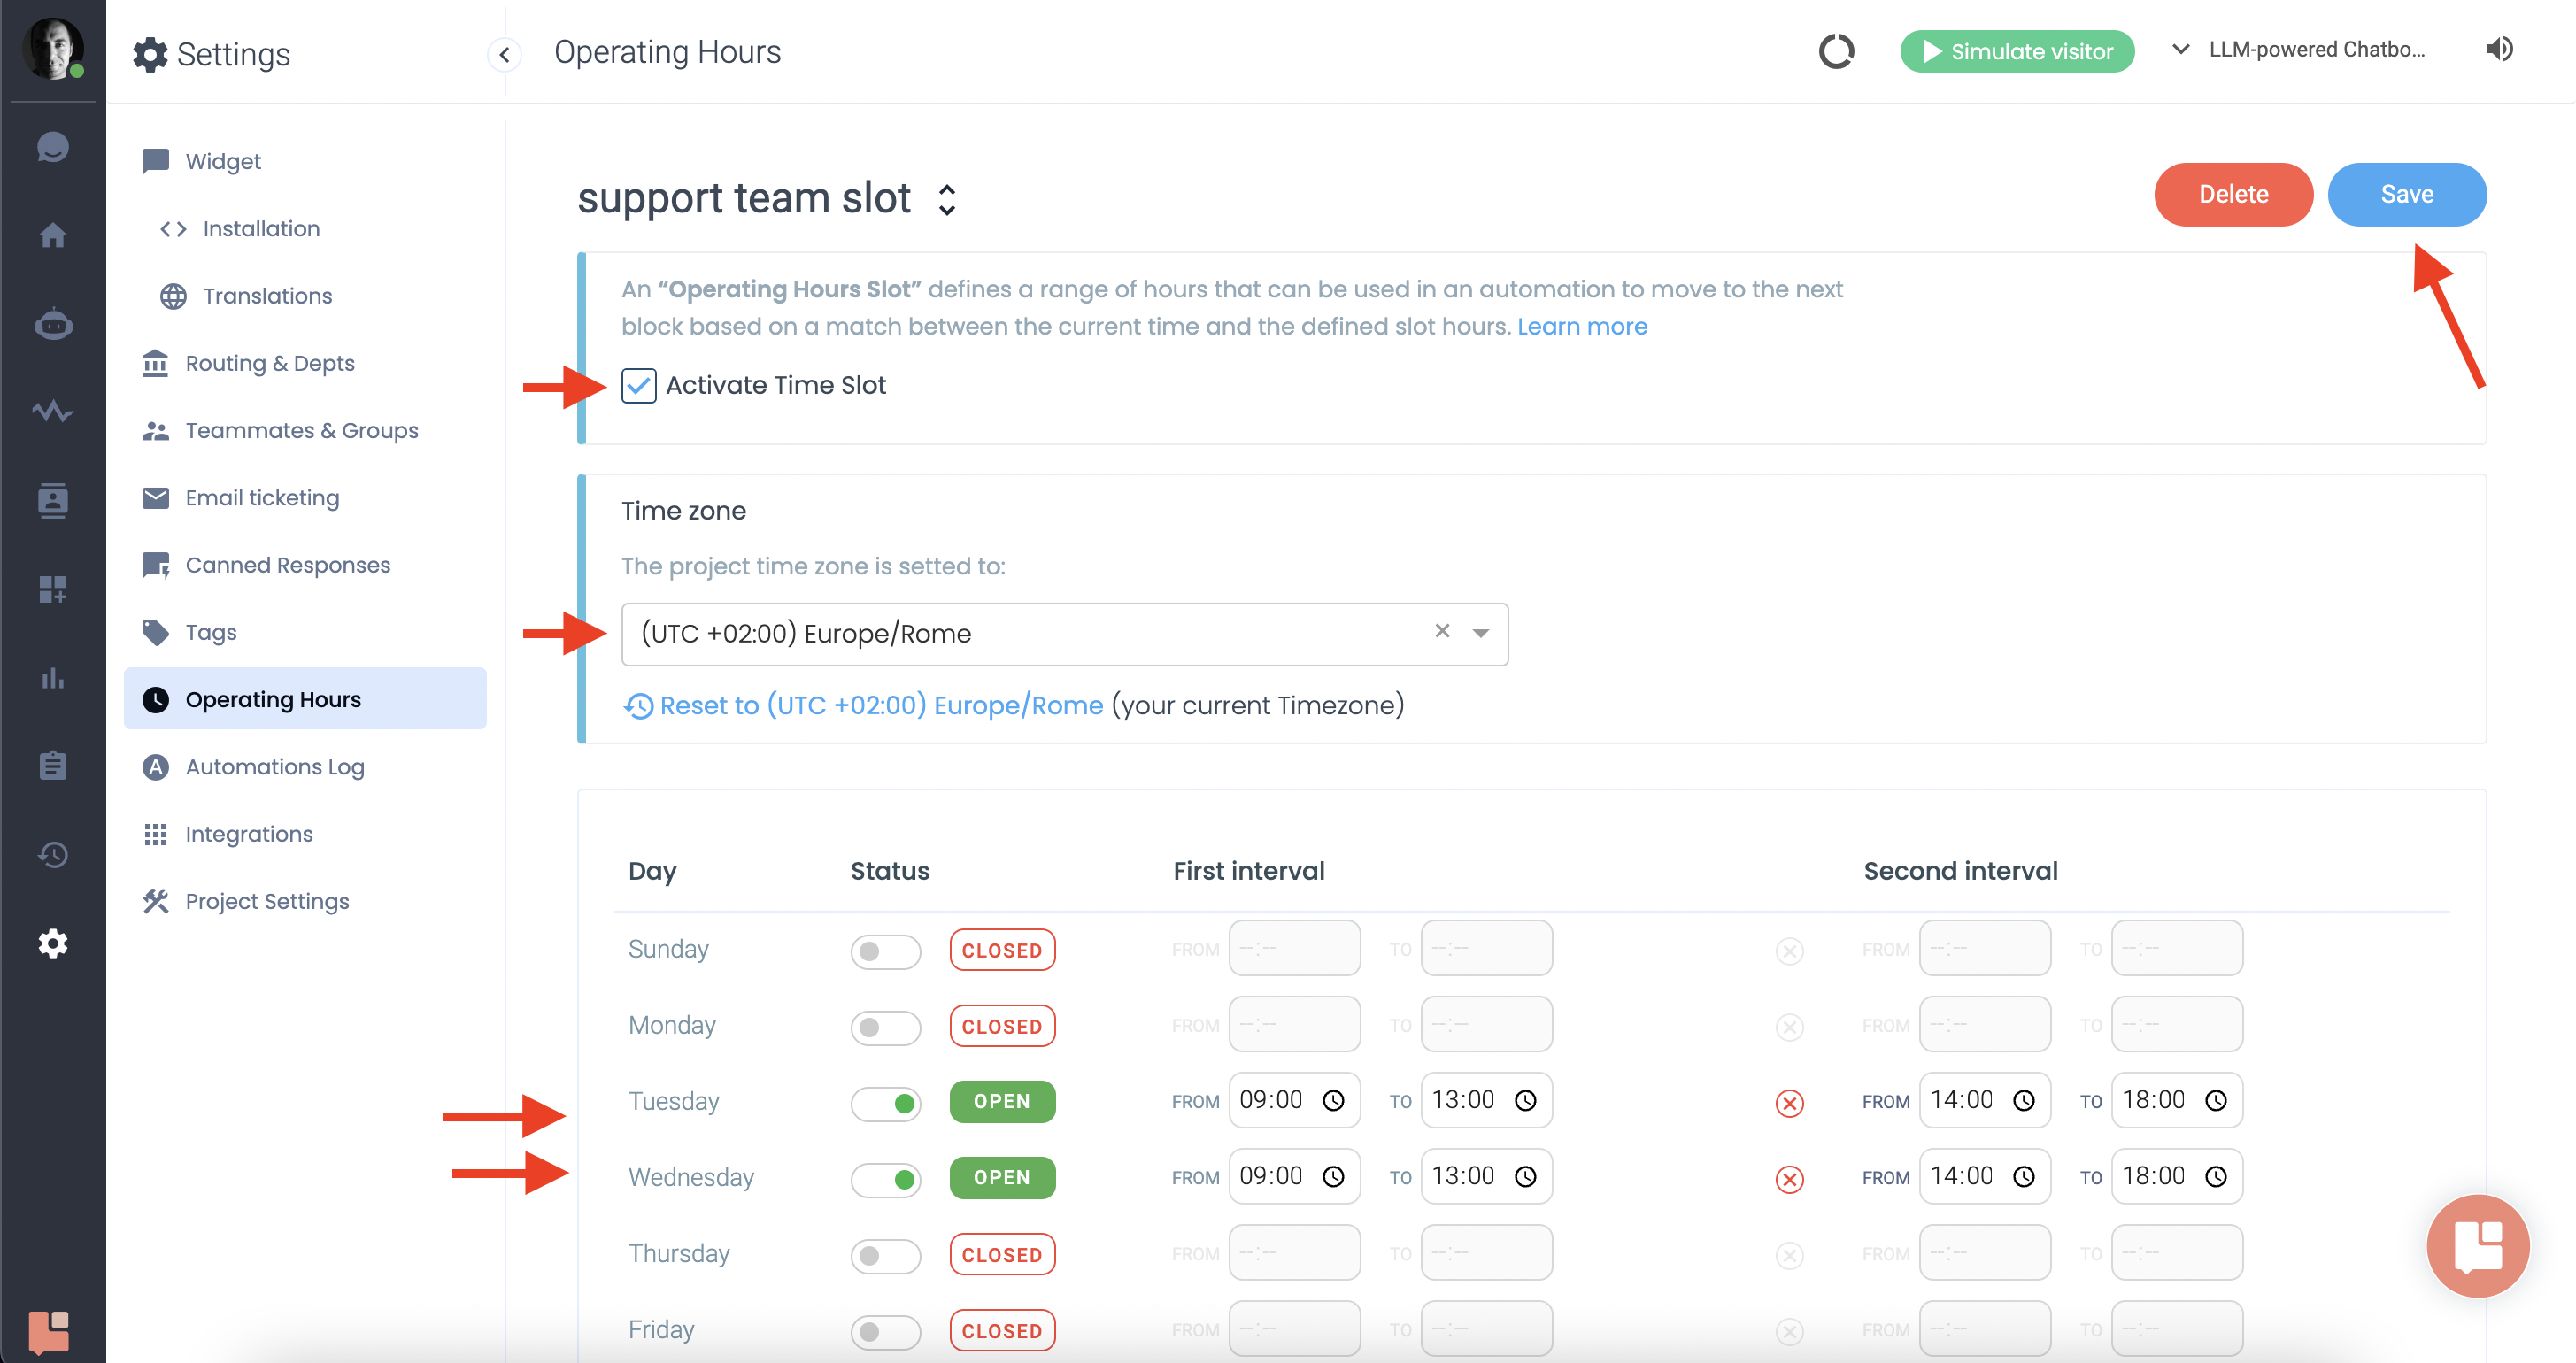
As you can see, a new operating hours page will appear where you can click on “Activate Time Slot”, and then select the time zone and specific working days and hours based on your needs.
Don’t forget to save changes.
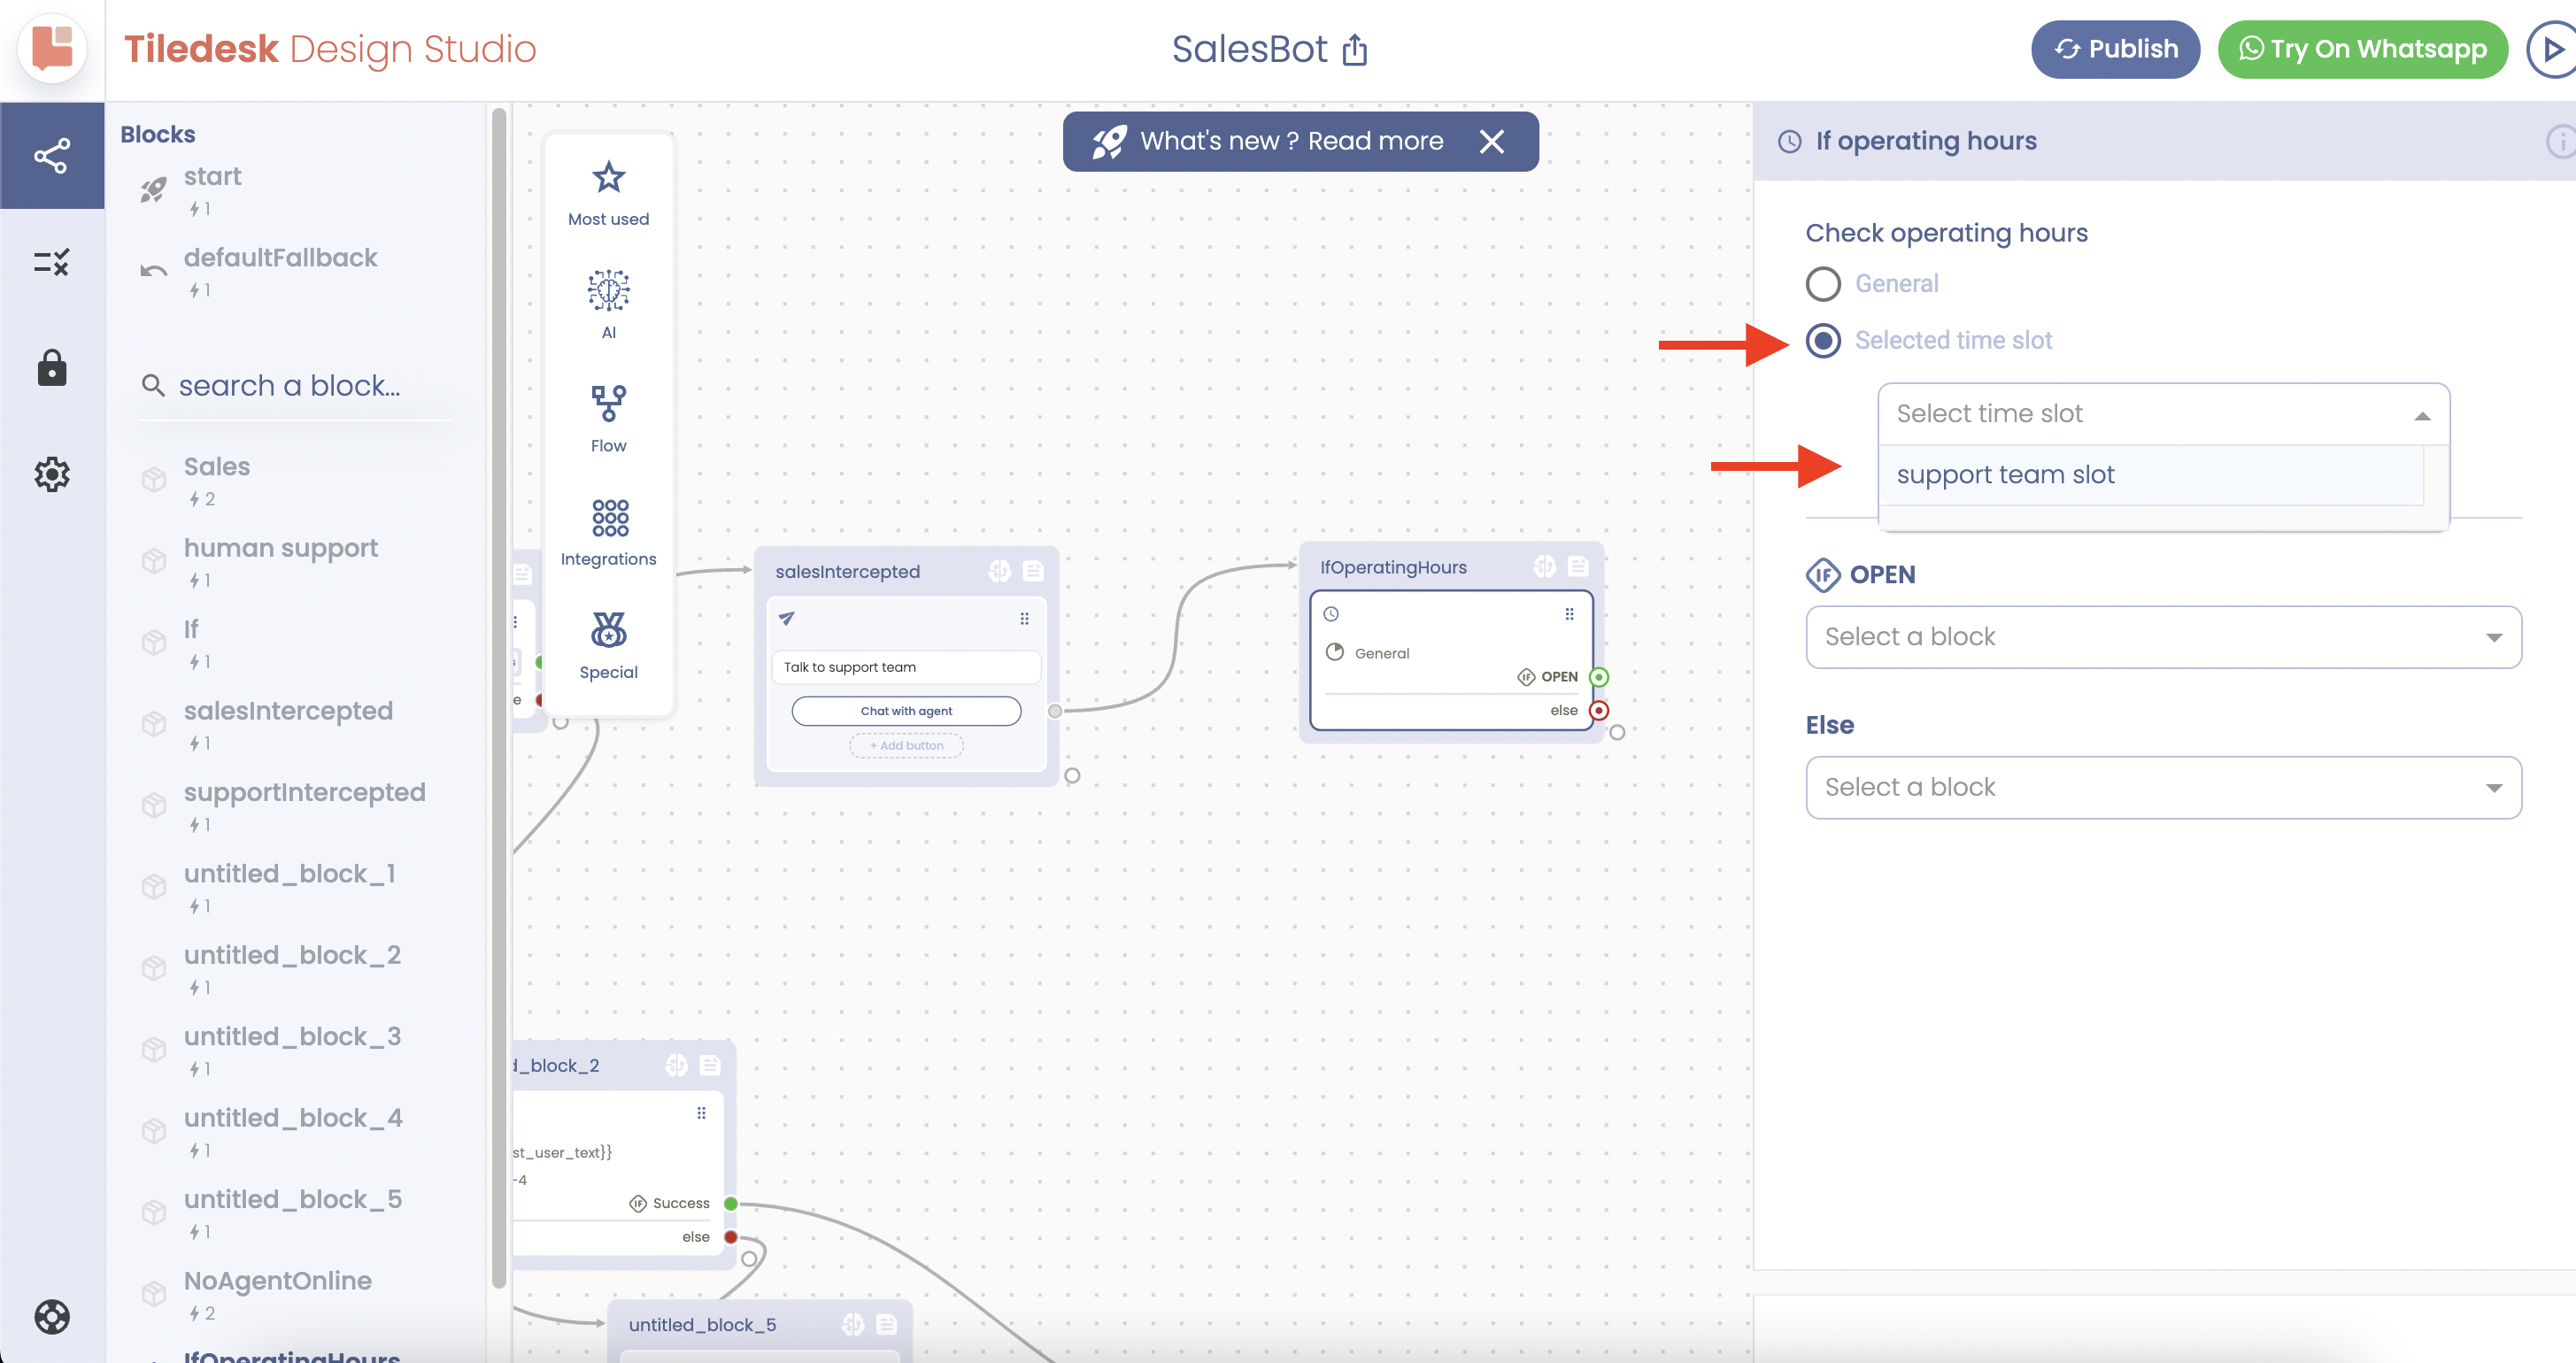
Then, return to the Design Studio and use the “If Operating Hour” action before the “Agent Handoff”.
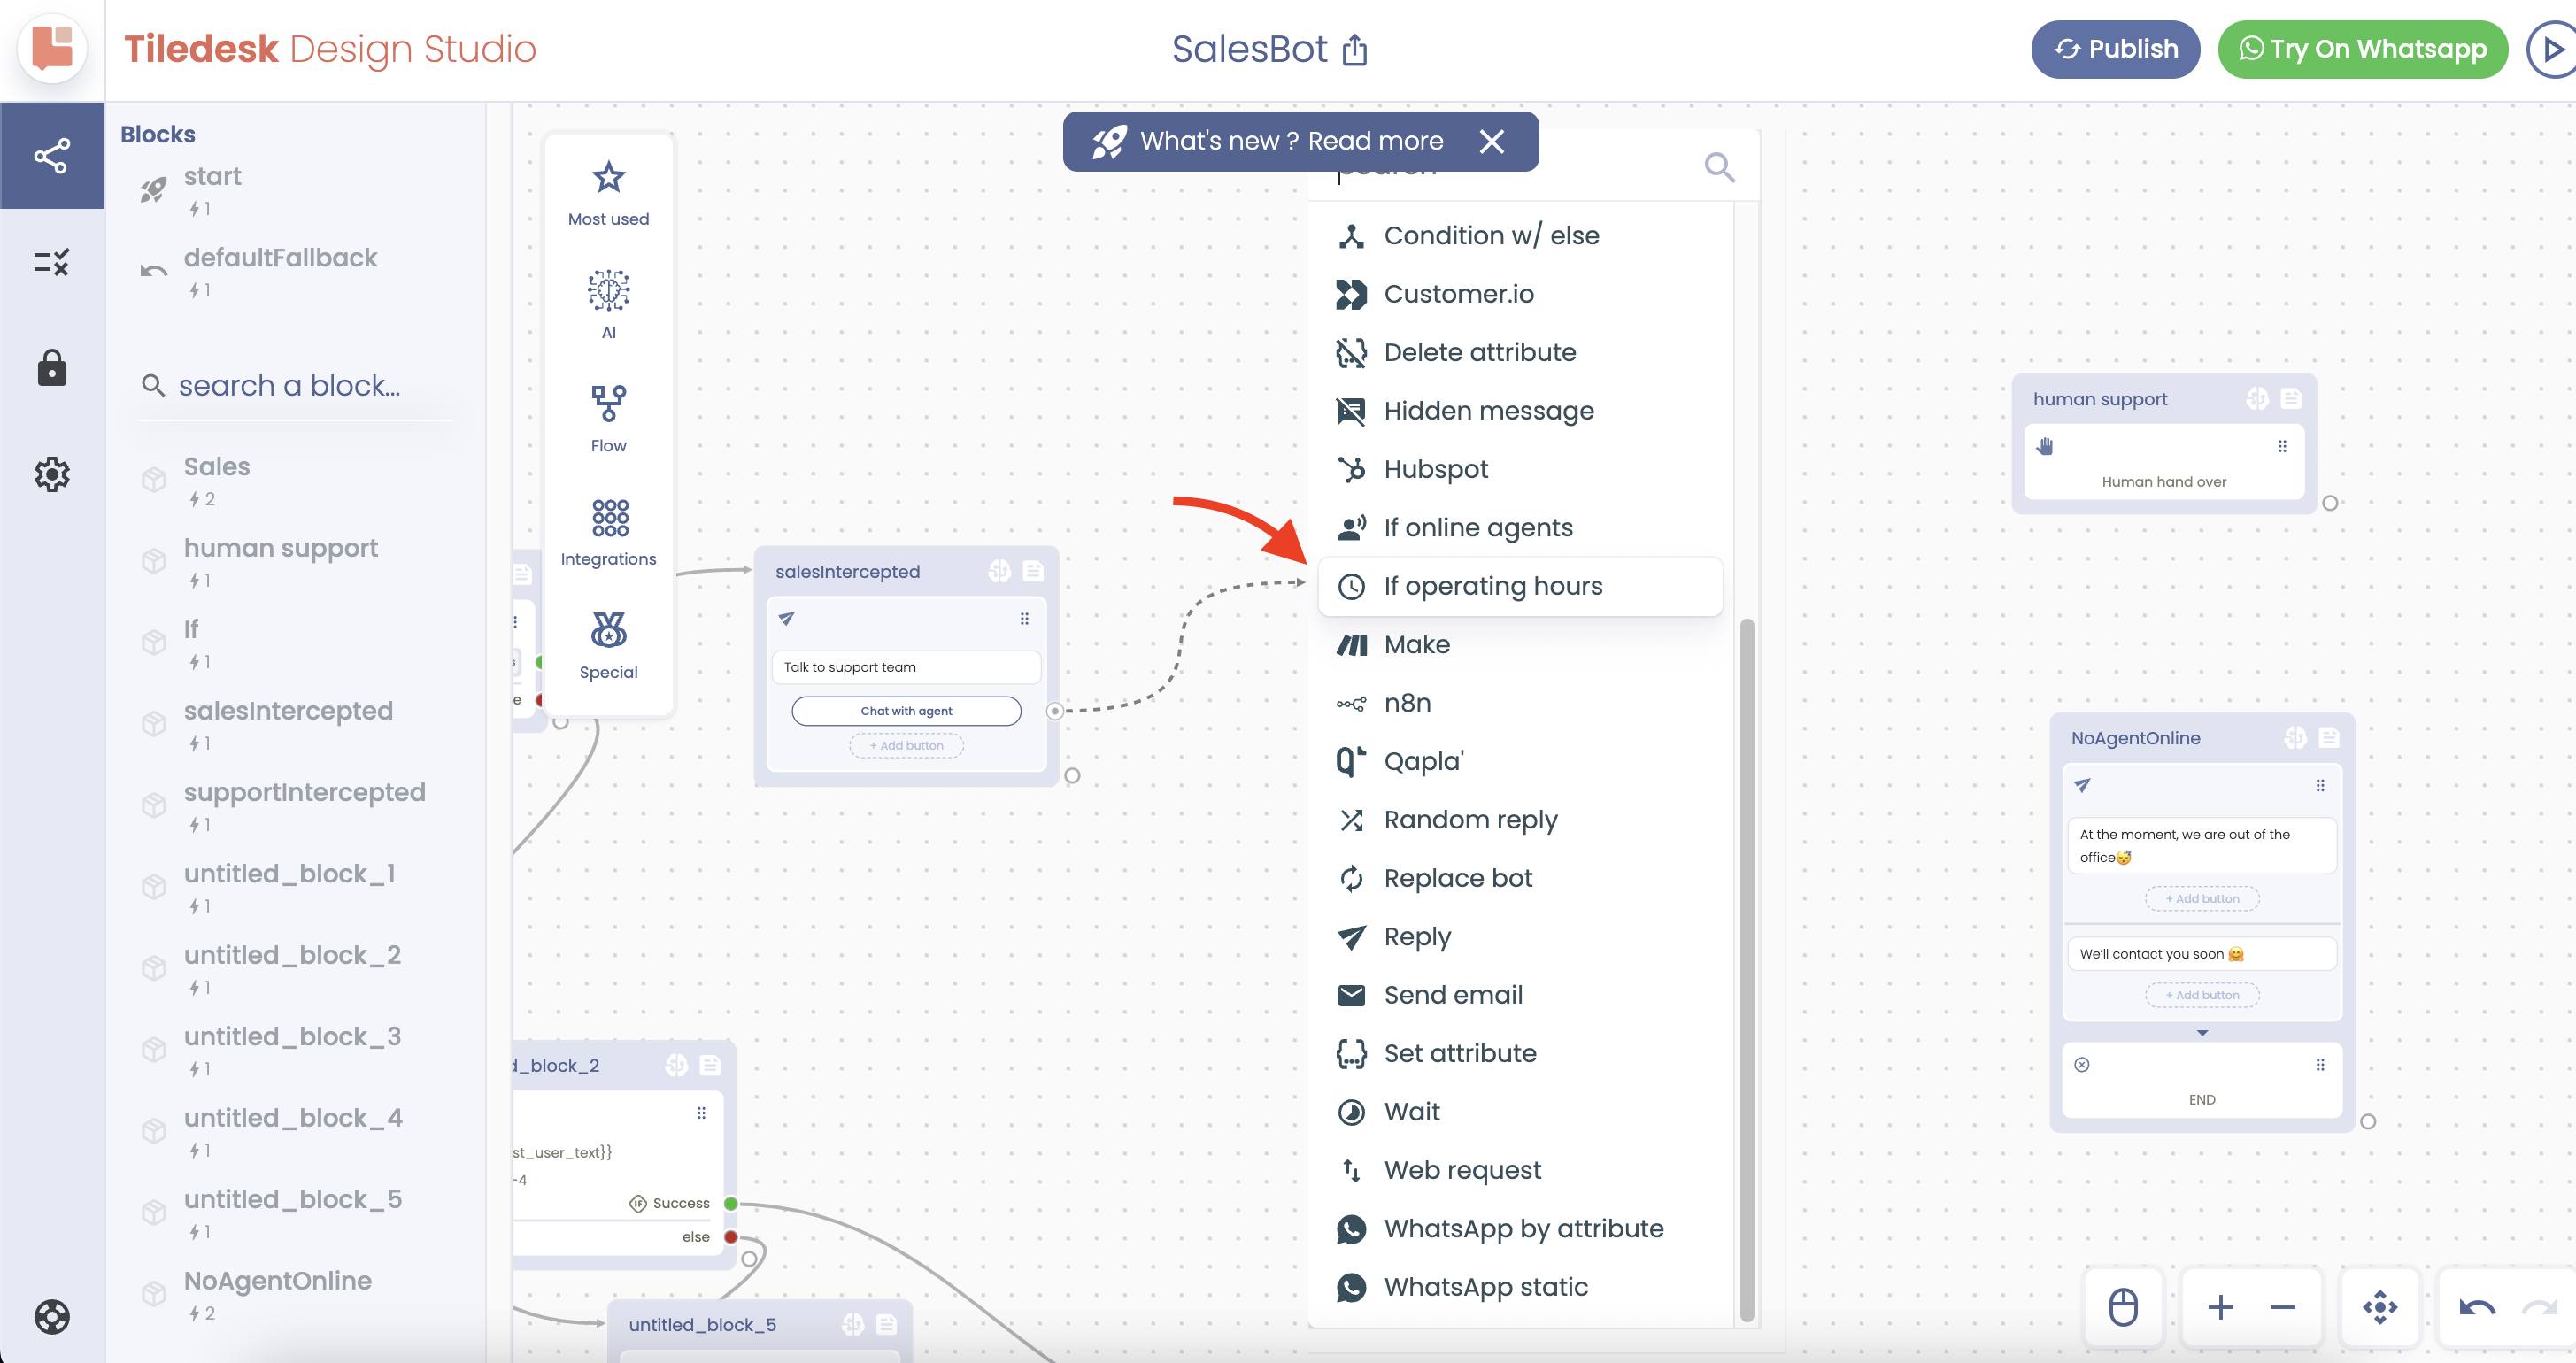
Then click on the new block, and from the right top menu, you have the option to click on the “Selected Time Slot” to select the “Support team slot” that we just created. Alternatively, you can simply leave it as default (General) if you don’t need different time slots.
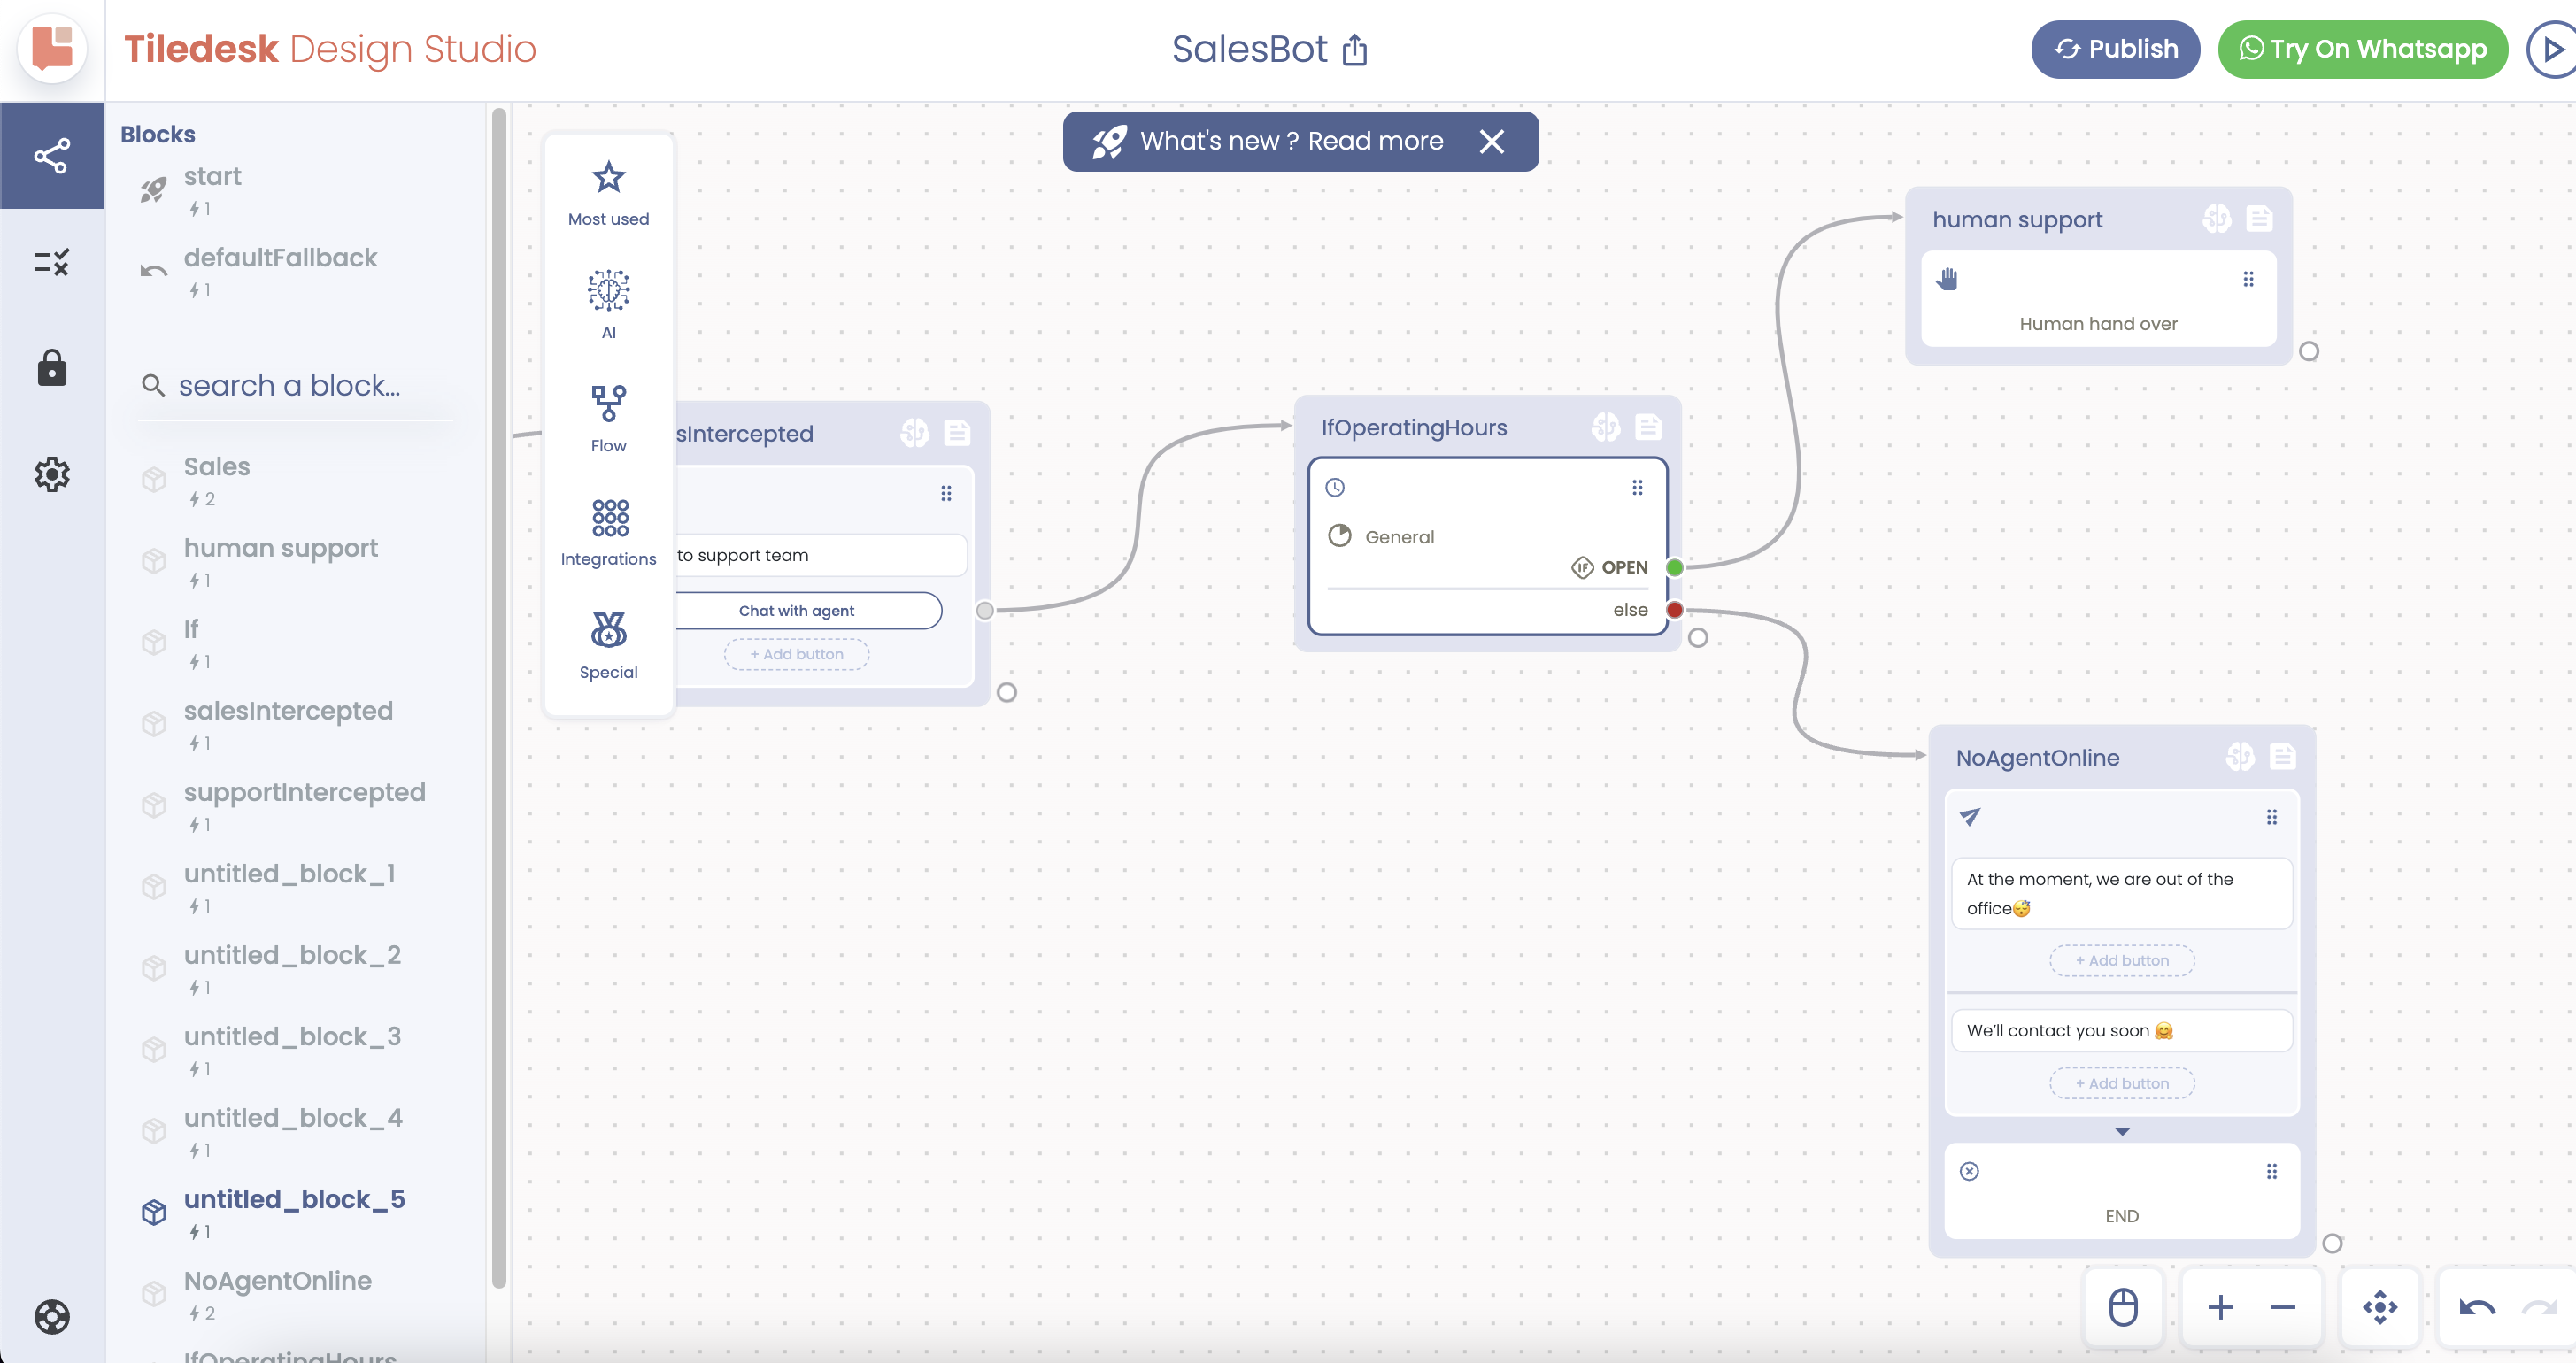
From the green endpoint, continue the flow to “Agent Handoff” and from the red endpoint to the offline message, as you can see in the image below.
Hope this helps.
Do not hesitate to contact us in case you need further assistance at support@tiledesk.com.
For further information, please visit www.tiledesk.com.
Would you like to start your journey? Create a free account now.