.png)
How to configure a WhatsApp Business account
-

- Giovanni Troisi
 02 September 2022
Tiledesk WhatsApp Integration allows your customers to reach you through their favourite messaging application: WhatsApp. On the other end, your agents will be able to promptly respond directly from our Web Chat. Quick replies, action buttons and media like images, videos and documents are supported on both sides.
But first, you need to create and configure a WhatsApp Business account. Keep reading to find out everything you need.
Create app on Facebook Developer console
If you have already created an app, you can skip this step. Otherwise, go to Meta for Developers and sign in with you Facebook credentials, where you can see your Facebook apps. Then click on "My Apps", and on "Create App", as below.

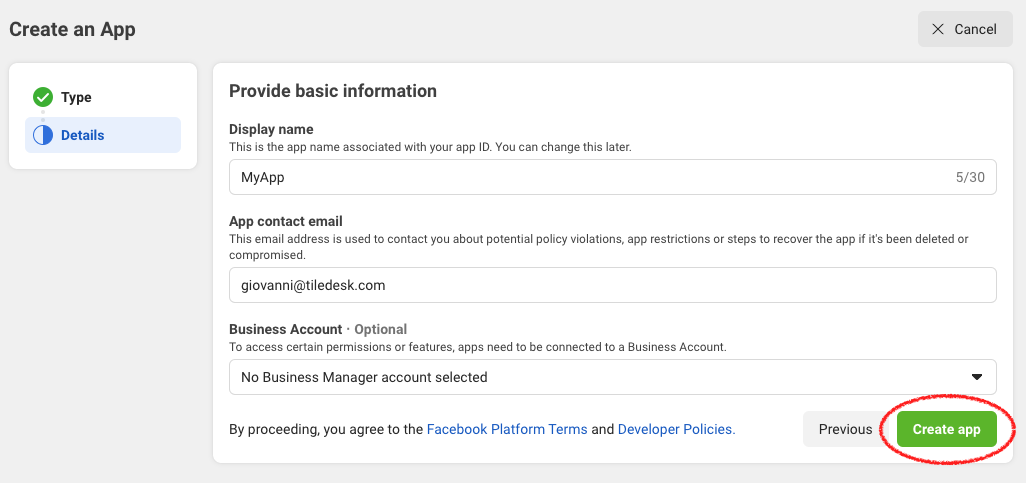
Select an app type and click on “Next”. Now choose the display name and type the contact email.
Note: a Business Account is required to have access to all features and to allow certain permissions. You can create an account for your company from the dedicated tool or by continuing to read this guide.
If you already have a Business Account, select it and click on “Create app”. If you don't, not to worry, you can create a Business Account later.
Well done! Your app is now ready.
Integrate WhatsApp with your app.
When on the same Facebook Developer console, make sure that you have selected the app where you want to install WhatsApp and search “WhatsApp" from the products list, then click “Set up”.
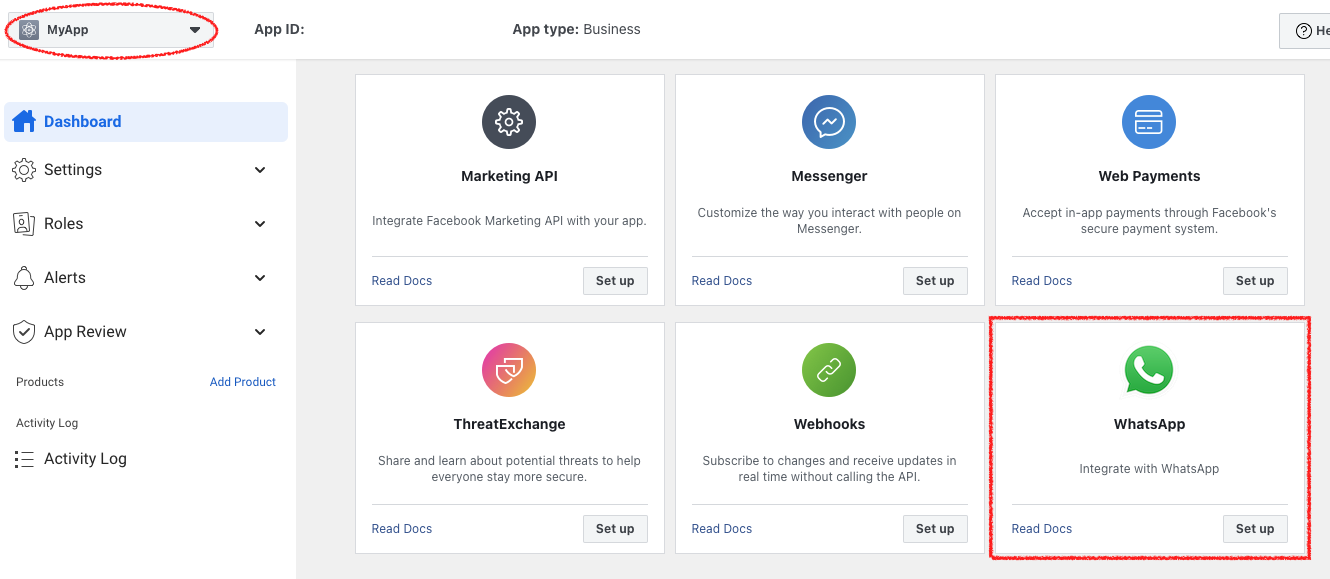
You should be able to see that on the left-side bar. Click on “Getting Started”. If you've selected a Business Account in the previous step, you can skip the steps below, otherwise keep reading!
Create a Business Account
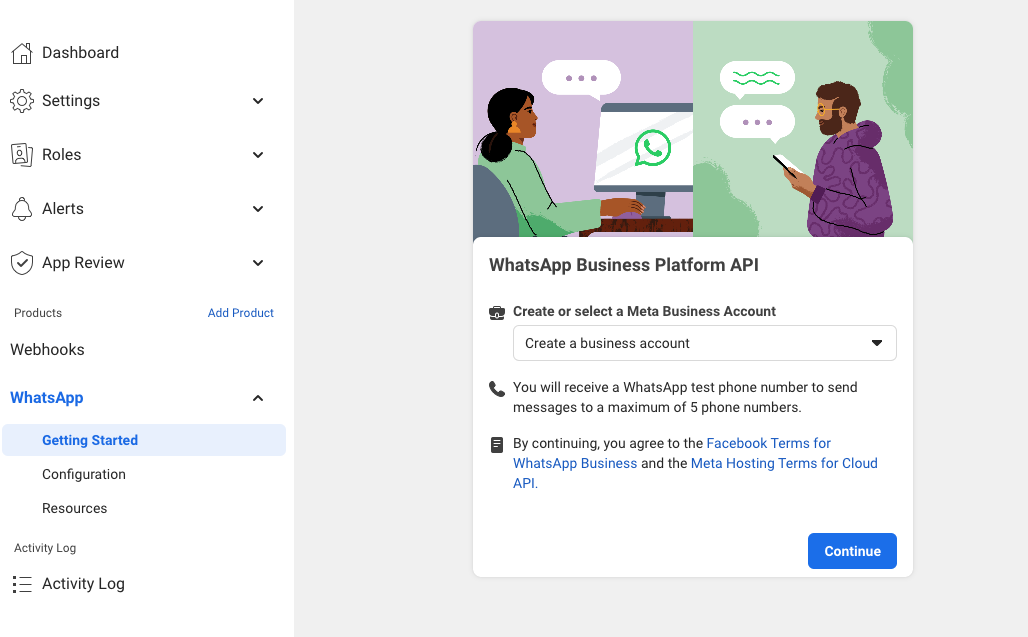
After clicking on “Getting Started” you will see the tool for selecting or creating a business account. Select “Create a business account” from the dropdown menu and click “Continue”.
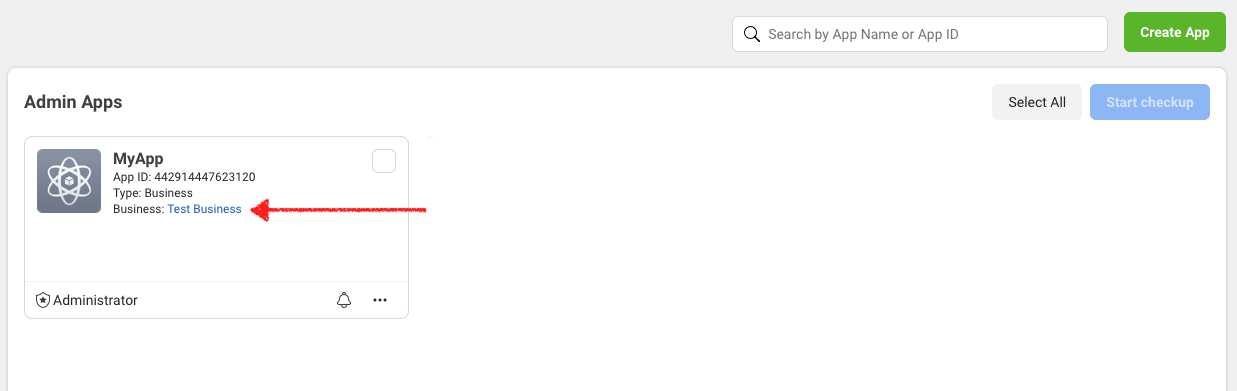
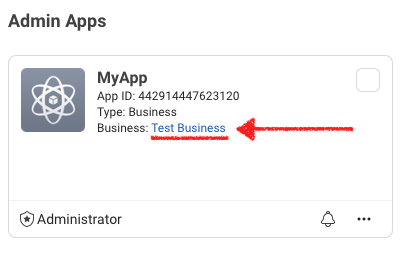
A default Business Account has been created. You can customize this account accessing the Meta Dashboard or clicking on Test Business in MyApp page, as below.
Test the integration
A Test Number is now associated with your app. Further down this article we will see how to setup the company's real number.
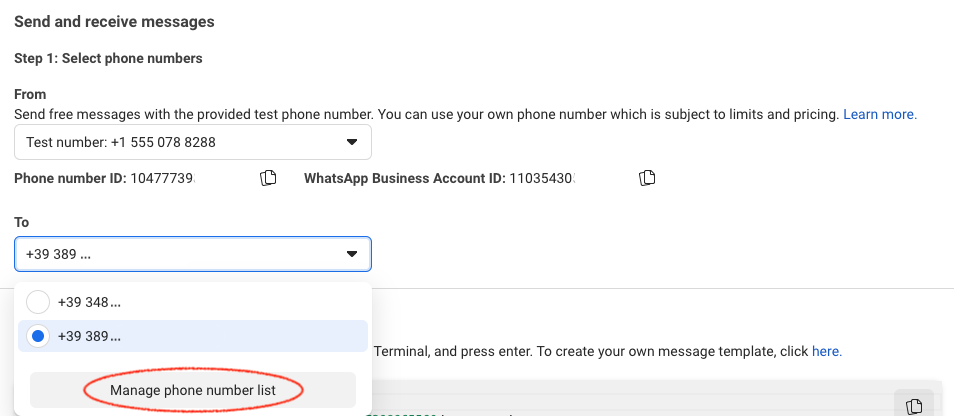
From the Getting Started tab you can test the WhatsApp integration, but first you need to configure a receiver number.
In this testing phase, you can send a message from the test number to up to 5 phone numbers to receive free test messages.
To configure a test phone number click on the “To” dropdown, and then on “Manage phone number list” button.
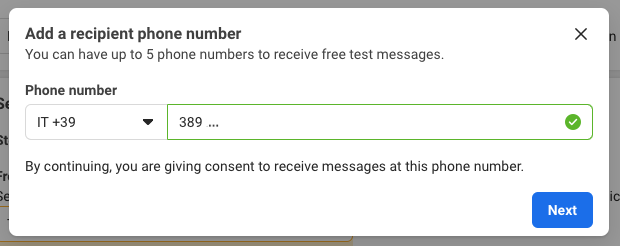
Select the prefix and insert the phone number, then start the verifying procedure by clicking on "Next" (a numeric code is sent by SMS).
Once completed, the phone number can receive test messages. Click on “Send Message” button to try it out. You should receive a message on WhatsApp from the test number.
Add a production phone number
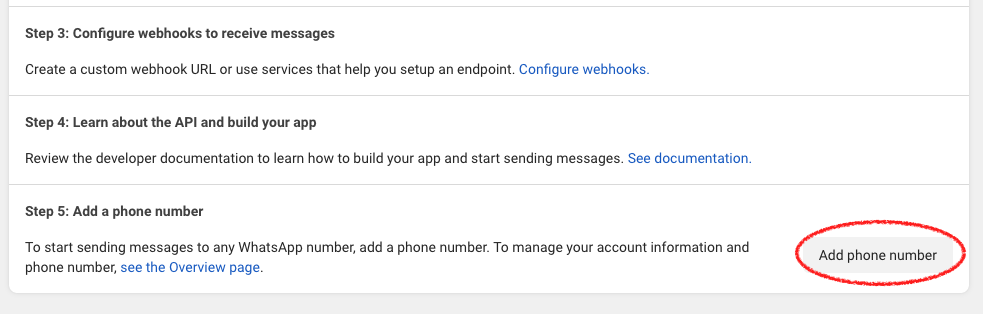
You may need to register a company production phone number.
Use of a private number is highly discouraged. You won't be able to use the WhatsApp mobile app anymore.
From the Getting Started page, click on “Add phone number”, as below.
Fill in your business information and click on “Next”.
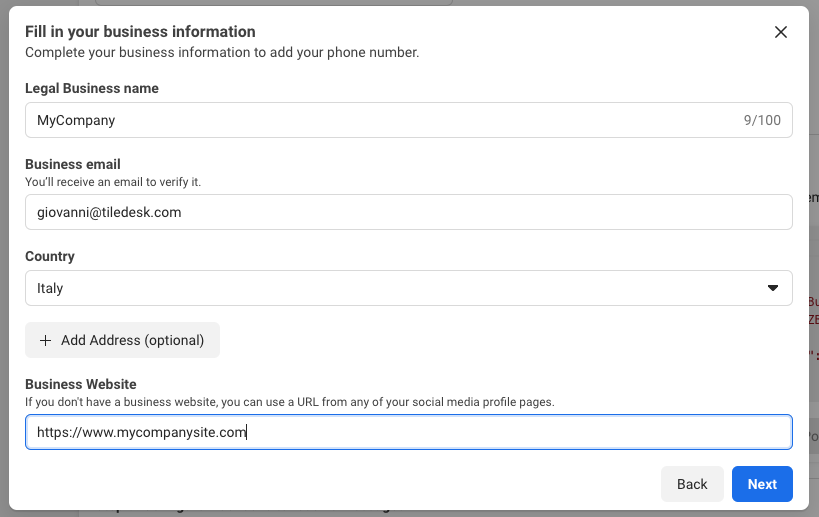
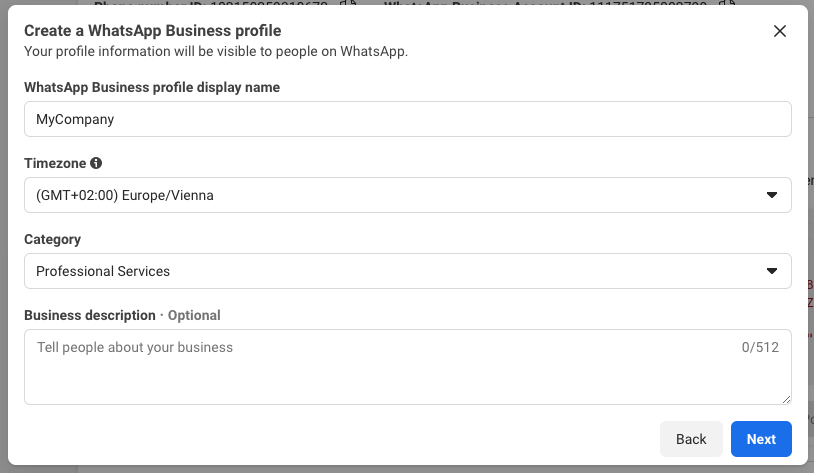
Fill in the required information to create a WhatsApp Business profile and click on “Next”.
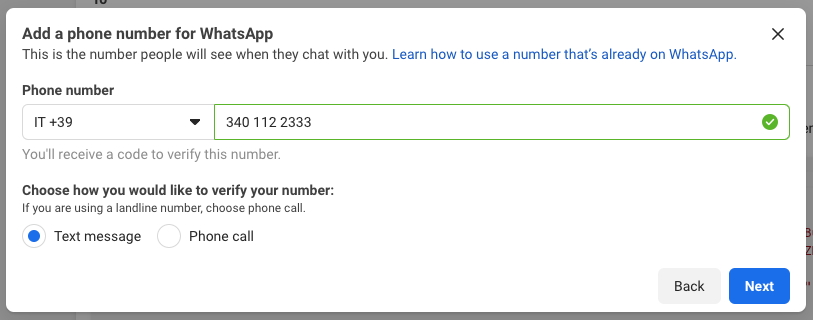
Finally, add the phone number and verify it through a Text message or Phone call.
Note: If you are using a landline number, you can verify the number only with a Phone call.
Once the number has been approved, you can test it, as shown earlier in this guide, by selecting the production number from the “From” dropdown.
Configure a Permanent Access Token
To use the WhatsApp integration with Tiledesk you need a valid access token. A Temporary access token is provided, but you need to refresh the information every 24 hours. This is a good solution for a testing phase, but you need a Permanent access token in production.
Let's see how to create a Permanent Accesso Token!
Click on the name of the Business Account in My Apps or go directly in Facebook Settings Dashboard from the Facebook Developer dashboard.
On the left-side panel, make sure that Business Account for which you want to activate the permanent token is selected, click on “System users” and then click the “Add” button.

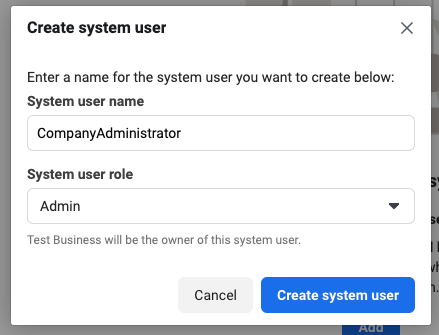
Type a System user name and choose Admin role. Now you can click on the “Create system user” button.
A user system has now been created. Note that the permanent token will be associated to that user.
Let's add assets to the newly created system user by clicking on “Add Assets” and giving the Full Control to the Facebook App, as illustrated below.
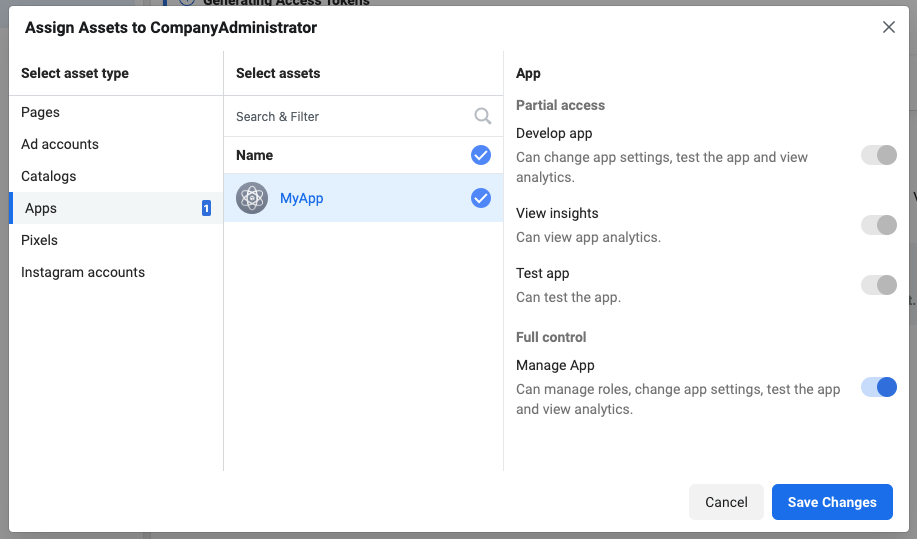
Click on “Save Changes” and the app will be added to the system user.
Finally, we are ready to generate our Permanent Access Token by clicking on “Generate new token”. Select the app…
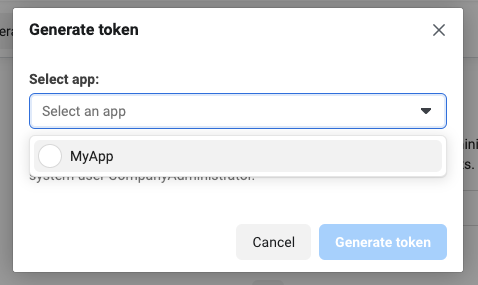
… and check the following permissions:
- whatsapp_business_messaging
- whatsapp_business_management

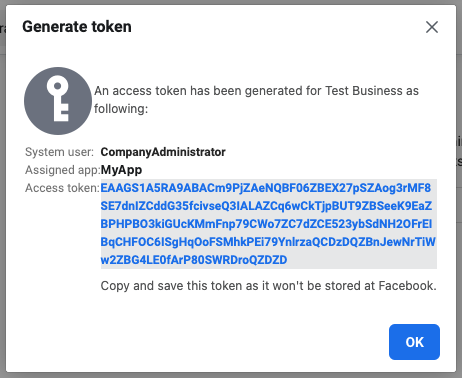
Click on “Generate token” and that's it! Your permanent token is now available.
Don't know how to use the permanent token on Tiledesk?
Maybe the guide on How to connect WhatsApp Business to Tiledesk might be helpful.
If you have any questions, feel free to contact us live on chat or at support@tiledesk.com or you can pop on our Discord Channel 📣.
For more info on who we are, what we do, or what is our shtick, visit the Tiledesk Website 👩🚀.