.png)
How to manage multiple projects
-

- Andrea Leo
 18 October 2021
What do we mean by a project
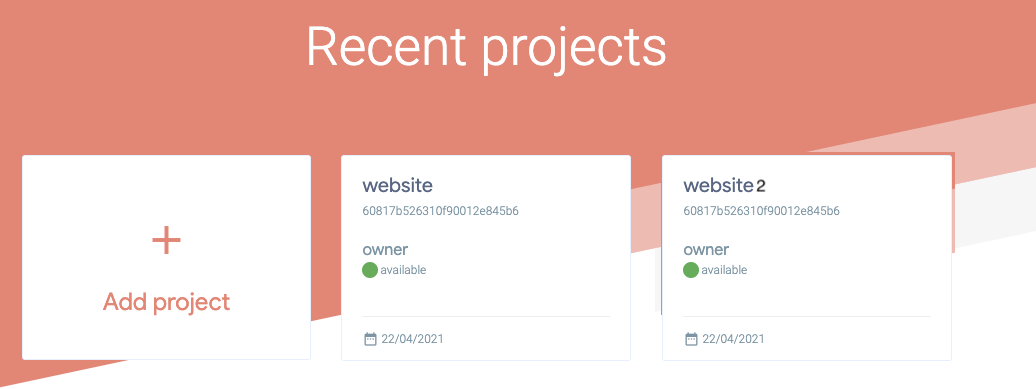
If you are an agency or you work for different brands, you can set up projects for each one and then switch between them to have everything structured. Tiledesk allows you to create multiple projects under the same email login, which makes it easier to manage chats for multiple websites or apps.
We do not advise managing publications of different brands in the same project, as statistics, channels, and users will not be separate. Each project can also only be branded with one identity.
Each time you log in to your project you will see stats about each project and be provided with direct links to conversation, campaigns, and more. All push notifications for all projects are also displayed.
A project is basically a separate Tiledesk account (with its own independent configuration), but you can use the same email login for each project and switch between the projects quickly.
How to add new projects
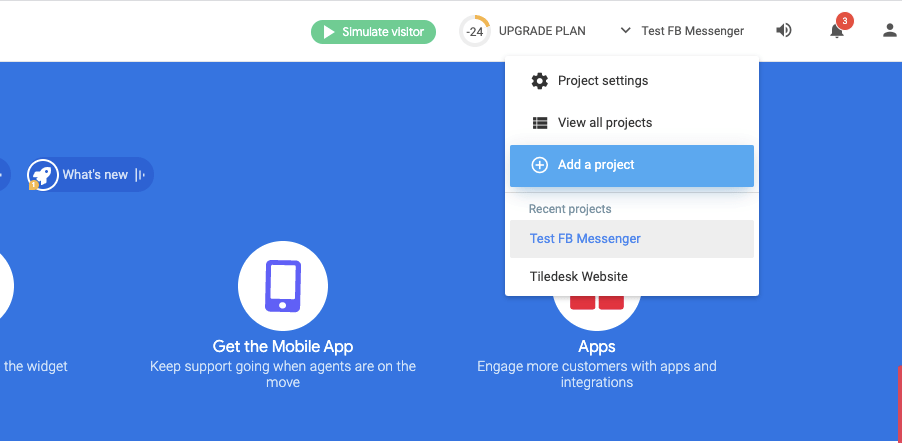
Adding a new project is pretty simple; you just need to click on the arrow next to your current project name in the top-right and hit the “Add a project” button. This will allow you to create a new project.
How to configure new projects
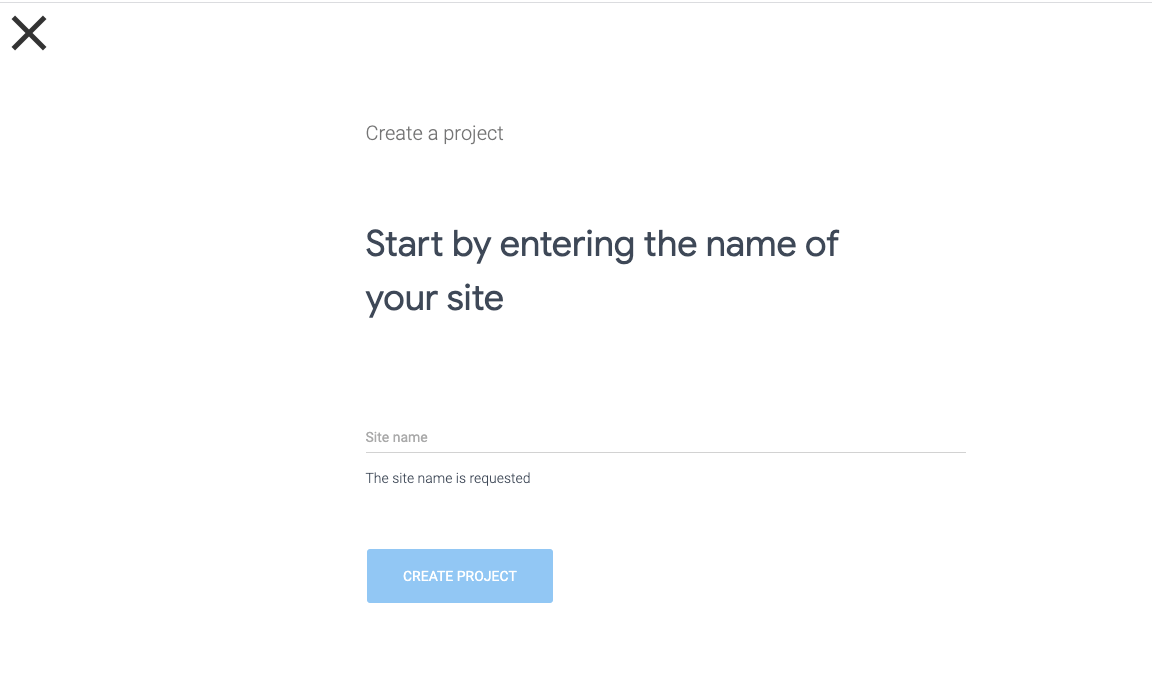
Clicking on the “Add a project” button will present you with a tour for setting up a project. You will be asked for your project name (for example your website name). After that click on “Create project” button.
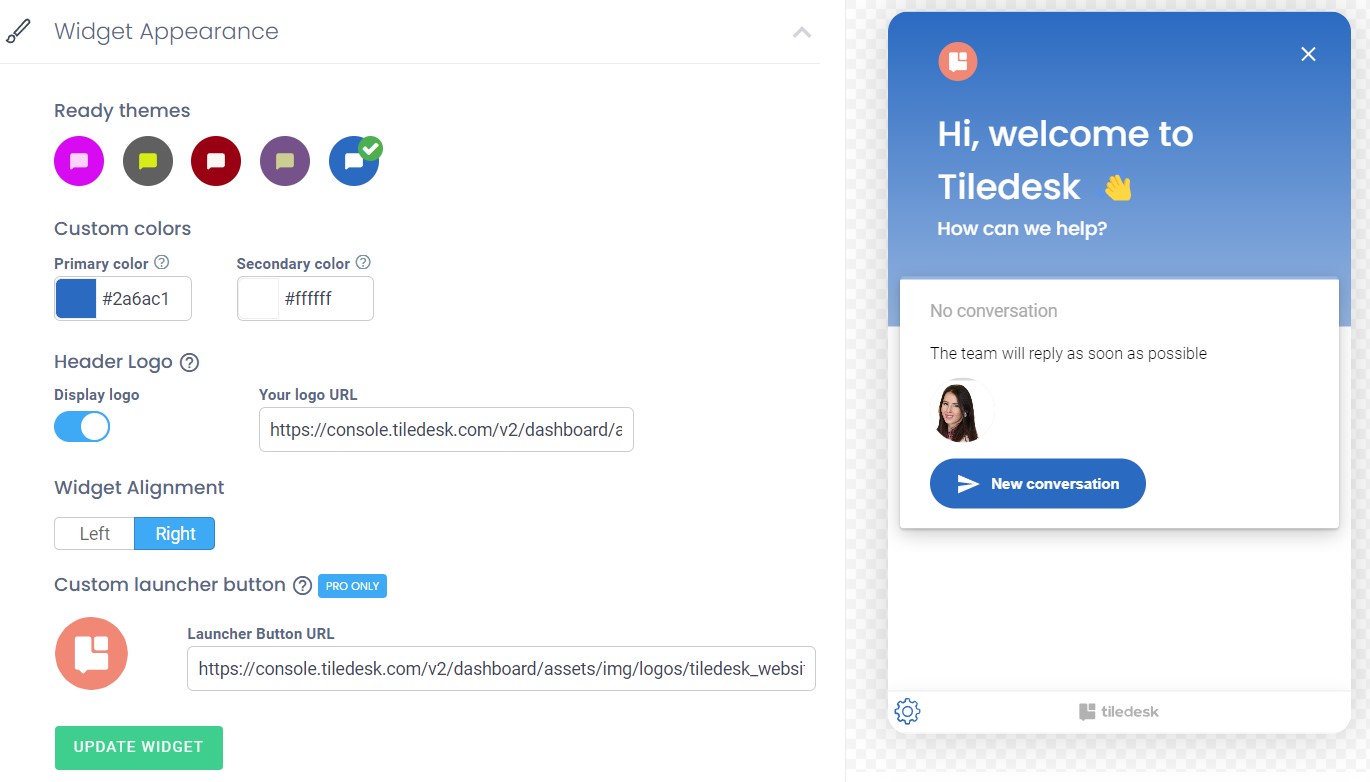
The next step of the wizard allows you to personalize your widget, same as you did when installing Tiledesk for the first time.
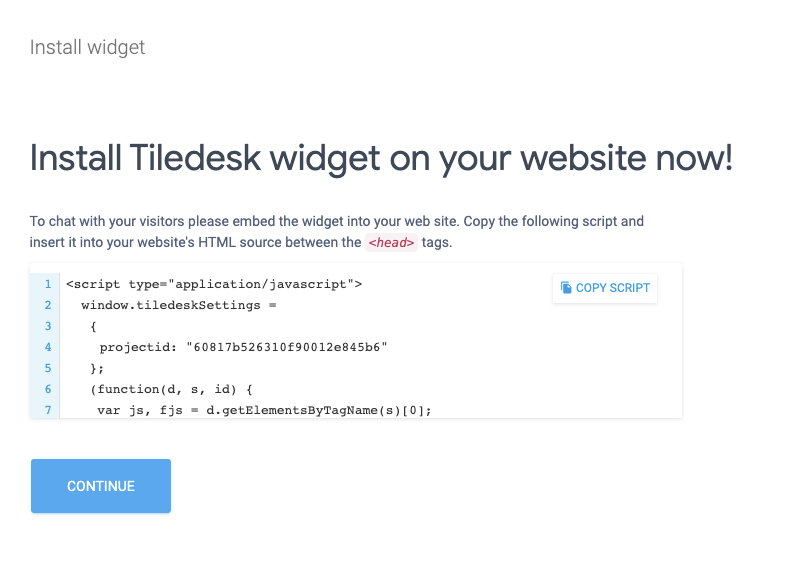
After the configuration, there’s one last step: installing the widget on your website. You can do this by following the instructions given in the configuration’s final step.
How to switch between projects
Once you’re done with configuring and installing your project, you will get access to your new Tiledesk Dashboard. From there, you can manage the Conversations, Appearance, and all the other settings for that particular project.
To switch the project – on the arrow next to your current project name in the top-right and click on the “View all projects” button. Click on the name of the project you’d like to log into.
For more info on who we are, what we do, or what is our shtick, visit Tiledesk.com 👩🚀