.png)
How to add Multiple Knowledge Bases & link Chatbots
-

- Jovana Ugrinic
 30 July 2024
Introduction
In Tiledesk, you have the flexibility to manage multiple Knowledge Bases (KBs) using namespaces. This feature is incredibly useful for organizing different sets of information and ensuring that specific bots have access to the relevant data. This tutorial will guide you through the process of creating and managing multiple namespaces for your Knowledge Bases in Tiledesk.
Purpose of Multiple Namespaces
- Organization: Separate different types of content, such as FAQs, technical documentation, and product-specific information.
- Bot-Specific Knowledge: Ensure that each bot only accesses the relevant Knowledge Base, improving the accuracy and efficiency of responses.
- Scalability: Easily manage and scale your Knowledge Bases as your content grows.
Step 1: Log in to Tiledesk and navigate to the Bots Section
- Open your web browser and navigate to [Tiledesk](https://www.tiledesk.com/).
- Log in with your credentials.
- In the Bots section, locate and click on the Knowledge Bases tab.
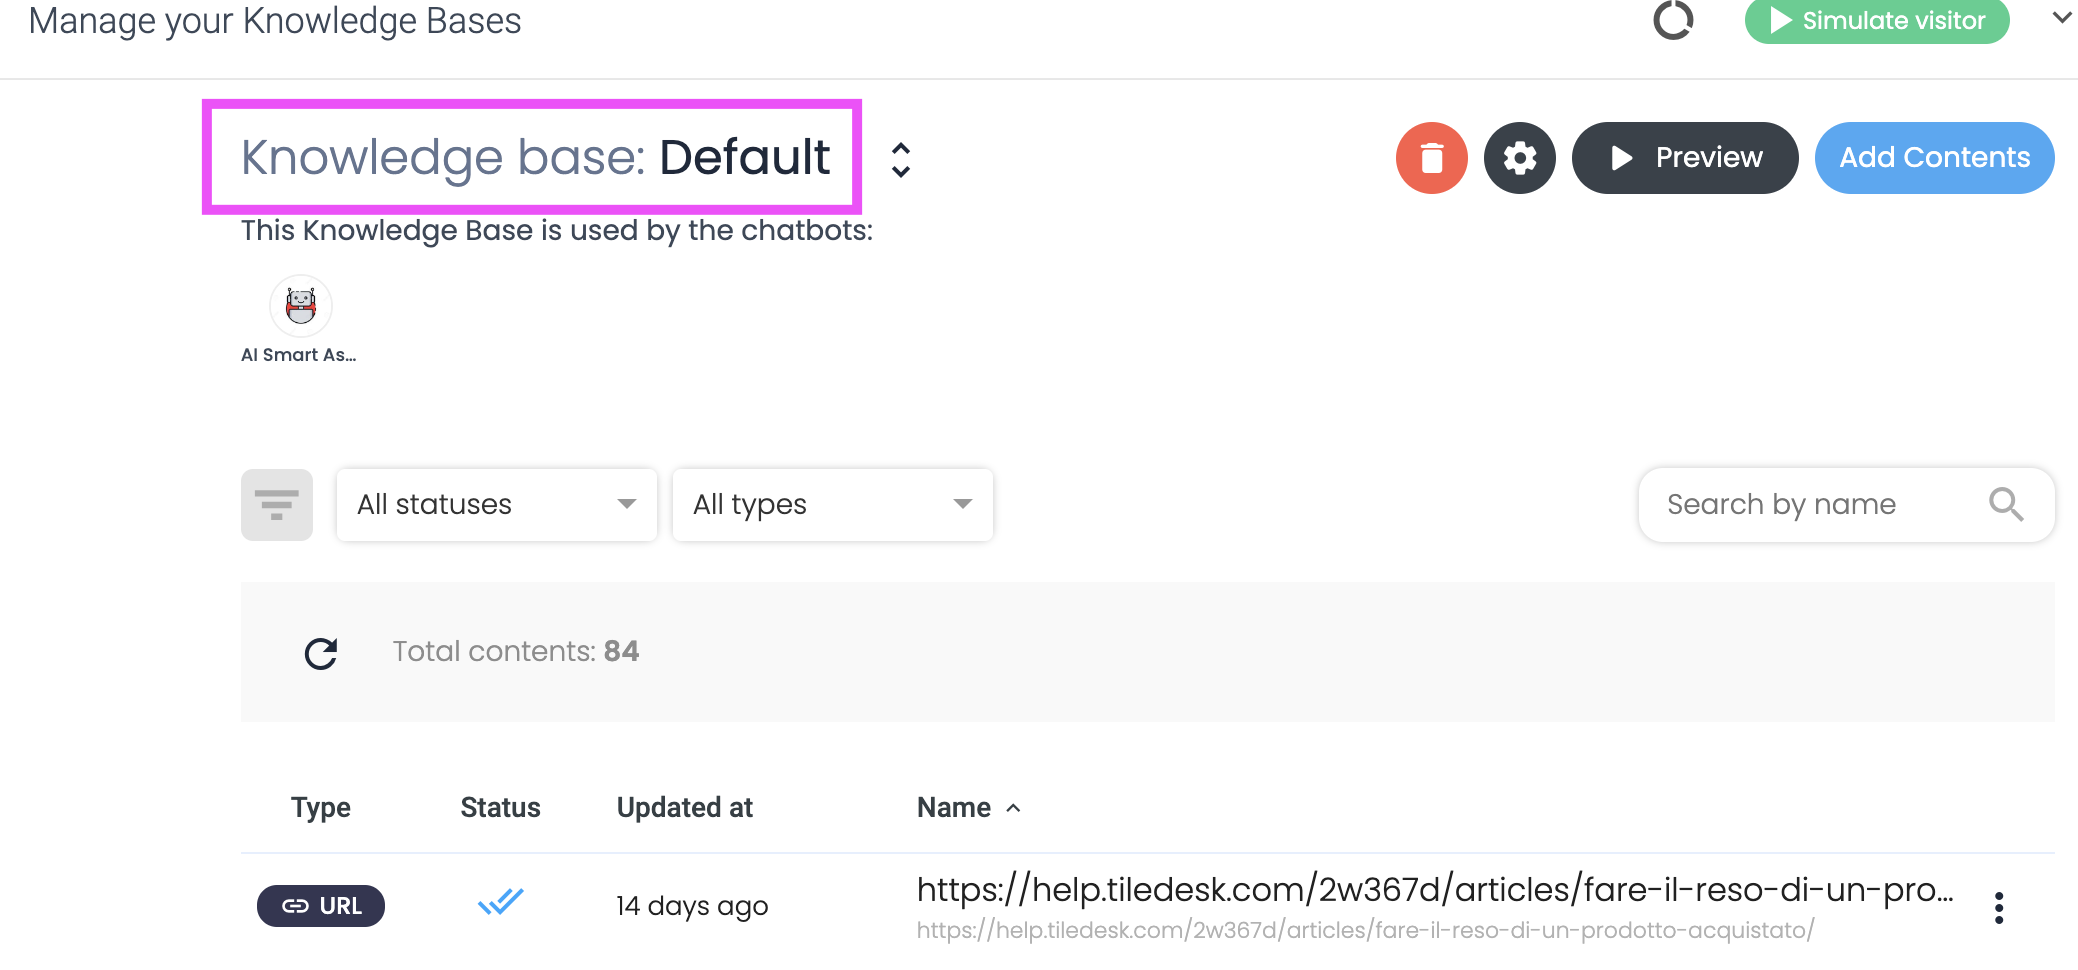
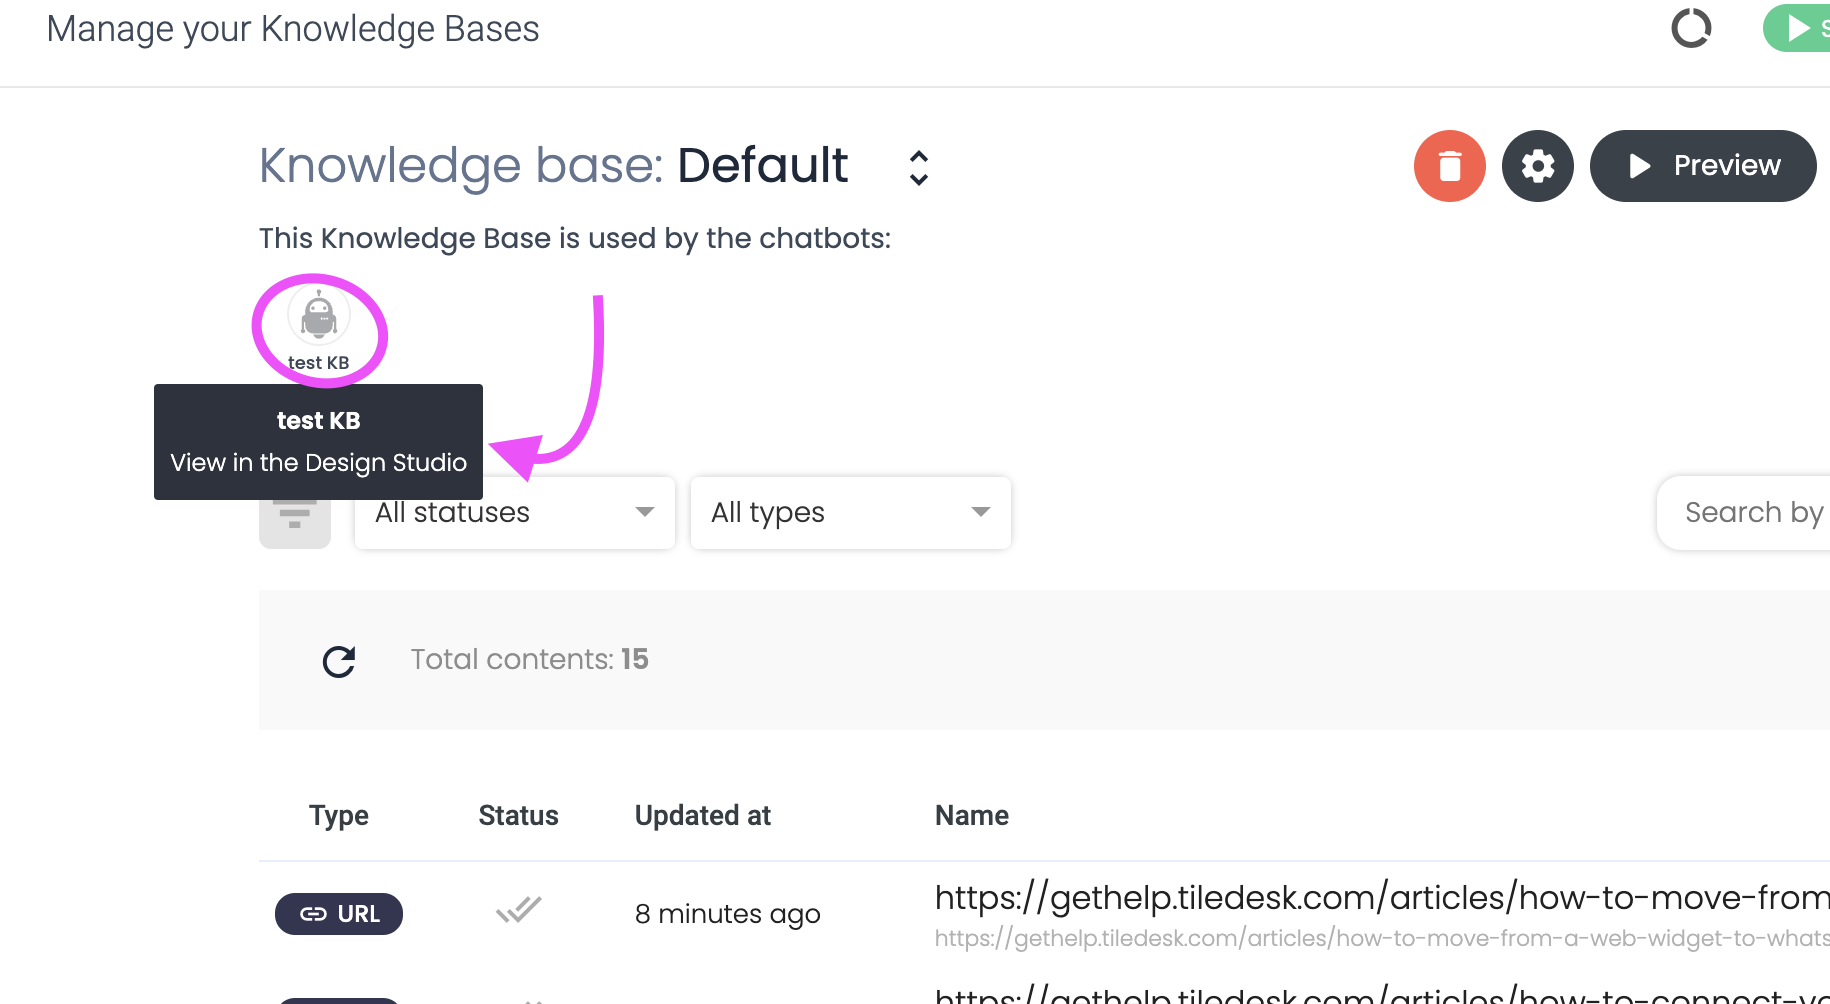
Step 2: Understanding the Default Namespace
- The very first time you add content to your KB, a default namespace is automatically created.
- You will see "Knowledge Base: Default" indicating the current namespace, as below.
Managing Multiple Knowledge Bases
1. Changing the Knowledge Base Name
- Purpose: Rename the default namespace to better reflect its content.
- How to Change:
- Click on “Knowledge Base: Default”.
- Enter the desired name for your Knowledge Base; it'll automatically get saved.
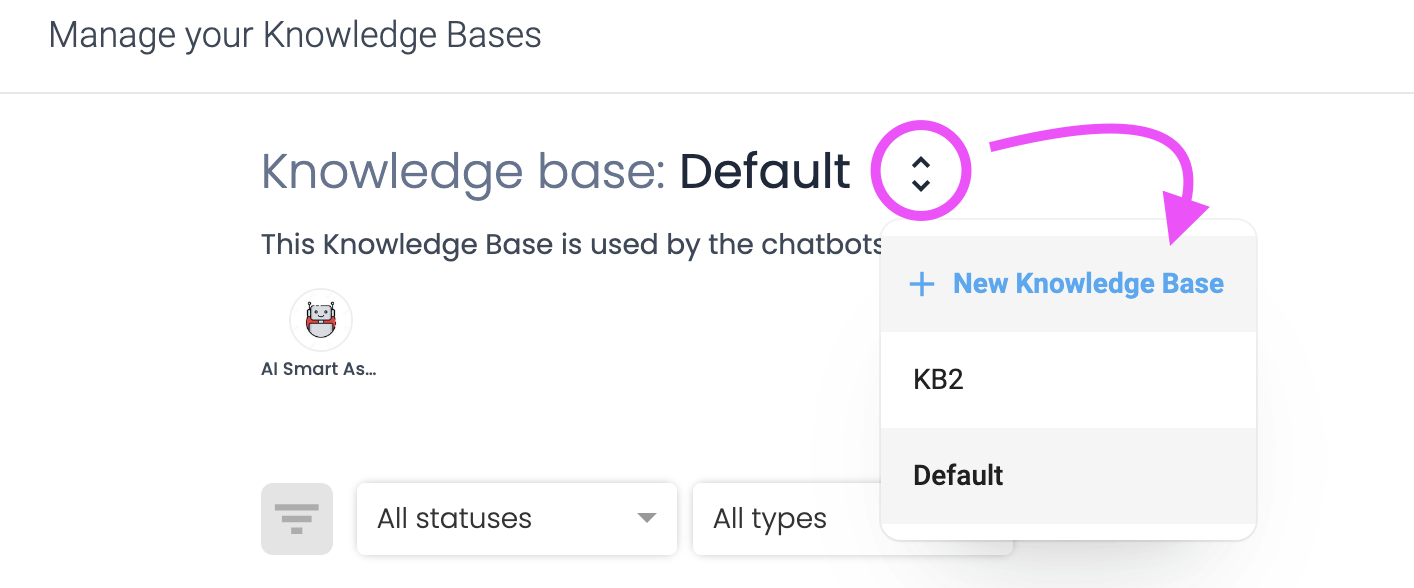
2. Adding a New Knowledge Base (Namespace)
- Purpose: Create additional namespaces for different sets of content.
- How to Add:
- Click on the arrows next to "Knowledge Base: Default".
- Select “+ New Knowledge Base”.
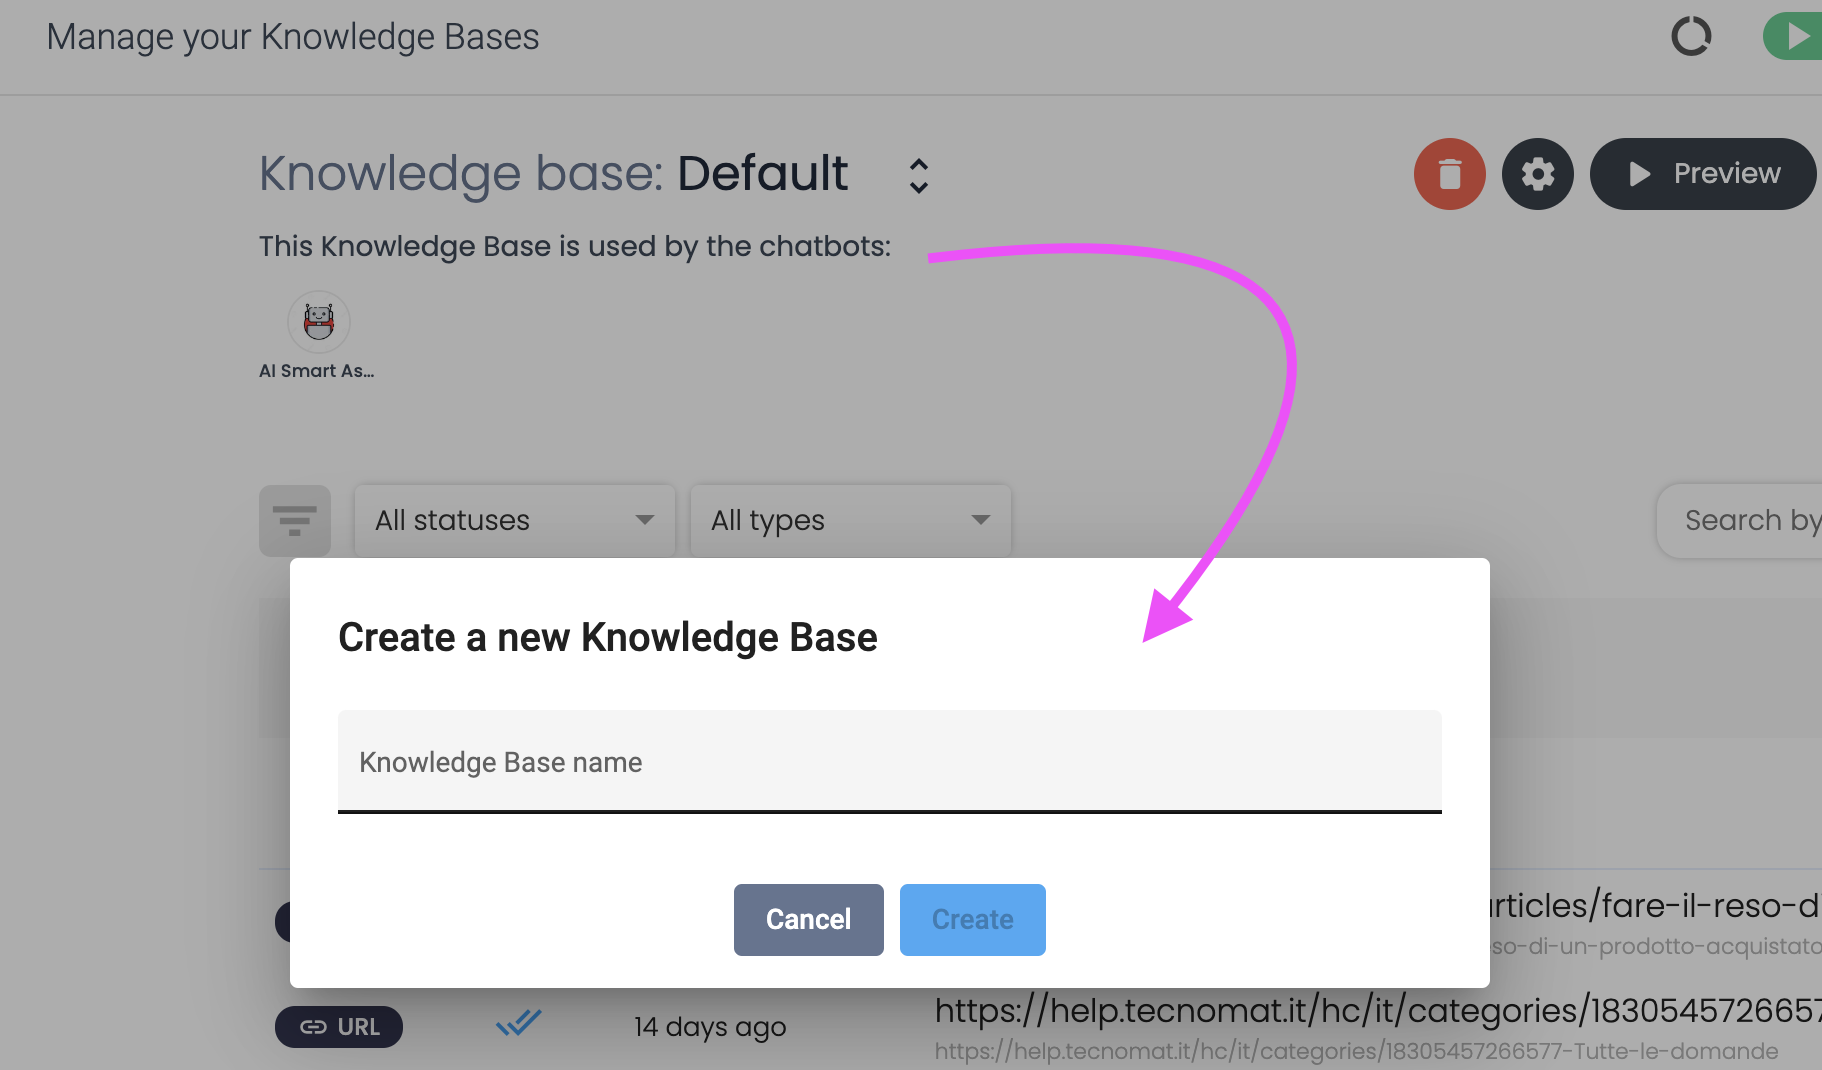
- Enter the name for the new Knowledge Base and click on “Create”, as below.

3. Viewing and Switching Between Knowledge Bases
- Purpose: Easily navigate between different namespaces to manage or view their contents.
- How to Switch:
1. Click on the arrows next to the current Knowledge Base name.
2. Select the desired Knowledge Base from the dropdown list.
3. The content and configuration for the selected namespace will be displayed.
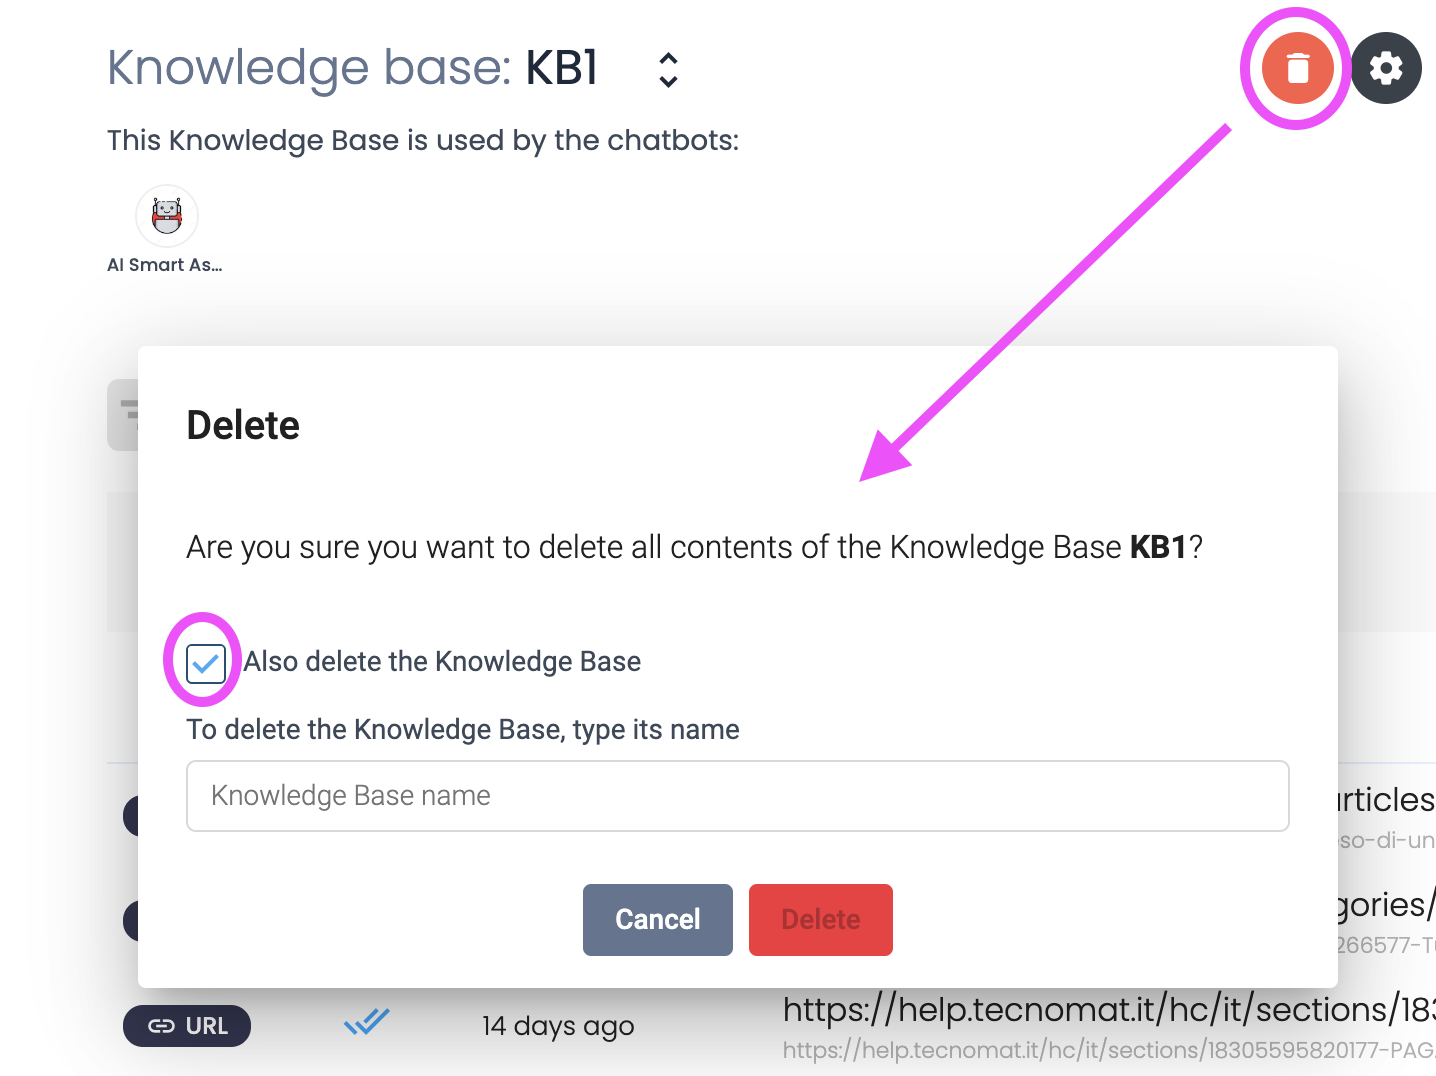
Deleting Namespaces
To empty the entire namespace is easy, simply click on the red Bin icon, as below. You can also choose whether to remove the namespace altogether and not leave it empty by ticking the box “Also delete the Knowledge Base”.
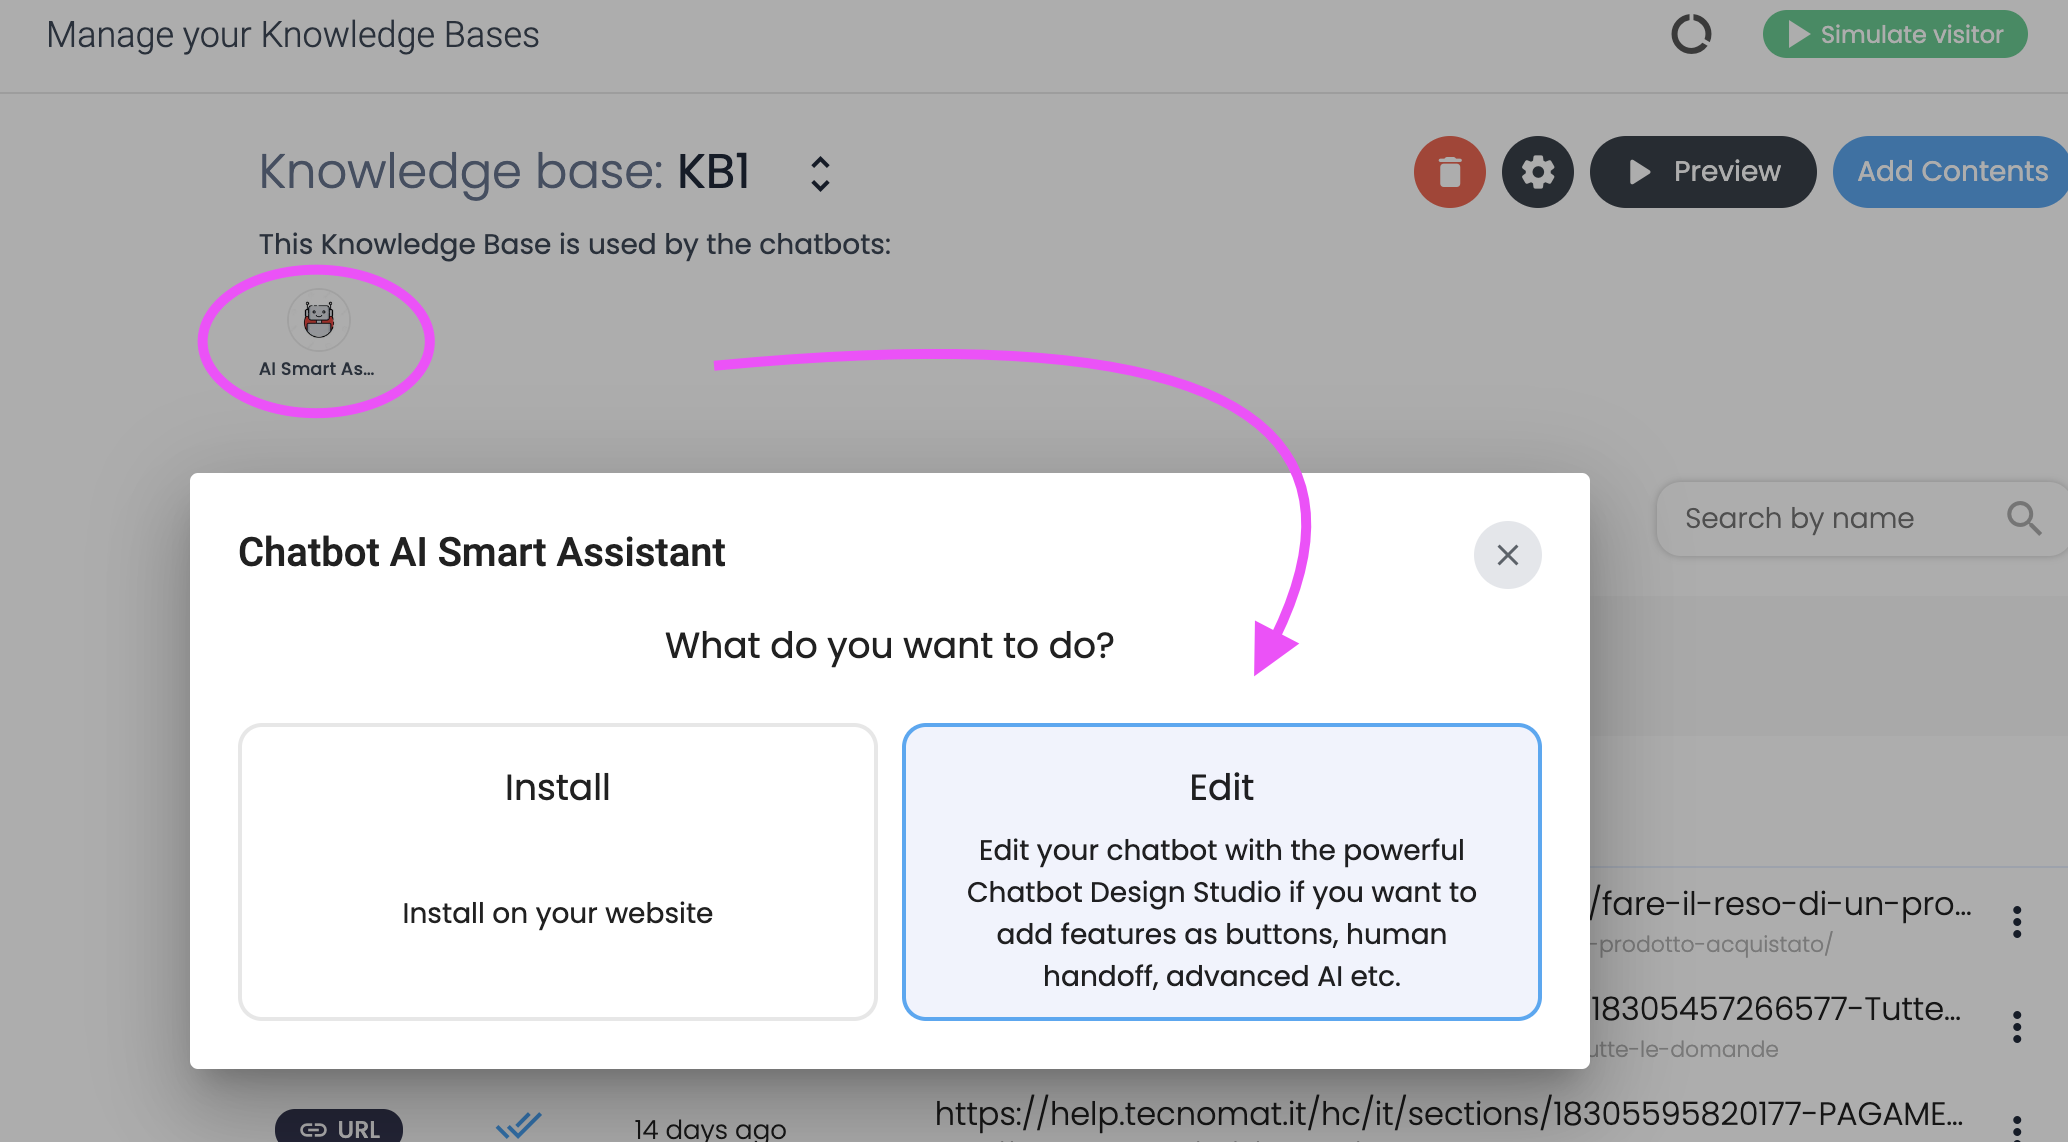
Assigning Bots to Knowledge Bases
1. When you select a specific namespace, you will see which bot is connected to that particular Knowledge Base.
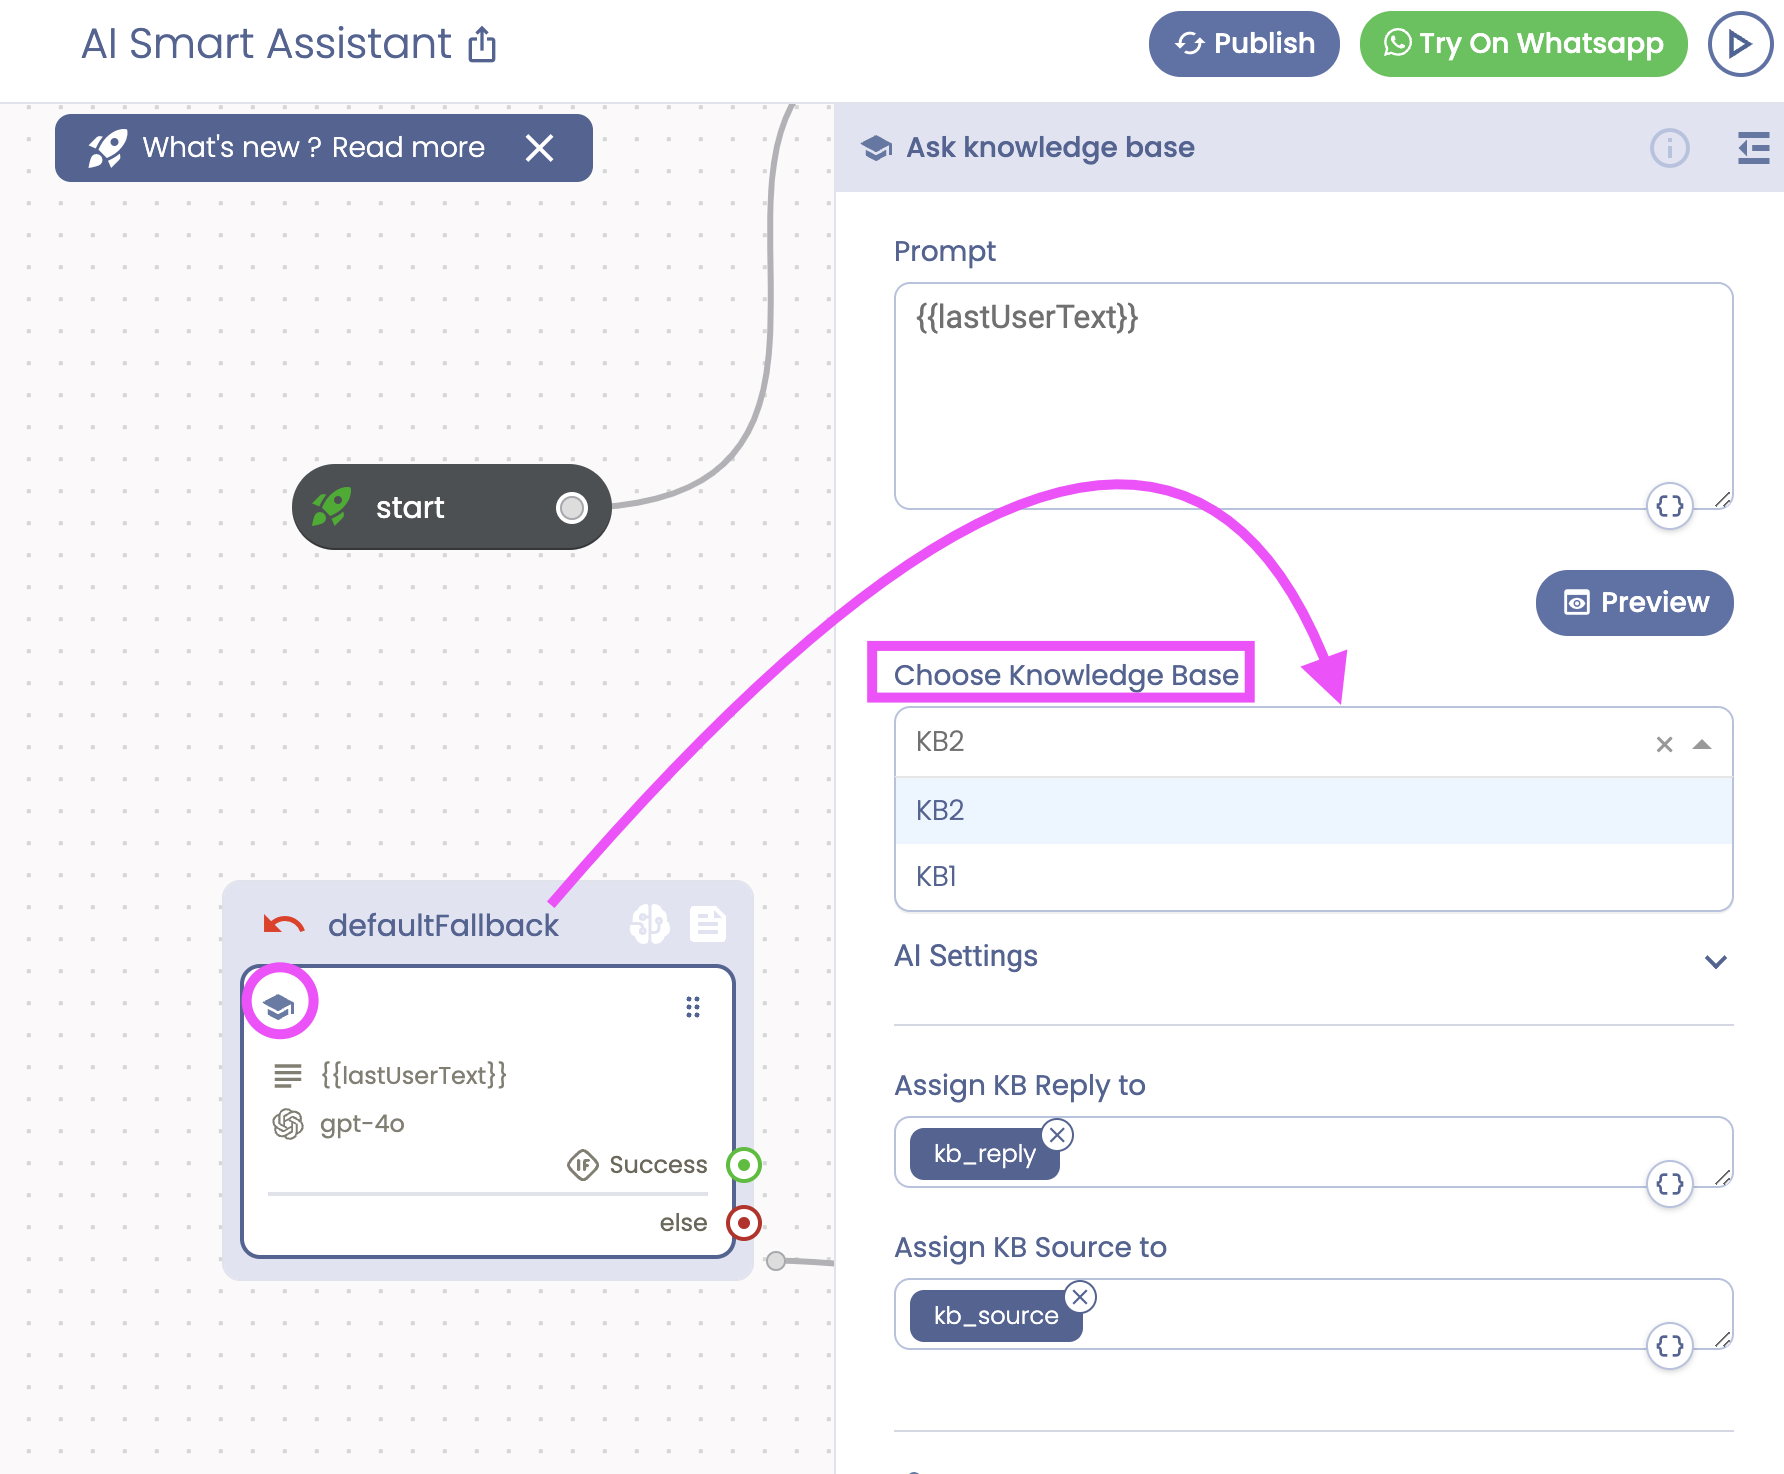
2. To assign a bot to a different Knowledge Base:
- Go to the **Bots** section.
- Select the Bot you want to configure.
- In the Bot flows, choose the appropriate block with Ask KB feature containing the linked namespace.
Best Practices for Using Multiple Namespaces
- Categorize by Topic: Create separate namespaces for different topics or departments to keep information organized.
- Bot-Specific KBs: Assign specific Knowledge Bases to bots designed for particular functions, ensuring they have access to the most relevant information.
- Regular Updates: Regularly update and review each namespace to ensure that the information is current and accurate.
Conclusion
Using multiple namespaces for your Knowledge Bases in Tiledesk allows for better organization, targeted information delivery, and scalability. By following this tutorial, you can efficiently create, manage, and utilize multiple Knowledge Bases, enhancing the overall performance and effectiveness of your Tiledesk bots.
Send your feedback to info@tiledesk.com 👋