Adding a Knowledge Base
Introduction
Tiledesk is a powerful platform that allows you to create and manage chatbots, and one of its most useful features is the ability to add a Knowledge Base (KB). A Knowledge Base helps your chatbot provide accurate and quick answers to user queries by referring to predefined content. This tutorial will guide you through adding a Knowledge Base to your Tiledesk account.
Step 1: Log in to Tiledesk & Navigate to the Bots Section
- Open your web browser and navigate to [Tiledesk](https://www.tiledesk.com/).
- Log in with your credentials.
- Click on the Bots section in the main navigation menu.
Step 2: Access the Knowledge Bases Tab
- In the Bots section, locate and click on the Knowledge Bases tab.
- Click on the blue button labeled "Add contents". This will open a new window where you can add different types of content to your Knowledge Base.
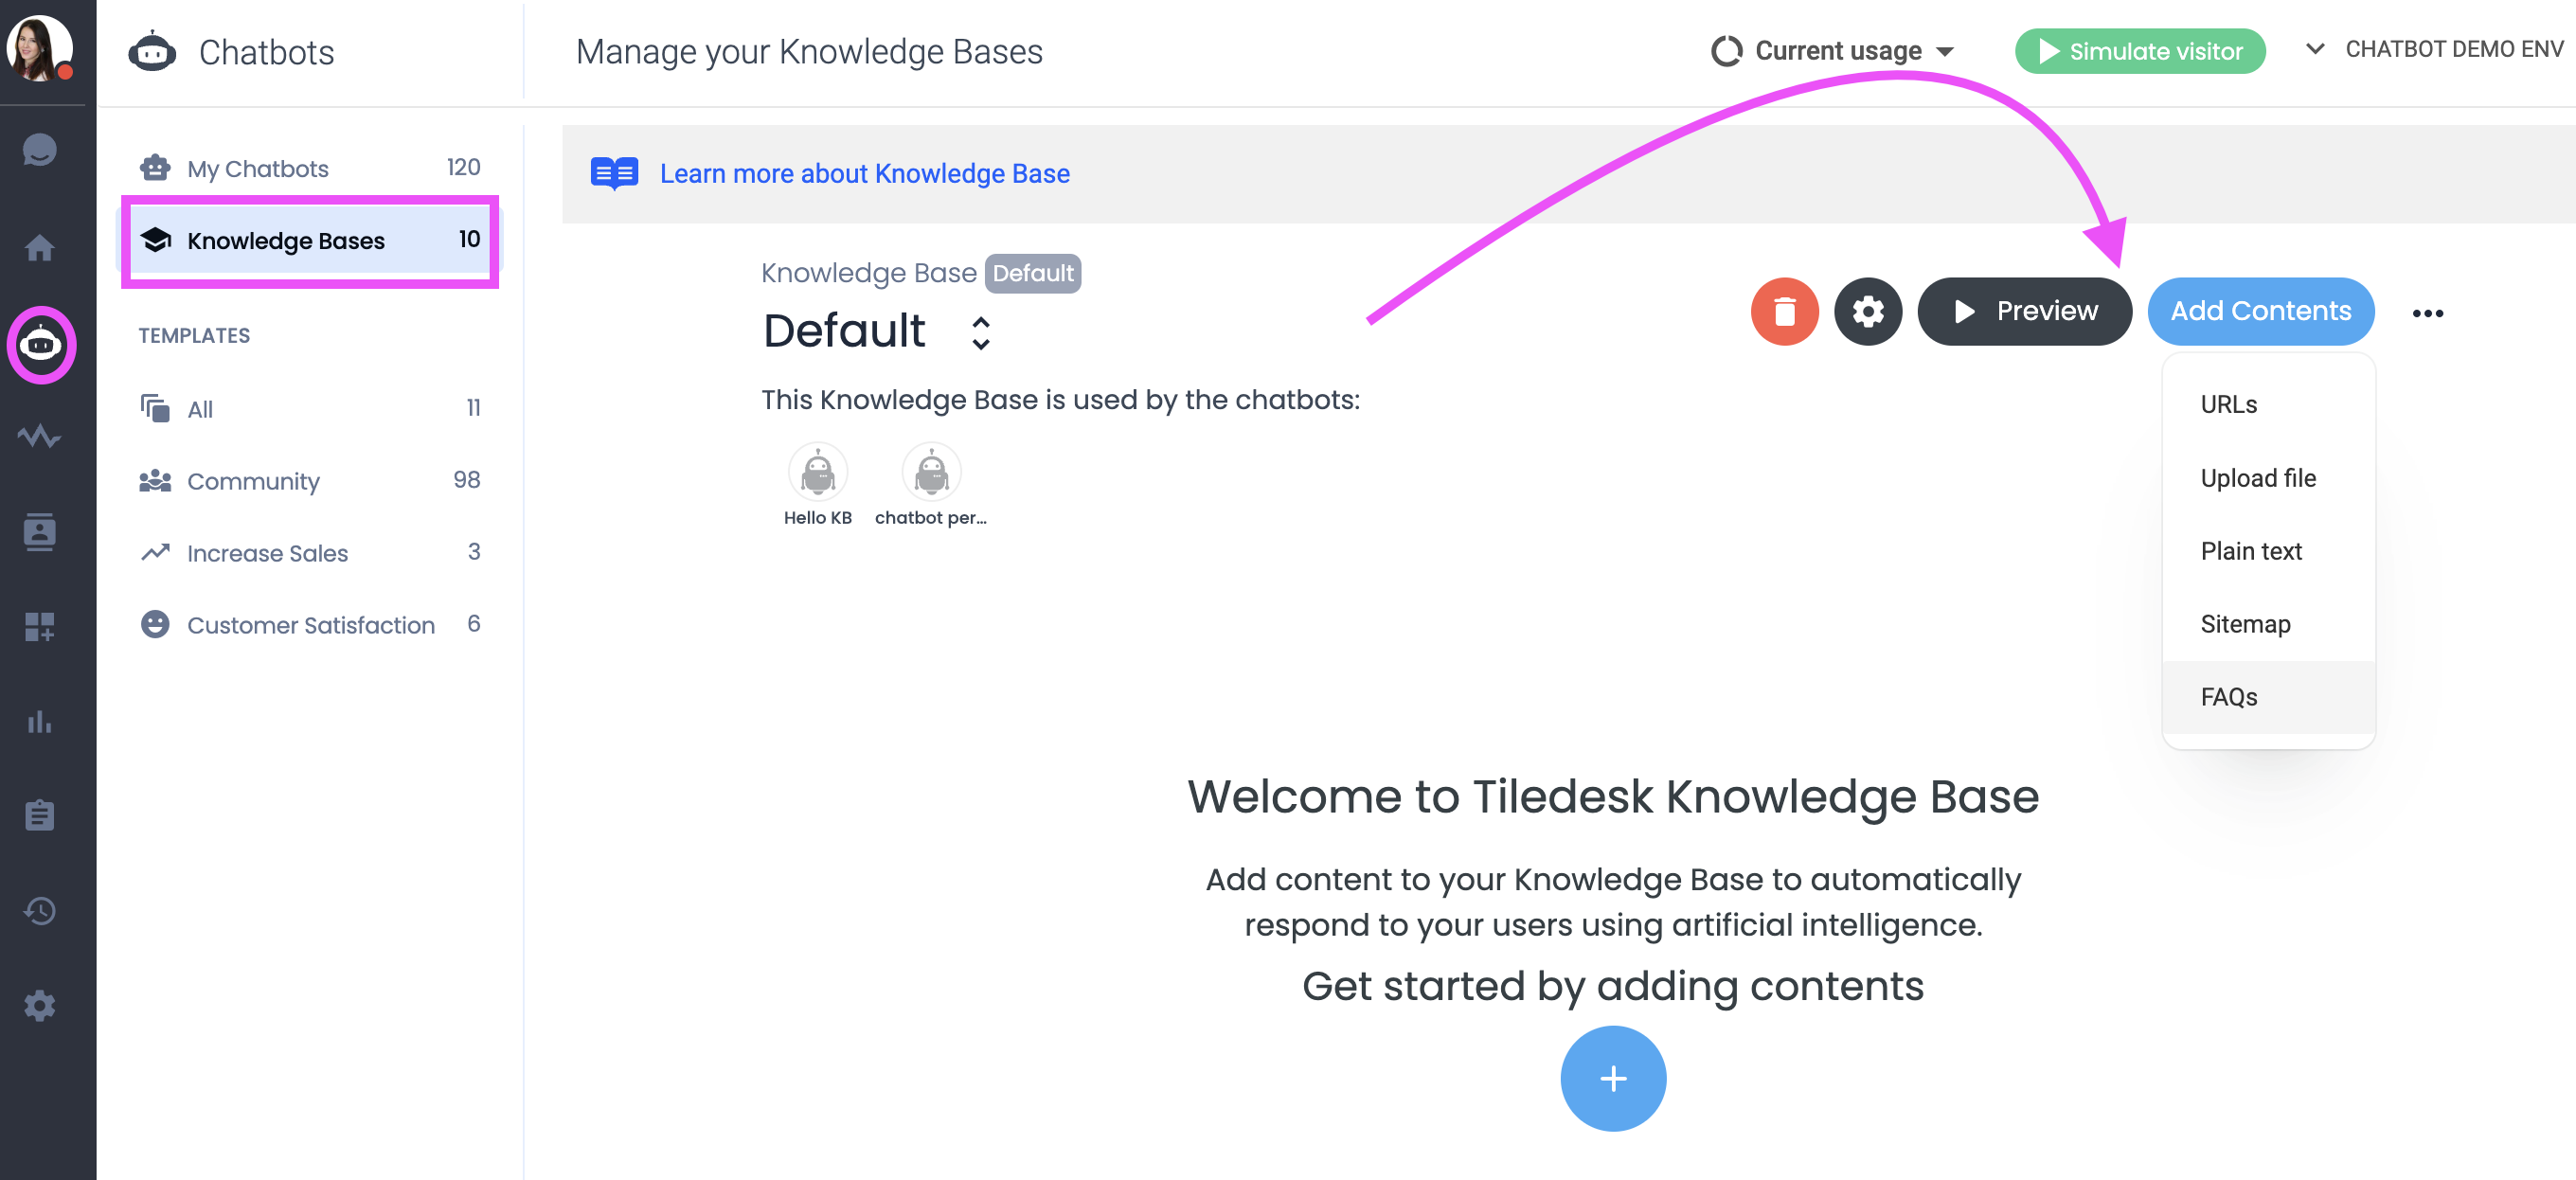
Types of Contents You Can Add
1. Text Content
- Purpose: Useful for uploading any other textual information that users might ask for.
- How to Add:
1. Click on Add Contents: Plain Text.
2. You can upload your texts simply by copying and pasting the content within the “File Text” field. Bear in mind that the maximum number of characters allowed for each text content is 32768.
3. Add a name to your Plain Text KB to better identify the information added.
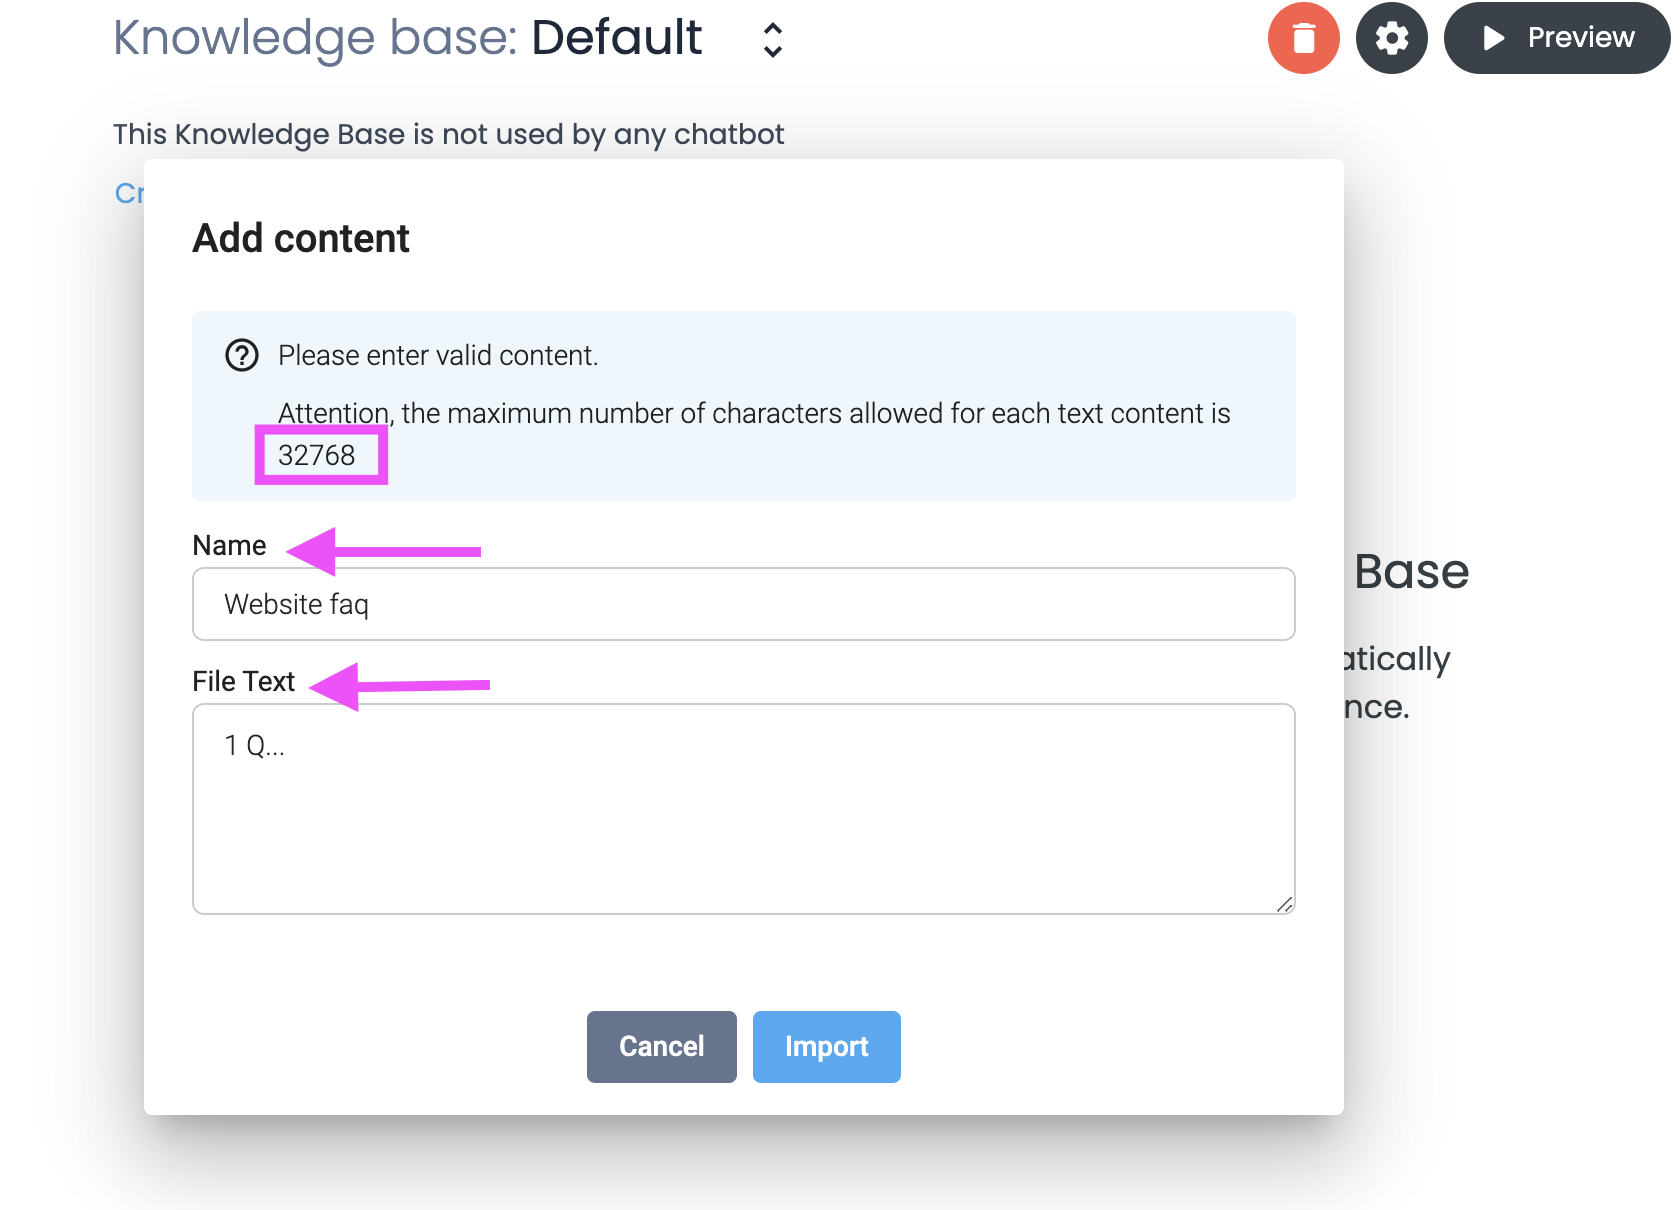
2. FAQs
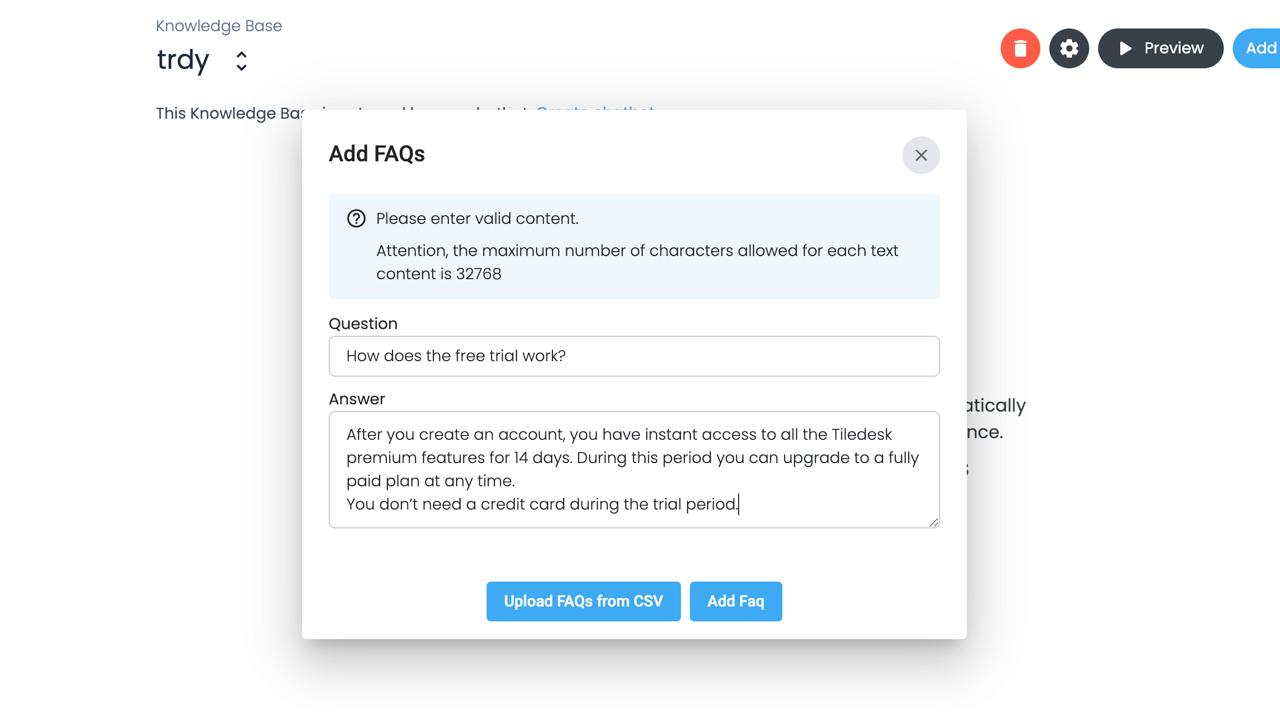
- Purpose: Similarly to the plain text option, you can also select the FAQs to a) copy and and paste your Frequently Asked Questions (FAQs) and/or b) upload directly a CSV file.
- How to Add:
1. Click on Add Contents: FAQs.
2. You can either insert your FAQs simply by copying and pasting the content within the “Answer” field following the “Question” field.
3. Alternatively, simply upload your FAQs CSV file.
3. PDF and DOCX
- Purpose: Useful for uploading detailed documentation, technical guides, user manuals, and other extensive documents.
- How to Add:
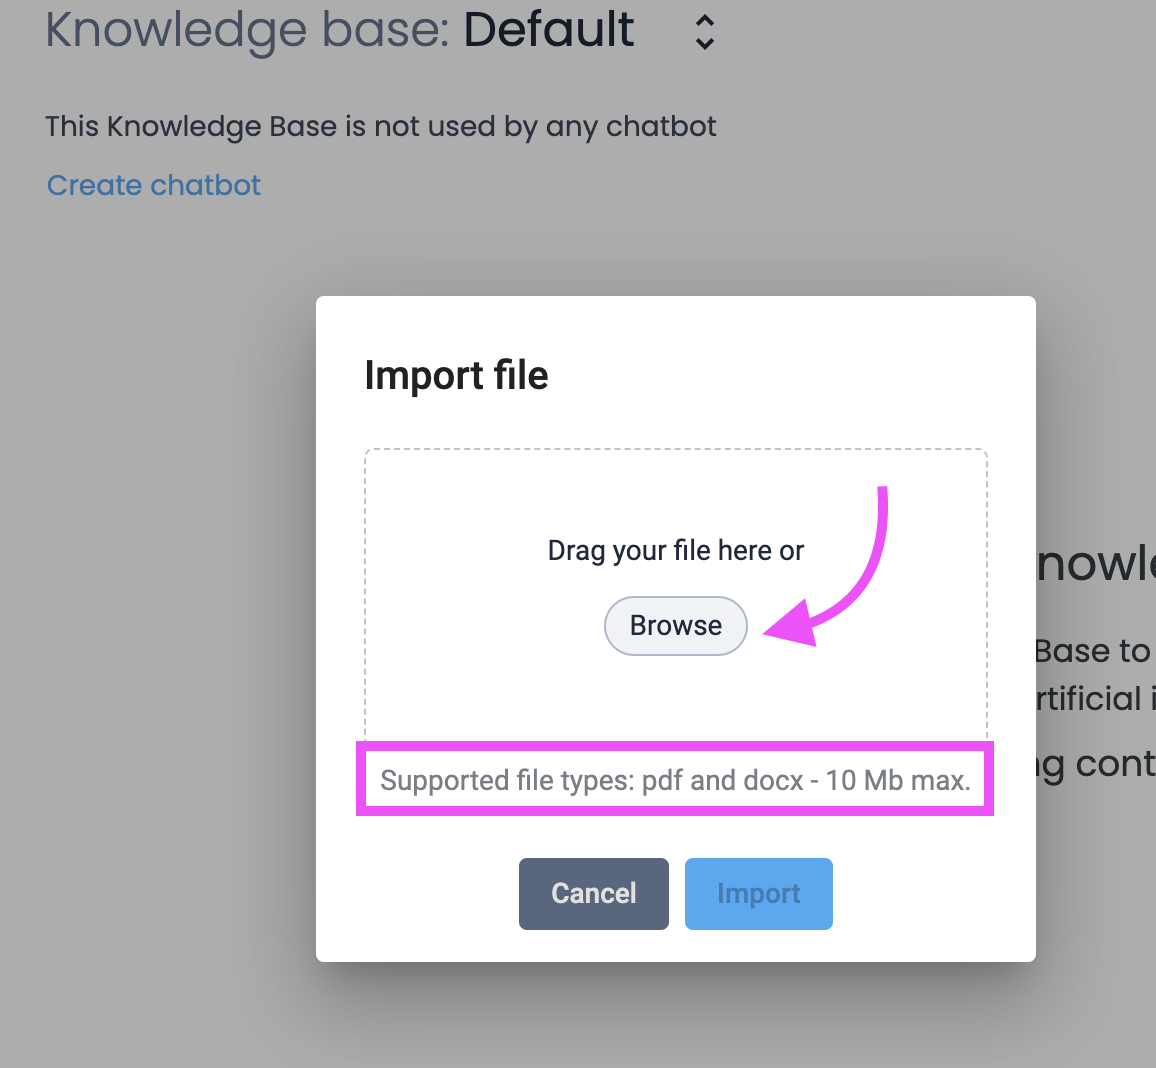
1. Click on Add Contents: Upload File.
2. Select the files you want to upload from your computer. Supported file formats are .pdf and .docx. - 10 Mb max.
4. Sitemap
- Purpose: Useful for including all pages and articles from your website automatically.
- How to Add:
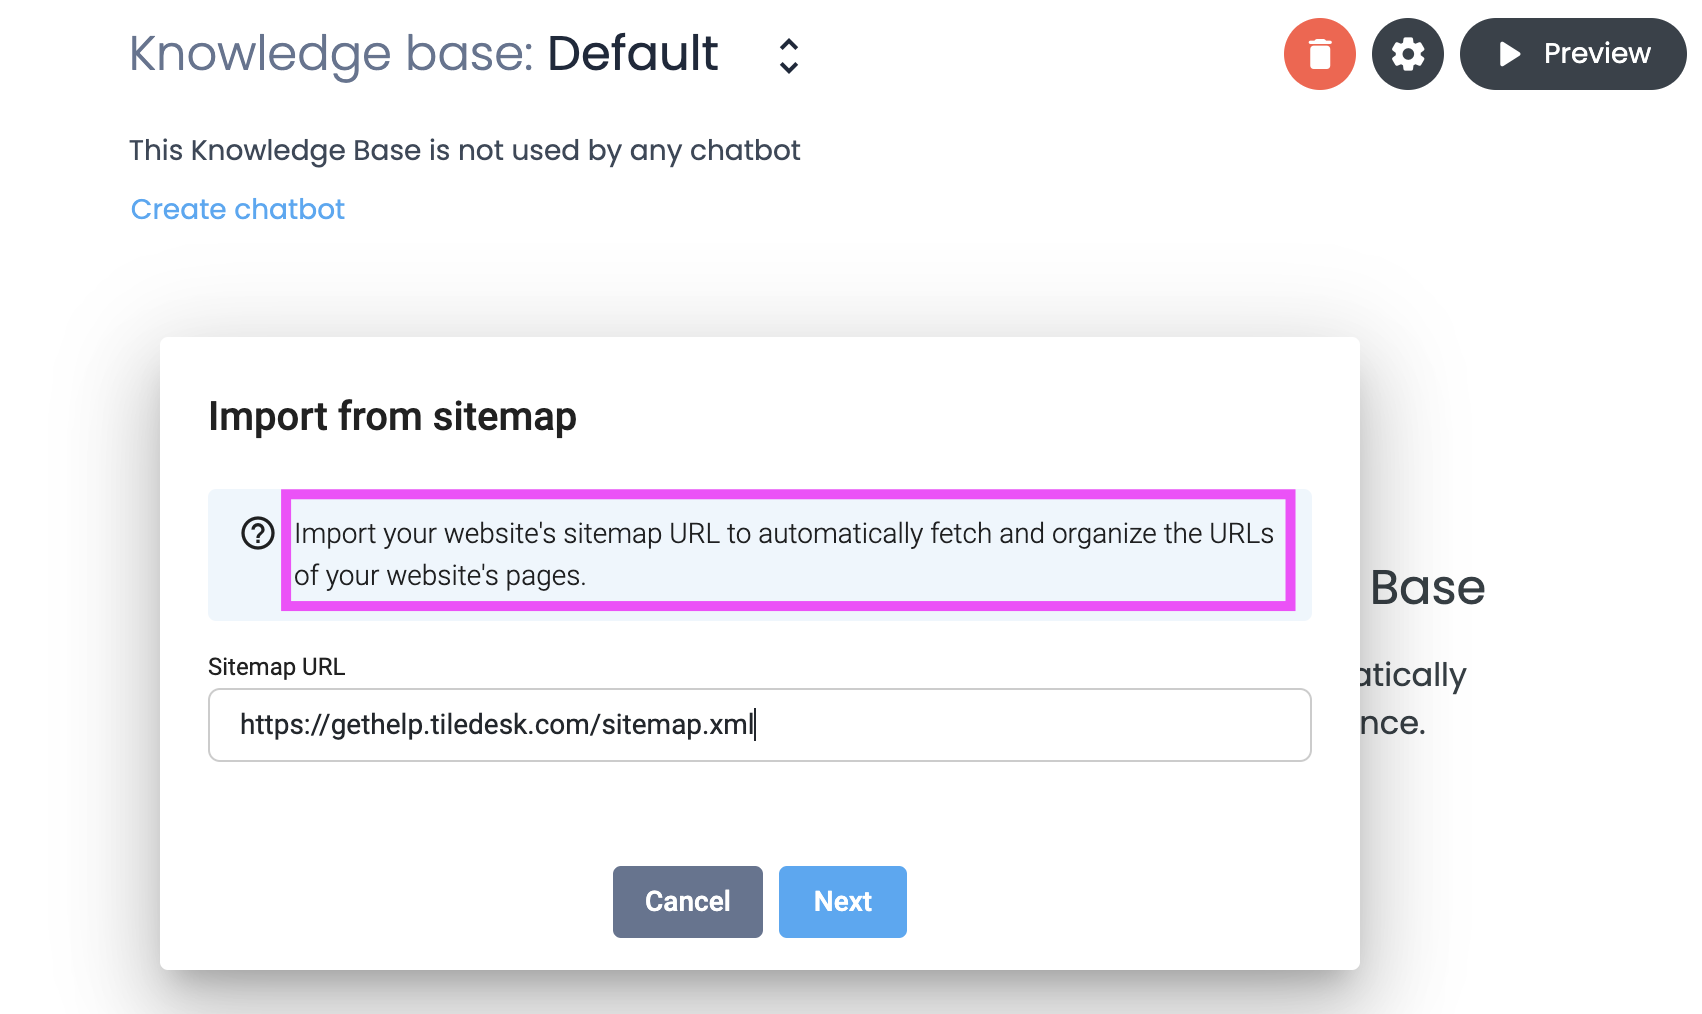
1. Click on Add Contents: Sitemap.
2. Enter the URL of your website's sitemap (e.g., `https://gethelp.tiledesk.com/sitemap.xml`).
3. Tiledesk will automatically fetch and include all the pages and articles listed in the sitemap.
5. URL
- Purpose: Useful for adding specific web pages or articles to your Knowledge Base.
- How to Add:
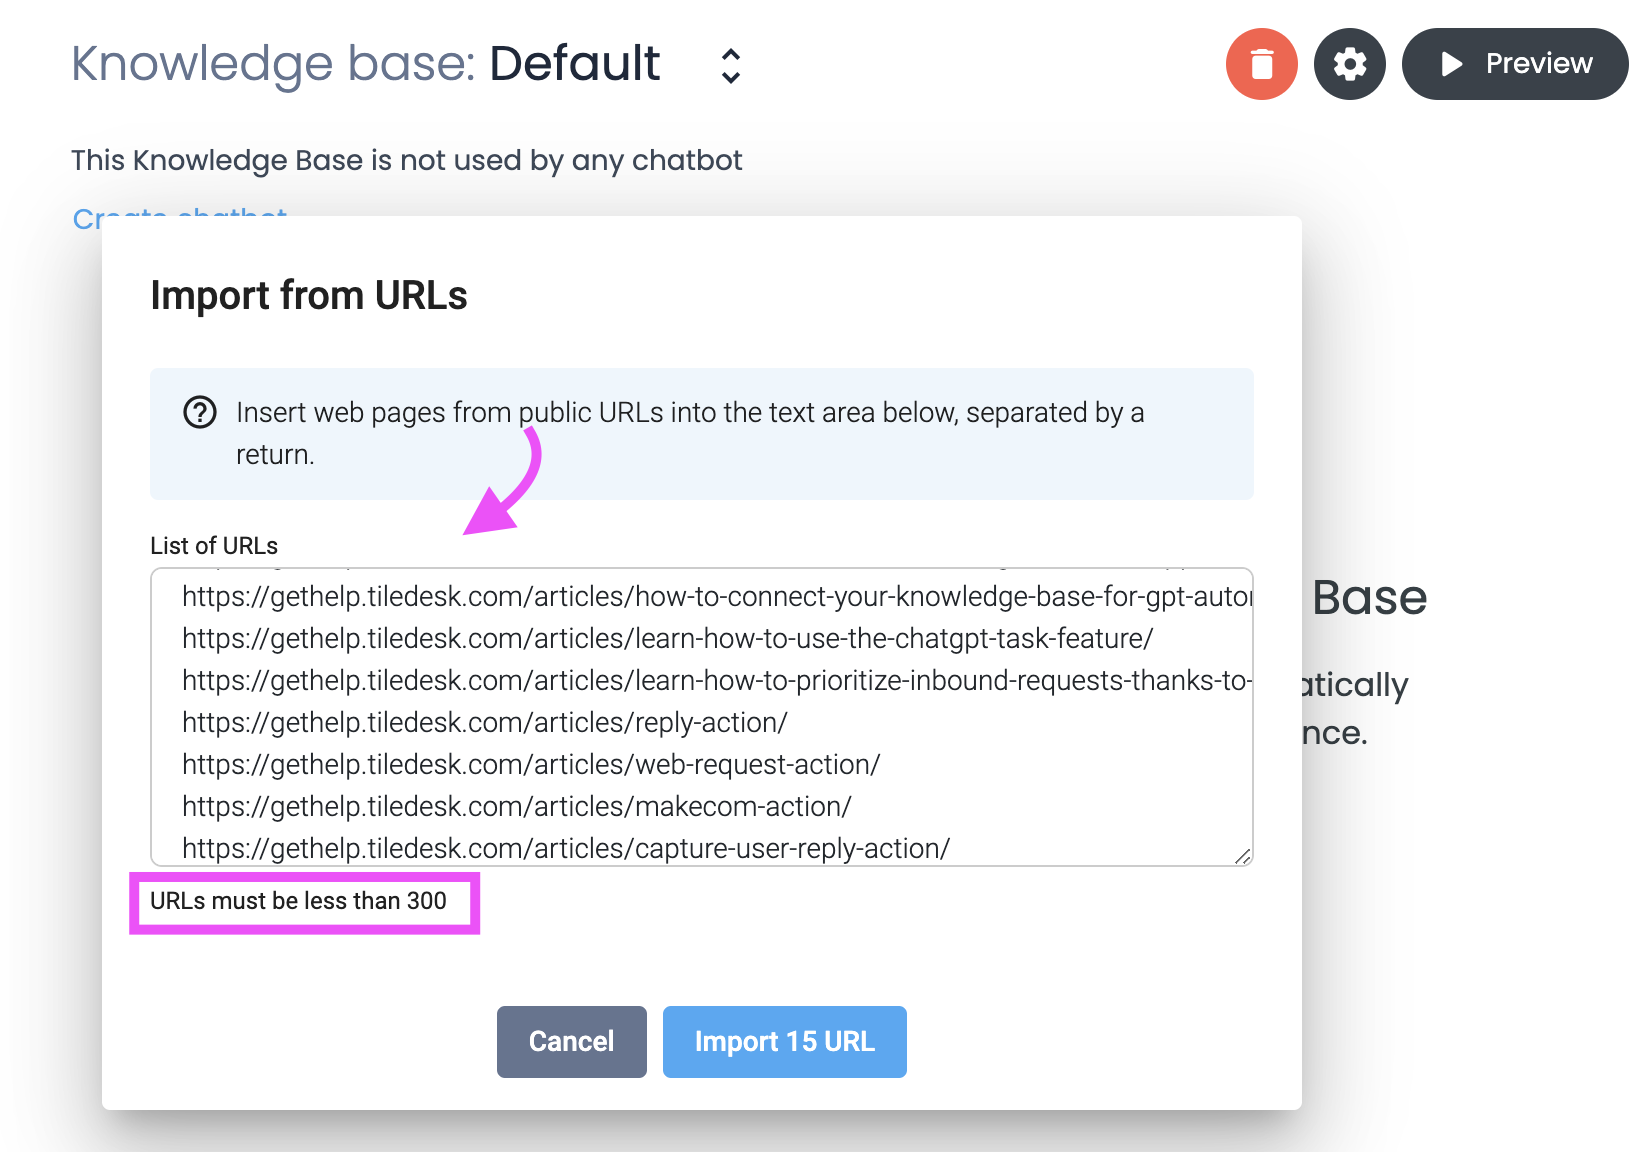
1. Click on Add Contents: URLs.
2. Copy and paste the desired URLs into the provided field.
3. You can add up to 300 URLs each time, with relevant content for your users.
Test Your Knowledge Base via "Preview"
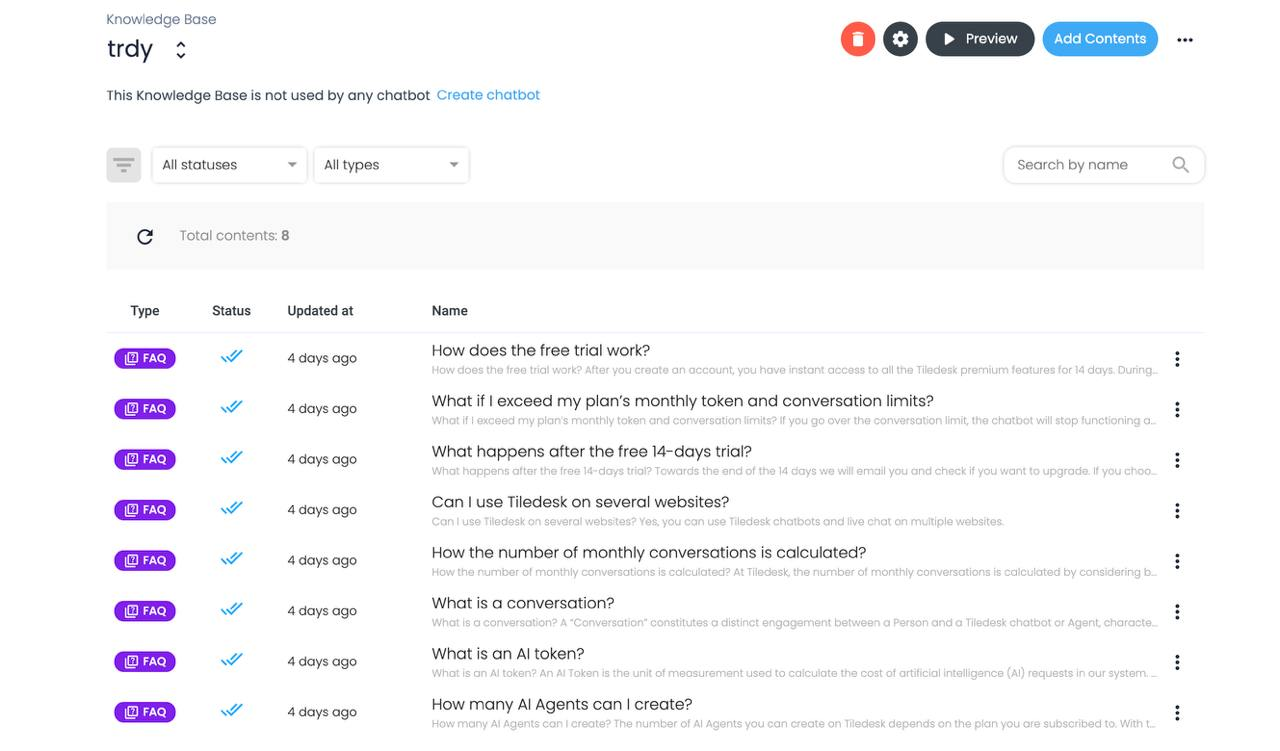
After adding all the desired contents, review them to ensure they are correct and complete via the Preview option. Click on it and test away until you're satisfied with the results; you can also use the “Re-use last question” option to speed up your testing.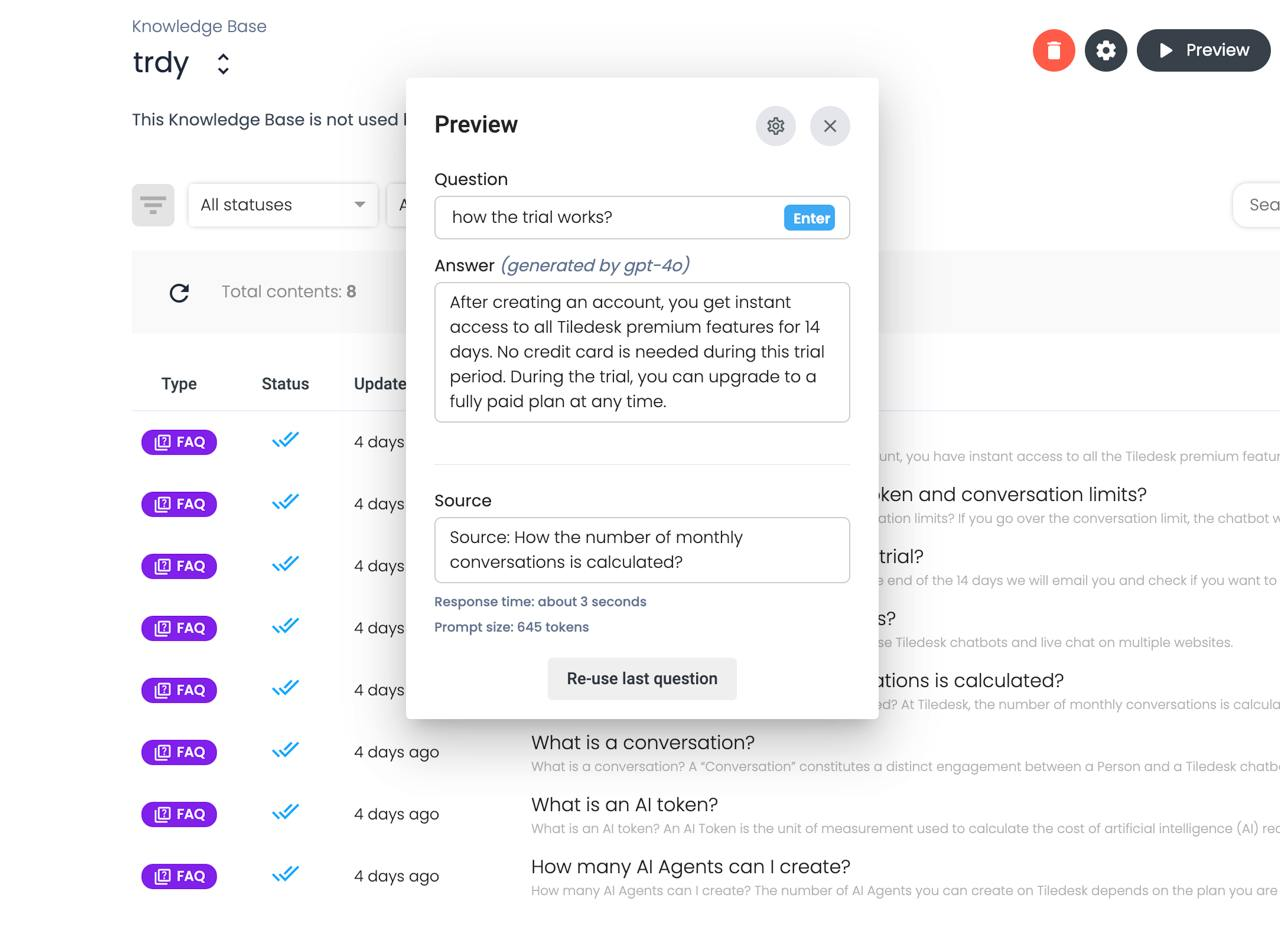
Create a Bot
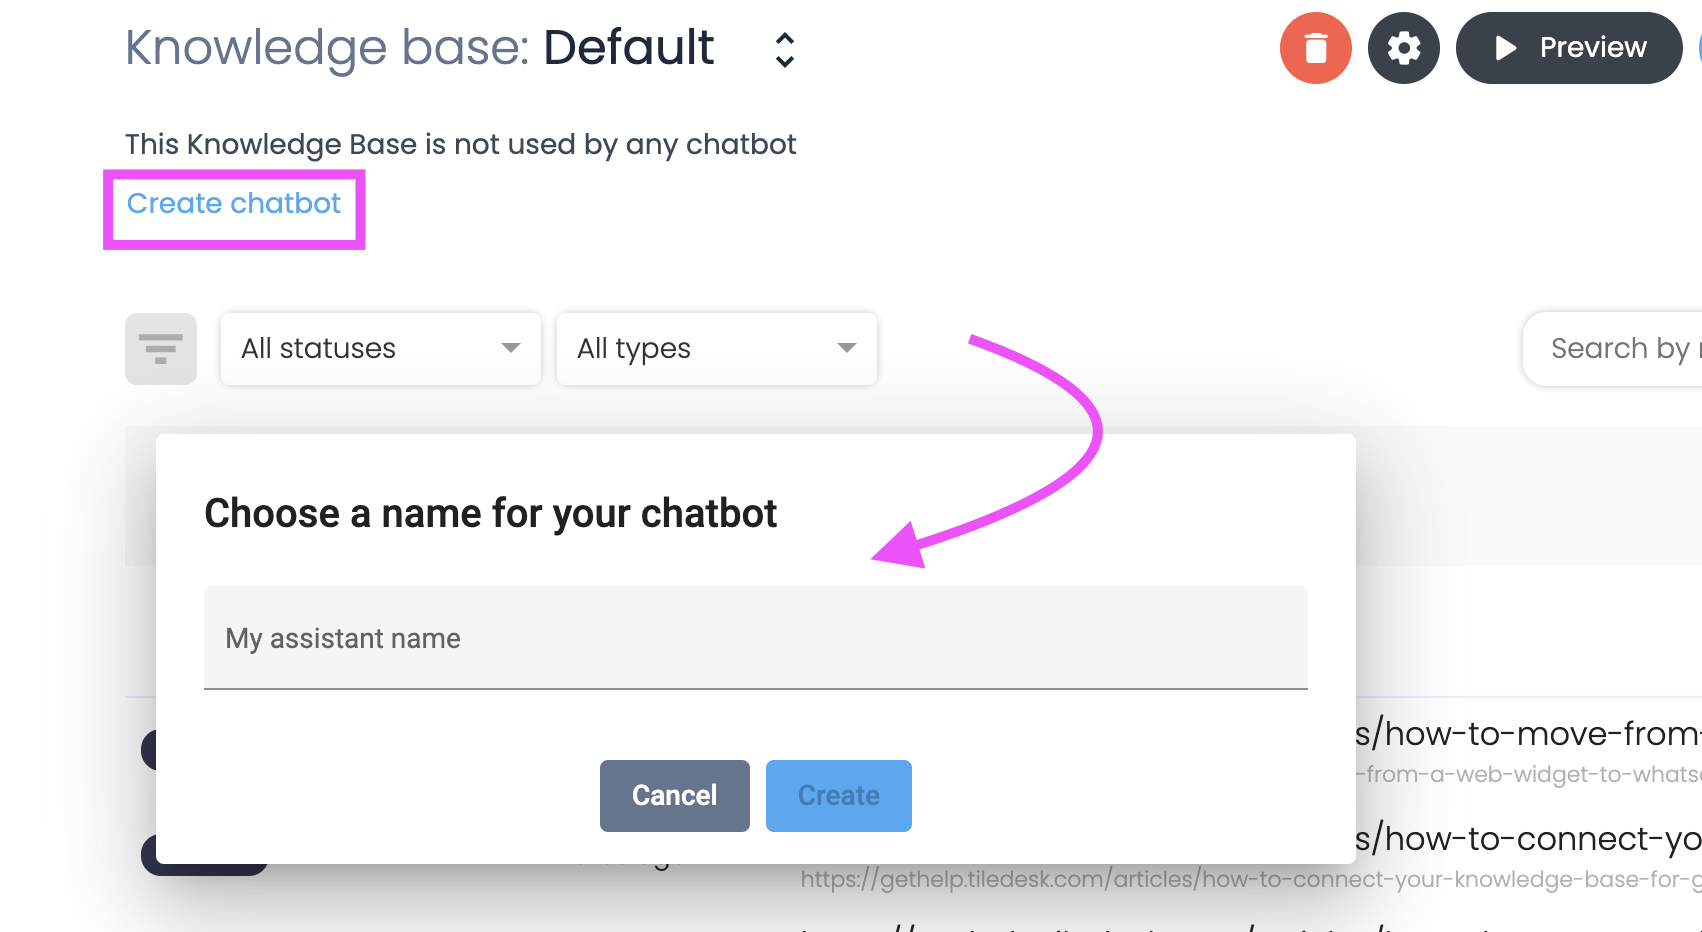
Once you're happy with your enriched KB, it is time to create a Bot that will be connected to all of that wealth of knowledge. Here's how. Click on the “Create chatbot” hyperlink and give a name to your Bot.
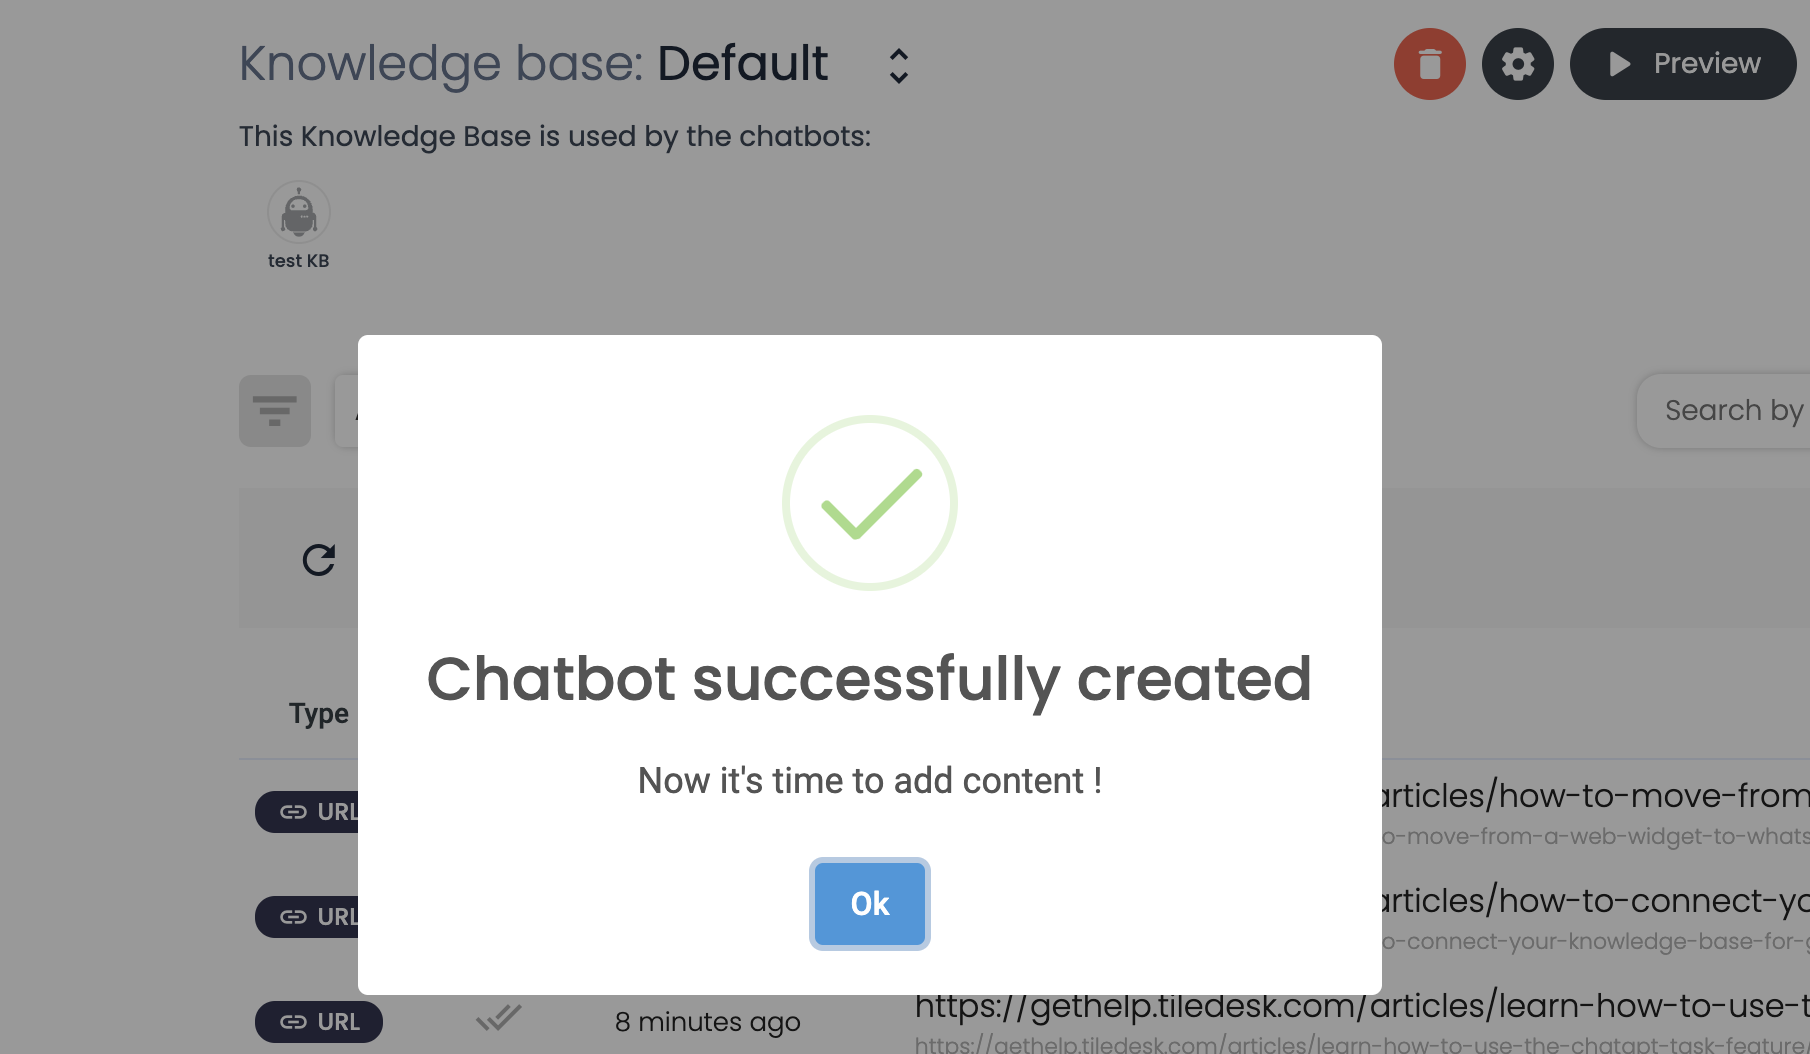
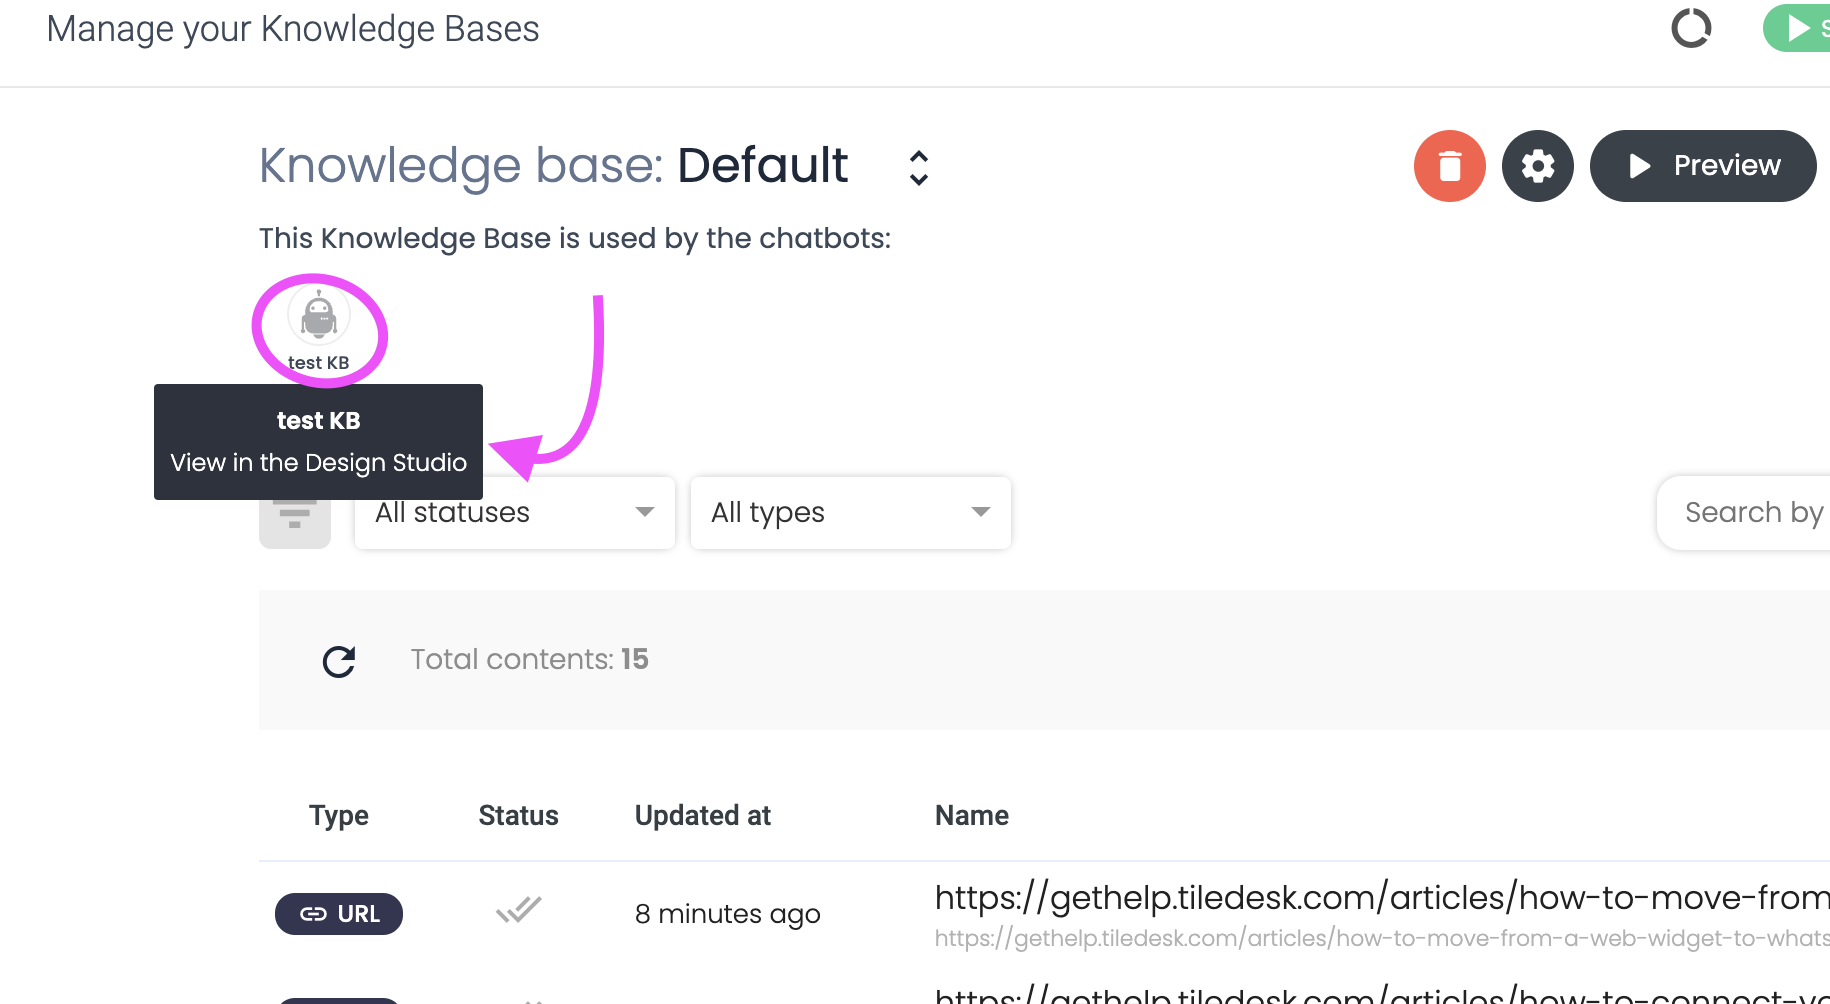
You'll see your newly created Bot right on the top of your KB; if you click on it, you'll be redirected to the Design Studio where you'll be able to edit it. Here you'll find some useful hacks and tutorials on how to build your perfect Bot.
Conclusion
Adding a Knowledge Base to Tiledesk enhances your chatbot's ability to provide accurate and timely information to users. By following this tutorial, you can easily add different types of content, ensuring that your chatbot is well-equipped to handle a variety of user queries.
Email us at info@tiledesk.com to share your feedback on our KB feature
.png)

