.png)
Importing a Chatbot into Tiledesk Design Studio
-

- Michele Pomposo
 24 January 2024
Follow these steps to import a chatbot configuration file into Tiledesk.
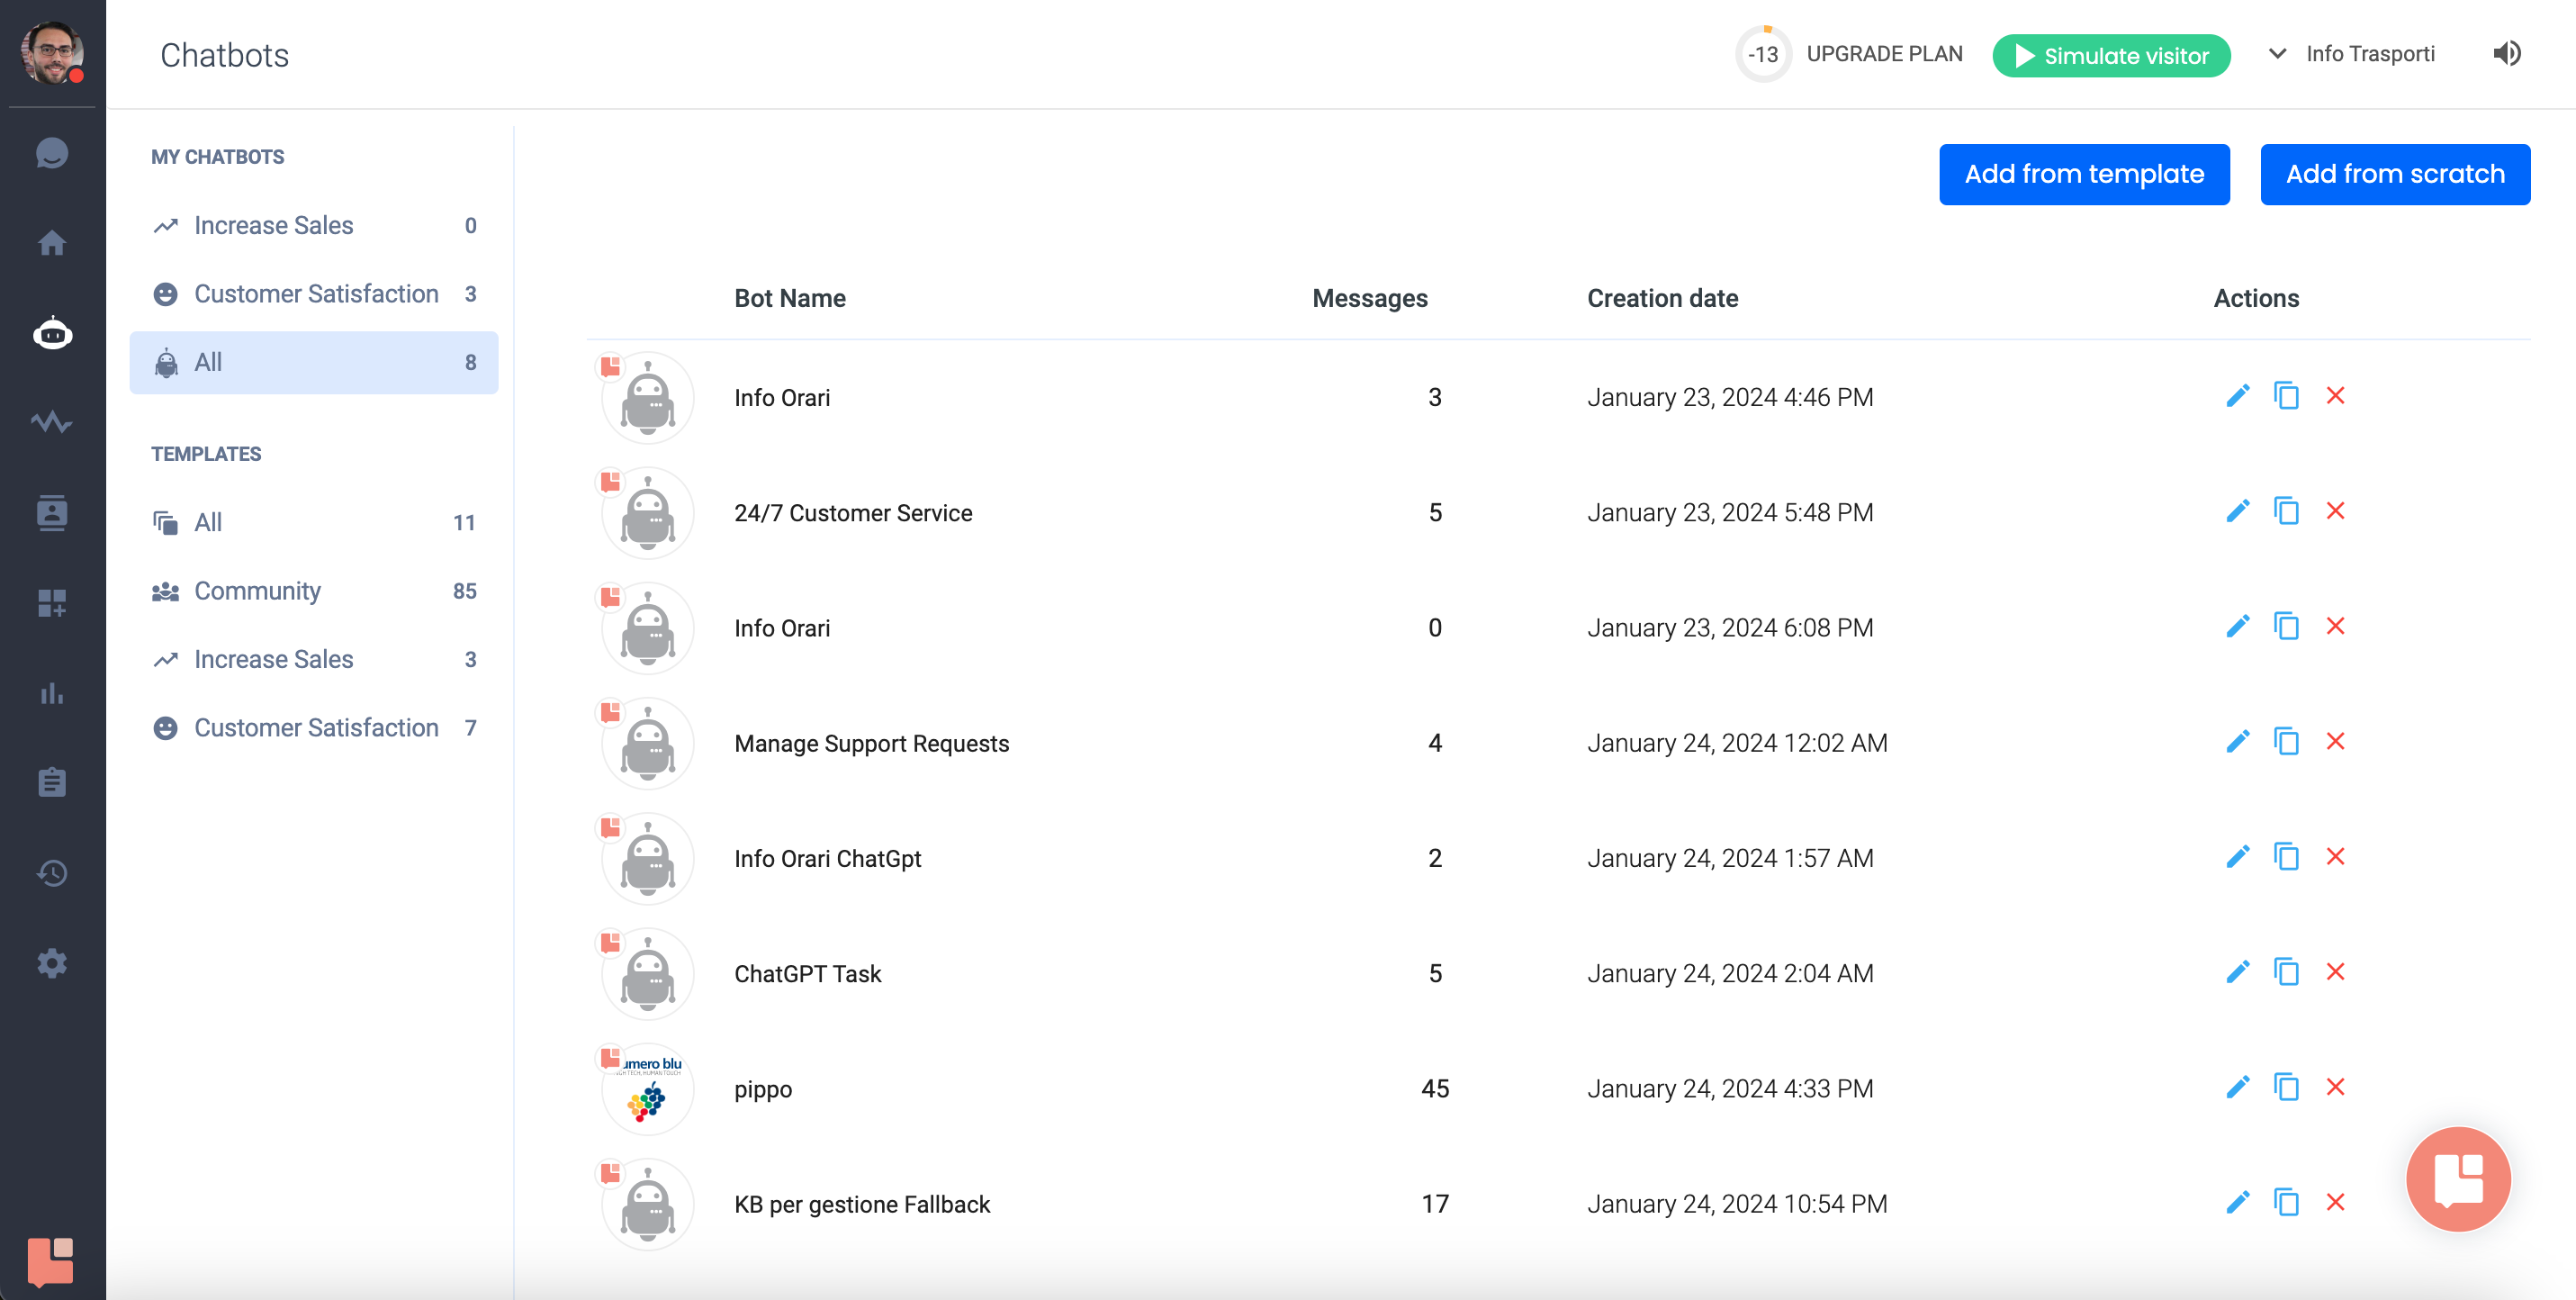
Step 1: Navigate to the Bots Section
Log in to your Tiledesk dashboard and locate the navigation menu on the left-hand side. Click on the Bots section (3rd icon from the top) to manage your chatbot configurations.
Step 2: Start the Import Process
Look for the "Add from scratch" on the top right of the Bots section and click on it to initiate the import process.
Step 3: Choose Import Option
In the new screen, switch to the Import tab, which allows you to import chatbots from other Tiledesk projects.
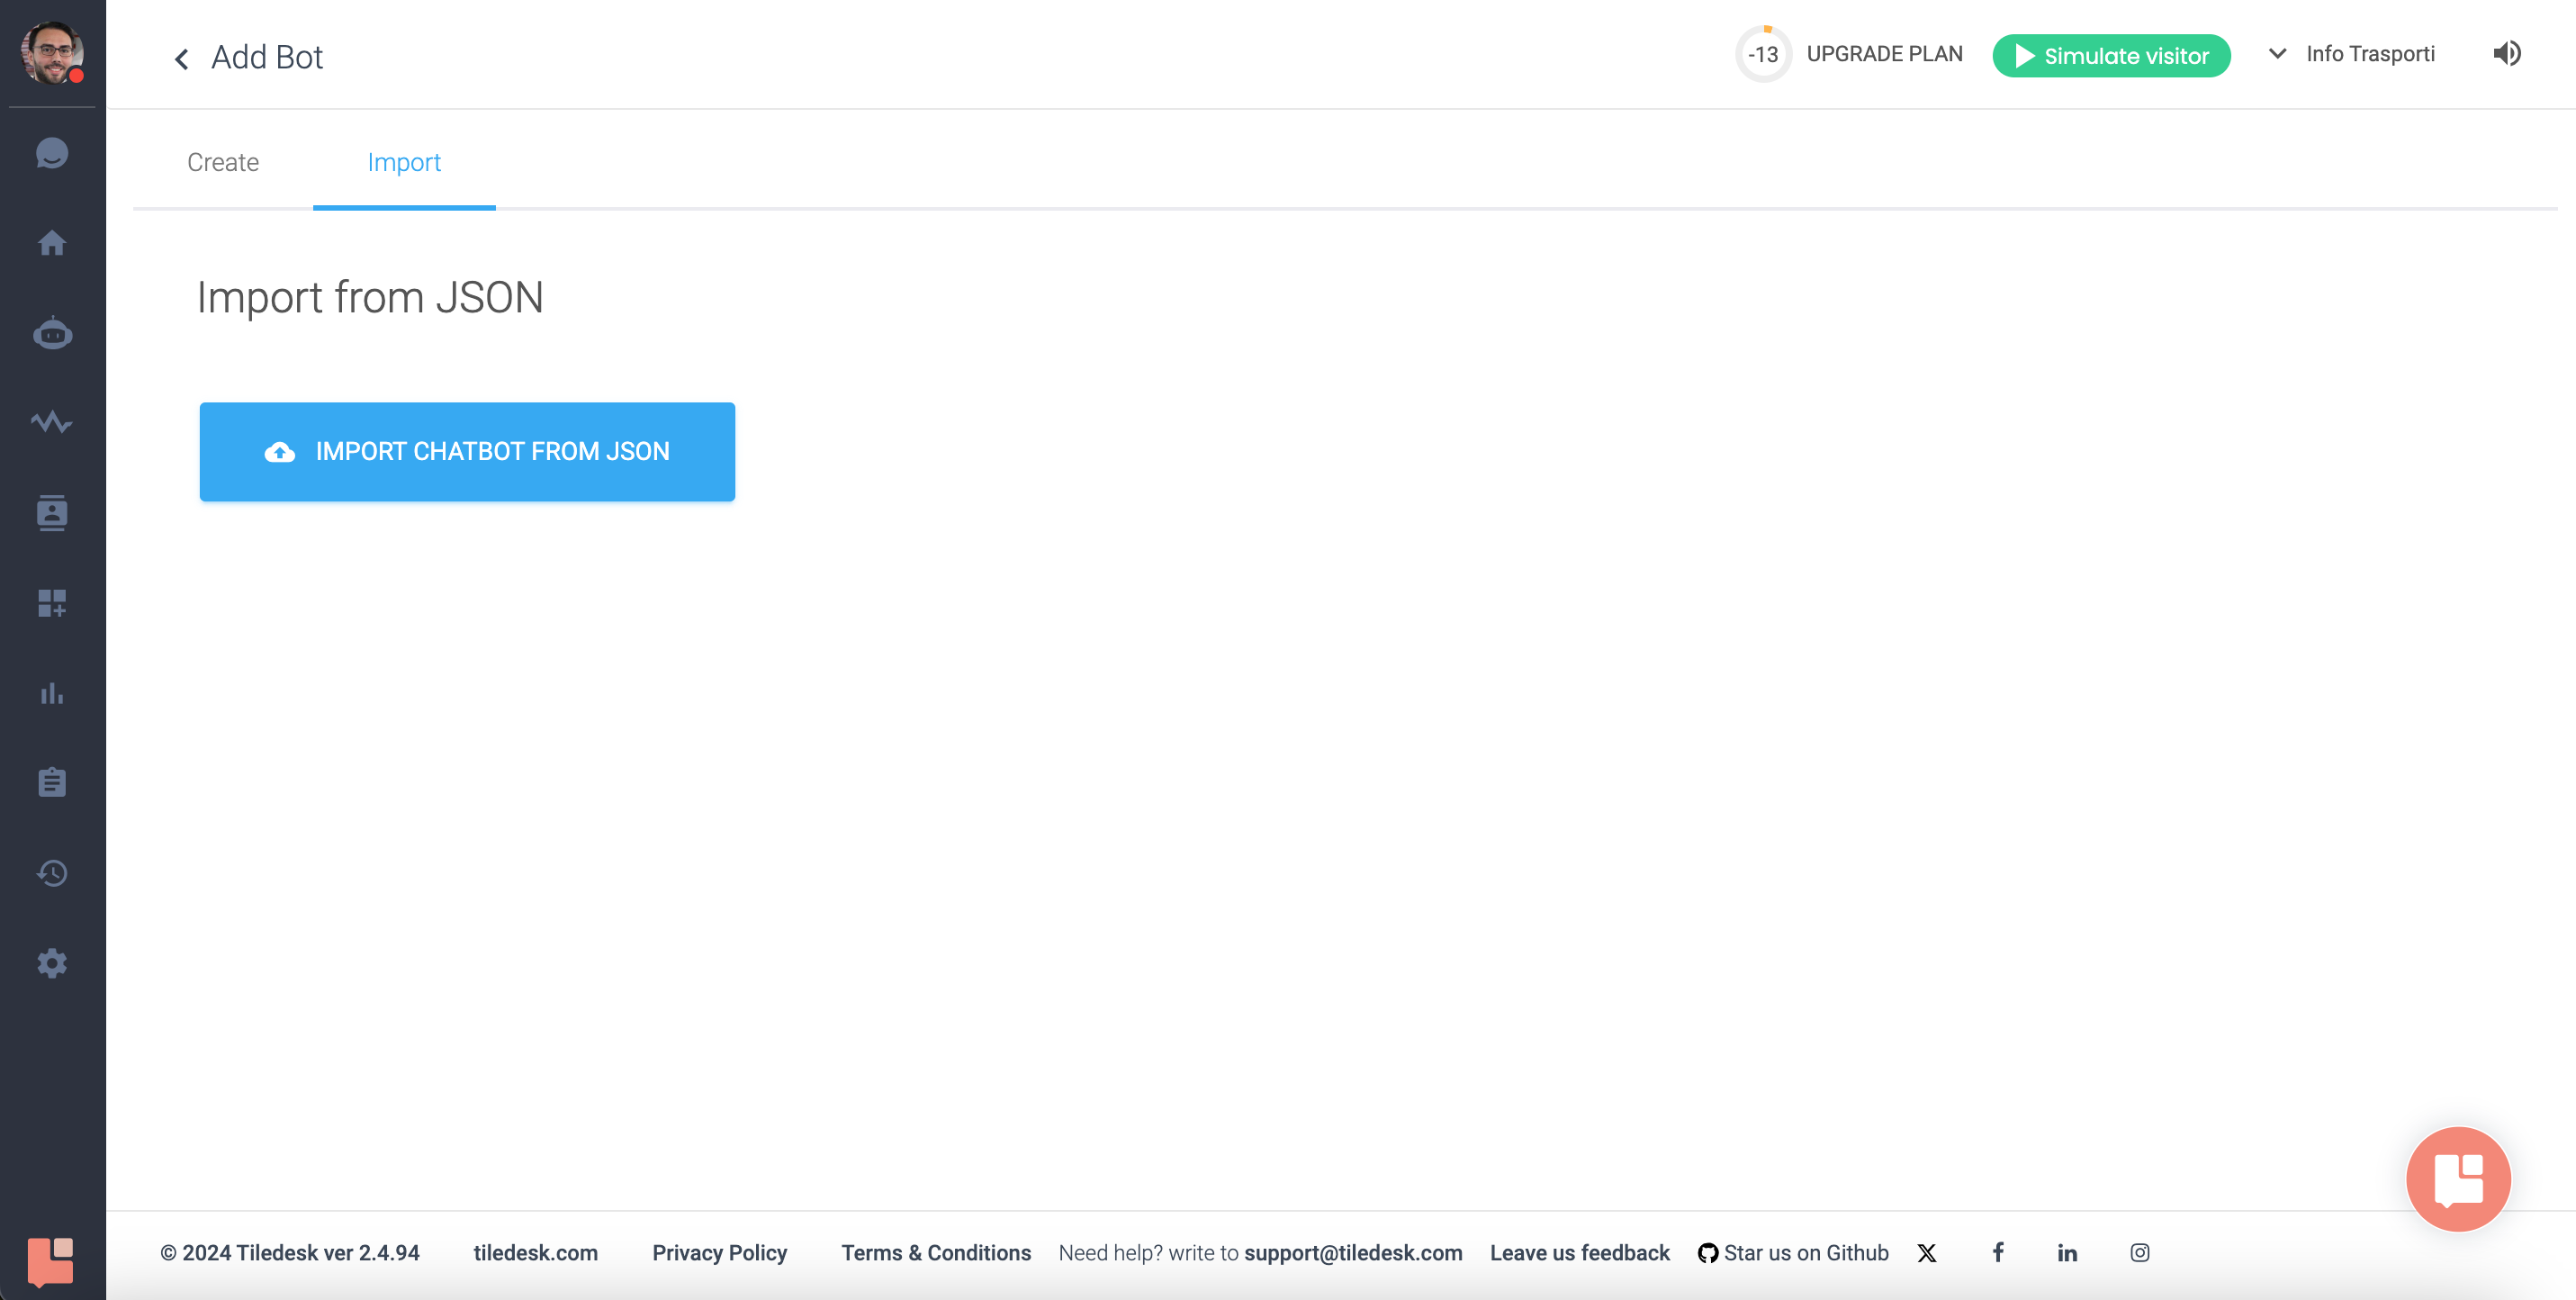
Step 4: Import from JSON
Locate the "Import chatbot from JSON" feature. JSON files are used to transport and configure chatbot data.
Step 5: Select JSON File
Press the "IMPORT CHATBOT FROM JSON" button and select the appropriate JSON file from your computer to upload.
Step 6: Finalize the Import
Wait for Tiledesk to process the file. Once complete, you should see a confirmation message indicating a successful import.
Step 7: Review Imported Chatbot
Return to the Chatbots section to view and edit your newly imported chatbot to ensure all configurations are correct.
Tips for a Successful Import:
- Verify the JSON file is correctly formatted with all necessary chatbot configurations.
- Check for syntax issues or missing data if there are errors during the import.
- Test the chatbot to confirm it operates as expected post-import.
Note: This guide is based on Tiledesk's user interface and may vary slightly with different versions. Contact Tiledesk support for any assistance.