How to Export a Chatbot from Tiledesk Design Studio
Exporting your chatbot from Tiledesk Design Studio not only allows you to back up your work or migrate to another project but also serves as a useful tool for troubleshooting issues with the support team. Follow the steps below to export your chatbot as a JSON file.
Step 1: Access the Design Studio
- Log in to your Tiledesk account.
- Navigate to the Design Studio where your chatbot is located.
Step 2: Open the "Import Export" Section

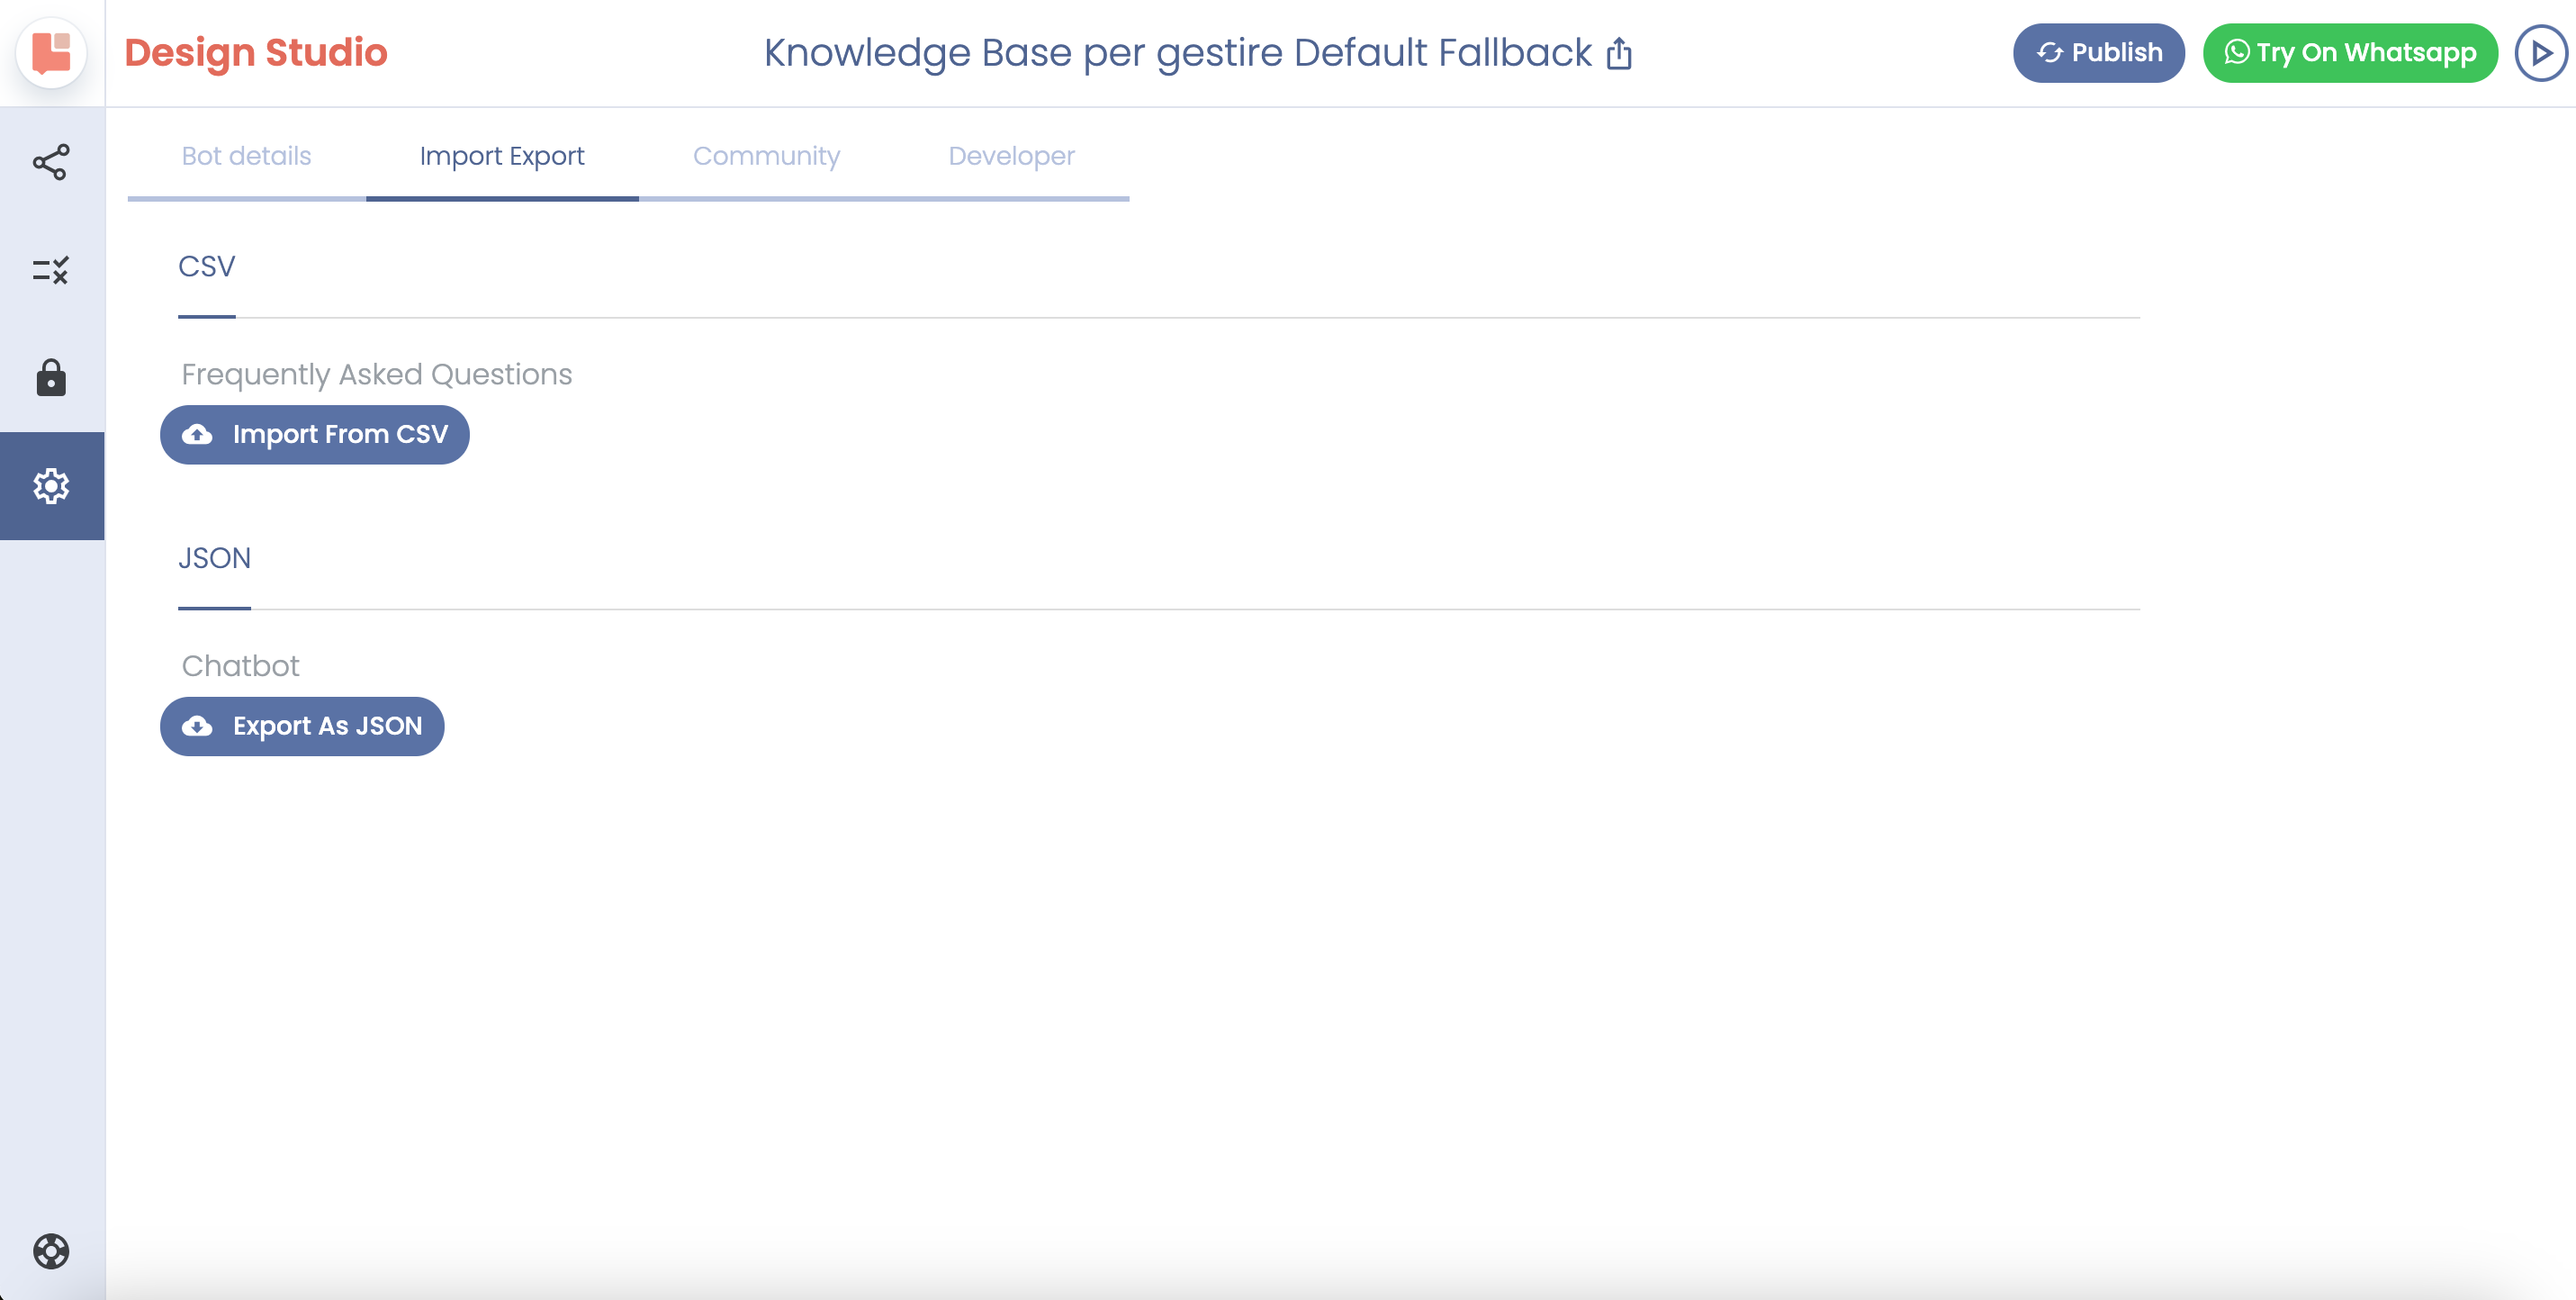
- On the left sidebar of the Design Studio, find the "Settings" icon represented by a gear.
- Click on it and go to the “Import Export" tab.
Step 3: Export as JSON
- Look for a section titled "JSON".
- Click on the "Export As JSON" button. This will initiate the export process.
Step 4: Save the JSON File
- A JSON file containing your chatbot's configuration will be generated.
- When prompted, select where you want to save the file on your computer and confirm to download.
Step 5: Verify the Export
- Go to the file location where you saved the JSON file.
- Open it with a text editor or JSON viewer to ensure all chatbot data is present and correctly exported.
Step 6: Utilize Your Exported Chatbot for Troubleshooting
- The exported JSON file can be an invaluable resource for the support team to help troubleshoot any issues.
- Share this file with our support team to allow them to replicate and diagnose any problems with the chatbot.
Important Note on Troubleshooting
- Utilizing the export function can greatly facilitate the support team in diagnosing and resolving issues swiftly, ensuring minimal downtime for your chatbot services.
Step 7: Use Your Exported Chatbot
- With the JSON file, you can now import your chatbot configuration into another project or use it as a reference for future developments.
Reminder
- Handle the JSON file with care as it contains your chatbot's full configuration and may include sensitive data.
Congratulations! You have successfully exported your chatbot from Tiledesk Design Studio.
.png)

