.png)
Getting started with email ticketing in Tiledesk
-

- Andrea Leo
 30 April 2022
Introduction
With Tiledesk you can seamlessly converse with your customers on multiple channels. You can quickly switch from the email channel to the chat channel at any time. In fact, you can switch from the email channel to the chat channel by clicking on the “Continue by chat” link in the footer of each email and vice versa, you can switch from the chat channel to the email channel simply by replying to the notification emails when you receive a chat message while you are offline.
Create a ticket by email
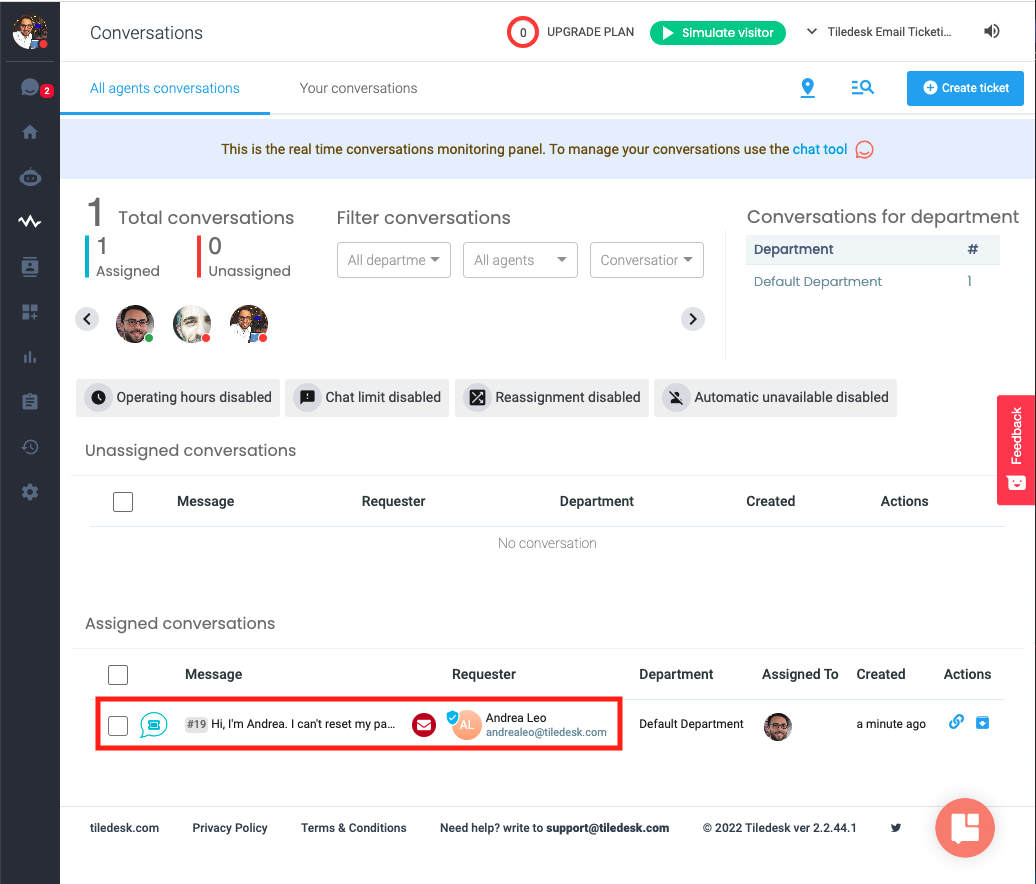
Email is one way that end-users can submit tickets to Tiledesk and have conversations with agents to resolve their issues.
Here’s how the email workflow works:
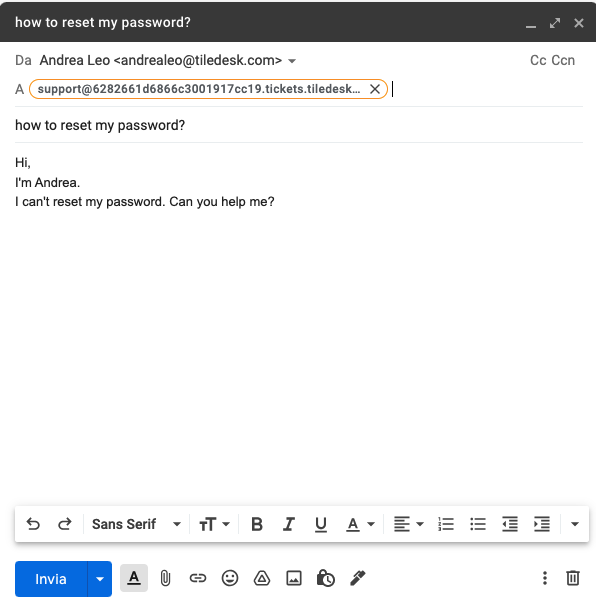
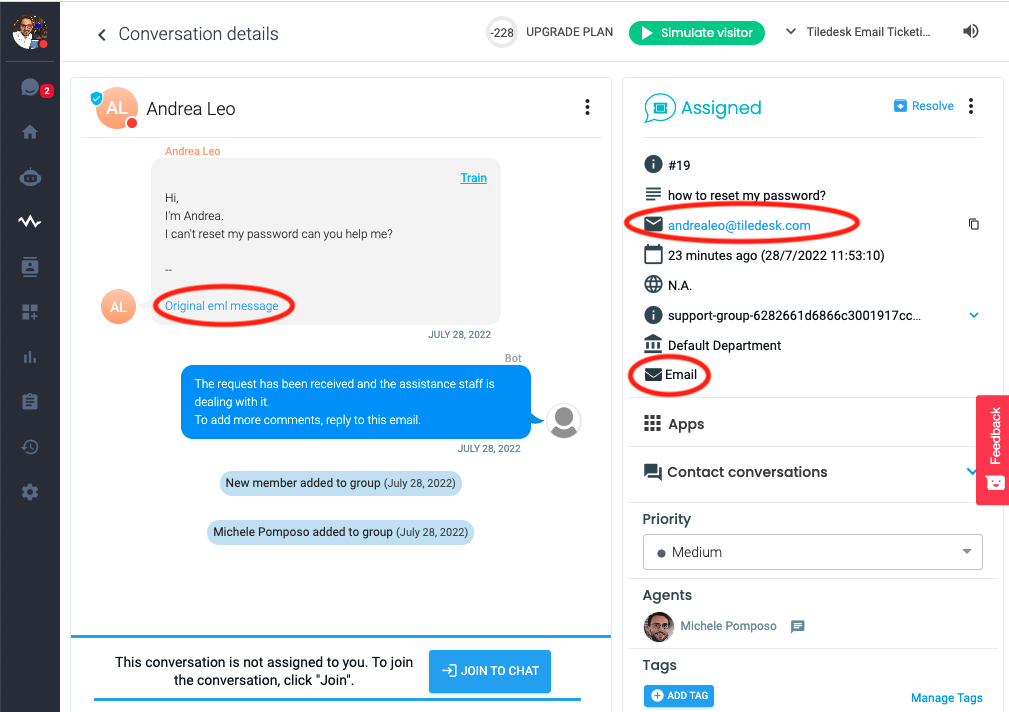
- When an end-user sends an email (also with images and attachments) to support@<Project_Id>.tickets.tiledesk.com address, it creates a ticket.
- If an agent replies with a message through Tiledesk, a notification email is sent to the person who was the original sender of the first email.
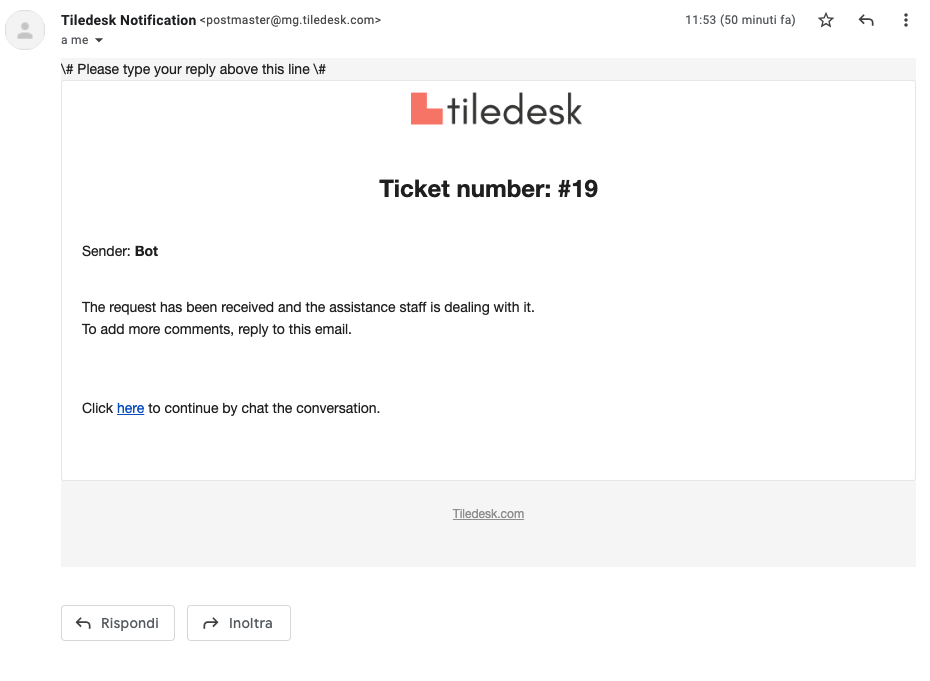
- If the end-user replies to the notification email, the reply creates a message in the ticket.
- The end-user can continue the conversation switching from email to the Tiledesk live chat using the “Continue by chat the conversation” link at the bottom of each email.
- The conversation between user and agent continues until the issue is resolved.
Getting a Tiledesk email address
To add a Tiledesk support address:
Step 1: Click the Setting menu
Step 2: Click Email sub menu in the sidebar
Step 3: Copy the generated Tiledesk email address from the text field
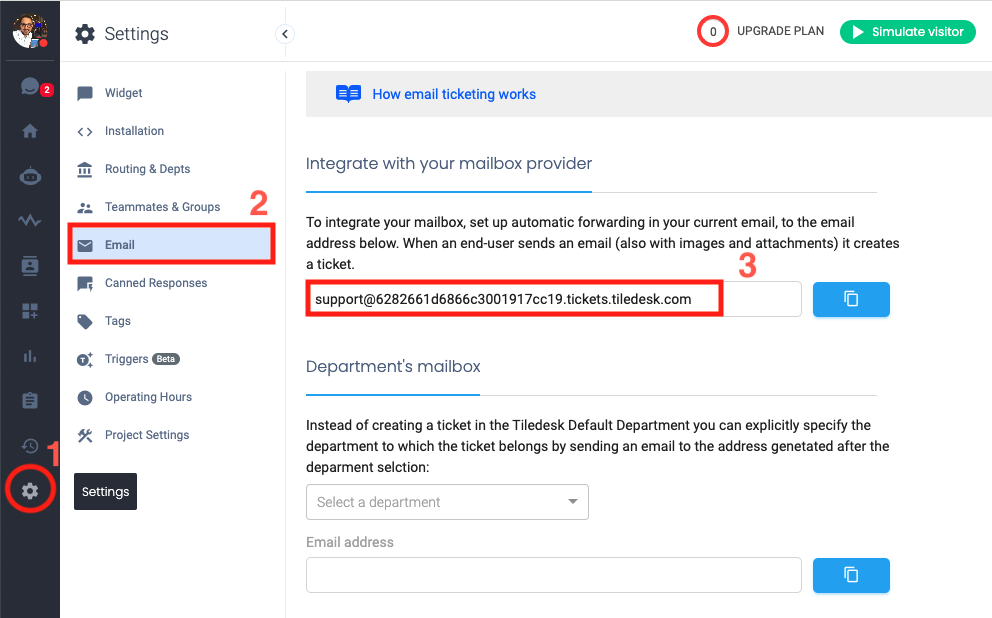
Now you can use this email to create tickets directly to Tiledesk
Use your own external email address for support requests
Accepting support requests via external email addresses is also supported. If you already have a support email address you can forward email received at those addresses to your Tiledesk email domain. For example, if you want to receive support requests at support@mycompany.com instead of support@<Project_id>.tickets.tiledesk.com, you must forward the email from support@mycompany.com to support@<Project_id>.tickets.tiledesk.com.
Do do that:
Step 1: Copy forward email address from the Settings → Email → Integrate with your mailbox provider (previous image)
Step 2: Configure the copied email address as the forwarding email address in the email inbox. Follow this guide to understand how to forward an email to an existing Gmail account.

Step 3: Send a mail to the forwarding address added inbox.
Step 4: Check Tiledesk email inbox in the Monitor tab for the new email.
Note: Any message forwarded to your external mailbox creates a Tiledesk ticket, or ticket update. However, replying to a customer’s email from within the external support address mailbox sends a message to the customer, but does not update the ticket in Tiledesk. To ensure that your email replies update the ticket, you need to send that reply from the Tiledesk email address, or from the Tiledesk agent interface.
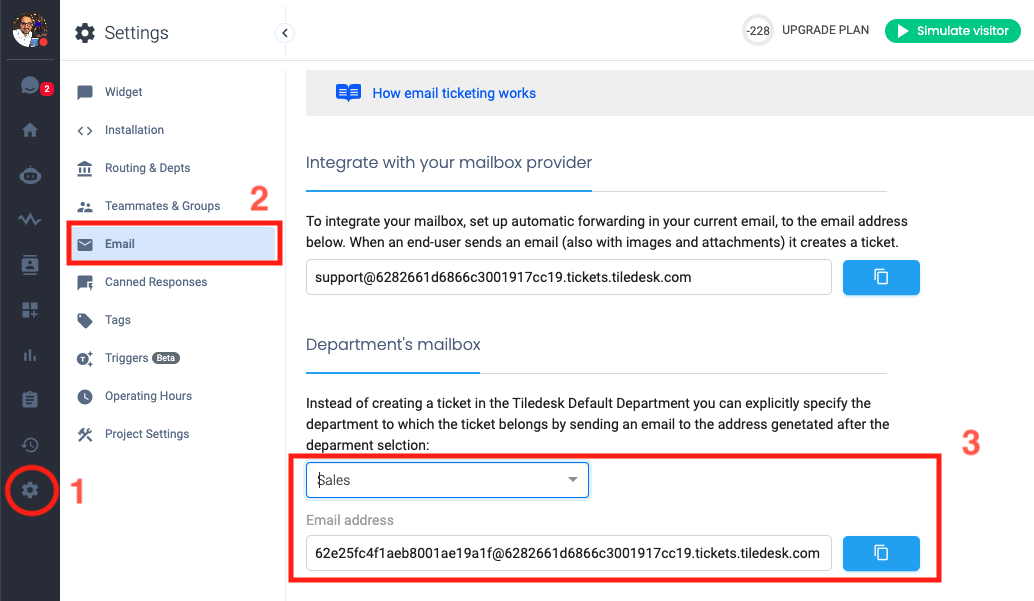
Specify the department by email
Instead of creating a ticket in the Tiledesk Default Department you can explicitly specify the department to which the ticket belongs by sending an email to the following address:
<Department_id>@<Project_id>.tickets.tiledesk.com
That's all, Tiledesk folks.
For more info on who we are, what we do, or what is our shtick, visit Tiledesk.com 👩🚀